Film cameras
Canon Canonet Reference guide
Reference guide for Canon Canonet. 71 pages in English. Read the original PDF, download or print a copy without registration.
71 pagesEnglish4.3 MB PDF
Loading your manual…Open PDF directly
Document details
- Brand
- Canon
- Model / document
- Canon Canonet
- Document type
- Reference guide
- Language
- English
- Pages
- 71
- File size
- 4.3 MB
- Category
- Film cameras
- Document date
- Not specified in catalog
Search available document text
Find a term, then jump to its page in the original PDF. Image-only pages may not be searchable; check the PDF for exact wording and diagrams.
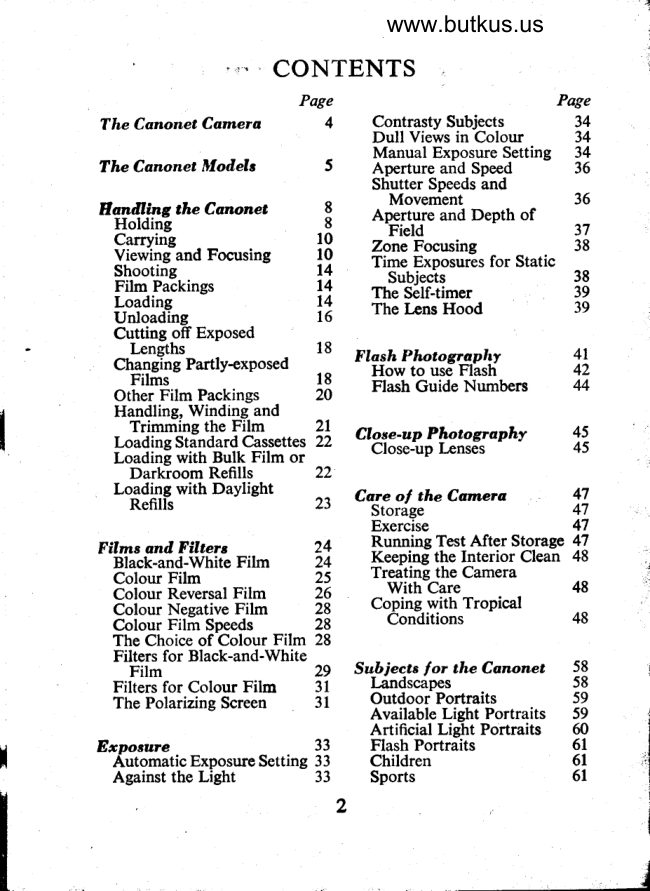
Page 2 · Read text
I

                                  Page                          Page
        Taking Coloar Pictures     63      Shutter Speeds to Arrest                          Movement          68
                                             Apertures with Clear Flash
          Facts and Fiqxtres           66     Bulbs                 69
           Conversion-of Feet and            Apertures with Blue Flash              Inches into Metric Units  66     Bulbs                 69
            Shutter Speeds with Auto          Conversion of Film Speed               Setting                   67    Svstems             69
           Focusing with Close-up           Pedth of Field with Canon           knses                   67       45 mm. Lens          70            Subject Size and Depth of         35 mm. Colour Films     7I
               Field with Close-up             35 mm. Black-and-White
                                                                        72        Lenses               67     Films
            Parallax Compensation in
                                                                        75         Close-ups           68  Howto...VhatisVhere?
                    The Green Section between pages 32 and 33      Page
     THE CANONET MODEI'S
       The Canonet
                                                        Special Controls 5           Loading 2 - Unloading 4 - Shooting 4 -
       The Canonet S
           Loading 6 - Unloading 5 -Shooting 8 - Special Controls 9
                                                                                 TO          Th.e Canonet QL77r 79, Compact QL77r 19, 79f' and,25.-..-
          Loading  f 2 - Unloading t2 - Shooting 13 - Special Controls
            13 - The Exposure Meter Battery 14
       Tlw Canonet lunior                                                ts
           Loading f5-Unloading   f 5-Shooting  f 7-SpecialControls t7
       The Canonet 2B                                                 ,8
          Loading  f 8- Unloading 18-Shooting 18- Flash 20
                                                                        22        TIw Canonet Cornpact 28
          Loading 22 -lJn[oading 22 - Shooting 22 -Flash 24
                                                                          7io',"",,
                         o,,,,,o,.%Il,fil i'jil,ii* ;13         on                   .          may ble reproduced, stored in a retrieval system,
                             or transmitted. in any form or by any means'
                                 electronic, mechanical, photocopying,  recording
                               or otherwise, without the prior permisssion  of the
                                               copyright owner.
                            sBN 24O 44974 6
                Printed 1972 inGreat Britain by Staples Printers Limited, Rochester, Kcnt
View original page 2Page 3 · Read text
www.butkus.us
     THE CAI\ONET CAMERA
  The Canonet is a 35 mm. miniature camera with built-in
rangefinder coupled to the lens and buil,t-in exposgre meter
                               can be used as an auto-dirJctly-cameiacoupled to the aperture. Itmatic         or, alteriratively, with manual setting of
shutter speed and aperture.
  The negative size is I x 1$ in. (24x3! ryn.) using standard35 mm. d-lm. A single load in a standard cassette will take
up to thirty-six exposures. The film can be loaded and
unloaded in daylight.                   -precision                             alloy casting with black. plastic  The body is a
covering, tfie metdl parts satin chrome finished,_the interior
black aiodized. An-accessory shoe is let into the top. The
overall dimensions are 5| x 3'| x 3f; in., the weight complete
with lens is 25 oz.
  The lens and shutter are rigidly fixed to the front of the
main body. This does away with opening -and-closing ^thecamera. A quick transport lever advances the film and film
counter and tensions the shutter in a single movement. The
camera back opens on a hinge.
  The film cou^nter is on the-right edge of the top plate and
 is geared to the film transport, I-t is self-setting, returning                                      c-amera back; it auiomatically to zero on- opening-exposed.the indicates th6 number of frames      An interlock
 mechanism automatically prevents double exposures or
 blank frames.
  The film is transported by a sprocket wheel on to a pgr-
 manently fixed take-up spool. Th-e filq is held in position.by
 a pressuie plate in suih a way.that g1ly the sections outside
 th^e picturdarea touch the guiclg rails on the film aperture,
                                                                                 is thui avoiding scratching the film. Rewinding the film
 simplified by a rewind knob with countersunk handle.
  The heari of the mechanism is an electric meter-the
 electric eye by the lens. It is coupled in two ways. With the
 aperture iing-set to "Auto"  it sets automatically the correct
 lens apertur! corresponding to-any-pre-set shutter-speed. A
 built-in shutter speed selecior for the beginner will select a
                         4
View original page 3Page 4 · Read text
suitable speed. If the light is inadequate f9r an €xposure at
that shutfer speed, the release button is blocked on depres-
sing. In addiiion both shutter speed and aperture can be
selected at will for manual exposure setting.
  There is provision on the shutter rim for setting film
speeds-      in ASA and DIN.  The between lens Copal SV shutter has speeds from I
(Compact models lP) to U500 sec. and Q,_it flash ryl-
chronized for bulbs and electronic flash and has a built-in
delayed action release (self timer).
  The lens of the Canonet is the lf-in. (45-mm.) Canon
SE,f 1.9, a five-element lens of four co-mponents, and of the
Canonet S a"f-angle1.7 six-element lens in five compo-nents, eachcovering an      of 5l degrees. The 40 mm. focal length
lenses oT the 'Compact' models have an angle of 55 degrees.
They are highly corrected, coated anastigmats of very good
definition, f,atness of field and full colour correction. The
whole lens with shutter moves in a helical focusing mount.
This movement also actuates the rangefinder, which is in
one eyepiece with the viewfinder. The distance scale is
calibrited both in feet and in metres from 3 ft. to infinity.
  The brilliant frame viewfinder incorporates automatic
parallax compensation by moving the frame with the dis-
tance setting bf the c&rllerit; In the base of the frame is an
aperture scale along which a needle moves, indicating the
aperture the electric eye has selected.
 The Canonet Models
  The Canonet 1962 is as described above with selenium-
 cell exposure meter.
  Canonet models up to 1961 are also as described above,
 but in place of the aperture scale in the viewfinder, an arrow
 appeari if no exposure is possible, indicat$e qhe direction
 iri which the shutter has to be adjusted. No shutter speed
 selector is provided.
  The Canbnet S (1965) is as described above, but is fitted
 with a CdS exposure meter.
  The Canonet QL models (1965) are similar to the Canonet
                            5
View original page 4Page 5 · Read text
www.butkus.us
S but with quick-loading device (see green pages). The
Canonet QLI9E (1966) is a Canonet QL19 with electronic
shutter (see green pages).
 THE CANONET COMPACT QL (1971) is a Canonet
QL of smaller dimensions:4f x3x2$in., weight 20o2.,with shutter speeds from ll4 to 1/500 sec. and B, and X
synchronization for flash. It has indicators for correct
film loading and correct film transport. Flash is automatic-
ally coupled to distance setting.
  The Canonet Junior is a simplified version of the Canonet
described above and was introduced at the end of 1962. It is
without the built-in rangefinder. The shutter is fully auto-
matic without aperture scale and the shutter speed is auto-
matically indicated on a scale in the base of the brightline
viewfinder. The distance set is also indicated in the view-
finder by three symbols-"Landscape", "Group", "Por-
trait". The finder has a close-up parallax indication mark.
Film transport and rewind are in the top plate.
  The lens is the Canon SE 40 mm. f 2.8, a four-element,
three-component, coated triplet of very good definition and
full colour correction; it covers an angle of 53 degrees. The
shutter speeds are from l/30 to U250 self-setting and B. Itcan be used at flash position :  ll30 sec. with individual
aperture settings from/2.8 tof22.In this case the exposure
meter is inoperative. It has no delayed action release.
  The Canonet Junior has overall dimensions of 5|x 3[x2[
in. and weighs 20 oz.
  The Canonet 28, introduced in 1969, is a programmed
Electric Eye (EE) model which will automatically select
shutter speed and aperture and has built-in flash cube
fltting which automatically sets the correct aperture on
setting the distance. There is no individual shutter speed
selection. The distance is set either by symbol in the view
finder or on a distance scale on the lens mount. The lens
is the Canon 40 mm. f2.8, a four elementthree component,coated triplet of high definition and colour correction. It
covers an angle of 53o.
View original page 5
Page 6 · Read text
The Canonet Compact 28 (1971) is an Electric Eye com-
pact model. It has CdS metering with programmed shutter
                                                        sec..' Cano" f?'9fi;;  f2.8 at 1.30 sec. to f14.5-at ll6v0
4O *tir. lens, built-in coupled rangefinde_r, viewfinder with
parallax coirection marki, automatic flash photography
iuith Caoolite D, ordinary flash by manual aperture setting.
                                                weighs  The Canonet is overill 5{x3#x2$ in. and
17$ oz.
View original page 6Page 7 · Read text
www.butkus.us
     HANDLING TIIE CANONET
  In order to simplify the description and handling -of theCanonet cameras without being confused by dffirent feature.s
of individual models, this guide has been divided into 6ro
iections. The general section applies to all models. The
requirements, and consequently dffirent handling, of each
model are found on the green pages after page 33.
  For convenience, a symbolic reference system is also used
in the general section.-Wherever the sign I qppears, funher
details-will be found in the camera pages of the green section
for each camera type.
   It is obvious that the camera should be held as steady as
possible, as the slightest shake, even if not seen in the
iregative, will become visible in the enlargement. Always
stand with your legs apart.

Holding
 FOR HORIZONTAL PHOTOGRAPHS hold the
camera horizontally against your nose while looking-through
the finder with one-eye. Keep both elbows close to the body.
Press the right thumb against the back of the camera,. let
the right index finger rest on the release, while- the right
middle finger, bent downwards, presses against.the camera
 front. ThJleft hand gnps the camera body on its left side.
  FOR VERTICAL PHOTOGRAPHS  rest the camera
upright against forehead and nose, gripping its top with
 ttie Gft hand, left thumb against the camera back. The right
hand holds the camera fiom below, right thumb on the
 release, the camera resting in the palm of the right hand.
  To release the shutter, press the release with the ball of
the finger (or thumb). Use finger pressure only and- keep the
hand and its grip on the camera steady. The actual pressing
down must be done slowly and smoothly.
  For slow exposures in the hand it is advisable to rest the
elbows or at ldast to lean the body against some support in
                                 I
View original page 7Page 9 · Read text
www.butkus.us                                It
order to avoid shake. In this way l/15, l/8 and even l/4 sec.                 {jcan be risked without camera shake. Such a support is also                      .t
desirable for faster exposures. A slightly unsteady hold may                              .N.l
easily lead to blurred pictures.                                                         4
  The use of a tripod is necessary when taking time exposures
and it is also recommended for speeds from l/15 to I sec.
For upright photographs from the tripod, use a ball-and-
socket head to allow changing from horizontal to vertical
position.

Cawying
  To be ready for quick action  it is best to carry the Canonet
on a short strap around the neck so that it lies on your chest.
Lifting it up to the eye then is a matter of a split second.
  For convenience and protection, the camera should
always be carried in its ever-ready case. The case is designed
to hold the camera ready for use. A retaining screw holds
the camera securely in the case, even when open.

Yiewing and Focasing
  The vieurfinder of the Canonet shows the subject in two-
thirds natural size. Looking through the finder, you can
clearly see the brilliant reflected frame which outlines the
exact field of view of the lens.
  However, the area just outside this field of view is also
visible. You can thus watch the immediate surroundings of
the subject to be taken.
  The finder of the Canonet (not Junior and 28) has
automatic parallax compensation. The white frame is
coupled to the distance setting and moves diagonally
downwards (when the camera is held horizontally) at
nearer distances, automatically compensating for the
different viewpoints between lens and viewfinder.
  The bright line frame of the Canonet Junior and 28 has
a close-up parallax indication mark in the viewfinder.
  To obtain a sharp negative, set the distance from the
camera to the subject as accurately as possible. On the
                          l0
View original page 9Page 10 · Read text
YIEWFINDER INDICATORS
                  :E
       E

Presr thc shutter releasc.  lf the needlc ar the cxtrcmc right moves and stops within thc correct
exDo3ure window (left). the shutter is rhen automatically rclcased. lf the needle stays on theariow faclng left (centie,'top) turn shutter speed ring to left for slowcr.shutter  spacd..  lf it stops at
the arrow faclng right (centre, bottom) turn shutter speed ring to _rlg.ht lor lastcr shutter sPeco.lf a red warnini  slc-nal'(on Cinonet l'962onlv) appear! in the iicwfinder  (right) the sublect ls too
bright or too dirk ior automatic rrearmenr. Uie ririnual operation or flash. Note: On Canonet S' che
aperture scale is at rhe top of the viewfinder.


In ore-1962 Canonets an arrowhead ir vlslble in the vicwfindcr  (left) bcfore you release the shuttcr.
 lf ihc orc-selccted shutter spccd is corrcct, this mark disappears whcn you.release-the  shuttcr
(ccntrc. left).  lf rhe shurtcr ldcks and the arrow polnts to thc lcft (centre, right) turn shutter 3Pccd
iingrolefiiorslowerspeed. lfarrowpointstoright,turnshutterspccdringtorightforfastcrspeed.


When using the slmplified rhuttcr specd sclector       ,ffiffiffion the  | 962 and S Cenonct-(lcft),SHUTTER-turnSETTINGSthc rlng-untll thc orotruZinc  lcvc'r polntito theLpproprlatc symbol, l.e. "lndoo-rs",  "Cl-o-udy", "Sunny". When usini the dclaycd actl6n setting (righo, push the flash lcvcr to the left ofthc X-settinS  as far as it will
 go, press thc jclf-timer levcr do*n, and release the shutter.
                                  11
View original page 10Page 11 · Read text
www.butkus.us
 canonet Junior and 28 w irhcut tuilt-in range finder,-
 estimate or measure the distance with a separate iange-
 finder and set it on the camera by turning the-focusing  ri-ng
 until the required distance figur-e is opplosite the dis-tancE
 index mark.
   There are also zolle focus distance syrnbols on the canonet
 Junior and 28 for simplified distance setting. These indicate
 "Landscape", "Group" and "Portrait" and can be seen on
 the right-hand side as you lookthrough theviewfinder. As
you turn the focrlsing ring an indicator points to the
 appropriate symbol.
  On the Canonet, a coupled rangefinder measuros the
 distance and at the same time bringithe camera lens auto-
 matically_into correct focus. To uie the rangefinder, look
 through the combined viewfinder/rangefinder eyepiece. you
 will.see a.bright rectangglar field, and in this fitird the image
of the subject appears double. As you slowly turn the leis
focusing.mount, the two.images fuse into ohe. Stop when
the two images are superimposed; the lens is then iocused
accurately on the subject.
  The orthodox way of rangefinder focusing just clescribed
is suitable for stationary or slow-moving subiects. For
action subjects a differenf method of focusing  is iuggested.
There. you set the camera and the rangefindei to a di-stance
at which the subject will be at a given moment, or focus on a
spot which the subject has to pass. watch the scene in the
rangefinder, and press the release button when the two
rangefindgr images coincide, indicating that the subject has
reached the pre-focused point.
  With subjects liable to react self-consciously  (e.g., chil- .dren), set. the lens to a suitable distance and th-enafproach
yo]rr.s.ubjecL quickly, exposing as soon as the two images
coincide in the rangefinder.
               focus on some object which is the same -.Alterna_tively,distance from the c_qmera as youi real subject, but in a
different direction. When the range is fourid, swing the
camera round and press the release button as soon as your
subject comes into the field of view.
                          t2
View original page 11Page 12 · Read text
vi EwFl N DER/RANGEFI N DER


Whcn you look through the Canonet viewfinder,-you sec your subject within a brightline framc' In
thc centre of the framl is the rectangular rangcfindcr area (top, centre). As you focus the_ lcns you
scc a double image in this central arca (obove,  left). When thc two_imagcs fusc into onc, thc lens is
correctlyfocusedl The brightlineframe-of the Canonet (notthe CanonetJunior and 28) corrccts
automaticalty  for paraltax (obove, right). As you focus thc lens on nearer subiects, thc frame movcs
dlagonally downwirds to give the correct framing of the subiect.


 F          A
                               ft0
                               o
   www.butkus.us       383
Thc briehtlinc framc of the Canonct Juniorand23hasaparallaxcorrectlon   mark In thc viewfindcr.
Thc wh6lc framc is uscd for landscapes or groups (left). When taklng close-ups, kec-p your sublcct
wlthlntheunshadedarea(ccntre).   Simplifiedfocussymbolsarcalsovtsibleinthevicwfindcr.  Asyou
focus thc lens a pointer (right) indicatcs tne approPriate settin8.
                                13
View original page 12Page 13 · Read text
www.butkus.us

     Shooting
       Practise the following operations first with an empty
   @mera until you can do them almost automatically. The
    Canonet Junior release will not work without film in the
    camera. The Canonet QL19E and 28 have no manual
     control.
      l.  Work the film transport. This advances the film counter
       and tensions the shutter.
    2a. Set camera to 66Autot', and in Canonet pre-select the
s":      shutter speed (see also page 33 "Exposure").
    2b. Set camera to manual control if you want to choose the
        aperture individually, and in Canonet also shutter
        speed (see also page 34 "Exposure").
   3. Focus and determine the picture area to obtain a sharp
         picture and the view you want.
   4. Release the shutter gently.
    Film Packings
    The Canonet cameras, like the majority of 35-mm.
    miniature cameras, use standard perforated miniature film,
    35 mm. wide. It is available in various packings (see also
    page 20), the most convenient being standard daylight
     cassettes. These are light-tight containers with a ready cut
    and trimmed length of film for 36 or 20 exposures (or 12
    exposur€s for some colour negative films). The cassette is
    loaded into the camera in daylight.
     Avoid loading or unloading the camera in brilliant sun-
     light though. Choose a shady spot or do it in the shadow of
    your own body if nothing better is available.
    Loading
      Note: For simplified loading of Canonet QL models, see    green pages.
    1. Open the camera back. In Canonet push the safety catch
        in the base of the tripod bush anti-clockwise while depres-
       sing the button beside it. In Canonet Junior, S and 28
        slide the catch at the base of the side wall of the camera
      downwards and the back spring will open. On Canonet
                              t4
View original page 13Page 15 · Read text
www.butkus.us
    Compact 17, 19,28 pull up the rewind crank fully and
    back will spring open.
. 2. lnsert the ftlm iassette. Pull out the rewind crank and
     place the cassette, with the protruding film end poiqting                                                                                      l
     io the take-up spool, into the cassette chamber. Fully    push back the rewind crank, so that it engages in the         I
      cassette spool.
  3, Fix the filln end to the take-up spool. Pull out about 3| in.               1t
     of film until the first perforation on the lower part of              I
     the film protrudes from tbe cassette. Turn the-take-up
  .  spool byits serrated flange until its flat _spring. is t?ging                 i
                                                              So.    ybu;-     iniert the film end into the slot as far as it will      Turn the take-up spool by its serrated flange until the                    I,l
     film is just taut and-its top perforations engage in. the
     sprocket wheel. Note: Canonet S take-up spool winds
     backwards, others forward.
  4. Close camera back, by pressing the back against the         4
     camera body, when it will click shut.                               J
   5. Make two blind exposures. Turn the aperture ring away
    from "Auto" setting (not on Junior and 28). Now
     operate the film transport lever and release the shutter.
     Repeat this and then operate the lever again. The fllm!.'   cointer will now indicate No. 1, showing that the flrst
     film frame is ready to be exposed. While winding the             ,'*
      lever, watch that the centre of the rewind crank rotates.
     This indicates that the film advances correctly from the
      cassette to take-up spool. Turn the aperture ring again
     to "Auto" setting (not on Junior and 28).
   6. Set film speed on lens mount rim r.
   Unloading
    Whenihe whole film has been exposed the film counter
   will indicate No. 36 or 20 according to the length of film
   used. The transport lever cannot be turned any further and
   indicates that all the film has been used up. ln Canonet
   Junior the release can also no longer be depressed. Do not
   force the winding lever, otherwise you will tear the film out
   ofthe cassette.
                              16
View original page 15Page 17 · Read text
www.butkus.us
1. Set for rewinding. This disengages the transport sprocket
   in the camera. Swing over the reversing button in the
   base of the Canonet and Canonet Junior: depress it on
   Canonet S, 28 and QL models.
2. Rewind the film. Lift up the crank handle in the rewind
   knob and turn it in the direction of the arrow engraved
   on it, until you eventually feel a resistance as you come
   to the film end clipped under the spring of the take-up
   spool. Turn on beyond this resistance, and give another
   two to three turns.
3. Open the camera back, as for loading, and pull up the
   rewind knob fully.
4. Remove the cassette. Then close the camera back or
   reload with a new film.
Cutting of Exposed Lengths
   If a film which is only partly exposed has to be processed,
advance the film for the next exposure. Then take the
camera into a darkroom-or work in complete darkness.
Open up the @mera back, pull up the rewind knob and lift
the cassette out of its chamber. With a pair of scissors cut
through the frame which lies in the film aperture. Put the
cassette down and carefully withdraw the exposed film from
the take-up spool and either put it in a light-tight container
or load it immediately into your developing tank. Now you
can retrim the remainder of the film (see page 2l), fix it
again on the take-up spool, and close the camera. It is
ready for the next exposure. The counter restarts fromzero (:      and you have also to allow for four frames lost       -2)(the amount of film lost through cutting and reloading).
  The reinserting can be done in daylight. In this case a
total of about six frames are lost.
Changing Partly-exposed Films
 To replace a partly-exposed film by another one, for
instance if you want to take a few colour photographs in
between some black-and-white shots, proceed as follows:
                            t8
View original page 17Page 18 · Read text
i,f
                                  HANDLING FILM       i


                                              Film back glossy
rFufi*ffi


           l. Correct way of trlmmins thc wcdre-
      shaped end (which ls fitted io rhc ccnirc
      spool of the cassette) with a standard
      trimming tcmplate. 2. Trimming of the
      curved cu! with a standard tiimming
      tcmplate. 3. Thc appearance of  thi
       trimmed_film: (/eft) wcdge, (right) curved
      cut. 4. Thc film cassettc,  its outer shell,
       centrc spool and scparate top. 5. How to
        fix thc film to thc ccntre spool of the
       cassettc. 6. Winding rhc film with the
      mechanical film winder to che centrc
      spool. 7. Asscmbling the cassctte. See
        rlro pages 2l-23.


                                    t9
View original page 18Page 19 · Read text
www.butkus.us
 i. Check the number of exposed frames on the ftlm countet.
 2. Rewind the filn but stop immediately you feel a slight
    resistance. This resistance comes froh-pulling the film
   end from the take-up spool. If the film ii to be reloaded
    again, you must not pull the whole film into the cassette,
   otherwise the film end would have to be extracted by
   opening the cassette in the darkroom for subsequent
    reinsertion into the camera.
 3. Unload the rewound film and write down the number of
   exposures taken on the beginning of the film leader. Now
   you can load the camera with any other type of film.
4. Reload the camera. When reloading, load the partly-
   exposed film in the usual way (page l2), but cover tie
    lens with a lens cap or some similaf opaque obiect. press
   the release and advance the film for the initial blind
   exposures (page 14, Loading, No. 5), and-with the lens
     still covered-go on pressing the release and turning the
   transport lever to move on the frames already expbsed
   before. Advance the film in this way untit tne nm
   counter has reached the number of the frame you noted
   before. To be on the safe side, it is advisable to allow one
   more frame to pass.
   The rest of the film can now be exposed normally.
Other Film Packings
  In addition to standard cassettes, 35 mm. film is also
available in various loose packings for loading into cassettes.
This is a much cheaper way of using film, as ybu do not have
to buy a new cassette every time with the fiim. The follow-
ing packings are available:
 DARKROOM REFILLS are lengths cut and trimmed to
36 exposures and have to be loadecl into a cassette in total
darkness.
 DAYLIGHT REFILLS are cut and trimmed lengths for
20 or -36 exposures which are wound on to a centre spool (as
used in the cassettg) and covered with a black pape? leader
strip to allow loading of a cassette in daylight.-
                        20
View original page 19Page 20 · Read text
BULK FILM is supplied in lengths of 18 to 200 ft., and
is the most economical way of using film. A suitable length
is cut off to be loaded into a cassette in total darkness.
Working in total darkness for loading darkroom refills or
bulk film is not difficult. It is, however, advisable to practise
filling with a dummy film first in daylight before starting the
darkroom work.
Handling, Winding and Trimming the Film
  When handling the actual film, particular care must be
taken not to touch its emulsion (matt) side. Always handle
it and wind on to the centre spool of the cassette by holding
the film by either side of its edge, preferably between thumb
and index finger. At the same time, it is of no less impor-
tance that the spot on which the loading is done should be
perfectly dry, clean and dust free.
  When using bulk film in loading cassettes, the edge of the
work-bench can be marked with notches or drawing-pins to
indicate various distances, let us say for 12,24,36 exposures
of film. This considerably simplifies the measuring of film
lengths in the darkroom
  The film ends need trimming. At the beginning of the roll
of film make either a straight or wedge-shaped cut for the
centre spool of the cassette and measure off the required
length of film (see table, page 21). At the end of this make the
curved cut for the take-up spool. The cut should start
between the fifth and sixth bottom perforation-when
emulsion is towards you-and must not go through a
perforation-           hole.  The ready-cut film is now spooled on the centre spool of
the cartridge or cassette. While winding on, hold the film
only by its edges.
   Also, take care not to press too hard on the film, and don't
squeeze the film-ends when drawing through the hand.
Failure to take the first precaution may result in fogging,
while neglect of the latter precaution may give rise to peculiar
kinds of exposure effect known as "lightning flashes". These
are due to electrical discharges, and appear as dark, zigzag
                           2l
View original page 20Page 22 · Read text
l. Open the cassette.
 2. Fix the film to the centre spool. If the centre spool is
    fitted with a film catch, thread the tapered end of the film
    into it. In cases where the centre spool is fitted with a
    lpring, thread the end under it and lold it sharply back.    If the centre spool is without any suitable fitting io hold
                 been proved best to wind a l-| in-. (4 cm.)    the film, it lqs
    piece of cellulose tape round the centre spool-, so that on
    either side about $ in. tape is used to secure the film.
3. Wind the fihn on the centre spool.
4. Insert the centre spool into shell, leaving the first 2 in. of
   film protruding through the light-trap.
5. Close the cassette. Where top and bottom are originally
   fastened by the outside label, fix the top and bottom
   cover to the shell, preferably with a length of cellulose
    tape.
Loading with Daylight Refills
  No darkroom is necessary, but work in subdued daylight
or artificial light.
1. Remove film wrappings and label of refiIl.
2. Open the cassette.
3. Introduce the refiIl into shell of the cassette; leaving the
    first 2 in. of paper leader protruding through light-trap.                                                                                            -  The actual centre spool of the cassette is not nelded.
5. hill out the paper leader and 2 in. of fiIm.
4. Close the cassette.
  Cut off the paper leader. Where top and bottom are
   originally fastened by the outside label, fix the top or
  bottom cover to the shell, preferably with a length of
   cellulose tape.
View original page 22Page 23 · Read text
www.butkus.us
        FILM AI..{D FILTERS
  Theie are two kinds of films available for the Canonet
cameras: black-and-white and colour.
Black-and-white Fitm
   This prodlcgs a                   4egative in which the colours and bright-
ness range of the subject are translated into black and white.
Flg- it, prints or enlargements on paper or black-and-
white transparencies can be made.
  The black-and-white film used normally is panchromatic;
that means that it is sensitive to all colouri. Tliere is a choice
of several types differing mainly in sensitivity as well as
certain other characteristics.
  SLOW FILMS are of low sensitivity, requiring compara-
      great exposure. Their main advantage is the extrernelylively
fine grain, permitting a high degree of enlargement without
1t9 eranular -structure becoming unpleasantly visible. Suchfilms also           _yield images of the-greatest shaipness. On the
other hand, these slow films are not very suitable for coping
with fast movement in other than exceitionally good lightl
ing, _nqr for general work in poor light.-Such fiims are rited
at 40-80 ASA or 17-20 DIN.
 MEDIUM SPEED FILMS still yield a reasonably fine
grain with good gradation. They are the most suitable
material for all-round photography, other than in poor
light. These films are rated at tOO-tiiO ASA or 2l-23 DIN.
  FAST FILMS with somewhat coarser grain (still accept-
able for reasonable degrees of enlargement) wiil cope with
most light conditions including pooi light'and inteiiors in
favourable conditions. This is in-e right-film for the photo-
grapher who wants to be prepared foi the unusual, to arrest
fast movement with high shutter speeds, as well ai shots in
poor light. The speeds are 200-400 ASA or 2L27 DIN.
 ULTRA FAST FILMS are primarily intended for high-
      sqorts slots in dull weather, interior snapshots in poor:.pged
                                                Theseljght, night phot_ography and ill-lit stage pictures.-wherefilms are specialist types for conditions        normal
                        24
View original page 23Page 24 · Read text
materials are totally.inadequate. The high speed is achieved
 at some cost in defirrition and graininess. speed ratings range
 from 500-1,300 ASA or 28-32 DIN.
  The above speed figures are based on the latest ASA
 standard for fi.lm speeds (and on the BS and DIN standards
 under rwision).. These fgures, when used on the exposure
 metcr, give minimum correct exposures, to make th6 most
 of the vers-atility of the film and-of the image quality. They
are also the figures quoted by most film-minufabturerj.
 sometimes films are, horrever,  still rated according to earlier
standards which, in effect, incorporated a gener-ous safety
 factor. a gai! st und erexposuie-by'the simple firoclis or ouei-
gxposing 4lms about 100 per cent (well wittrin the exposure
latitude of most black-and-white films). So you may come
across films apparently only half as fasi as ofhers of similar
     because of this difference in ratings. The table on page !y-p9,7l indicates the current film speeds io be used with tfie
exposure meter, even if-the fiJm packing gives a lower rating.
  This applies to black-and-white nega/ive materials onlf;-
spqe_d rating methods have not changed for colour films.
  There is a wide range of differeni makes of films in all
speeds- ol the market. Their chara cteristics, apart from speed,
vary-slightly,from make to make. It is safe to say thlt ali
well-known brands are reliable and good. The best film is
the one you are used to. Professional photographers and
advanced amateurs may find one or the other char-acteristics
of a particular make, i.e., its gradation, granular structure,
acutance, etc., of particular value for specific jobs.
Colour Film
  These films produce an image in colour after appropriate
processing, corresponding directly or indirectly to the
natural colours of the subject. From the practicai point of
yiew, colour flm is as easy to use as black-and-white film,
but needs a little more care in exposure. processing is more
complex and is often carried out bv the film riaker or
specially appointed processing laboraiories.
  There are two types of colour film: reversal and negative.
                         25
View original page 24Page 25 · Read text
I
                                                                                                                                                                                          I                        www.butkus.us
                                                     4
Colour Reversal Film : '                                                                                                                                                     .                                                         fi
  This produces a colour transparency on the actual film
exposed in the camera. This transparency held up to the
light shows a positive image with all P!r!s of the ggbject in
tlieir original colours. It can be viewed in a suitable trans'
parency viewer with a magnifier or it can be projected in a
slide projector to give a large picture on a screen.
  Th6re is little doubt that the projected image is the most
natural and best for showing colour.
  Although the colour transparency.is an end product, it
can still be used to make:
(a) duplicate positive colour transparencies,
(b) a black-and-white negative which can then be used to
   produce black-and-white prints or enlargements,
(c) a colour negative for making colour prints and e-nlarge-
    ments, as fiom colour negative film (described below),
(d) direct colour enlargements on colour reversal paper-
  Colour prints on paper invariably show- a loss of colour
quality as compared with the original positive transparqncy.
  For correct colour rendering, colour reversal films have
to be carefully matched to the light by whicb they.are to be
exposed. Accbrdingly, some makes are available in two or
more of the following types:
(a) daylight colour film which wi! glvg corr-ect colour
    rqiroduction in daylight or with blue-tinted flash bulbs,
(b) artificial light type colour film which- will. give correct
    rendering by photoflood or tungsten illumination,
(c) artificial light type colour film (type B) which will give
    correct rendering with high-power studio larnps.
  Colour films made for one kind of light may often be used
under different light conditions with the aid of a conversion
 filter as recommended by the manufacturer.'  Different makes of colour film may yield transparencies
of a slightly different characteristic colour quality, colour
saturati6n ind colour contrast. Which you prefer is very
much a matter of personal taste.
                          26
View original page 25From the M. Butkus archive. Original publisher and archive notices are retained.
Check the model and edition against your equipment.
PDF verified 2026-10-10.