Camera accessories
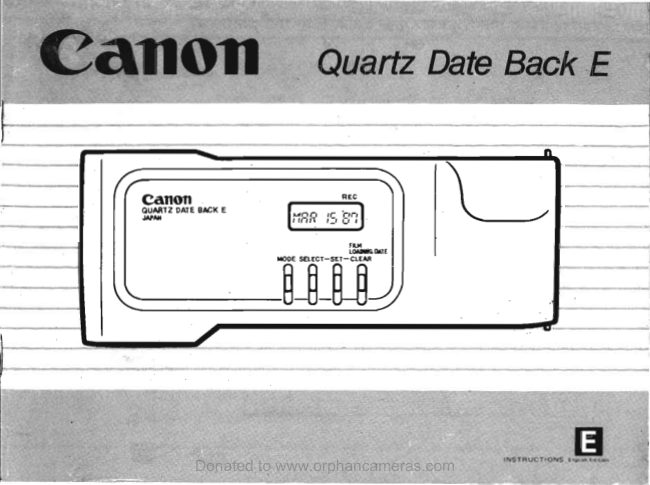
Canon data back E User manual
User manual for Canon data back E. 18 pages in English. Read the original PDF, download or print a copy without registration.
18 pagesEnglish1.0 MB PDF
Loading your manual…Open PDF directly
Document details
- Brand
- Canon
- Model / document
- Canon data back E
- Document type
- User manual
- Language
- English
- Pages
- 18
- File size
- 1.0 MB
- Category
- Camera accessories
- Document date
- Not specified in catalog
Contents
Search available document text
Find a term, then jump to its page in the original PDF. Image-only pages may not be searchable; check the PDF for exact wording and diagrams.
Page 3 · Read text
Introduction                        Contents
Exclusively designed for the Canon EOS 620, EOS 630        Nomenclature.                                P.3
and EOS 650, this Quartz Date Back E is a fully                1. Attaching the Quartz Date Back E to the
automatic data back which imprints various data           Camera                       ..                         P.4
on the film. Special features of the Canon Quartz             2. Basic Function of Control Buttons           P.5
Date Back E are:                                                     3. Display Information                         P.6
                                                                           4. Display Mode Selection                     P.7
1. Built-in automatic date imprinting mode                       5. Basic Operation for Setting
  programmed up through the year 2029.                     Display Numbers                           P.7
                                                                           6.  Setting Data Imprinting                      P.8
2. Built-in automatic quartz, digital clock mode               General Information on Data Imprinting
   with 24-hour display.                                            a) Setting the date....                       P.8
                                                                     b) Setting the time                       P.10
3. Four imprinting modes:                                          c) Setting the record number              P.11
   1) Date Mode (any of th ree sequences-                       d) Setting the frame counter number      P.12
     year/month/day, day/month/year                            7. Film·Loading Date Check                 P.13
     or month-3 characters-/day/year)                           8. Replacing the Battery                    P.14
   2) Time Mode (day/hour/minute)                                9.  Liquid Crystal Display                    P.16
   3) Record Number Mode (arbitrary 6-digit                Specifications                              P.16
    number and 0  <blank»
   4) Frame Counter Mode (four-digit Fc 0000- Fc
     9999)

4. Film-loading date check function.

Please spend a few minutes reading through
these instructions before you start using your
Quartz Date Back E.
                                                        For easy reference to the data back's parts,
                                                        please unfold the front flap of this booket.

                   Donated to www.orphancameras.com                           2
View original page 3Page 5 · Read text
1. Attaching the Quartz Date Back E to the Camera


For those who have bought the EOS 650 Quartz             b) To attach the Quartz Date Back E, insert its
Date, please go to chapter 2.                              bottom hinge into the lower socket first. Then
                                                        depress the hinge release pin, align  it with the
Be sure that there is no film in the camera before           upper socket and let go of the hinge release
attaching the Quartz Date Back E.                               pin to lock  it on.

a) Open the back cover of the camera and              Then load the film.
   carefully push the hinge release pin down to
   remove as illustrated.                                           * Wipe the contacts of the camera and the
                                                                  Quar,tz Date Back E with a clean dry cloth to
                                                       ensure proper contact. Otherwise, the data may
                                                             not be properly imprinted.


4                  Donated to www.orphancameras.com
View original page 5Page 6 · Read text
2. Basic Function of Control Buttons


The basic functions of the Quartz Date Back E's            b)  Position Selector:
various control buttons are as follows.                         -Selects the digit to be set or reset when
                                                          changing numbers in the various modes.
a) Mode Selector:                                           <continuously lit> -  <blinking>
    -Selects the modes.
        Date mode <year/month/day>-                   c) Number Set Button:
        Time mode < day/hour/minute > -                     -Sets values when the digits flash.
        Record number mode <arbitrary 6-digit
      number>-                                   -Changes the order of <year/month/day>
       Frame counter mode-                             by pressing with the mode selector.
       OFF < No data imprinted>
                                                                    d) Film-Loading Date Check/Clear Button:
    -Changes the order of <year/month/day>                       - Film loading date appears on the display
     by pressing with the number set button.                    panel.

                                                            -Clears values when the digits flash in the
                                                                     following manner.
                                                        year- '86                                                   FILlil
                              LOADING DATE                   month -1, JAN
       MODE SELECT-SET-CLEAR                     day-1    hour-O
                                                                    Minute, and other numerals-DO
  -~-~-~j-


                  Donated to www.orphancameras.com                           5
View original page 6Page 7 · Read text
-,
3. Display Information

   < year/month/day> display                   < OFf > display
        [ En· 3  15] (MAR 15'1987)                            ~_----,O=--F_F--,] No data will be imprinted.
    <day/month/year> display                   < Data Exposure Confirmation Indicator>
            [,---=15~-=-3-=B=-'~1] (MAR 15 1987)
                                                                  This mark appears for about 2 sec.
   < month/day/year> display                                      after shutter release, indicating that
                                                             data have been imprinted.
            I'1R~'                    (MAR 15 1987)                15 B1                                        < Battery Replacement Warning Indicator>
   < day/hour/minute> display

                             (15th, 8:30)                           "Battery" appears to indicate that the      [15   8:30]
                                                                   battery should be replaced.
    < Record number> display
       50 YO 30 (number 50 40 30)

   < Frame counter >display

                           (78th frame counter)      [Fe  00 18]

6                  Donated to www.orphancameras.com
View original page 7Page 8 · Read text
1
4. Display Mode Selection


Press the mode select button, and the display            The data displayed upon shutter release will be
changes as follows:                                           imprinted.
    < Date mode> display
          <year/month/day> ....
           ..   < day/month/year> ....
         < month-3 character-/day/year>
    <Time mode>display
           ..   <day/hour/minute>
    < Record number> display           ..
    < Frame counter> display
    < OFF..   >display                                                    -.J


5. Basic Operation for Setting Display Numbers


a) Each time the position selector is pressed, a           Each depression of the number set button in-
    2-digit unit starts flashing.                              creases the flashing numeral by one.  If the but-
                                  ,                               ton is held down continuously, the numeral will
b) After the 2 digits you wish to change start                increase rapidly. The numerals do not carry
   flashing, press the number set button until the           over into other positions, for example from day
   desired number appears.                                     to month, or from minute to hour.

c) Press the position selector until the digits stop
   flashing.

                  Donated to www.orphancameras.com                              7
View original page 8Page 9 · Read text
6. Setting Data Imprinting

                                                            a) Setting the date
General Information on Data                   Each time the postiion selector is pressed, a
Imprinting                                                       2-digit unit start flashing in order of <year>
The data will be imprinted upon shutter release in             - < month> - < day>, in any date mode.
any display mode except "OFF".

 ·The data will be imprinted at the position shown.                                                  ·Changing the order of <year/month/day>
                                                   Any of three formats (year/month/day, day/-
                                                           monthlyear, and month/day/year) may be
                                                             selected in the date mode. The <year/mon-
                                                        th/day> display sets initially. To change this
                                                                 order, follow these steps:

                                                                      1) Select the date mode by pressing and
                                                                   releasing the mode selector.

                                                                      2) Press the mode selector while pressing
                                                                  the number set button. Each time the
                                                 mode selector is pressed, the display
·You can confirm data imprinting when the data                                                                     rotates in the sequence:
 exposure confimation indicator lights up in the                                                    < year/month/day> - < day/mon-
 display panel.                                                             th/year> -  < month/day/year>·The data may not appear clearly on the picture
   if the data imprinting area is bright.
·Numerals imprinted may blot slightly depending
 on the kind of film.
·Data will not be imprinted when any digit on
 display panel is flashing.
·Be sure to set to "OFF" when you do not want
 to imprint anything.
8                  Donated to www.orphancameras.com
View original page 9Page 14 · Read text
8. Replacing the Battery


 When the "BATIERY" mark lights up in the                   3)  Insert the screwdriver tip into the chamber
 display panel, the battery has become exhausted.          and then gently push the battery.  It will then
 Replace promptly as directed.                          pop up as shown in ®.
 - Battery type: Lithium 3V, CR2025 (coin-shaped)
 - Battery life: Approx. 3 years (at normal                       4) Wait 15 seconds after removing the old battery
  temperatures about 20°C/68 OF)                        and then load the new battery with the " + "
 -A new battery is included at time of purchase.               side facing up as indicated on the outside of
                                                               the battery chamber cover as shown in ©.
  Be sure to replace the battery only when film is
  not loaded.                                                         5) To load the new battery, first insert one side in-
                                                                          to the chamber and then press  it to the left
 1) Open the back cover.                                        with your finger until  it will go no further as
                                                   shown in @.
 2) Using a phillips-head screwdriver, take out the
    retaining screw to remove the battery chamber           6) Finally, slide the battery slightly to the right,
   cover ®.                                                   lock  it into place and replace the cover.
14                 Donated to www.orphancameras.com
View original page 14Page 15 · Read text
The Quartz Date Back E's settings upon comple-        *Remove the battery chamber cover only to
tion of this procedure will be as follows:                    replace a battery.

 Date: January 1, 1986                                    'Battery performance substantially reduces at
 Time: 00 00:00                                         low temperatures (below 0°C/32°F). Do not
 Record Number: 00 00 00                          throwaway these batteries, because once
 Frame Counter: Fc 00 00                                  restored to room temperature, you may be able
                                                                  to use them again.
If < '86  1  1> does not appear in the display
panel after replacement, please remove the bat-         'Keep batteries away from children.  If swallowed,
tery and wait for at least 15 seconds before                contact a physician immediately.
reloading.


                  Donated to www.orphancameras.com                            15
View original page 15Page 17 · Read text
4) Data imprinting system:                                   Digital clock accuracy:
   Automatic imprinting coupled with exposure by         Accurate to within ±30 seconds per month at
  a miniature lamp which exposes a                    normal temperature (20°C/68°F)
   transmissive LCD from the film's base side to
   project numbers and characters.                   Power supply:
                                                              3V, CR2025, lithium battery
5) Exposure confirmation indicator: .
   An exposure confirmation mark (an LCD. in-             Battery life and replacement warning:
   dicator) lights in the display panel for 1-2 sec-          About 3 years (at normal temperature). Battery is
   onds after exposure.                                    automatically checked.  If the voltage is below a
                                                               certain level, "BATIERY" lights in the display
6) Data imprinting speed during continuous ex-             panel.
   posure: Same as the continuous exposure
   speed of the camera.                              Dimensions: 147.70N) x 58.4(H) x 24.7(D) mm
                                                                         (5-13/16" x 2-5/16" x  15/16")
7) Data imprinting lamp intensity:
   Automatically set (five levels) according to OX          Weight: 75 g (2-5/8 oz) with battery
   code.                                                                       (All data are based on Canon's Standard Test
                                                        Method.)
Automatic calendar function:
Programmed for all dates from 1986 to 2029.                             Subject to change without notice.
Automatic correction for long and short months
and leap years.
                                                               This digital apparatus does not exceed the Class
Film-loading date check:                        B limits for radio noise emissions from digital
Data back automatically remembers the film-load-           apparatus set out in the Radio Interference Regu-
ing date. Date can be displayed at any time on                 lations of the Canadian Department of Communi-
the display panel by pressing the film-loading date            cations.
check button.


                  Donated to www.orphancameras.com                            17
View original page 17From the M. Butkus archive. Original publisher and archive notices are retained.
Check the model and edition against your equipment.
PDF verified 2026-10-10.