Film cameras
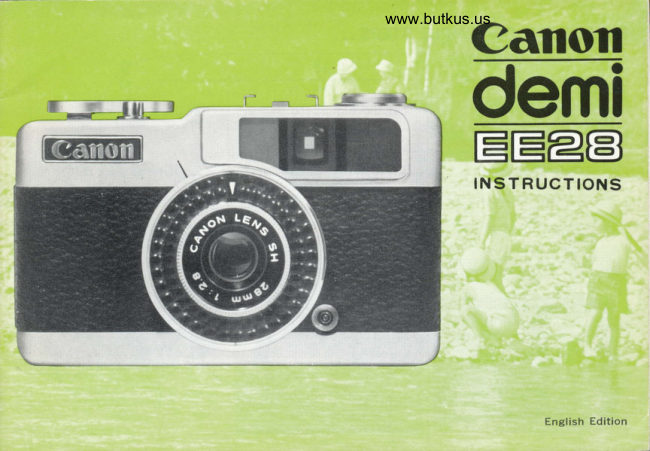
Canon Demi EE28 User manual
User manual for Canon Demi EE28. 24 pages in English. Read the original PDF, download or print a copy without registration.
24 pagesEnglish8.0 MB PDF
Loading your manual…Open PDF directly
Document details
- Brand
- Canon
- Model / document
- Canon Demi EE28
- Document type
- User manual
- Language
- English
- Pages
- 24
- File size
- 8.0 MB
- Category
- Film cameras
- Document date
- Not specified in catalog
Search available document text
Find a term, then jump to its page in the original PDF. Image-only pages may not be searchable; check the PDF for exact wording and diagrams.
Page 2 · Read text
Gamera for Beginners
Canon Demi EE 28 is a newly designed compact EE camera. Excellent pictures can be easily
taken even by those who have never handled a camera before.


                                   *t rr-*i. &s&e..:f $-i#


      ffi$ffiffi\*l*           ffiffiffiffi
View original page 2Page 3 · Read text
www.butkus.us

        Film Counter
        Film Advance Lever
        Shutter Release Button
        Film Rewind Crank
        Accessory Shoe
        Auto-Manual Aperture
         Index
        Viewfinder Window
       Manual Aperture Scale
        Distance Index
       Snap Mark
        Exposure Meter Window
        Flash Synchronization
        Socket
       Canon Lens
       Zone Focus Marks
       Auto Mark
View original page 3Page 5 · Read text
Venmo @mike-butkus-camera  Ph. 2083
PayPal Name  Lynn@butkus.org      www.PayPal.me/lynnbutkus
View original page 5
Page 8 · Read text
FEATURES OF GANON DEMI EE 28


 I fne Demi EE28 has a program EE system,     if The lens is made up of 5 elements in II  in which the shutter, exposure meter and     Ql 3                       lt has been specially de-                                         "o-ponents.so that enlarged pictures can be obta-aperture are fully coupled. The appropriate       signed
combinations of aperture stops and shutter    ined with the same quality as those ordinary
speeds are programmed in advance. When    35 mm size film. Focusing is of the helicoid
the camera is aimed at the subject the   focus type where the entire lens system
accurate selenium exposure meter automatical-    protrudes out. This lens has already been
ly selects the correct exposure.                proven on the Canon Demi as a sharp and
                                               high performance lens.
5f Just set the focus mark at the snap     1 The Demi EE 28 weighs onty 29O grams.
        when                           pictures               snapping                                out                                          of doors,Q mark                                                                                                     tlf  lt's a compact camera that can easily be            get  and you'll                                   pictures                 correct                       focused                                         no                                             put away in your handbag. lt's most conven.matter what type of subject you shoot. There's
no necessity for refocusing with each new    ient on trips.
subject. All you have to do is press the shutter
release button.
View original page 8Page 9 · Read text
www.butkus.us      demiCANON DEMI EE 28 SPECIFICATIONS                          trtrm

Type: 35 mm demi-size (24 x 18 mm)camera    Film Speed: ASA 25-4OO.
    with program EE system.                   Viewf inder :  Marked viewfinder. O.42X.
Lens: Canon Lens SH 28 mm F 2.8 5 ele-      Snap mark, shutter sPeeds, exposure
   ments in 3 components composition. 55'       warning marks and parallax compensation
    angle of view.                             mark are indicated inside the viewfinder.
                                                                                       BEE Mechanism: Program EE system with    Flash Synchronization: X contact. JIS
    fully coupled exposure meter, shutter       type socket.
   and aperture. Manual aperture setting    Film Advance Lever t  I32" revolving angle.
    possible. When shooting with manually-        Additive windups possible.
    operated apertures the exposure meter    Film Gounter: Self-resetting type.
    circuit is disconnected and shutter speed   Size: 116x69x39 mm.
    of 1/3O sec. and aperture stops of F 2.8,   Weight: 29O grams.
    4, 5.6, 8, 11, 16 and 22 can be used.
EE Working Range: EV8 (F2.8, 1/30 sec.)-
EV 17.5 (F 25, 1/300 sec.) with ASA 100
     film.
Exposure Meter: Highly accurate galvano'
   meter using selenium  cell.
View original page 9Page 11 · Read text
www.butkus.us   around the spool, take the slack out of the    ready for exposure and the film counter   film and check to see that film oerfora-       will indicate O.   tions        are accurately engaged on the spool      * Additive film windups are also possible.    soroc Kets.
   x When the film advance lever is wound     * Checking for correct film loading.
      allthe way until it stops, the film and  f ilm     The film is correctly loaded  if the rewind-
     counter advance by one frame. The film        ing crank revolves simultaneously with the     advance               lever                                                after                can again                        be                         wound                                        movement of the film advance lever. In                 release                                    oressed.         shutter     the                       button                                    is                                                    this case, however, the rewinding crank
5. Close the back cover. The back cover  is       sometimes will not turn if the film is loose   completely locked by just pressing down                                                   inside the film cartridge. Therefore,  it is  on  it.                                                        best to raise the rewinding crank and turn
6. Wind the film advance lever and press the          it in a clockwise direction two or three   shutter release button. Repeat this opera"       times, beforehand, in order to take the   tion four times.                                slack out of the loaded film. Reload the With the fifth windup the first frame will be        film when it is not loaded co;'rectlv.

                           cEaB       i
                                                                                *,'*  ,.r*,  i*
                                                                                                                                                     ;l
                       Eneage with                         the projection_     3
                                                                                        I
          'n".''""n"0)cEngage with
View original page 11Page 12 · Read text
FILM SPEED SETTING
Turn the film speed setting ring, on the back
cover of the camera, and set the index mark
to the film speed of the film to be used. The
figures on the left are ASA and those on theright are DlN. Just set the index mark to
the, de.sired figure on one side, ASA or DlN,a.nd the corresponding figure on the othei
side, DIN or ASA, will be automaticallv set.
oThe intermediate dots on the film speed dial indicate the following figures:
               32 40   64 B0   125 160   250 320           ASA 25      50    1OO      200         400
                    18      21       24          27           DtN 15 16 17   19 20    22  23    25  26
  :al:ffffiHt

                $'lx          ,?^      \b'                CI            so            I  A          i21
                  {*          I$
View original page 12Page 13 · Read text
www.butkus.us
EE PHOTOGRAPHY
1. Set the AUTO Mark.                       from the camera to the subiect. Turn the
  Turn the aperture ring all the way in the      focusing ring and set the chosen mark at   direction of the arrow and set AUTO at      the index.                                               Long distance mark Over 10 meters  the index. Otherwise, the EE mechanism   A   will not function.                                                    r r Medium distance                                                                  ffl (Snap markt     mark Approx. 1O nreters
                                                                                   meter2. Focus                                                   ,   Short distance mark Approx. 1
  When taking pictures you must always adjust   OThe distances indicated by the intermediate
   the lens according to the camera-to-subject      dots between the marks are shown on the   distance. This is called focusing. Focus-      distance table on the back cover of the
   ing with the Demi EE 28 is of the simple      camera.
   and accurate zone focus system.          OThe snap mark (hl) on the focusing ring is
oSelect, from among the three zone focusing     used when taking snap shots out of doors.  marks on the focusing ring, the mark which        It is designed for simple photography  corresponds most closely to the distance       (Refer to page 14.)


                                                                    $tu#
                                                                                                                                                                                                                      t!Fr..ii€,$i$1+Sp*ut*t
View original page 13Page 14 · Read text
3. Look Into the Viewfinder.                              DECIDE THE EXPOSURE
  According to the various marks inside the                                        A, When the needle is in the EE range.   viewfinder you can check (i) the condition                                 +   of the exposures, and (iiJ the field.of-view.           It means                                                           the EE exposure is alright. Decide
                                           the composition of the picture and press
                                                the shutter release button.
   F           Ftash mark.
  N  Parallax comp€nsation
        mark
         Field-of-view frame

               Shutt€r speed


       over exposure -"rx   L 100
      www.butkus.us                         -
View original page 14Page 16 · Read text
aHow To Use the Snap Mark
                                       When shooting pictures out of doors set the
   The various shutter speeds indicated inside     focusing index, beforehand, at the snap
    the viewfinder are coupled to the following    mark. You will be able to enjoy taking
    aperture stops.                             snap shots with no trouble at all.
    iWhen film speed is set at ASA 100              1. Set the focusing index at snap mark.
   Dot indicated on the figure 300 in  the      2. When the needle inside the viewfinder  is                                                     within the snap mark range EE photog'     viewfinder means 25O (1/250 sec.'                                                   raphy is possible with a sharp focus on
                                                    your subject. There is absolutely no
                                              need for refocusing according to each
                                            new subject.


I4
                                   W*
View original page 16Page 17 · Read text
www.butkus.us
                                          aDecide the Composition of the Picture.
The needle will almost always be within the        Everything within the white field-of-view
snap mark range under the brightness needed        frame inside the viewfinder will be exposed
for taking snap shots out of doors. Therefore,       on the film.
it will be convenient to use the snao mark.            ln the case of short distance i1 meterl                                                 photography, however, a slight parallax
                                               occurs. Therefore, compose your picture
                                                        within the parallax compensation mark.

x ln case the needle goes out of the snap
 mark range and into the white range, you
  must focus once again so that subject is in
  correct focus.
View original page 17Page 18 · Read text
4. Press the Shutter Release Button.
   After the composition of the picture has
  been decided, release the shutter. Press
   the shutter button gently in order to get a
    c lear, u n b lu rred p ictu re.

           t
View original page 18Page 20 · Read text
HOW TO REWIND AND UNLOAD FILM
As the exposed film is naked within the      1. Raise the rewinding crank'
camera, the entire roll will be ruined  if the back      2. While pressing the film rewinciing outton,
cover of the camera is opened before rewind'          located on the base plate of the camera,
ing the exposed film back into its original          turn the rewinding crank in the direction
cartridge. Therefore, unload the film after         of the arrow. Stop rewinding when res'
rewinding the exposed film in the following         istance becomes light.
manner    :                                          3. Pull the rewinding crank upwards and
OWhen the end of the film is reached the        ooen the back cover of the camera.
  film advance lever becomes tight and no      4. Remove the exbosed film cartridge.
  further winding is possible.


   www.butkus.us
View original page 20
Page 21 · Read text
www.butkus.us
FLASH PHOTOGRAPHY
When the needle inside the viewf inder is within     1. Preparation for Flash Photography
the flash mark, it means the subiect is too      Attach the flash unit onto the accessorydark for EE photography and that flbsh photog-     shoe of the camera and plug the cordraphy must be used.                                   into the flash socket on the camera.When changing to flash photography, releasethe AUTO mark from the index and switch.    2. Set the Focus Accurately                                                                                                 distance.over to manual aperture setting. The shutter      Focus and obtain the shooting                                                                                     backspeed is automatically set at 1/30 sec. when      Refer to the distance table on theAUTO is released.                                 cover of the camera. Accurate focusing  is                                                     especially necessary in the case of flash
OCanon Flash Unit J-3 or Flash Quint is re-      photography.
 commended for flash photography. The use    3. Obtain the Aperture Stop and Set it  of Speedlight is also possible.                  to the lndex.aM, F and MF class flash bulbs are recom-       After obtaining the aperture stop, accord-
  mended.                                      ing to the following calculation, turn the
                                                  aperture ring and set the aperture stop to
                                               the index.
                                                                 Guide Number                                                     Aperture Stop--                                                                               Distance
                                                       4. Press the Shutter Release Button.
                                                      Press the shutter release button after check-
                                                    ing the field-of-view through the viewfinder.
                                       The guide number is indicated on the
                                             box containing the flash bulb.
                                                                 It is convenient to use Flash Unit J-3                                               because it has an exposure calculating
                                                                 p late.
View original page 21Page 22 · Read text
HOW TO USE FILTERS
1. Effectiveness of Filters                   3. Exposure Adjustment Method
    Filters are attached to the front frame of       Divide the film speed of the film being
   the lens by screw-in method. Filters give      used by the exposure factor of the filter.
   special effects on monochrome and color       Reset the film speed to the numerical value
   films. Also, ND filters are used to adjust      thus obtained.
                                                                          when   exposures in cases of over-exposure.                   Film Speed _Film Speed                                                      Exposure Factor                                                                  Using Filter2. Exposure Adjustments When Using
   Filters
   Filters have exposure factors according to      * For example, when a Y3 filter with an
   density and type. Therefore, when using         exposure factor of 2 attached to a camera
  a filter the exposure must be adjusted ac-                                                      using ASA 1OO film, then it is f$:50.   cording to the exposure factor of the filter.                                                       In other words, the film speed should be
                                                          reset to ASA 50.
View original page 22Page 23 · Read text
27 mm Filters
OFor monochrome film use
 YL (Exposure Factor 1.5)   Prevents human skin from photographing dark at seaside and
 Y3 (Exposure Factor 2)     high mountains. Also increases the contrast between blue sky
                         and white clouds.
 01 (Exposure Factor 3)    Human skin is photographed naturally and beautifully.
 R1 (Exposure Factor 6)    Red objects are photographed white and is effective in that
                            photographed results are different as when seen with the naked
                                   eye.
 G1 (Exposure Factor 3)      Effectively reproduce green colors.
OFor both monochrome and color film use
 UV (Exposure Factor 1)   Common use filter for protecting the lens and for increasing
                               clearness of the picture.
 ND4 (Exposure Factor 4)   ND4 decreases the lightvolumeto L14 and ND8 to 1/8. There-
 ND8 (Exposure Factor 8)    fore, these filters are convenient to use in case of over-exposure.
oFor color film use
  Color Conversion A
       (Exposure Factor 2)   There are two types of colcr films. One is for tungsten and the
  Color Conversion B         other for daylight use. These filters are used when these films
       (Exposure Factor 3)   are used under opposite lighting conditions.
  Skylight
       (Exposure Factor 1)   Used for protecting the lens and for increasing clearness of the
                                picture when using color film.

                                                                                     2L
View original page 23Page 24 · Read text
www.butkus.us
ACCESSORIES FOR CANON DEMI EE 28
1. Flash Unit J-3                             4. Selftimer 6
      Exclusively for baseless bulbs. With built-       Used by inserting into release hole of
     in convertible socket for AG and pH.             shutter release button. Has a time lag
2. Flash Quint                                      of approximately 1O seconds.
     Five  f lash bulbs can be flashed continu.    5. Canon Release
    ously. Exclusively for AG type.                     All metal.
3. Speedlite lOO                             6. 27 mm Filters
     Small-size, high-performance type. With          (Refer to page 21)
      built-in transistor circuit in which there
     is no voltage drop once it is charged,


         5                    6ffiffiffi2.
View original page 24From the M. Butkus archive. Original publisher and archive notices are retained.
Check the model and edition against your equipment.
PDF verified 2026-10-10.