Film cameras
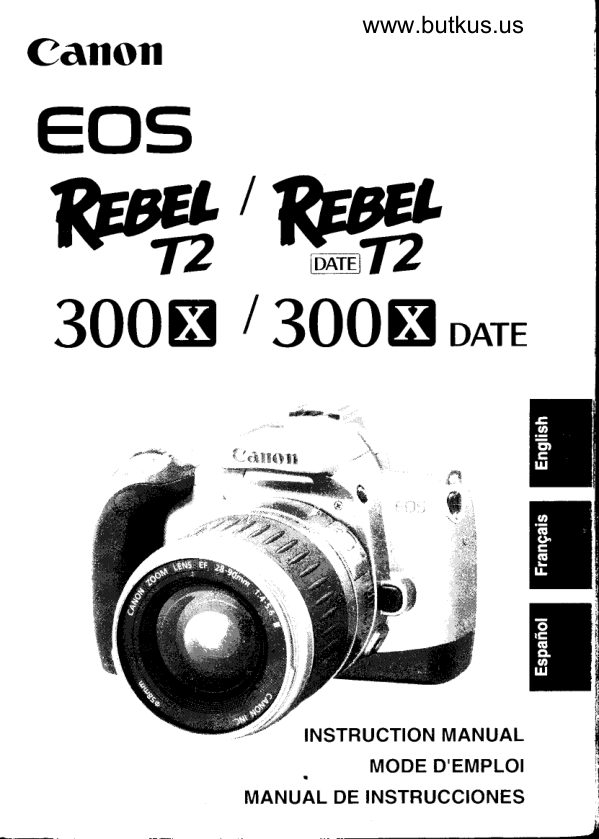
Canon EOS Rebel T2 - 300x User manual
User manual for Canon EOS Rebel T2 - 300x. 53 pages in French, Spanish. Read the original PDF, download or print a copy without registration.
53 pagesFrench, Spanish4.0 MB PDF
Loading your manual…Open PDF directly
Document details
- Brand
- Canon
- Model / document
- Canon EOS Rebel T2 - 300x
- Document type
- User manual
- Language
- French, Spanish
- Pages
- 53
- File size
- 4.0 MB
- Category
- Film cameras
- Document date
- Not specified in catalog
Search available document text
Find a term, then jump to its page in the original PDF. Image-only pages may not be searchable; check the PDF for exact wording and diagrams.
Page 1 · Read text
www.butkus.us
Canoil
coswwt300El DArE 30081


                                 .    MODE D'EMPLOI
                MANUAL DE INSTRUCCIONES
                                 J
View original page 1Page 3 · Read text
Thank you for purchasing a Canon product.                                                               \The Eos REBEL T2 (DATE)/ 300x (DATE) is a very compact autofocus, single-                                                                                                                                                                             i
lens reflex camera.  lt can be used for a wide variety of subjects and situations with
fully automatic and user-controlled shooting modes.                                                                                                            .;
Read this           Instruction                  manual and familiarise yourself with your new camera        jfl               pictures.before       taking
Also read "Handling cautions" on page 4 to prevent camera malfunction and                              i
damage.                                                                                                                                           ,'l
                                                                                       1
  Before Using Your Camera
   ' Before shooting an important event, be sure to take test shots to make sure                                  i   the camera operates properly.
   ' Eos cameras have a lens mount for dedicated operation (autofocusing,          1
   exposure control, etc.) with Canon EF lenses. Using a non-Canon EF lens
   with an Eos camera may not result in proper camera or lens operation.         +
   Note that the warranty does not cover any camera malfunction or damage                       l   occurring with the use of non-Canon producrs.                                   t
 Conventions Used in this Instruction manuat
  . The <$\> icon indicates the Main Dial.
   ' All operation procedures described in this booklet assume that the Mode
    Dial is set to a mode except <cED>. Before proceeding with any operation,             ,t
   be sure that the Mode Dial is set to a shooting mode.
                                                                                                                                                                                                                                                                                                                                  I  . Reference page numbers are indicated by (p."-).
  . The * symbol indicates_that the respective feature can be used only in         T
   CreativeZone modes (P, Tv, Av, M, A-DEP).                           e
  ' The camera control icons and markings used in this booklet correspond to               I
   the actual icons and markings found on the camera.                                                                                    ,.y'
  ' The (64)and (66) icons indicate that the respective function remains in            I
   effect for 4 and 6 sec. respectively after the button is released.              d
                                                                                                                                         I
View original page 3Page 4 · Read text
I
i                           www.butkus.us
r

 I

    ffi
            Installing the Batteries...............                        ........... 11
         Checking the Battery Leve1.........                     ..........12
         Mounting and Detaching a Lens.........           ................... 13
       How the Shutter Button Works                           .............14
        @Loading and Unloading Film                            ............15
          O.< Midroll Rewind                                                    ........ 16


         Since everything  is automatic,  all you do is press the shutter
          button.


        You can set the desired shutter speed or aperture value to
          obtain the exposure you want. You take control of the camera.


    Symbols
       {)              symbol aleds you to actions to prevent shooting           ln:irJt"
    E  The Note symbol gives supplemental information.
View original page 4Page 5 · Read text
Handling Gautions                A
Camera Care and Storage
 . The camera is a precision instrument. Do not drop  it or subject  it to physical            I
  shock.
. The camera is not waterproof and should not be used in wet conditions or    4
  undenruater.  lf the camera gets wet, take  it to your nearest Canon dealer as soon
  as possible.  lf small amounts of water splash onto the camera, wipe  it with a
  clean dry cloth.  lf the camera is exposed to salty air, wipe  it thoroughly with a
  slightly damp cloth.
 . Do not leave the camera in places prone to excessive heat such as in a car on
  a sunny day. Excessive heat can cause the camera to malfunction.
. The camera contains precision electronic circuitry. Never attempt to
  disassemble the camera.
. Use only a blower brush to blow away any dust on the lens, eyepiece, mirror,
  focusing screen, film compartment, etc. Do not clean the camera body or lens
  with any cleaner containing an organic solvent. For stubborn dirt, consult your
  nearest Canon Service Centre.
. The shutter curtains are extremely thin. Use only a blower to clean them. Be
  careful not to blow air too forcefully on the shutter curtains. The shutter curtains         i
  can be easily deformed or damaged. Also, when loading and unloading film, be
  careful not to touch the shutter curtains.                                                                                            I
. Do not touch the electrical contacts with your fingers. Otheruise corrosion may
  develop on the contacts, resulting in improper camera operation.                                   i
'  lf the camera is not to be used for an extended period, remove the battery. Store
  the camera in a well-ventilated, cool, dry place. During the storage period, press           I
  the shutter button to release the shutter a few times once in a while.                        I
                                                                                                                                                                                                                                                                                                                                      I. Avoid storing the camera in a labouratory, cabinet, etc., where corrosive
  chemicals are present.
.  lf the camera has not been used for a prolonged period or if you will use the camera for an important event, check the operation of all the camera controls or     III
  take the camera to your nearest Canon Service Centre.
LCD Displays
By their nature, LCD displays react more slowly at low temperatures, and may
appear dark at high temperatures. The display will return to normal at room
temperature.
View original page 5Page 6 · Read text
.E
                          www.butkus.us
                                     $:trlt.1sffi\\lllq,\g/                  rPrvdin   I

                                                                                                                                                                                                                                                                                                                                                                                                                                                                             .t:
 Batteries
  . Before installing the batteries, wipe the battery contacts to remove any
   fingerprints and smudges. This is to prevent faulty connections and corrosion.
  ' Never disassemble or recharge the batteries. Also, never store a battery in high-
  temperature places or short circuit the battery contacts or toss a battery into a
    fire.
  ' Although the batteries work well even at low temperatures, battery performance
  may decline slightly at freezing temperatures. In such a case, keep spare
   batteries warm in a pocket, etc., and use and warm the batteries alternately.
 How Low Battery Lev_els Affect Camera Operation
 on the LCD panel,  if the .flr icon btinks or it is not displayed, a proper exposure
 can still be obtained as long as the shutter releases. However, when the battery
 level is low, film advance and auto rewind might stop midway or not work at all
 and <[> icon may blink on the LCD panel. After the batteries are replaced with
 new ones, film advance will be possible and film rewind can resume by pressing
 the <O:!> button.
Lens Electrical Contacts
 After detaching the lens from the camera, put on
the lens caps or put down the lens with the rear end
up to avoid scratching the lens surface and
electrical contacts.


l\  Safety Precautions
1. Do not look directly at the sun or any other strong light source through this lens
   or through a camera with the lens attached as this could cause damaged
   eyesight. Take particular care not to look directly at the sun through the lens
  alone as this can cause blindness.
2. Do not leave the lens or an SLR camera with the lens mounted in direct sunlight
   with the lens cap removed. This is to prevent the lens  f rom magnifying the sun's
   rays, which could cause fire.


                                                  5
View original page 6Page 12 · Read text
r                             www.butkus.us
     Iil               -           voys_1.31!         ''      P_"j9rel                                            ' I
                                                                                 R   fnstalling the Batteries ffii-
     r Batteries are not included in camera body only (not kit) sold in North Arnerica. Obtain
       batteries separately.
    The camera uses two CR2 lithium batteries.
                                 ,l Open the battery compartrnent cover.
                                        t o Slide the release lever in the direction
                                 shown by the arrow in the diagram, and
                                  open the cover.


                                                  bafteries.                              ft Installthe                       ,& o Make sure the batterycontacts (* and -)
                                       are properly oriented as shown.
 U?R3    o Do nol mix old and new batteries. IM                          "h Close the battery compartrnent cover.
                                       .  o Press the cover until  it snaps shut.
                              o The date and time must be set. See


      www.butkus.us


        For places where CFP batteries rnay not be easily available, take spare batteries
         with you. Also carry spare batteries for extended shooting sessions.
View original page 12Page 13 · Read text
1Checking the Battery Level ,              'innmii*'inn@
Check the battery level after replacing the batteries and before using the camera.
                     Turn the Mode Dial to a shooting mode.
                                         . The camera will then turn on and the LCD panel
                                          will display one of the following battery level
                               mark:
               H      : Battery levelOK.
                                      f]        : The battery level is low. Keep spare                      Dl                                               batteries handy.
                                  The batteries willsoon be completely                       1.1,         :
                                      -'fii  '     : Reolace the batteries.                            .u.

Battery Life                                                (With 24-ex. rolls)
    Temperature     0% Flash Use    50% Flash Use   100% Flash Use
      At 20'C           54 rolls           23 rolls            16 rolls
    At-10'C          35 rolls            16 rolls            11 rolls
. The battery life shown above is based on Canon's testing conditions with new
  batteries.


r=lfl   .  lf ncnning -      irrcorrectly.is Takedisplayedout theon batteriesthe LCD panel,and installthe batteriecorrectly.nny harc been installed
      .  lf you often press the shutter button halfway tor a prdlonged period or just
,     autofocus witfput taking a picture, the battery life will be affected.,     . when not using the camera, set the fvlode Dialto <GIlEb.
View original page 13Page 15 · Read text
I    How the Shutter Button Works €=
        The shutter button has two stages. You can press  it down halfway or fully. The
         two levels of shutter button operation are as follows:
                            When it_is pressed halfway:
                               o Pressing the shutter button down halfway
                                                   activates autofocusing (AF), and also
                                                   activates the automatic exposure (AE)
                                       mechanism and sets the shutter speed
                                        and aperture value.
                                 o The exposure (the combination of shutter
                                         speed and aperture value) appears on the
                                 LCD panel and in the viewfinder (64).
                            When it is pressed fully:
                                    o The shutter is released to take the picture
                                        and the film advances by one frame.


      0    f    Extender (optional) is used and the rnaximum aperture (the lorrcst
               f/number)"n       of the lens becomes smaller than f/5.6, autofocusing will not operate.
                For details. reler to the extende/s instn"ctions.
       r=
                                                 rnornent of exposure is called canera shake.      13 Canrera morement drring the
               Carnera shake can cause durred pictures. To prevent blurred pictures due to
                '   camera shake:                  . Hdd the canera steady.
                      . Firmly grasp the carnera Eip with your right hand, and press yorr bottr
                 elbows lightly against your body.
                  Fbld the lens at the bottom with your left hand.           :..     .                   Press the carnera agBinst your face and lmk through the viewfinder.           !,      .            ,       . To rnaintain a stade starrce, place one foot in front of the other instead d
            ffii       lining up both feet.                  . Use your finger tip to torch the shutter button, grasp the camera with yolr
        $i     entire rigl'rt hand, then press the shutter button pnfly.
rlir
View original page 15Page 16 · Read text
www.butkus.us
   @ LoaOing and Unloading Fitm                        '
      Loading Film
        After you load the film, the camera first winds the entire roll onto the camera's
       take-up spool. with DX-coded film, the camera automatically sets the film,s lso
      speed. Then each time a picture is taken, one frame of film i3 rewound back into
          th*e_film- cartridge.                          Jtre frame counter shows always number of shots remaining.                g Turn the Mode Diatto any setting  T                                 I  except <(m>.
                                        back cover.                           )  Op"n the                           .3 o Slide down the back cover release lever
                                    and open the bacx.
             3 angle.Insert the film cartridge at a slight
                                   Align the film leader edge with the
                          <A> mark.          4                            o Hold down the film cartridge while pulling
                                           out the film leader.  tf you pull out the film
                                           leader too much, rewind it back into the
                                                   film cartridge.
                                Close the back cover.         Wrong              tr
                             #  o Close the back cover until  it snaps shut.
                            > Film prewind will start and there will be a
                                             shutter-release sound about 1O sec. later.
                                  The <@> icon and frame count will also
                                      be displayed on the LCD panel.
                              > During the film prewind, the ISO speed will
                                      be displayed on the LCD panet.


                                                       15
J.--,.
View original page 16Page 17 · Read text
T@ Loading and Unloading Film ls
                                                                               I             shutter curtains have been manufactureo wtnffiffi pdcltlH]*tW{)  . rn"      touch them with yorr fingers. When loading film, do not torch or damage the
.       curtains with your fingers or film.
                                                                      you are,    . In hot and humid enMronments, do not remove the film packaging until
     . Infraredready to filmloadcannotthe film.be Lsed with tltis carnera.
l=ll]l -   theff t|eshutterfilm iswillnotnotloadedwork.property,Rdoad thethe film<@>cartri{eicon willproperly.blink on the LCD panel and

  Unloading Film
After the film's last frame is exposed, the camera rewinds the film automatically
                                       After the film is rewound, there will be a
                                     shutter-release sound. Check that the <@>
                                       icon is blinking on the LCD panel, then open
                                    the back cover and take out the film
                                        cartridge.


  O*Midroll Rewind
To rewind the film in midroll, follow the procedure below.
                            Press the <Gl3b button.
                         > Film rewind will begin.
                          o Make sure the <@> icon is blinking, then
                                     take out film cartridge.


0     f yor Arc out the film cartridge in midroll withst rewirrding the ftlm and then load
    a new roll of film ard press the shutter button completely, the new film will only
     rewird into the cartridge. Before loading a new roll of film in this case, close the
.    carr€ra bmk and press the shutter button.
16
View original page 17Page 18 · Read text
www.butkus.us -aA
 Fully Automatic Shooting         %1--&
   EfutlAuto Mode                                                 ........18
      AF-Assist beam with the Built-in F|ash................................  1 9
              lmage Control Modes               .....................20  ,Programmed
        hlPortrait  / ILandscape / OClose-up /
      {lSports/ ENight Portrait/ CE)Flash off
 @ Using Red-eye Reduction....
  ,$ Self-timer Operation....                             ...............23
  E Wireless Remote Control (DATE Model only) ...................24
   Using the Eyepiece Cover..........                          ......24
   EEIElmprinting the Date or Time (DATE Model only)................25


                                                                                                         ,effimffi

This section explains how to use the camera's Basic Zone modes.Ot.h)t
.lt.V>    <(t  .Et  <lTl> on the Mode Dial for quick and easy shooting.
Each Basic Zone mode suits a particular subject. The film advance mode, flash,
and other functions are set automatically. You just press the shutter button.
                    Turn the Mode Dial to <O>, <i>, (h  ),
                <g>,.t\t,<E> or <Fn>.
                      .The picture{aking procedure is the same as with
                             the "<E> Full Auto mode" on page 18.


                                                    17
View original page 18Page 22 · Read text
www.butkus.us

  (   Sports
                          This is for fast-moving subjects when you want to
                           treeze the action.
                              . The camera willfarst track the subject with the centre
                     AF point. Focus tracking willthen continue with any
                                of the seven AF points covering the subject. When
  www.butkus.us           . focusWhile isyouachieved,hold downthethebeepershutterwillbutton,soundfocusingsoftly.  will
                            continue for continuous shooting.
                              . Using a telephoto lens and ISO 400 or higher speed
                                  film is recommended.
 E Nl$t Porbdt
                          This mode is for taking pictures of people at twilight or  I
                                at night. The flash illuminates the subject while a slow I                                                                           r                              syrrc speed obtains a natural-looking exposure of the
                        background.
                             .  lf you want to photograph only a night scene
                              (without people), use the <;^ > mode instead.
                             . Tell the subject to keep  still even after the flash fires.
(f  r.ru""tipoo b plusr qmra$d€.
     Flash dtEl
                    You can disable the flash when you do not want  it to
                                    fire.
                             . The built-in flash or any extemal Speedlite will not
                                          fire.


                                                       21
View original page 22Page 23 · Read text
(with the built-in flash) H'"HO Using Red-eye Reductioh
When flash is used in a low-light environment, the subject's eyes may come out
red in the photograph. To reduce this "Red eye" the red-eye reduction lamp
shines a light into the subject's eyes before the flash is fired. Red-eye reduction
works in all shooting modes except <-- > <(>.El>.
                     d* Move the <>> arrowtothe <O> icon
                                I on the LCD panel.
                         o Look at the LCD panel and press the
                             <FUNC.> button to move the anow. (66)

                            \  Turn the <tFft> dialto set "r" on the                  .ZtCo panet.
                         o Press the shutter button halfway to return
                                          to normal camera ooeration.
                            o To cancel red-eye reduction, set "0" on
                                      the LCD panel.


    "J
lE[  *n   you press tfe shutter button halfway,
-      the red-eye reduction lampon indicator will      appear in viewfinder and on the LCD panel.                                                      ,i
      . RecFeye reduction  will not work unless the                                                .,                                                                                                                         f
       subject looks at the recFeye reduction lanp.               Fled-eye reduction
        Tell the su$ect to look at the lamp.                   lampon indicator      . For maxirnrm effectiveness, press the
        shutter button fully after tfe red-eye reduction
      lanp turrs off (after 1.5 sec.).
      . You can take a picture even while the red-eye reduction lanp is  lit.
      . The effectiverxess of red-eye reduction varies &pending on the subject.
      . To further increase the effectiveness of red-eye redlrction, go to a brighter
       environnpnt or rrnve doser to the subject.
View original page 23Page 25 · Read text
-  iwiWireless Remote Control (onrE Model only)
With Remote Controller RC-S (optional), wireless operation is possible up to 5 m/
16.4 ft away from the front of the camera.
                            Press the <El/N)b hrtton.                           I                                    f  o While looking at the LCD panel, press the
                                 <c::/$E> button to select.$it.
                            Take the picture.                            ]               A o Point the controller toward the camera's
                                  remote control sensor and press the
                                        transmit button.
                           > Taken about 2 sec. later.
                            o The indicator will be the same as during
                                      the last 2 sec. of the self-timer.
Remote         control               sehsor


            types of                      fluorescent lights ndght cause the rernote control operation to   tlO     C"n"in
    work inproperly, Place the camera away from any flmrescent lights as far as                                                                 I
      possible.

           lf you set <El1/$b arddo ndfdrqforfor.rrninutes,  the rwrntecontrol rnode will                           IE     be canceled automatically to save battery power.                                                                                                                                                                I
                                                 sn*il*rffiswvr''|4*-* 'Using the Eyepiecg Cover          H
During self-timer or remote control operation when your eye does not cover the
viewfinder eyepiece, stray light may enter the eyepiece and affect the exposure
when the picture is taken. To prevent this, use the eyepiece cover to cover the
eyepiece. (p.7)
                         Remove the eyecup from the              1                            I  eyepiece.
                               Attach the eyepiece cover.              $                              ,q* o Slide the eyepiece cover down into the
                                   eyepiece groove to attach  it.


24
View original page 25Page 26 · Read text
www.butkus.us.lm
    lmprinting the Date or Time pATE Modet onry) M
                             The camera has a date feature with an
                                   automatic calendar to 2099.  lt can imorint
                                    the date or time on the photograph as
       $"                   shown in the left photo.
          *1.{}"                                     f The date or time can be imprinted in any
                                   shooting mode
                            i
             $r

                   Date position
                      EII(J          tl  Move the <)> arrow to <l[b.                                    I o Look at the LCD panel and press the           ian^5tl      '\           <FUNC.> button. (66)
                        o  lf the date and time has not been set,
                 ,t/            page 26-" towillsetblinkthe ondatetheandLCDtime.panel. See
             o/
                      qp                               Select the date format.
                       d, o Turn the <fZti> dial.
                          > The date format will change in the
                                        following loop:


                             Month, day, year


                                     Day, hour, minute
View original page 26Page 28 · Read text
www.butkus.us
   User-Gontrolled Shooting                 t'        ,:s
                                                                      aW


                                 With CreativeZone modes, you can set the desired
                                   shutter speed or aperture value to obtain the
                             exposure you want. You take control of the
                             camera.
                                  o A * next to the page tifle indicates that the
                                   feature is available only in Creative Zone modes.


                                                27
,L
View original page 28Page 29 · Read text
TSelecting the AF mode*
The AF mode is the AF operation method. Three AF modes are provided: ONE

                                                                                                                                                                                                                                                                                                                                                                                                                                                                                                                                                                                                              iSHOT (One-Shot AF), Al FOCUS (Al Focus AF), and Al SERVO (Al Servo AF).
                               Select the AF mode.                                                                                                                     I                         o Press the <AF> button (66) and turn the
                              <rfX> dial.


 ONE SHOT (One-Shot AD
For still subjects. When you press the shutter button halfway, the AF focuses
once.
) When focus  is achieved, the AF point achieving focus flashes  in red and the focus confirmation
   light <O> in the vieMinder lights. The exposure is also set.
  Al F@US (Al Focus AF)
This mode switches the AF mode automatically to One-Shot AF or Al Servo AF                               fdepending on whether the subject is still or moving.
o ldeal for moving subjects whose distance from the camera keeps changing.
l The exposure  is set at the moment the picture  is taken.
  Al SERVO (Al Se'vo AF)
For moving subjects. While you hold down the shutter button, the camera
continues to focus the subject approaching or moving away from the camera.
r  ldeal for moving subjects whose distance from the camera keeps changing.
o The exposure  is set at the moment the picture is taken.
o The beeper  will not sound when focus is achieved.


28
View original page 29Page 30 · Read text
www.butkus.us
Elselecting the AF point* w
The AF point is used for focusing. The AF point can be selected automatically by
the camera or manually by you. In the Basic Zone modes and <A-DEP> mode, the
AF point selection is automatic only. In the <P> <Tv> <Av> <M> modes, the
AF point can be selected either automatically or manually.
. Automatic AF point Selection
  The camera selects the AF point automatically according to situation.
. ManualAF point Selection
  You can select any of the seven AF points manually. This is best when you want
  to be sure to focus on a particular subject, or to compose a particular shot
  quickly.
                            Press the <E> hrtton. (@6)             4                                    ff > The currently-selected AF point will light.


                                   \   Select the desired AF point.                    .& o While looking at the AF point on the LCD
                                      panel or in the viewfinder, press the cross
                                    keys to select the desired AF point.
                           o To select a horizontal AF point, press the
                                                        left or right cross key. To select a vertical
                           AF point, press the top or bottom cross
                                        key.
     Select with cross keys        o You can also turn the <"2\> dial to select
        Automatic selection                                 an AF ooint.                        i                                 AF points                                                                          lf all the                                                                         light,                                                           automatic AF                        o                              .s:c.9c         ,   :Cx'                                        point                        E.9                                             selection                                                                     will                                              be set.6.9  I
                         o Press the shutter button halfway to returnEE.tr'qrO     +:tr+.EEf  (D<q         .Ar       <q            to shooting.
                        J
       Automatic selection
View original page 30Page 31 · Read text
Eselecting the AF point*
 Focus Lock
After achieving focus, you can lock the focus on a subiect and recompose the
shot. This is called "focus lock."
                               Select the desired AF point.

                           Focus the subject.
                          o Aim the AF pornt on the sublect, then
                                    press the shutter button halfway.
  hr-*l-q=s---L

  www.butkus.us         t

                           Keep pressing the shutter button
                              halfway and recompose the picture
           (ir                       as desired.
          +.:{ -C                Take the picture.


tll   . -     viewfirderlf focus haswillnotblink.been Inachieved,this case,theyoufocuscannotconfirnrationtake a picturelight even<O> wtlenin theyou
       press the shutter button fully. Reconpose the shot and focus again or see
     . "Whenlf you useAutofocusan external,Fails"EOSdedicated(p.31).        Speedlite and focus cannot be achieved
       with the AF-assist beam, select the centre AF potnt.
      . Focus lock also raorks in the Basic Zone modes (except .{\t). Just start from
       step 2 above.
30
View original page 31Page 32 · Read text
ti                          www.butkus.us
  Wnen Autofocus Fails (Manual Focusing)                                       r
    Autofocus can failto achieve focus (the focus confirmation light <O> blinks) with
    certain subjects such as the following:
    Difficult Subjects for Autofocusing
    o Low-contrast subjects.
     Example: Blue sky, flat surface with a solid colour.
      . Subjects in very low light.
     . Extremely backlit or reflective subjects.
    Example: Automobile with a strong reflection.
     . Overlapping near and far objects.
    Example: Animal behind bars in a cage.
     . Subjects having a repetitive pattern.
    Example: Personalcomputer  keyboard, windows on a building, etc.
    In such cases, do one of the following:
   (1) Focus lock an object at the same distance as the subject and recompose.
   (2) Set the lens focus mode switch to <MF> and focus manually.
     lMIl Manual Focuslng
                                 rl  Set the lens focus4   mode switch to                                  I <MF>.
                            )  Focus the subject.                                  .ir o Focus by turning the lens focusing ring
                                                       until the subject is in focus in the
                                           viewfinder.

     Focus ring


   t=]qr     lf you hold down the shufter button halfway wfrile focusing nnnually, the active .r$E#*
     AF point nnrk and the focus confirmation light <o> will light vrf,ren'focus is        $ll       achieved.

                                                            31
I,
View original page 32From the M. Butkus archive. Original publisher and archive notices are retained.
Check the model and edition against your equipment.
PDF verified 2026-10-10.