Film cameras
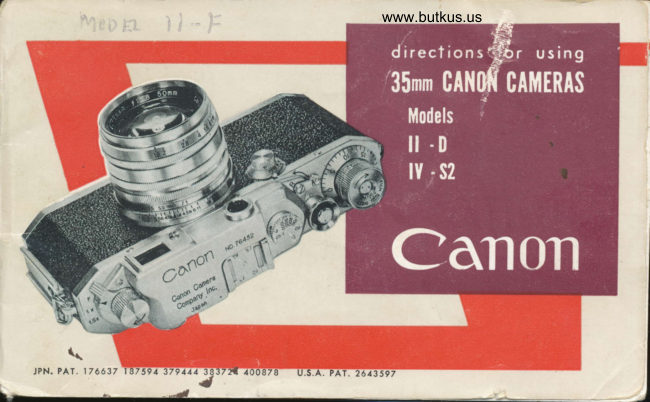
Canon I-D / IV-S2 User manual
User manual for Canon I-D / IV-S2. 44 pages in English. Read the original PDF, download or print a copy without registration.
44 pagesEnglish10.5 MB PDF
Loading your manual…Open PDF directly
Document details
- Brand
- Canon
- Model / document
- Canon I-D / IV-S2
- Document type
- User manual
- Language
- English
- Pages
- 44
- File size
- 10.5 MB
- Category
- Film cameras
- Document date
- Not specified in catalog
Search available document text
Find a term, then jump to its page in the original PDF. Image-only pages may not be searchable; check the PDF for exact wording and diagrams.
Page 3 · Read text
www.butkus.us
      :        l$'.  X
Your CANON CAMERA qnd CANON LENS ore the products of the highest
grode of precision engineering ond opticol reseorch.
The comerq is strong, compoct ond simple to operote. As it is o precision
instrument,  it  is odvisoble thot you understond how to operote it by
studying the direction corefully.
The superior resolving power of the CANON LENS will produce negotives
of extreme shorpness i the lens will resolve to o higher degree thon the
emulsion of modern high-grode film.
    O USE YOUR CAMERA INTELLIGENTLY
    O LEARN TO USE IT IN EVERY POSSIBLE WAY
    O TREAT IT WITH RESPECT
Although fully guoronteed for five (5) yeors, it will, with cqre, lost you
o lifetime ond give you photogrophs you will be proud to own.
View original page 3Page 6 · Read text
www.butkus.us


  HOW TO OPERATE YOUR CAATOAT CAMERA
      l.  Remove the lens Cop. By sure to reploce this Cop when your comero is not in use.
    2. see thot the Reversing Lever is or the "A"  (Advonce) position.
Then turn the Film Winding Knob one complete furn when it  will stop. By doing so you
will odvqnco one film frome ond wind the shutter ot the some time.
NOIE:  Alvavs vind thc Film Vinding Knob iust beforc taking a picture. Do not leave it *ound
       ovu long periols es this may weakcn tAe SAutter Spring-and'may causc accidental exposurc if         tAe Slrutter Releesc Button is presseJ by mistakc.
3
View original page 6Page 7 · Read text
lndex lYlark
    Setting The".Shutter Speed Diols
    There are t*9 Shutter Speed Dials:
           High: for lpeeds between ll25 to l/1000 sec.
                                  (l /500 sec. on Model ll-D) & B (Bulb)
           Slow: for ,speeds between 1125 to  I sec. &
                T (Time)
                                                                                                                             l                                                                                                Digitally signed by mike butkus
                                                                                                                         DN: cn=mike butkus,
                                                                                                                             o=orphancameras, ou=29,                                  mike butkus email=mike@butkus.org, c=US
     High Shutter Speed Diol                                                                   Date: 2020.04.18 10:08:26 -04'00'
       Correct exposures ore best obtoined with on exposur€ meter or by following the instruction
       supplied with the film.
      To operote the comero ot ony of the speeds shown on the High Shutter Speed Diol, first
       turn the Film Winding Knob. Roise the diol with thumb ond forefinger ond turn until the
      speed required is exoctly opposite the Index Mork ond let the diol foll. For l/1000 sec.,
       the diol drops only holf the distonce of the other speeds. Intermediote speeds con not be used.
     NO|E : When thc. High SAutter Speed Dial is in usc the Slow SAutter SpeeJ Dial must 6e set at 25
                 (t/zs sec.I
                                                                                                                           I
L                                                                                   )
View original page 7Page 8 · Read text
www.butkus.us


                                         iq
                                   t,              ff.,,d"'#  www.butkus.,n70060 Fb                                      ^
Slow Shutter Speed Diol
The Slow Shutter Speed Diol will  offer speeds between 1i25 ro  I sec. ond T (Time) by
turning the diol to the correct position so thot the required speed registers uppermost
opposite the index mork. The Diol is locked only ot 25, to releose  it  press Spring Lock
with your thumbnoil ond turn the Diol to your left.  Be sure thot the High Shutter Speed
Diol is set qt 25 I  (l 25 sec.).
NOIE,  Speeds intermediate between tf zs, tfa, t,4, tfz and !  sec. may be obtaired by setting the d;al
         to the estimated position.
5
View original page 8Page 9 · Read text
Thon one secondfirE E"posures Lonn3,
                                                                  I{
                A iime exposure moy be obtoined by using the B (Bulb) position
                   on the High Shutter Speed Diol. The shutter remoins open
                     from the time you press the Shutter Releose Button until the
                           pressure is removed.
                     You moy olso obtoin o time exposore with the SIow Shutter
                      Speed Diol ot T (Time). Press the Shutter Releose Button qnd
                                                  open until you turn ihe  Il              the shutter will open ond remoin
                       Slow Shutter Speed Diol to  l.   The shutter will  close only
                     when this method is used.

                                                                                                                       essential ,                    NOfE :  For speed slower than tf Zs sec. a solid tripod is
                         snd preferably a Canon Camera Holder and Canon Cable Release'
View original page 9Page 10 · Read text
www.butkus.us
Lens Aperture Scole


  The Lens Aperture conirols the omount of light entering
  the lens ond olso the Deoth of Field. Set the Lens
   Aperture tf-stop) by turning the Aperture Scole (knurled
   ring) to the proper positicn. This is best determined
   with on exposure meter or by  f ollowing the instructions                     lndex lvla*
   given with the film.
  When the Lens Aperture is closed by one stop; the
  omount of light entering the Lens is decreosed by one
   holf, two stops, by one quorier ond so on.  Therefore
  you should odiust the Lens Aperture in coniunction
  with your shutter speed. Suppose your exposure meter
   indicotes o speed of 1 200 sec. ot f :5.6.   lf you wont
   to expose  f or o slower speed soy 1,I00 sec., then you
  must close down the Lens Aperture to  f  B. In other           Knurled Ring                                                                                                       '  words, os you hove doubled the time of the shutter
  opening, you must reduce the omount of llght entering
  the lens by holf to obtoin tlre correct exposure.
View original page 10
Page 11 · Read text
F                                        I
Depth of Field Scol" I
                   The Distonce Scole ond  the Depth of Field Scole ore used                                      i
                         together.     I                                                                                                            "l
                       Depth of Field meons the ronge of obiects which will be in
                                focl's on your film. This ronge vories with the distonce of the          II
                           obiect of shorp focus ond the Lens Aperture.  lt extends from
                            in front of the obiect of shorp focus to beyond  it.   The
                           greoter the Lens Aperture, the less will be the Depth of Field.
                        Depth of Field olso diminishes os the distonce of the obiect
                                                                                         .|.8                                                          ond the      \               Theof shcrpillustrotionfocus fromshowsthe thefilm LensploneAperturedecreoses.ot f :
                            Distonce Scole ot 25 feet. An obiect ot 25 ft  is in shorp focus.
                    The Depth of Field Scole shows thot the neorest obiect olso
                            in focus is opproximotely 2l feet ond the forthest obiect in
                           focus is opproximotely 30 feet.   lf the Lens Aperture Scole is
                         set ot  f : I I  the obiect in focus will extend from I2 feet to
                                infinity (o).  See illustrotion on next poge.
View original page 11Page 12 · Read text
www.butkus.us
Infrored Index
   R morking indicotes the position ot which focusing should be set when using on
    infrored film. Be sure to use proper infrored filter which is reco.mmended by
    monufocturer of infrored  fi lms. After occurote focusing is done in the usuol mon-
    ner reod the obiect distonce off the Distonce Scole of the lens. Then turn the lens
   so thot the obiect distonce will be exoctly opDosite the R index mork. The lens is
   now in focus for infrored photogrophy.
Distonce Scole                                                                      lnde*,L_Mark                                                                                ?tl   a
                                                 f   When                        poge          occurote                   ocus (see                                         been                           18 2                                     I0) hos                                                                                                                                                         2.8  *  mqde                                           distonce                    obiect,        on ony                        the                             octuol
   from the film* to the obiect is shown 5v
   the Distonce Scqle which is morked from
    3.5 to infinity (co)in feet.  Lenses with metric
    sccles ore provided when speciolly ordered.         K:urledRing
     iShown by the Red Dot neor the Accessory Clip.
                                                                                                                                     D,stance 5ca/e

                                                                                                                                                                ,/
                                                                                                Distu,.rn lnJet  ilarl                       Depth oi  F iell  S,ales
View original page 12Page 13 · Read text
Focusing


        www.butkus.us

It is recommended thot the comero be held os illustroted.   lt should rest comfortobly on
the heel of the left hond ond be bolonced by the right hond. Hold the comero to your
cheek to keep it steody while sighting through the Ronge-View Finder* Eyepiece. Monipulote
the Focusing Lever with either your left or right forefinger whichever is more comfortoble.
More precise focusing is possible by setting the Mognificotion Control Lever ot 1.5 x (see
poge 12) ond rototing the Milled Focusing Ring os shown in right illustrotion.
NO|E:  The Focusing Lever is released from the lnfinity CatcA on the lens by depressing the knob and
        turning.                                                            { JPN. PAT. 176637 17s722
                                                                                                                                                                                                 I O
View original page 13Page 14 · Read text
www.butkus.us


As you look through the Ronge-View Finder Eyepiece ond rotote the Focusing Lever you
 will see two imoges of the some obiect. The imoges move oport or together os the lever
is roloted. Turn the Focusing Lever until the two imoges of the obiect on which you ore
focusing coincide exoctly. Your lens is now in shorp focus on the obiect. At the some time
 oll obiects in the ronge shown on the Depth of Field Scole will olso be in focus ot the
f-stop you select for the cxposure.

ll
View original page 14
Page 15 · Read text
cotion Control*
                           There ore three positions  f or the Mognificotion Control Lever;
                          F,  I x, ond 1.5x. When reolly shorp focusing is required,
                              turn the Lever to l.5x when the obiect will be mognified 1.5
                           times. Remember, however, the octuol imoge recorded on the
                                  film will be the picture saen ot the F position of the Lever.
                        The lx position corr€sponds to the imoge seen ond recorded
                           by ony CANON LENS with o  f ocol length of l00mm. The l.5x
                               position shows the imoge for ony CANON LENS with o focol
                             length of l35mm.
                A certoin difference bctween the picture seen through the
                          Ronge-View Finder Eyepiece ond the imoge recorded by the
lens is inevitoble. For normol photogrophy the difierence is immoteriol being so slight.
But for cerloin work compensotion should be ollowed.
                                            * JPN. P4t.379t1l
                                                                                      t2
View original page 15Page 16 · Read text
www.butkus.us

When the Lever is set ot  lx  for CANON
                                    .|00LENSES with focol length of    mm, ond the
obiect distonce is less thon I3 feet o speciol
viewfinder with porollox compensofion odiust-
ment should be used.
  NOfE :  Specially designed Viewfinders  to
   compensale lor paral lax are available for all
  CANON TENSES except for the Standard
   50 mm CANON LENSES.
At   I .5 x with  .|35 mm CANON LENSES for
dislonce less llron I4 feet it  is essentiol to
use the speciol viewfinder ovoiloble for eoch
type of lens.

l3
View original page 16Page 17 · Read text
Exposure & Composition
       To expose ond compose your picture ore the lost steps
        ond perhops lhe nrost imporlont. Be sure lhot the moin
         obiect in the scene you ore photogrophing is in shorp
            focus.
        For 50 mrn CANON LENSES, the imoge recorded on the
              filnr will be the one seen through the Eyepiece with lhe
          Mognificotion Control Lever ot  " F ".  Hoving composed
         your picture gently press lhe Shutter Releose Bullon with
         your forefinger. Never lerk while rrrol<ing on exposure.
        The slightest movemerrt for on exposure mode ot 1 25 sec.
         or slower will give you o blurred picture.
       By pressing the comerq io your cheek, keepirrg your
         elbows irrto your side orrd by holding your breoth iust
        before ond during lhe ocfuol instont of exposure you
           will get on exfremely slrorp picture.
        There ore two woys fo hold fhe cornero. One  is for
          horizcnfol pictures os showrr irr this poge ond the  ot her
           is for verticol pictures os shown in next poge.
                                                                 14
View original page 17Page 18 · Read text
www.butkus.us


NOTE;  Make sure your finger does not touch the High
         SAuffer Speed Dial as it will  alter the correct speed.
        Give  particular attention to  this when gloves are
          wotn.
View original page 18Page 19 · Read text
NOTE: Vhen taking vertical picture care should be taken
         that the cover does not swing in front of  the
         Iens.  lt  is recommended to detach the flap from
         the case.


                                                                                             l6
View original page 19Page 20 · Read text
Double E^posures                  www.butkus.us
      Double exposures ore rrormolly quite impossible on the CANON CAMERA, but for
       speciol effects tlrey ore sometinres needed. Expose the first piclure os usuol. Then
       while keeping the Shutter Releose Button pressed down, turn the High Shutter Speed
       Diol COUNTER-CLOCK-WISE without lifting the Diol until you heor o "Click" ond the
       Diol turns no further. Releose the Shutter Releose Button first then the Diol. The
       Shutter is now completely rewound ond the second exposure moy be mode.
       This oction moy be repeoted ony number of times, ond be odiusted to onother
       speed, if required.
                     Accessory CIip                    i
                                       This is used for  fitting
                                 ottochments such os
                                         lhe Speciol Viewfinder,
                                     tJniversol \/iewfinder,
                                                   etc.
View original page 20Page 22 · Read text
www.butkus.us
                                       Pull out the Toke-up Spool,* ond slide
                                the reody-cut-leoder end up under the
                                 Toke-up Spool Clip os  f or os it will go.
                              The glossy side of the film should foce
                              the spool. Moke sure thot the per-
                               foroted edge of the film is flush with
                                flonge of the Toke-up Spool. Do not
                              wind the film oround the spool.
                            With the Toke-up Spool in your left
                          hond ond lhe film mogozine in your
                                    right hond, drow out the film obout
                                  four inches so thot the first two per-
                                  forotions ore showing. See diogrom
                                         plr:te inside the comero.
                                    Slide both the film mogozine ond rhe
                               Toke-up Spool evenly ond gently into
                                    their correct chombers oll the woy
                       down The dull (emulsion) side of the
                                       film should be focing the lens.
                                                    rtJPN. PAT. 391935


4.+,          FiajL;

        F-         <
View original page 22Page 23 · Read text
Turn the Film Winding Knob slightly to engoge the
sprockets in the film perforotions os shown'
The dotted line os shown in the diogrom indicotes
the film poth when correctly looded.
View original page 23
Page 25 · Read text
Keep the Reversing Lever still
el " A".  Pull up ond turn the
Rewinding Lever gently in the
direction shown by the orrow
in the diogrom. When it will
not turn  f urther, your film is
tout, hoving token uP the
slock film in the mogozine.
Lostly, turn the Film Winding
Knob ond press the Shutter
Releose Button. RePeot this
process once ogoin. BY doing      Next set the Exposure Counting
this you ensure thot You will       Diol ot the bose of the Film Wind-
not use the first two fromes      ing Knob to "1"  by turning  it
which hove been exposed to       counterclockwise with your thumb
                                                                        onlight while you were looding.        noil cofching one of the lugs
See note on poge 23 to vorifY       the Diol. Eoch time the Winding
thot you hove correctlY looded      Knob is turned this Diol outomo-
the film.                                 ticolly regisiers the next number'
                                                              22
View original page 25Page 26 · Read text
www.butkus.us

                                      NOIE :  Each time the Vinding Knob is turned the
                                                            Rewinding Knob rotates in e reverse direction.
                                                       This indicates that the ftln  is  properly
                                                                   passing to tfie Take-up Spool for the next
                                                               exposure, provided you have taken care to
                                                  make the film taut by tightening tha filn
                                                        wound in the magazinc. Should the Rewind-
                                                              ing Knob not turn, obviously the sprockets
                                                      are not engaging the film perforations. You
                                                                   should then rewind the film until it disengagcs
                                                     the Take-up Spool, open the Baseplate and
    Next set the Film Speed Indi-                           reload again.
     cotor* ot the top of the FilmI   Winding Knob to the speed of               STOP THE REWINDING MOTION (SEE NEXT PAGE) AS SOON
                                                                        SHUTTER RETEASE BUTTON    your film. This will serve os o           AS THE REVOTVING OF THE
I   reminder thot your com€rq  is               COMPTETETYCEASES, THISINTOWIttTHEPREVENTMAGAZINE.THE TEADER FROM DRAWING
    looded ond will show speed of
    the film you ore using.
                                           * JPN. PAT.4OO878
      23
View original page 26From the M. Butkus archive. Original publisher and archive notices are retained.
Check the model and edition against your equipment.
PDF verified 2026-10-10.