Film cameras
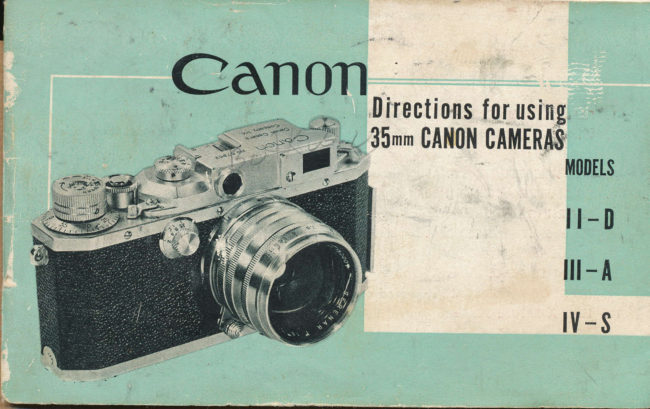
Canon II-D / III-A / IV-S User manual
User manual for Canon II-D / III-A / IV-S. 47 pages in English. Read the original PDF, download or print a copy without registration.
47 pagesEnglish6.2 MB PDF
Loading your manual…Open PDF directly
Document details
- Brand
- Canon
- Model / document
- Canon II-D / III-A / IV-S
- Document type
- User manual
- Language
- English
- Pages
- 47
- File size
- 6.2 MB
- Category
- Film cameras
- Document date
- Not specified in catalog
Search available document text
Find a term, then jump to its page in the original PDF. Image-only pages may not be searchable; check the PDF for exact wording and diagrams.
Page 2 · Read text
Introduction

 Your CANON CAMERA ond CANON-SERENAR IENS ore the products of the
 highest grode of precision engineering ond opticol reseorch.
The comero is strong, compoct ond simple to operote. As it is o precision
 instrument, it is odvisoble thot you understond how to operote it by studying
the directions coref ully.
The superior resolving power of the CANON-SERENAR LENS will produce nego-
tives of extreme shorpness; the lens will resolve to o higher degree thon the
emulsion of modern high-grode  film.
       *  USE YOUR CAMERA INTELLIGENTLY
       *  LEARN TO USE IT IN EVERY POSSIBLE WAY
       *  TREAT IT WITH RESPECT
Although fully guoronteed for five (5) yeors, it will, with core, lost you o
lifetime ond give you photogrophs you will be proud to own.
View original page 2Page 5 · Read text
I                                                                        Rongefinder                l3          I l.  LENS FOCUSTNG LEVER with Infinity Cotch qnd coupled with{       12.  SHUTTER RELEASE BUTTON
        13.  HIGH SHUTTER SPEED DIAL fOT high speeds; 1125 to l/1000 second ond B (Bulb).     B
      14.  ACCESSORy CLtp to hold Speci of Viewfinder, Universol Viewfinder, etc. .  .            17
                    't 5.  RANGE-VIEW FINDER EY EPITCE Rongefinder ond Viewfinder combined .                 13
       16.  REWINDING KNOB to rewind t he exposed film bock into originol film mogozine ofter
            Reversing Lever is set to R.                                                       27
     17. RANGE.VIEW FINDER WINDOW
     18. RANGE-VIEW FINDER MAGNIFICATION SELECTOR three positions: F,  I x ond 1.5x.
           Use l.5x for eosier qnd occurote focusing                                            l5
       19.  TERMINAL.                                                                                     3l
      20.  FLASH UNIT MOUNTING BRACKET                         O  '  3l
      21  .  EVOLUTION OF CANON CAME'?AS                                                  36                                                           IS
      22.  CANOI.,I ACCESSOP.IES                                                  ' T                                   f-: "'-:                                                  42
View original page 5Page 8 · Read text
T HOW TO OPERATE THE
  CAMERA
Reod the directions corefully. You cqn leorn how
to use your cqmero in o few minutes.
 l.  Remove the Lens CoP.
                                   5Omm2.  lf you hqve o collopsible lens (SERENAR                                         mork     f:1'.9 or f'3.5) pull'ond out the lens to the   on the borrel      lock by turning os illus-
    troted. The Stondord lens (SERENAR 50mm
    f:1.8) on the Model lll-A ond lV-S comerqs is
     non-collopsible.
3. See thot the Reversing Lever is ot the " A "    position (Advonce). Th-en turn the Film Wind-
    ing Knob one complete turn when it will stop.    Eo'ch time the Filil Winding Knob is turned
   the Expos.ure I Counting Diol outomoticolly    registers the next number.
NorE                    t;"?:iit                                      "i8"9)"il^ I?oz      '  ?':"!;"'oilil"'!,               "!,"0          exposures (see page 2s).
NOfE :  A,lways wind the Filn Windins Knob iust before
           taking a picture, Do not leave it wound over
        long periods as this may weaken the Shutter
         Spring and may cause accidental exposure  i f
          fAe SAutfer Re/ease Button is pressed by mistake. 7
View original page 8Page 9 · Read text
HIGH SHUTTER SPEED DIAL On the Model ll-D, lll-A ond  lV-S comeros there ore two Shutter
 Speed Diols.
    High :    f or speeds between 1125-l /1000 second (1/500 onll-D)&B(Bulb).
   Sl5w, for speeds between 1125-1 second & T (Time).                 ,$*:Tni)]ii]I$$I.
 On the Model ll-A comero there is one Shutter Speed Diol
 giving you speeds between 1/25-1 1500 second ond B (Bulb)
         INTERMEDIATE SPEEDS EANNOT BE USED
                                                                                lndex lvlirk Correct exposures ore best obtoined with on. exposu.re
 meter or by following the instructions supplied with the
  fi Im.
 To operote the comercr of ony of the speeds shown on the
 Hish'shutter Speed Diol, first'turn the'Film Winding l(nob.
 Th; Shutter Speed Diol will not select the desired speed
 unless this ho! been done. Roise the diql with thumb ond forefinger qnd turn until the speed required is exoctly
 opposite the lndex Mork qnd let the diql foll.
 For I /1000 sec., the diql drops only holf the distonce of
 the other speeds.
 Press the Shutter Releose Button ond the Shutter operotes
 qt the selected speed.
                                               used tAe Slow NO|E : When the High Srlutter Speed Dial is
                                                                                                      (t                                                                           sec,)           SAutter Speed Digl must 6e set at 25                                          /zs
8
View original page 9Page 10 · Read text
SLOW SHUTTER SPEED DtAL The Slow Shutter Speed
Diol (not mounted on the Model ll-A comero) will
 record speeds between 1125-l sec. ond T (Time) by
 turning the diol to the correct position so thqt the
 required speed registers uppermost opposite the index
mork. Be sure thot you hove first turned the Film
Winding Knob one complete turn ond the High Shutter
Speed Diql is set ot 25-1 (1 125 sec.)
NOIE: Speeds intermediate between the 25, IlB,  tf + and
            I sec. may be obtained by setting the dial to the
          esfimafed position.
TIME EXPOSURES LONGER THAN ONE SECOND A time exposure moy be obtoined by using the
B (Bulb) position on the High Shutter Speed Diol. The shutter remoins open from the time you
press the Shutter Releose Button until the pressure is removed. The use of o Coble Releose
is recommended for this purpose.
You moy olso obtoin o time exposure with the Slow Shutter Speed Diol ot T (Time). Press the
Shutter Releose Button ond the shutter will open ond remoin open until you turn the Slow
Shutter Speed Diql to 1 or until you turn the Film Winding Knob. (The lotter method is
View original page 10Page 11 · Read text
recommended only  for  microphotogrophy  etc.).  The shutter  will  close only when either of
 the two methods given obove ore used.
 NOTE: Fo3peed slower than tf zs sec. a solid tripod is essential and preferably a Canon Camera Holder.
 IMPORTANT  When using Flash lJnit with the lvlodel IV-S camera and making exposures with the High
  Shutter Speed Dial precise flash synchronization will be affected if  the SIow Shutter Speed Dial is not
 set af 25, See pages 30'35.
 LENS ApERTURE SCALE The Lens Aperture controls the omount of light entering the lens ond
 olso the Depth of Focus. Set the Lens Aperture (f-stop) by turning the Aperture Scole (knurled
  ring, see illustrotion) to the proper position. This is best determined with on exposLre meter
 or  f ollowing the instructicns given with the film.
 NO7'E :  The more |ight you want fo enter the |ens, the larger must
        be the Lens Aperture. Rofafe the Knurled Ring whilst
          Iooking into the lens and see the movement of   the
           diaphragm.


lo
                                                            Knurld Ring
View original page 11Page 12 · Read text
When the Lens Aperture is closed by one stop, the omount of light entering the lens is
decreosed by one holf; two stops, by one quorter ond so on. Therefore you should odiust the
Lens Aperture in coniunction with your shutter speed. Suppose your exposure meter indi-
cotes o speed of  I /200 sec. ot  f :5.6,  lf you wont to expose for o slower speed, soy I /100
sec., thon you must close down the Lens Aperture to f:8.  In other words, os you hove
doubled the time of the shutter opening, you must reduce the omount of light entering lhe
                                                                                                                                                                                                                                                                                                                                                                                                                                         _l
lens by holf to obtoin the correct exposure.
The toble below gives you the relotion between the Lens Aperture ond the relotive time of                                                               l
exposure for Conon Comero.
                                                 s6I 8.0 |   ll     l6                                                          ,.t    3.5     | 4.0  Lens Aperture                                                          r '8     I  2.0  I                                                                       I
  Relotive Exposure Time                0.8          I      2     3     4     6   12  32   64
DISTANCE SCALE When occurote  focus (see poge  I 3) hos been mode on ony obiect, the
octuol distonce   f rom the plone of the film to the obiect  is shown by the Distonce Scole (see
next poge) which is morked from 3.5 to infinity (o) in feet. Lenses with meter scoles ore
provided when speciolly ordered.
                                                                                                                                              ll
View original page 12Page 13 · Read text
DEPTH OF FOCUS SCALE See illustrotion below. A  little study will show how io plon the
 exposu re you wont. The Distance Scole ond the Depth of Focus Scole qre used together.
                                        Depth of Focus meons the ronge of obiects
                                               which will be in  f ocus on your film. This ronge
                                                   vories with the disf once of the obiect of shorp
                         Index lvlark                focus ond the Lens Aperture (see poge l1).
                                                                      It extends  f rom in  f ront of the obiect of shorp
                                           focus to beyond it.  The greoter the Lens
                                               Aperture, the Iess will be the Depth of Focus.
                                             Depth of Focus qlso diminishes in proportion
                                               to decreose in distqnce the obiect of shorp
                                                focus is from the film plone.
                                     The illustrotion shows the Lens Aperture ot
                                    Focusing Ring  f'1.8 ond the Distonce Scole ot 25 feet. An                                                 \/                obiect ot 25  f t is in shorp focus. The Depth of
                                                  Focus Scqle shows thot the neorest obiect olso
                                                  in focus is opproximotely 2l  feet ond the
                                                    forthest ob!ect in focus is opproximotely 30
                                      Disfance Sca/e feet.   lf the Lens Aporture Scole is set ot
                                                                         f , 1 I  the obiect in   f ocus will extend   f rom
 Distance lndex lvlark      Depth of Focus Scale     12 teet to infinity (o).


12
View original page 13Page 14 · Read text
FOCUSING lt  is recommended thot the comero be held
os illustroted.  lt should rest comfortobly on the heel of
the left hond ond be bolonced by the right hond. Hold
the comero to your cheek to keep it steody whilst sighting
through the Ronge-View Finder Eyepiece. Monipulote the
Focusing Lever with either your lef t or right  f orefinger
whichever is more comfortoble. More precise focusing  is
possible .by setting the Mognificotion Selector ot  l.5x
(see poge 17) ond rototing the Milled Focusing Ring os
shown in lower illustrotion.

NOIE :  The Focusing Lever is  released  f rom the Infinity
 Catch on the lens by depressing t.he knob and turning'
View original page 14
Page 15 · Read text
Out                      Out of focus                   ln correct focus
As you look through the Ronge-View Finder Eyepiece ond rotote the Focusing Lever you will
see two imoges of the some obiect. The imoges will move oport or logether os the lever
is roioted. Turn the Focusing Lever until the two imoges of the obiect on which you ore
focusing coincide exoctly. Your lens is now in shorp focus on the obiect. At the some time
oll obiects in the ronge shown on the Depth of Focus Scole will olso be in focus qt the
f-stop you select  f or the exposure.


14
View original page 15
Page 16 · Read text
MAGNIFICATION SELECTOR There qre three positions for the Mognificotion Selector; F, 1x,
ond 1.5x. When reolly shorp focusing is required, turn the Selector to l.5x when the obiect                        ,|.5will be mognified    times. Remember however, the octuql imoge recorded on the film will
be the picture seen ot F position of the Selector.
The lx position corresponds to the imoge seen ond recorded by ony CANON-SERENAR lens                            ,|00with q  f ocol length of   mm. The l.5x position shows the imoge for ony CANON-SERENAR
lens of focol length of 135 mm.
A certoin difference between the picture seen through the Ronge-View Finder Eyepiece ond
the imoge recgrded by the lens is inevitoble. For normol photogrophy the difference  is
immqteriol being so slight. But for certqin work compensotion should be ollowed.
The diogrom shows the difference, or porollox, when the Selector is ot F for o 50 mm lens.

                                                                            Field-of-View of  th.
                                                                                    lens 50mm.
                                                                            Field-of-Vie* of th"
                                                                                  finder at 3.s ft.
                                                                               Field-of-Vrew of  the
                                                                                  finder at t2 ft.
                                                                            Field-of-Vie* of the
                                                                                       finder at infinity.
                                                                                            l5
View original page 16Page 17 · Read text
The diogrqm below shows the porollox when the Selector is set ot  lx for SERENAR lenses
with focol length of 100 mm. Note thot when the obiect distonce is less thon 13 feet
o speciol viewfinder with porollox compensotion odiustment should be used.
NOfE :  Specially designed Viewf inders to compensate for parallax are available for aIICANON-SERENAR
       TENSES excepf {or the Standard so mm.


                                                                                                                                    rQQ mm
                           Field-of-View of the                             Field-of-View of the
                              Iens (too mm)                                   finder at t3 ft.
                           Field-of-View of the                             Field-of-Vie* of the
                             finder at s  ft.                                    finder at inIinity.

16
View original page 17Page 19 · Read text
-l


         1

                l

      I


                   I


                l
            i    EXPOSURE qnd COMPOSITION To expose ond compose
      yovr picture ore the lost steps ond perhops the most
      importont. Be sure thot the moin obiect in the scene you
      ore photogrophing is in shorp focus.
      For 50 mrn SERENAR lenses, the imoge recorded on the
        film will be the one seen throL,gh the Eyepiece with the
      Mqgnificotion Selector ot  F. Hoving composed your
       picttrre gently press the Shutter Releose Button with
      your forefinger. Never ierk whilst moking on exposure.
     The slightest movement for  on exposure mode ot
      1125 sec. or slower will give you o blurred picture.
     By pressing the comero to your cheek, keeping your
     elbows intr  your side ond by holding your breoth
View original page 19Page 20 · Read text
iust before ond during the octuof instont of exposure yoL,
will get on extremely shorp picture.
There ore two woys to hold the comerq. One is for hori-
zonf ol pictures os shown in the preceding poge ond
the other is for verticol pictures os shown here. For
verticol pictures the Shutter Releose Button is press by
yoL,r thumb insteod of  f orefinger.
NOIE :  hlake sure your f inger does not touch the Htgh
 Shutter.Speed Dial as it will alter the correct speed. Give
 particular attention to this when gloves are worn.
View original page 20
Page 21 · Read text
DOUBLE EXPOSURES Double exposures ore normolly
    quite impossible on the CANON CAMERA, but for speciol
   effects they ore sometimes needed. Expose the  first
   picture os usuol. Then whilst keeping the Shutter Re'
   leose Button pressed down, turn the High Shutter Speed
   Diol COUNTER-CLCCKWISE  without  lif ting the  Diol
    until you heor o  " Click " ond the Diol turns no
   further. Releose the Shutter Releose Button first then
   the Diol. The Shutter is now completely rewound ond
   the second exposure moy be mode.
   This oction moy be repeoted ony number of times. After eoch exposure the High Shutter
   Speed Diol moy be odiusted to onother speed, if required.


20
View original page 21Page 22 · Read text
Film lvlagazine
N. T,OADING AI{D UNT-,OADING
   YOUR. CAMERA
LOADING Alwoys lood in subdued light. Before you
begin looding, set the Reversing Lever to   tt A,,
(Advonce) ond turn the Film Wi.nding Knob until  it
stops Press the Shutter Releose Button. Keep the
Lens Cop in ploce.
Open the Boseplote by lifting the lock hondle ond
turn it  in the direction shown by the orrow, from
" Cf ose " to t'ODen."
Pull out the Tqke-up Spool, ond slide the reody cut
leoder end up under the Toke-up Spool Clip os for
os  it  will go. The glossy side of the film should
foce the spool.  qke sure thot the perforoted edge
of the film is flush^ with flonge of the Toke-up Spool.
Do not wind the film oround the spool.

   21
View original page 22Page 23 · Read text
With the Toke-up Spool in your left
 hond ond the film mogozine in your                                                                                     +i
 right hond, drow out the film obout                                                                                          .;l
  f our inches so thot the first two per-                                             inches
 forotions ore showing. See diogrom
plote inside the comerq
                                                 Two per{orations

Slide both the film mogozine ond the
Toke-up Spool evenly ond gently into
their correct chombers, oll the woy
down. The dull (emulsion) side of
the film should be focing the lens.


22
View original page 23Page 24 · Read text
Not correct


                                                                                                   SprocIefs
Turn the Film Winding Knob slightly to engoge
the sprockets in the film perforotions os shown.

The red line os shown in the diogrom indicotes
the film poth when correctly looded.


 23
View original page 24Page 26 · Read text
Remember to set Exposure Counting Diol ot the bose of the Film Winding Knob to "1" by
turning  it counterclockwise with your thumb noil cotching one of the lugs on the Diol.  Set
the Film Speed Indicotor ot the top of the Film Winding Knob to the speed of your film.
This will serve os o reminder thot your comero is looded ond will show speed of the film
you ore using.

                                                                                          25
View original page 26Page 27 · Read text
NOTE: Eoch time the Winding Knob is turned the Rewinding Knob rototes in o reverse
 direction. This indicqtes thot the film is properly pessing to the Toke-up Spool for the next
exposure, provided you hove token core to moke the film tout by tightening the film wound
 in the mogozine. Should the Rewinding Knob nct turn, obviously the sprockets ore not
engoging the film perforotions. You should then rewind the film until  it disengoges the
Toke-up Spool, open the boseplote qnd relood.

IMPORTANT: THE LEADER CAN BE PREVENTED FROM DRAWING CoM,DLETELY INTo THE
MAGAZINE BY STOPPING THE REWINDING MCTTCN (SEE NEXT PAGE) AS SOCN AS THE
REVOLVING OF THE SHUTTER RELEASE BUTTON CEASES.


26
View original page 27
From the M. Butkus archive. Original publisher and archive notices are retained.
Check the model and edition against your equipment.
PDF verified 2026-10-10.