Film cameras
Canon QP Pellix User manual
User manual for Canon QP Pellix. 29 pages in English. Read the original PDF, download or print a copy without registration.
29 pagesEnglish1.2 MB PDF
Loading your manual…Open PDF directly
Document details
- Brand
- Canon
- Model / document
- Canon QP Pellix
- Document type
- User manual
- Language
- English
- Pages
- 29
- File size
- 1.2 MB
- Category
- Film cameras
- Document date
- Not specified in catalog
Search available document text
Find a term, then jump to its page in the original PDF. Image-only pages may not be searchable; check the PDF for exact wording and diagrams.
Page 2 · Read text
To main Camera Manual site
                                   www.butkus.us


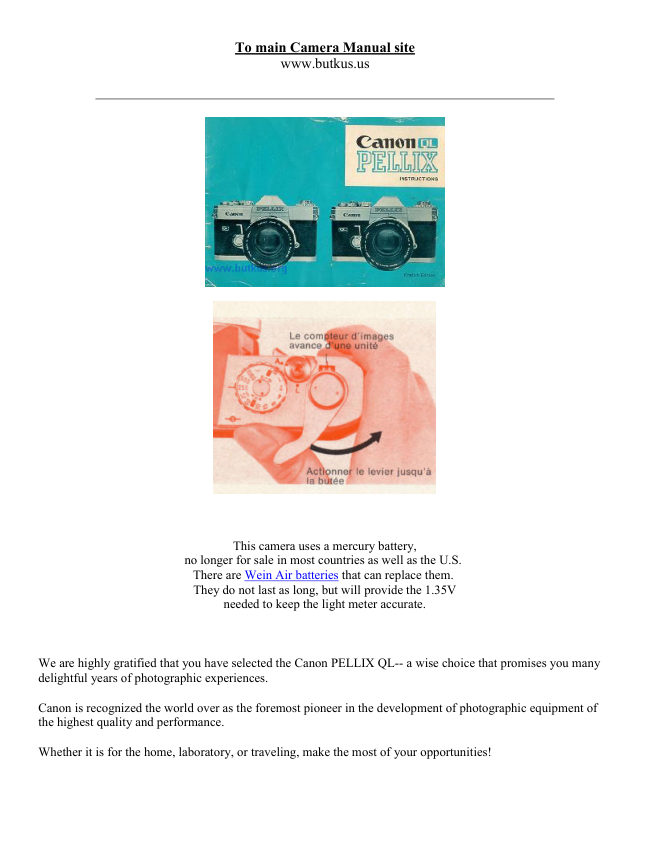
                                  This camera uses a mercury battery,
                       no longer for sale in most countries as well as the U.S.
                          There are Wein Air batteries that can replace them.
                        They do not last as long, but will provide the 1.35V
                               needed to keep the light meter accurate.


We are highly gratified that you have selected the Canon PELLIX QL-- a wise choice that promises you many
delightful years of photographic experiences.

Canon is recognized the world over as the foremost pioneer in the development of photographic equipment of
the highest quality and performance.

Whether it is for the home, laboratory, or traveling, make the most of your opportunities!
View original page 2Page 3 · Read text
Before Using...

It is important for you to thoroughly know and to get accustomed to handling the Canon PELLIX QL. Please
read this instruction booklet carefully, and master the manipulations of the various parts completely. If you are
thoroughly versed in the correct handling of the camera, you can get the maximum performance out of the
Canon PELLIX QL to your greatest satisfaction.

Contents


Mercury Battery Loading : 8
                                            Film Rewinding : 28
Film Winding : 10
                                             Photography Using Self-timer and Eyepiece
Shutter and Aperture Adjustment : 12              Shutter : 29

How to Use Built-in Exposure Meter : 16          Flash Synchronization : 30

Exposure Setting 1--Shutter Speed Priority        Uses of Lenses : 31
Method : 18
                                          Double Exposure : 36
Exposure Setting 2--F Stop Priority Method : 19
                                                         Filters : 37
Coupling Range of Built-in Exposure Meter ; 20
                                               Proper Care of the Canon PELLIX QL : 38
Focusing : 21
                                                 Interchangeable Lenses and Accessories : 40
Holding the Camera : 23
                                        Canon Booster : 43
Film Loading : 25
View original page 3Page 5 · Read text
Technical Data

Type: 35mm single-lens reflex camera.

Viewfinder: Eye-level system using pentagonal prism. Waist Level Viewer 2 can be attached.

Focusing Glass: Highly efficient in resolving power, using Fresnel lens and built in prism screen rangefinder.

Mirror: The Canon Pellicle Mirror, a half bans parent mirror.

Standard Lens: FL 50mm F 1.8, FL 50mm F1.411, FL 55mmFl.2, FLP 38mm F2.8

Aperture: Fully automatic pre-set aperture built in. Pre-set release possible.

Shutter: 1/1000 -1 sec. and B (T) X single pivot dial focal plane shutter.

Exposure Meter: Built in. Zero-method CdS cell coupled to shutter dial and aperture setting. TTLM system.

EVO.5(with ASA 100 film, F 1.2 at 1 sec.)-EV 18 (F 16 at 1/1000 sec.) one stage system. ASA 25 - 2000.

Powered by one 1.3 V M 20 (# 625) mercury battery.

Photometry: Exposure meter functions with the CdS actuating lever. Continuous photometry is possible with

the CdS actuating lock lever. Battery checker built in.

Measuring of Ultra-Low Illumination: EV 1.5 1/2 sec. -EV--4.5 30 sec. at F 1.2 can be measured with the

attachment of the Canon Booster (auxiliary meter for extremely dim lighting).

Flash Synchronization: Synchronizing possible for FP and X contacts and FP class, M class MF class and

speedlight.

Self-timer: Built in. Time adjusting type.

Film Rewinding: Done by button and crank.

Film Advance Lever: Single operation 174° winding lever, possible to wind with several short strokes.

Film Loading: Back cover opening and closing, using only cartridge.

The Canon developed QL mechanism makes possible simple and quick loading of film.

Interchangeable Lenses: Automatic pre set aperture type FL series lens system.

Film Counter: Self-resetting type.

Size: 144x91x43mm (5~"x3%"xl~")

Weight: 755 grams (l lb. lO1/2oz.)--body only.

                          Subject to alterations.
View original page 5Page 7 · Read text
Mercury Battery Loading - A Wein Air battery is needed as a replacement.

Load the mercury battery into the battery compartment. The mercury battery powers the built in CdS exposure
meter, and the meter will not function unless the battery is in position.

1.  Press the finger against the battery cover and turn to the left to remove.

2.  Face the central contact of the mercury 2 battery inwards and insert, then screw the cover back in.

Before insertion, clean mercury battery thoroughly with a dry cloth. Perspiration or finger marks may cause
corrosion and may prove particularly harmful to center of contact. Un. clean battery may also damage the
contact point of the camera.

 For mercury battery, National M-ID or Toshiba TM-MC is used -equivalent to Mallory RM-625R, Eveready
E625N, GE #625. Life of the battery in continuous use is approximately one year.
See this link on a Wein Air replacement battery.

When inserting, do not confuse the (+) ( - ) Not only will the meter fail to function in case of reverse insertion,
but the cover cannot be screwed in properly.

When not in use for a long period, remove the battery and keep in a dry place.


Battery Check

Check the mercury battery after loading it. Especially when loading a new battery, be sure to check the voltage.

1.  Set the film speed graduation of the shutter dial at ASA 100 and set "X" et the index mark. Lift up the outer
sensitivity ring of the shutter dial and turn. See page 16.

An accurate check cannot be made if settings other than those mentioned above are used.

2.  Turn the check ring on the outer side of the film rewind knob and set " C" at the index mark.
View original page 7
Page 8 · Read text
3.   If the meter needle inside the viewfinder swings up to or over the c index, it means there is sufficient
voltage. If the needle stays below the edge of the 0 index, voltage is insufficient and the battery must be
replaced.

In the Canon PELLIX QL, the electric current flows only when the CdS actuating lever is pressed.


Film Winding

1.  The turning of the film advance lever winds the shutter, film winding and aperture charging in one motion.

2.  When the shutter button is pressed, the diaphragm simultaneously closes down to the pre-selected F stop
and the shutter operates.

Immediately after the shutter operation, the advance lever is again in ready position.

Be sure that the safety lock lever is set at "A".

The winding may be done by moving the lever with several short strokes.

After loading the film, make another wind, since there is the possibility of the very first winding not catching.

Unless the winding is completed, the shutter will not be actuated, even though the shutter button is pressed. In
such a case, check the winding once more.


Film Counter

Each winding of film will advance the number of the film counter, indicating the number of
pictures taken. When the back cover is opened, the indicator automatically returns to starting
position " S ".
View original page 8
Page 9 · Read text
Safety Device for Shutter

When the safety lock lever around the shutter button is turned to " L" position, the shutter is locked
and will not move. This device may be used when the camera is carried in a wound condition.

Attaching the Cable Release

A cable release can be attached to the shutter button. Even if the safety lock lever is at " L"
position, the shutter will operate by using the release.
When using the cable release, be sure to close the eyepiece shutter before shooting. Refer to
instructions on page 29.


Shutter and Aperture Adjustment

The shutter and aperture adjust the exposure with the shutter adjusting the exposure time and the
aperture ad lusting the amount of light. The Canon PELLIX QL uses the zero-method coupled
meter, and it is very simple to get the proper exposure.

Shutter Speed Dial

By revolving the dial, it is possible to adjust the speed by turning it to the necessary index number.
The index on the dial shows the denominators of 1/1000 sec., 1/15 sec., etc.

The shutter speed dial does not revolve between the indexes "X" and "B".

Set the index at the position where the click stop catches.

"B" means bulb exposure. The shutter, which remains open during the pressing of the shutter
button, is employed when making exposures of more than one second.

In case of " B" index, adjust it to the white dot just below the " B" index.

When it is necessary to make a n exposure over an extended time, first set it at " B ". Keep the
shutter button pressed, turn the time lock lever to indicator " L". In this case, even if the finger is
removed, the exposure continues. When the lever is returned to "A", the shutter closes.
View original page 9
Page 10 · Read text
Time exposure is possible also by using the lock-attached cable release.

The "X" index is used for synchronizing a speedlight. Although the shutter speed at "X" is 1/60
sec., actually it is equivalent to a very short exposure during the flash time of the speed light.


Lens Aperture

The adjustment of the quantity of light and depth-of-field are made by turning the pre-set aperture
ring to adjust the desired F stop to the index.

As the numerical value of the F stop gets larger, the amount of light reaching the film becomes
correspondingly less. For each F stop the light is reduced one-half. Accordingly, when the aperture
is increased by one index point, the exposure is doubled, and when it is increased by two index
points the exposure is quadrupled.

The aperture ring can also be set to intermediate values.

Depending on the lens, there are instances where there is no relation to the lightness being halved
between the maximum diameter of the aperture and the next aperture reading.

The ratio between aperture and the amount of exposure, using F 2 as the basis, is as follows:

Lens Aperture

1.2, 1.4, 1.8, 2, 2.8, 3.5, 4 5, 6, 8, 11, 16, 22

Exposure Ratio

3 2 1.25 1 1/2 1/3 1/4 1/8 1/16 1/32 1/64 1/128
View original page 10
Page 11 · Read text
Pre-Set Aperture and Checking of Depth-of-Field

Lens with A-M Ring

1.  Pre-Setting of Aperture: Set the A-M ring at "A". Then set the desired F stop on the pre-set
aperture ring to the index. The diaphragm will close down to the pre-set F stop only for the instant
that the shutter is released. Except for the instant that the shutter is released, the diaphragm will
remain fully open.

2.  Manually Operated Aperture: When the ~ A-M ring is set at "M" the diaphragm closes down to
the pre-set F stop. In this way the depth-of-field at the time of shutter release can be checked. When
the A-M ring is reset at "A" the diaphragm again returns to maximum opening.

Lens with Manual Aperture Ring

1.   Pre-setting of aperture: Set the desired F stop on the pre-set aperture ring to the index. Then set
the index of the manual aperture ring to this pre-set F stop. The diaphragm will close down to the
pre-set F stop only for the instant that the shutter is released.

2.  Manually Operated Aperture: When the ~ manual aperture ring is turned in the direction of
closing down the diaphragm, after setting the desired F stop on the preset aperture ring to the index,
the diaphragm will close down to the pre-set F stop and the depth-of-field can be checked. The
manual aperture ring cannot be turned when set at maximum aperture opening.

Refer to pages 34-35 concerning depth-of-field.

            Relation Between the Pellicle Mirror, CdS, Diaphragm and Shutter
View original page 11Page 12 · Read text
How to Use Built in Exposure Meter

The exposure meter of the PELLIX QL, which is of the zero method type, is coupled to the shutter
dial and aperture ring. The exact exposure is easily determined according to the brightness of the
subject to be photographed. There are two ways of determining the exposure--either by first
selecting the shutter speed or first selecting the F stop.

Film Speed Setting

Show the film speed of the film used in the small window. To do this, hold up and turn the film
speed set ring around the shutter speed dial. If the film is ASA 100, for example, make correct
setting by showing 100 in the ASA window.

When ASA 25 appears in the small window, this is as far as it turns to the left. The right turn
extremity reads · (2000).

The following film speeds may be used:
          (32) (40) (64) (80) (125) (160) (250) (320) (500) (640)

ASA 25 · · 50 · · 100 · · 200 · · 400 ·

DIN 15. · 18. · 21. · 24. · 27. ~

          (16)(17) (19)(20) (22) (23) (25) (26) (28) (29)

       (1000) (1250) (2000)

    800. · 1600.

      30. · 33.

        (31) (32)   (34)
View original page 12Page 13 · Read text
Figures in parentheses represent intermediate film speeds.

 The film speeds are shown either on the film box cover or on the explanatory sheet.


CdS Actuating Lever

The exposure meter can be set into measuring condition by turning the CdS actuating lever towards
the lens.
The CdS actuating lever can be fixed by turning it towards the lens after setting the lock lever at "
L" position. If the lock lever is returned to its original position ( ~ index) the CdS actuating lever
will also return to its original position.

The shutter cannot be released while the CdS actuating lever is being turned or when it is locked
with the lock lever.

How to Measure the Average Brightness

The exposure meter on the Canon PELLIX QL is of the spot reading type which accurately
measures any special spot of the subject. Therefore, when measuring a subject with greatly
differing dark and bright parts, take two measurements, one each of the dark and bright parts. Then
obtain the average value and set the F stop or shutter speed accordingly.


Exposure Setting 1 -Shutter Speed Priority Method

1. Set the shutter at a desired speed.

2. Face the camera towards the photographic subject, look into the viewfinder, and press the CdS
actuating lever fully.
View original page 13
Page 14 · Read text
3. Either keep pressing the lever or lock , the lever and turn the aperture ring.

4. Set the meter needle at the o index within the viewfinder for correct exposure.

 Canon's TTLM system has been adopted in the PELLIX QL which provides the most accurate
photometry. Under this system, the CdS photocell of the built-in meter is placed in the closest
position to the film on the back side of the panicle mirror.

 The rectangular frame on the outside of the prism screen within the viewfinder is the same size as
the light receiving area of the CdS photocell. Place the center of the photographic subject within
this frame and measure the intensity of light. In this way the photographer can decide the best
exposure for his photographic needs. The TTLM system makes possible the measuring of
exposures in counter-light conditions.

 Measurement at "B" and "X" indexes of the shutter dial is not possible with the exposure meter
because " B " is used for long exposures over one second and " X " is used for speedlight.


Exposure Setting 2 -- F Stop Priority Method

1. Set the lens aperture at the desired F stop.

2. Face the camera towards the photographic subject, look into the viewfinder, and press the CdS
actuating lever.

3. While pressing or locking the CdS actuating lever, turn the shutter dial.

4. Set the meter needle at the o index within the viewfinder for correct exposure.

 Intermediate positions on the shutter speed dial scale cannot be used, but since any aperture may
be utilized, the shutter speed should first be determined when strictly considering the exposure. It is
most practical to adjust the aperture according to this.

 During the use of the meter, there are instances of the movement of the needle becoming slack,
owing to changes in the degree of light, but this is due to the characteristics of the CdS.

 When taking pictures against light, always use a lens hood.
View original page 14
Page 15 · Read text
When the subject is too bright or too dark and is outside the coupling range of the built-in exposure
meter, the meter needle will point to the top of the viewfinder and will indicate that proper
exposure cannot be obtained. Refer to " Coupling Range of Built-in Exposure Meter " on the
following page.


                                            Focusing

                                           While looking through the viewfinder, rotate
                                                   the focusing ring.

                                                                    It is out of focus when the image within the
                                                         circle in the center of the viewfinder is unclear.
                                                                    It is in focus when the images coincide and the
                                                  unclear images become clear.

                                         The center of the viewfinder (circular section)
                                                               is the prism screen type rangefinder for
                                                 focusing made up of microscopic prisms.
View original page 15Page 16 · Read text
Eyesight adjustment lenses are available as optional attachment. When an eyesight adjustment lens
is attached to the eyepiece, those who are far-sighted or near-sighted can take pictures without
glasses. Four different Copters of +1.5, 0, -2.5, and -4 are available.

Composition and Viewfinder

The exact picture image to be photographed on the film can be seen on the ground glass without
any parallax. It is possible to determine the composition exactly according to the viewfinder.

Waist-Level Viewer 2 can be attached to the eyepiece for copying, enlarging and
microphotography. In this case, the image is reversed left and right.
View original page 16
Page 17 · Read text
Holding the Camera

Holding the camera firmly is very important in order to take a clearly focused picture. Hold the
camera in either vertical or horizontal position, as shown in the photographs. Look through the
viewfinder and adjust the focus while determining the composition. Then, gently press the shutter
button. At this time, it is important to consider the following points:

1. Hold the camera with both hands as t firmly as possible.

2. Stabilize the camera by pressing it C against the cheek or forehead.

3. When the camera is in a horizontal position, both elbows should be firmly pressed against the
body, and at least one elbow should be resting against the body when in a vertical position.

Rough pressing of the shutter button is a cause of blur.

It is advisable to use the tripod and cable release. Particularly recommended when using a slow
shutter speed below 1/30 sec.
View original page 17
Page 18 · Read text
Film Loading

Canon PELLIX QL accepts any standard 35mm film in cartridge for daylight loading.

When loading a new film, avoid direct sunlight. 4 When repacking a long-wound film for darkroom
loading into the ordinary cartridge, trim the end of the leader part in between the perforations.
View original page 18
Page 19 · Read text
1. Open the back cover.
  Raise the back cover lock, make a half turn to the left, and the cover will rise. Open the back
cover fully. When the back cover is opened, the QL cover also opens simultaneously and is ready
for loading the film.

The QL cover automatically opens and closes together with the opening and closing of the back
cover. Do not touch the QL cover.

2. Insert cartridge.
  Raise the rewinding knob all the way. When the cartridge has been inserted, push the knob back
to its former position again. Push the fork into the axis of the cartridge. In case the knob does not
fully return, it can be easily put into proper position by turning it slightly to the left or right.

3. Set film tip to the red mark.
   Face the cartridge as shown in the picture and hold the film down with the left hand so that it
does not rise.


4. When the back cover is half closed, the QL cover presses down on the film. Check through the
sprocket window whether the film has been engaged correctly onto the gear.

5. Close the back cover.
   Press down to prevent the cover from rising, then turn the back cover lock clockwise to close.
Fold down the rewinding crank.

If the film is sagging, the cartridge will rise and the back cover will not close.

6. Make three blank shots.
  Leave the lens cap on and advance the film three times, each time releasing the shutter. The film
counter will advance from the "S" mark to "O". With one more advance, the camera will be ready
for the first shot.
View original page 19
Page 20 · Read text
Setting the Film Speed

When loading the film, be sure to set the film speed in the window of the shutter dial. Refer to
page 16 for setting the film speed.

Checking Correct Film Loading

The film is properly loaded and transported if the rewind knob rotates when the film advance lever
is wound. If the rewind knob does not rotate, it means the film was not loaded properly. If such is
the case, take out the film, as plus bated on page 28, and reload the film.


Film Rewinding

Since no further winding is possible when the film has reached the end, rewind the film
immediately into the cartridge. As the exposed film is naked within the camera, the entire roll will
be exposed and ruined if the cover is opened before rewinding.

1. Press in the rewinding button.

2. Rewind with crank.
  Raise the rewind knob, turn the crank in the direction of the arrow, and return the film into the
cartridge. When the rewinding button stops revolving and rewinding resistance becomes light,
immediately stop rewinding.

3. Open the back cover.
View original page 20
Page 21 · Read text
4. Remove the cartridge.
  Raise the rewind knob completely and remove the cartridge.

Once the rewinding button has been pressed, the finger may be removed. The button will return
automatically when the lever is wound.

If winding is continued after the film is at its end, the film will come loose from the cartridge spool
or tear and rewinding will become impossible. If this happens, open the back cover in a completely
dark room.


Photography Using Self-timer and Eyepiece Shutter

Wind the shutter and close the eyepiece shutter. Turn the self-timer lever in the direction of the
arrow and press the shutter button. The shutter will be actuated approximately 10 seconds later.

Be sure to wind the self-timer completely.

Be sure to wind the shutter. If this is neglected and only the self-timer is wound and the shutter
button pressed, the self-timer will act but the shutter will not be actuated.

The self-timer lever can be used as a CdS actuating lever as soon as it returns to its original
position. When taking shots with the eye off the eyepiece, such as when using the self-timer or
cable release, always be sure to close the eyepiece shutter.

Eyepiece Shutter

Since the Canon PELLIX QL incorporates the mirror, the light rays may cause ghosts on the film
plane if the viewfinder eyepiece receives strong light.

For closing the eyepiece shutter, turn the eyepiece shutter ring to the left
and set the index mark to [ ].
View original page 21
Page 22 · Read text
Flash Synchronization

                               By connecting the cord of the flash unit or speedlight
                                               to the flash socket, it is possible to synchronize the
                                          following shutter speeds.
                               When taking pictures with flash, light volume
                                          adjustment is required because the Canon PELLIX QL
                                           uses a stationary mirror. Obtain F stop by guide
                                    number and further open aperture by one-half.

                         A lens hood is necessary when taking flash pictures.


Uses of Lenses

Changing Lenses

In removing the lens from the camera, after turning the bayonet ring of the lens to the left, take out
the lens.

In mounting the lens, match the red dot of the lens to the red dot on the camera mount Turn the
bayonet ring to the right and fasten.

When mounting, turn the bayonet ring of the lens sufficiently to the left and coincide the red dot
and guide pin of the lens.

Do not change your lens in a strong light. When changing your lenses have the replacement lens at
hand. Then quickly change the lenses in the shade. . . or use your shadow as a shield from direct
light.

There is a pre-set aperture lever at the back end of the lens which opens and closes the aperture.
When the lens is removed, be sure to always put on the dust cap so as to protect the aperture lever.
View original page 22Page 23 · Read text
If interchangeable lenses are changed while the CdS actuating lever is in locked position, the pre-
set aperture lever cannot be connected to the coupling part on the camera body and the pre-set
aperture will not function. Be sure to unlock the CdS actuating lever when changing
interchangeable lenses.

Do not touch the panicle mirror or the coupling section of the aperture. When not in use for a long
time, protect the panicle mirror by putting on the flange cap.


Distance Scale

The distance scale indicates the distance between the focused subject and the film plane. The scale
is necessary for checking the depth of-field, for infrared photography and flash photography.

The correct position of the scale, where the distance is a one-digit figure, is in the middle of the
figure; if it is a two-digit figure, it is between the two figures; and if it is a three-digit figure, it is in
the middle of the central figure.

Infrared Index " R "

For infrared photography, correction of the distance scale is necessary because the focal position
deviates a little from ordinary photography. Make ordinary focusing first, then adjust that distance
scale to the infrared mark " R ". For instance, if the distance reads 10m after focusing, merely shift
the 10 scale to " R " position.

The position of " R " is scaled according to the use of the standard of a film with the highest
sensitivity of a wave length of about 800my and infrared filter (for example, KODAK IR 135 film
and WRITTEN 87 filter).
View original page 23
From the M. Butkus archive. Original publisher and archive notices are retained.
Check the model and edition against your equipment.
PDF verified 2026-10-10.