Flashes & lighting
Canon Speedlite 155A User manual
User manual for Canon Speedlite 155A. 8 pages in English. Read the original PDF, download or print a copy without registration.
8 pagesEnglish2.6 MB PDF
Loading your manual…Open PDF directly
Document details
- Brand
- Canon
- Model / document
- Canon Speedlite 155A
- Document type
- User manual
- Language
- English
- Pages
- 8
- File size
- 2.6 MB
- Category
- Flashes & lighting
- Document date
- Not specified in catalog
Search available document text
Find a term, then jump to its page in the original PDF. Image-only pages may not be searchable; check the PDF for exact wording and diagrams.
Page 1 · Read text
www.butkus.us


**
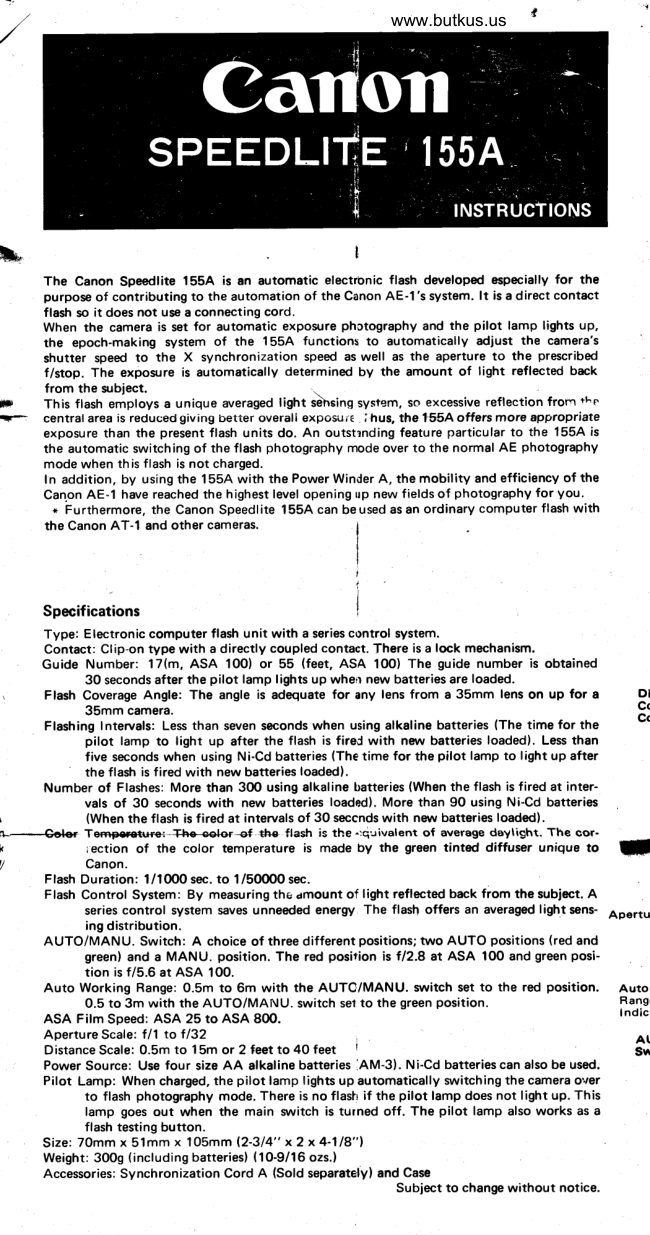
     The Canon Speedlite 155A is an automatic electrbnic flash developed especially for the
       purpose of contributing to the automation of the Canon AE-l's system. lt is a direct contact
        flash so it does not use a connecting cord.
     When the camera is set for automatic expo$Jre photography and the pilot lamp lights up,
      the epoch-making system of the 155A functions to automatically adlust the camera's
       shutter speed to the X synchronization speed as well as the aperture to the prescribed
        f/stop. The expozure is automatically determined by the amount of light reflected back
       from the zubject.
fif     This flash employs a unique averaged light se-trsing system, so excessive reflection frorn theqr-:   central area is reduced giving better overali exposui€  . ihus, the 155,4 offers more appropriate
       exposure than the present flash units do. An outsunding feature particular to the 155A  is
       the automatic switching of the flash photography mode over to the normal AE photography
     mode when th is flash is not charged.
       In addition, by using the 155A with the Power Winder A, the mobility and efficiency of the
      Canon AE-l have reached the highest level opening up new fields of photography for you.
       * Furthermore, the Canon Speedlite 155A can beused asan ordinary computer flash with
        the Canon AT-1 and other cameras.


      Specifications
      Type: Electronic computer flash unit with a series control system.
       Contact: Ctip-on type with a directly coupled contact. There is a lock mechanism.
     Guide Number: 17(m, ASA 100) or 55 (feet, ASA 100) The guide number is obtained
           30 seconds after the pilot lamp lights up when new batteries are loaded.
 ,      Flash Coverage Angle: The angle is adequate for any lens from a 35mm lens on up for a      Dl
         35mm camera.                                                                          ctCt       Flashing Intervals: Less than seven seconds when using alkaline batteries (The time for the
              pilot lamp to light up after the flash is fired with nerru batteries loaded). Less than
               five seconds when using Ni-Cd batteries (The time for the pilot lamp to light up after
              the flash is fired with new batteries loaded).
     Number of Flashes: More than 30O using alkaline tratteries (When the flash is fired at inter-
              vals of 30 seconds with new batteries loaded). More than 9O using Ni-Cd batteries
i            (When the flash is fired at intervals of 30 seccnds with new batteries loaded).
n-'-€oter   Tempcratr*re The eelor-ef +h+ flash is the ^-.gui.ralent of average daytight. The cor-
k            rection of the color temperature is made by the green tantd diffuser unique to    il
/             Canpn.
       Flash Duration: 1/10O0 sec. to 1/50OO0 sec.
       Flash Control System: By measuring the dmount of light reflected back from the subject. A
                series control system saves unneeded energy The flash offers an averaged lightsens- Apertu
                ing distribution.
     AUTO/MANU. Switch: A choice of three different positions; two AUTO positions (red and
              green) and a MANU. position. The red posirion is f/2.8 at ASA 1O0 and green posi-
              tion is f/5.6 at ASA 100.
      Auto Working Range: 0.5m to 6m with the AUTO/MANU.  s:witch set to the red position.   Auto
              0.5 to 3m with the AUTO/MANU. switch se1 to the green position.                  Rang                                                                                                              lndic     ASA Film Speed: ASA 25 to ASA 800.
       Aperture Scale: t/1 to tl32                                                                                                                                                                                                                     I                                        AI       Distance Scale: 0.5m to 15m or 2 feet to 40 feet                                        Su
      PowerSource: UsefoursizeAAalkalinebatteries:AM-3).Ni-Cdbatteriescanalsobeused;
        Pilot Lamp: When charged, the pilot lamp lights up automatically switching the camera  o'.rer
             to flash photography mode. There is no flash if the pilot lamp does not light up. This
            lamp goes out when the main switch is turned off. The pilot lamp also works as a
                flash testing button.
        Size: 70mm x 51mm x 105mm 12-314" x2x4-118"1
       Weight: 30Og (including batteries) (10-9/16 ozs.)
       Accessories: Synchronization Cord A (Sold separately) and Case
                                                                 Sublect to change without notice.
View original page 1Page 4 · Read text
www.butkus.us

I  Loading the BEttoric 1. Use four new size AA Alkaline batteries
   (AM-3). You can also use Ni-Cd batteries
    instead of Alkaline batteries. Manganese bat-
    teries can be used but will not last as long as
    Alkaline or Ni-Cd batteries.
2. To take off the battery chamber cover, press
     it and slide it off in the direction of the
   arrow. After having loaded the batteries, slide
   the battery chamber cover back on in the
   direction opposite to the way the arrow  is
   pointing while holding down the batteries.
  On this occasion, be careful to fit the position-
    ing tabs on the bottom part of the cover to the
    grooves.
3. Only load the batteries following the diagram
  on the inside of the battery chamber.  lf
    incorrectly loaded, the batteries may burst and
    leak damaging the speedlite.


Isetting the ASA Film Speed
Because the guide number of the flash will chenge
depending on the sensitivity of the film being
used, be sure to correctly set the ASA film speed.
lf you forget to do this, you will not be able to
get the correct exposure.
1. Turn the ASA setting dial until the proper
  ASA scale of your film appears on the ASA
  window and is aligned with the white index
   mark. At this time, the f/stop will also change
   accordingly. Dots represent intermediate film
   speeds as shown by the numbers in parentheses.
                                                                                   d{0                                                                                                                                     I 25 t60      250..400..800320    500  ASA25..50.32 t0    6r tro 100..200
 * Also, confirm that the ASA film speed on the
   camera has been properly set.
Attaching to the Camera
1. Turn the main sruitch off.
2. After loosening the tightening nut of the
   attachment leg, insert the attachment leg into
   the accessory shoe of the camera. When the
   attachment is uncertain, there are cases when
    the terminal does not make contact.
    First of all completely press the flash in, then
    tighten the nut to lock the flash on.
 x When attaching this flash to a camera that
   does not have a directly coupled contact, use
   the exclusive Synchronization Cord A.


When the Speedlite 1554 is attached to the
Canon AE-l,  it can be used in three ways.
I.    Automatic exposure flash photography with
     Canon FD lenses.
II.   Manual aperture   f lash photography with
     Canon F L lenses.
III.   Manual aperture flash photography.
These three usages, though somewhat similar, are
explained separately below.
View original page 4Page 5 · Read text
AE (Automatic Exposure) Flastr
      Photography with FD Lenses                      ,/
   The 1554 is used for AE  f lash photography
   when the AE-l is set for AE photography.
   When the pilot lamp lights up, you know the
    camera's and flash's circuitry are connected
    while at the same time controlling the shutter
   speed and aperture automatically for correct
    exposure.
 Setting on the AE-l
 1. Set the aperture ring of the lens to the "A"
    mark.
 2. At any shutter speed except "B" the shutter
    speed will be automatically set at 1/60 sec.

Step for Flash Photography
 I   Swhctring the AUTO/MANU. Switch
   This sruitch is used to set the prescribed aper-
   tures coupled with AE flash photography.
   There are two aperture settings for AE flash
    photography; the red position and green posi-
    tion. The MANU. position in thg cen:sr cf tl is
    sruitch should be set when you perform manu'al
    flash photography. This particular setting  is not
    at all related to AE flash photography.
 f  Reading the Apertures
   The f/stop fixed by the AUTO/MANU.  switch
     is the value below the aperture index mark of
   the sarne color as the srvitch position. For ex-
   ample, the AUTO/MANU. switch is set at the
    red position, the f/stop below the red aperture
    index mark is used for AE flash photography.
   The f/stop will change depending on the setting
   of the ASA film speed. In the case of ASA 100,
   the red position is t12.8 while the green posi-
    tion is f/5.6.
I   Limits of the Auto Working Range
   Depending on the f/stop selected, the au io
   working range that can be correctly exposed
    will change. For this purpose, the color of the
   line along the aperture scales indicates the
   distance range effective for AE flash photo-
   graphy in accordance with the color of the
   mark on the AUTO/MANU.  switch.
    Therefore, you can understand the limit of the
   auto working range depending on the color of
   the line below the distance scale. When the
   Al.ITOIMANU. switch is set at the green posi-
    tton. tirs 3utc; wcrkirrg range will rcad O.Sm :c
  3m while at the red position the auto working
    range will read 0.5m to 6m.
 x Even though the ASA film speed changes, the
    limits of the auto working range are always
         f ixed.
    x For knowing how to select the aperture for
  AE flash photography, use the following as
    standards:
   Green Position: When you want to deepen the
                      depth-of-field of the subject.
   Red Position: When you want to make the
                    depth-of-field of the subject
                  shallower or the subiect dis-
                    tance is greater than 3m.
   x When the distance is less than 1m, the light
    distribution may be uneven due to differences
   in the optical axes between the lens and the
        f lash.
I  Main Switch and the Pilot Lamp
   After completing the above processes, turn the
   main switch on. The pilot lamp lights up when
   the flash is charged.
View original page 5Page 6 · Read text
F                           www.butkus.us
         !  Focusing
           After confirming the limits of the auto working
           range, look into the viewfinder and focus. lf  it
          should go outside the limits of the auto work-
           ing range, you will not be able to get the cor-
            rect exposure.
         I  Confirmation of the Metor Needle and Photo-
          graphy
        When the pilot lamp lights up, the shutter speed
           will be automatically adjusted to the X syn.
           chronization speed while the aperture will also
       be automatically adjusted to the prescribed
            f/stop.
      The meter needle inside the viewf inder
           indicates the designated f/stop on the halfway
          depression of the shutter button. After con-
           firming the focus, you may release the shutter.
         I AE Metering of the AE-l and Automatic
          Switching
       When the pilot lamp goes out after photo-
         graphy, the camera will be automatically
          adjusted to the normal AE photography mode
            until the 155A is charged again. That isto s.ty,I
     :e  the camera switches automatically from the      -*-  flaslr pfiotography mode to the normal AE
         photography mode.
      N When you are performing normal AE photo-
          graphy, there may be a very rare occurrence
         where the pilot lamp wilt light up white the
         shutter is in operation if the flash is charg-
         ed. lf this should happen, your film will be
          improperly exposed.

                                                                                                                                                                                                                                                                                                                   I        x While looking anto the viewfinder, you can
            realize that the camera has switched over to the
          flash photography mode because the meter
         needle moves to the designated f/stop. How-
           ever, this will sometimes mislead yott as is the
         case when the f/stop designated for AE flash
H       photography happens to be the same as that for          normal AE photography.
         Therefore, when you want to perform flash
          photography,  it is best to release the shutter
         making sure the pilot lamp lights up.
         I  with tho Main Switch off
        When you turn the main sruitch off, the pilot
      .   lamp will go out. In this instance, the flash's
         and camera's connecting circuits will be cut off
        and you will be able to perform normal AE
          photography.
     "    * After  f inishing your  f lash photography,
ki         . be sure to turn the main switch off so as not to
-.    1          eo4?;rtrre arainingtheba-tte-ries.--.=.==----_---    |..
F.j      I   Self-Timer
           Press the shutter button only after confirming
           the lighting of the pilot lamp.
H      I   Testing the Flash
          After the pilot lamp lights up, depress this pilot
         lamp. Then, if a flash is fired, you know the
            flash is functioning correctty.


          Manual Aperture Flash photography
           with FL Lenses
     When you are using a FL lens which does not allow
       automatic exposure control, you must set the
         lens's aperture manually.
       Setting on the AE-l and Lens.
      1. At any shutter speed except "8" the shutter
          speed will be automatically set at 1/60 sec.
      2. After selecting the f/stop prescribed for auto-
          matic flash photography, set that f/stop on the
            lens manually.
View original page 6Page 7 · Read text
Step for Flash Photography
   1. Set the AUTO/MANU. switch to the red posi-
       tion or green position.                                     v
   2. Turn the aperture ring of the lens to be set at       c
       the designated f/stop.                                      c
   3. Turn the main switch on.                                                                            li
   4. After confirming the limits at the auto working       c
      range, look into the vierarf inder and focus.       z
      After the pilot lamp lights up, release the
        shutter.                                                                 1,
   x The camera will not automatically return to the
     AE photography mode in this case.


                                                                              2,
   tr   Manuat Aperture Flash Photography    T
   Like ordinary flash units, you can also perform
   flash photography by operating the aperture ring
  manuallv.                                                                                         r                                 _.***r4,         - |   Settings on the AE-l
   1. At any strutter speed except "8" the shutter
      speed will be automatically set at 1/60 sec.
   2. Disengage the aperture ring from the  " A"
     mark and set the aperture manually after you
       decide on one..
   Step for Flash Photography
    1. Set the AUTO/MANU. sruitch to the MANU.
        position. This will cut off the automatic aper-
       ture control circuit.                                      I
   2. Look into the viewf inder and focus.
   3. After determining the subject drstance, read
       the distance scale on the flash unit's calculator
       dial and set the corresponding aperture on the
       lens. When the correct aperture falls between
      two f/stop numbers, set at the smaller f/stop.
   4. Turn the main wvitch on and depress the                                                                                                                                         . t       shutter button after the pilot lamp lights up.
   5. The manual aperture control "M" signal inside
       the viewfinder flashes on and off and the meter
       needle fixes itself in the uppermost position.        I
   x The guide number allocated to this Speedlite
     155A is a figure obtained 30 seconds after the
       pilot lamp has lit up when new batteries are
      loaded. Therefore, when you wish to depress
      the shutter button immediately after the pilot   O
                                                                                                                                                                            .     lamp lights up, open the aperture by half an        f
l*2    f/stop.

                                                                        2.


   Since the Canon AT-1 is not an AE (Automatic       3.
   Exposure) camera, it is necessary to manually set
   the lens aperture to the prescribed f/stop for auto-      4.
   matic flash photography. However, at any shutter
   speed except "B" the shutter speed will be auto-      5.
   matically set to the X synchronization speed of
   1/60 sec. when the 155A is charged. Refer to Part II
   regarding more detailed operation.                           6.
View original page 7Page 8 · Read text
www.butkus.us

   When you use the Canon Speedlite 1554 with
    other cameras,  it  will function as a normal
    computer flash or manual flash. But, when you use
       it with a camera which does not have a directly
     coupled contact,  it is necessary to use a Synchroni-
     zation Cord A which  is available separately.
    1. Mount the 155A onto the accessory shoe of the
        camera.
     When you use the 155A with acamera which
       does not have a directly coupled contact, insert
       the Synchronization Cord A into the synchro
     ;   cord socket on the side of the 155A's base,
      mount the 155A on the canera, and insert the
       plug of the synchronization cord into the flash
        terminal of the camera.
    2. Set the shutter speed dial of the canera to the
     X synchronization speed.
      I  Automatic flash photography is performed
      when the AUTO/MANU.  srvitch is set either to
       the rd position or to the green position while
      manual flash photography is performed when
    I  tn"AUTO/MANU.ffi-
     ,   position. When performing automatic flash
       photography, read the prescribed aperture
        scale, and set that f/stop on the aperture ring
       of the lens. After setting the aperture for auto-
       matic flash photography, turn the main switch
       '   on. Then, focus within the auto working ranges.
    A picture should be taken after the pilot lamp
          tights up.
     !  Manual flash photography is performed when
       the AUTO/MANU. sruitch is set to the MANU.
        position. In this case, after focusing you should
       read the aperture corresponding to the subject
       distance on the flash unit's calculator dial and
       set that aperture on the aperture ring of the
       '    lens. Turn the main sruitch on and take a pic-
        ture after the pilot lamp lights up.
   x When performing flash photography immediate-
       ly after the pilot lamp lights up, open the
        aperture by half an f/stop.
   x When using the Speedlite 155A on cameras
      with lenses that have coupled guide numbers,
       set the AUTO/MANU. switch to the MANU.
       position and set the camera guide number to
    .   17 or the nearest number less than 17.
   Other Notes
    1. After vou are finished taking a shot in auto-
     matic flash photography, :uecersive !ls*r
-,.__ photography can be performed continuously
       as long as the pilot lamp does not go out.
    2. There is a case when the flash exposure may
       differ more or less depending upon factors
       concerning the subject and background. For
       example, this happens when there is no back-
      ground or when the sublect or the background
        has a high reflectivity.
   3. ln cold climates, keep the batteries warm so
        that they will always be ready for use.
    4. The batteries must be replaced with four new
       ones of the same type at the same time.
   5. ]f the 1554 will not be used for a long period
      of time, the batteries should be taken out of
       the battery chamber.
   6. After the completion of flash photography,
       turn the main switch off.


   CANON lNC.   ,,  ,r. r,r" 3.chome, Mrnato.ku. Tokyo 108, Japan
    PUB. IE1O29A   0677N65   PRINTED  IN JAPAN
View original page 8From the M. Butkus archive. Original publisher and archive notices are retained.
Check the model and edition against your equipment.
PDF verified 2026-10-10.