Movie cameras & projectors
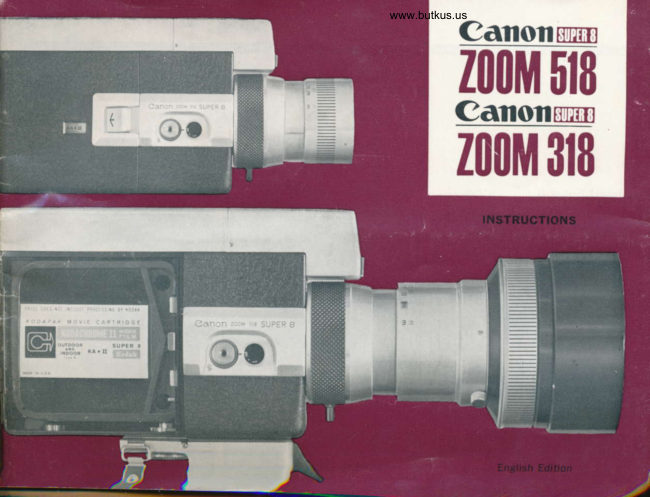
Canon Zoom 518 / Zoom 318 movie camera User manual
User manual for Canon Zoom 518 / Zoom 318 movie camera. 36 pages in English. Read the original PDF, download or print a copy without registration.
36 pagesEnglish10.7 MB PDF
Loading your manual…Open PDF directly
Document details
- Brand
- Canon
- Model / document
- Canon Zoom 518 / Zoom 318 movie camera
- Document type
- User manual
- Language
- English
- Pages
- 36
- File size
- 10.7 MB
- Category
- Movie cameras & projectors
- Document date
- Not specified in catalog
Search available document text
Find a term, then jump to its page in the original PDF. Image-only pages may not be searchable; check the PDF for exact wording and diagrams.
Page 3 · Read text
www.butkus.us


Film Type                  Shutter Lc:k
window                         Dial
    Side Cover
    Latch

         Shutter Release
         Button

     s$
View original page 3Page 5 · Read text
Venmo @mike-butkus-camera  Ph. 2083
PayPal Name  Lynn@butkus.org      www.PayPal.me/lynnbutkus
View original page 5
Page 6 · Read text
www.butkus.us

      I

lnsert Super 8 film cartridge.     Remove the lens cap.             Look through the viewfinder.
View original page 6Page 7 · Read text
Focus, and check whether the
exposure meter needle is within      Rotate zooming lever and          Press the shutter release
the proper range.                    adjust size of subject.                   b utto n.
View original page 7
Page 8 · Read text
www.butkus.us


   1l


FEATURES OF SUPER 8 SYSTEM
Simple Film Loading                            Golor Temperature Gonversion Filter
Canon Zoom 51.8 and 318 incorporate the new  A Color Conversion A type filter for conversion of
Super 8 system. Just slip in the entire Super 8    color temperature has been built into the optical
cartridge which holds a continuous SO-foot length of   system. This enables the use of tungsten type film
film.                                           in daylight. When shooting under artificial light,
Film Speed is Automatically Set                  the conversion can be easily made by simply setting
The Super 8 cartridges have differently positioned    upright the filter conversion pin on the trigger grip.
slots according to the type of film. Therefore, when   When using daylight film from the beginning, the
                                                                     filter is automatically removed with the insertion ofthe film cartridge is slipped into the camera the film
speed is automatically set and properly exposed    the film cartridge and shooting can be performed
pictures can always be shot.                           in that condition.
View original page 8Page 9 · Read text
SPECIFICATIONS
    Ganon Zoom 518                                   Filming speed :  18 fps.
                                                                                             micromotor    Type: 8mm cine camera, employing Super 8 film   Film Drive:   Electrically powered
       cartridge. Not necessary to turn cartridge over.      provides continuous automatic filming of the full
    Frame Size : 4 x 5.4mm Super 8 size film.         15m (50ft.) length of the film.
     Lens :  F 1.8 with zooming range of 9.5-47.5mm.   Power for Drive: Three 1.5V penlight batteries.                                                                                              battery switch with con'         L L-component, 14-element construction. Zoom    Shutter Release :  Mercury
        ratio, l:5. Zooming is manual by rotation of lens     tinuous running and safety lock.
        barrel. Zoom range can be extended to super'tele'    Footage Counter: Countable up to Soft. Automati'                                                                    cally resets when new cartridge is inserted.       photo  ( 15.6-78mm) with optional tele-converter.                                                                                           For checking film advance'     Viewfinder :  Parallax-free single lens reflex type,    Film Transport Indicator :                                                          ment.        including 4 prisms and 11-element lens construc-                                                       Battery Tester :   Push-button actuated indicator      tion. Built-in prism screen focusing system and     shows power level of micromotor batteries.
      exposure meter indicator: Eyepiece can be adjust'     Size :  206 x 1O1 x 55mm (8lr/stt x 4" x2l/g"lI    ed to the eyesight of photographer.                 Weight :   l, L0O grams (2\b. 6l/z oz.l
                                                                                                                                                                                                                                                                                                                         - co n veTter T3x, etc.    Exposure Meter: Through-the'lens system, with    Acces s o rlEi: Trl geeaEaiF4, te   I e        highly sensitive CdS meter. Batteries for EE sys'
      tems are two 1.3V  fi 625.                    Ganon Zoom 318
                                                                                                                                                                                                                                                                                               :    EE System: Film sensitivity, filming speed and    Similar to model 518, with the following exceptions                                                           F 1.8 with zooming range of 10-30 mm.       aperture setting are coupled. Aperture warning    Lens :                                                                        1 :3.   1O-component, l'2'element      marks for under- or over-exposure are shown in    Zoom ratio,                                                                  construction.       viewfinder. Automatic adjustment for filters.                                                 Focusing: Zone focus system, set by rotation of     Film Speed Range : With tungsten type film, ASA      front lens.
     25-L6O. With daylight type film, ASA 16-100.    Viewfinder : Contains 4 prisms and 12-element lens      Film sensitivity is set automatically'.                    construction.
    CCA Filter :  Built into camera, automatically  cor-   Bod" Color: Brown       rects for exposure of tungsten film for daylight    Size: 199 x 101x 55mm (7Te" x4" x216"lI      use. Determined by cartridge used, or manually Weight: 1,050 grams (2\b. 4s/aoz.l
      from outside.                              Note  : llo  TeTe-convelter lS avallable tOrtnsmodel,
View original page 9Page 10 · Read text
www.butkus.us
                             MERCURY BATTERIES                it'B . $
                                               Before inserting the mercury batteries into the
                                             camera, wipe all poles clean of all fingerprints
                                                 or stains with a dry cloth. Unclean batteries may
                                                cause corrosion and damage the contact points.
Before using Canon Zoom 518 or 31g, load it with                                       lWhen not in use for a long period, remove the
the two mercury batteries packed in a separate    mercury batteries and keep in a dry place.envelope.  lf the batteries are not inserted, the
electric eye (EE) mechanism will not function.

 a
  I                     2
View original page 10Page 11 · Read text
www.butkus.us
LOADING OF MERCURY BATTERY

                                                  Screw in the inner cover of the mercury batteryI  Remove the outer cover of the mercury battery
                                          knob       compartment by turning it to the right. t             bv turning the outer cover   ffTf""t$.:nt
                                                       Attach the outer cover of the mercury battery                                                                  f                 inner cover of the mercury battery                                                      compartment.                                                                          l,               by turning it to the left.2:;;mi5.                                        lBe sure the mercury batteries are inserted in the
        the central contact side of the two mer.    correct direction. Otherwise the EE mechanism
         batteries inwards and insert.                    will not function properly.3:::;
3
View original page 11Page 12 · Read text
10
REPLACING OF MERCURY BATTERIES

When the shutter lock dial is set at L the EE circuit       i Use two 1.3V f 625 batteries of the same make                                                                                                        -is cut off. When set at R or O the electric circuit    equivalent to Mallory RM 625, Eveready E 625,
is switched on and the exposure meter functions.    GE f 625, National M-1D, Toshiba TH'MC. A mercury
1f the exposure meter needle inside the viewfinder    battery can ordinarily be used for one and a half
does not move after setting the shutter lock dial at    yea rs.
R or O and aiming the camera at the sky or other      I Be sure to replace the two mercury batteries
bright places, the mercury batteries m ust be re-    sim ultaneously.
placed.


                T
View original page 12Page 13 · Read text
POWER FOR FILM DRIVE AND                         www.butkus.us
  EYEPIEGE ADJUSTMENT
.   LOADING OF DRY BATTERIES                           Insert three 1.5V penlight (size AA) batteries,
                                                                               facing towards the front       Loosen the battery compartment opening-clos-        with the (*) poles     I        ing knob by turning it to the left.                     according to the instructions inside the battery      t                                                 compartment.
'              the top cover by sliding it backwards.                                            lWhen the camera is not to be used for a prolonged
   zRemove                                          period of time, remove the dry batteries.
View original page 13Page 15 · Read text
www.butkus.us

BATTERY CHECK                                                          lf the needle is in the blue zone, it means the
                                                                 batteries have sufficient capacity. lf the needleAfter the dry batteries have been loaded, check to                                                                   means the batteriessee whether the capacity of the batteries is suffi'          is not in the blue zone, it
                                           must be replaced.cient.
    Press the red button at the bottom of the camera      f Always check the battery tester before shooting.a
 I and check the position of the needle seen in  I  the battery test window.
View original page 15Page 16 · Read text
LOADING AND UNLOADING OF
                     FILM CARTRIDGE     FIIM

                                                                                cover                                        I  OOen the side cover by sliding the side                                     latch in the direction of the arrow.                                         I
                        6Slide the Super 8 film cartridge in, right.side.
cAN0N Z00|v| 518                  f   up, towards the front of the camera, and                                 r  ssl the film cartridge into position by pressingthen
cA1'|0N Z00lvl 3l I           down on  it.
                         fctose the side cover by pressing it.
            U
                    I
View original page 16Page 17 · Read text
www.butkus.us                                15
                                                                                                        HI|.fIin
    Set the shutter lock dial at R and press the    further until F appears, and then take out theI                                                                                            end||   thutter button.  lf a film winding sound can be    cartridge. No flip over or rehandling at the
    heard and the white dot in the film transport     is necessary.
 indicator revolves, it means preparations for shoot-   lThe footage counter automatically resets to 0
 ing have been completed.                       when the cartridge is taken out.
E The super 8 cartridge contains a continuous
Jl  SO-toot length of film. Stop shooting when the
    footage counter indicates 50, advance the film
 -a


                                            0.40.30.20.10.0
View original page 17Page 18 · Read text
SHOOTING                    NIIIM

                      FOCUSTNG-CANON ZOOM 518
                              Turn the focusing ring and get the subject into focus.
                          Canon Zoom 518 has a prism screen rangefinder
                                     built into the center of the viewfinder. Adjust thecAt{0t{ z00M 518                                focus so that the subject can be seen most clearly
CAN0t,| Z00frl 318             through this prism screen rangefinder.
                          The aligned image can be seen more accurately and
                                    easily the longer the focal length of the lens. The
View original page 18Page 21 · Read text
www.butkus.us
                                                                                                        F{lflfin

I  SHUTTER RELEASE BUTTON                             I  Safety Lock   When the shutter release button is pressed, shooting      When the shutter lock dial is set at L, the mer-                                                                        I    starts and the footage counter advances simulta-       cury battery circuit is disconnected. The shut-
I    neously. The shutter lock dial must be set at R.    ter release button is also locked and prevents in-
   The shutter lock dial performs the following two    advertent film advance.
    functions   :


                                                  iL s-
View original page 21Page 22 · Read text
HIEilTI

fi  Running Lock                         CABLE RELEASE SOCKET
f   S"tthe shutter lock dial at R and then press the   When shooting movies using a tripod, use the cable -  shutter release button. Next, if the shutter lock     release by screwing it into the cable release socket.
dial is set at O, while still pressing the shutter
release button, the shutter release button will re-
main in a pressed down condition even after the
finger is taken off the shutter release button.

                       2


                                                          Turn while pressing the shutter release button.
View original page 22Page 25 · Read text
www.butkus.us
                                 FOLDING TYPE TRIGGER GRIP
usE oF AccEssoRtEs
                                            The shutter can be released while firmly holding the
                                              camera by the trigger grip. Use of the trigger grip is
                                            recommended for easier handling.
                                                                 I   Unfold the grip, align the connecting parts of the
                                                                  I  grip and camera, and attach the grip onto the                                                 camera by screwing the attachment screw into
                                                       the tripod socket.
View original page 25Page 26 · Read text
||   Hold the grip with the right hand and pull the    verting the color temperature becomes necessary.
f    trigger. The shutter will function and the film   To eliminate the trouble of attaching a filter every
I    will advance.                               time you want to shoot in daylight, a Color Con'
ti  Wfren folding the grip, pull the lever down'    version A type filter has been built into the optical
                                                                                                 shooting                                                                                            for daylight                                                                           Thus,                                                             of the camera.!   waras.                                      system                                                                                 as it                                                                                 the camera                                                               you use                                                               type film                                                  with tungsten r  TRIGGER GRIP AND COLOR TEMPERATURE                                                                                        is.ll  coruvERsroN-r When tungsten type film is used for daylight    In case you want to shoot under artificial lighting,
shooting, a Color Conversion A type filter for con-    stand up the color conversion filter cancellation


                                                                   .i\ii                    l
View original page 26Page 27 · Read text
www.butkus.us

pin of the grip before attaching it onto the camera'    Please bear in mind that proper color photo'
This pin will eliminate the built'in Color Conversion    graphV cannot be performed  if the above'mentioned
A type filter from the optical system and shooting    manipulations are not followed correctly.
under artificial lighting becomes possible. Use of                                     lWhen using black and white or daylight typeblue lamp is not necessary. You may use ordinary    color films, the Color Conversion A type filter is
flood lamps or spotlights.                              automatically eliminated with the insertion of the
lWhen the grip is not attached to the camera, or    film cartridge. When shooting under artificial light'
when the grip is attached to the camera with the    ing with daylight type color film, use blue lamp or
color conversion  filter cancellation pin folded, the    Color Conversion B tYPe filter.camera is set for daylight shooting'
View original page 27
Page 28 · Read text
26
 REMOTE CONTROL SWITCH

 With the use of the remote control switch you can      When the release button of the remote control
 operate the camera from a distance.                     switch is pressed down and slid in the direc-
     lnsert the plug of the remote control switch        tion of the arrow. the film advances and is set
    cord into the remote control switch socket of    into running lock condition.
                                        lWhen disconnecting the cord of the remote con-I  the camera.                                                                trol switch from the camera, be sure to return the    Set the shutter lock dial ?t . , while pressing                                                      shutter lock dial of the camera to R first.    the shutter release button, to set the camera                                                                                 lf the cord of the remote control switch is discon-2  in running lock condition.                                                    nected from the camera before the shutter lock


  www.buktus.us
View original page 28From the M. Butkus archive. Original publisher and archive notices are retained.
Check the model and edition against your equipment.
PDF verified 2026-10-10.