Film cameras
Canonet QL 28 User manual
User manual for Canonet QL 28. 24 pages in English. Read the original PDF, download or print a copy without registration.
24 pagesEnglish3.7 MB PDF
Loading your manual…Open PDF directly
Document details
- Brand
- Canon
- Model / document
- Canonet QL 28
- Document type
- User manual
- Language
- English
- Pages
- 24
- File size
- 3.7 MB
- Category
- Film cameras
- Document date
- Not specified in catalog
Search available document text
Find a term, then jump to its page in the original PDF. Image-only pages may not be searchable; check the PDF for exact wording and diagrams.
Page 3 · Read text
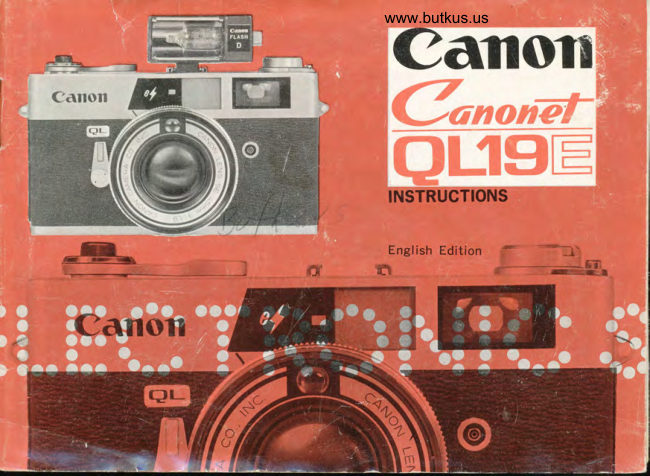
Canonet eL tgE is one of the highest perfor.mance cameras in the world, incorporating the threeiirt  aArinced mec,hanisrns- in the camera field today--the eleuronic shutter, automatic exposure;'r;;'h;;;t;  fo,r Jtash, and the automatic fitm ioading Q.L mechanism. There are no. ape.rture or shutterscales on this iamera. Alt the necessary steps in photography are handled. by the ele(ronic shutter.
                                                                         conditions                                                 under                                                    dark                                            method,                                  shoot,                                                                                                .v'ou switch orer to                                       the EE                    youU;i;,.-bright conditions                                          -with'                                                                            lga(ing'                                                  you                                                           gi.ves                                 mechanism                           the              system, and                                                                                                                                                                                                                       .                   QLiuiomatic-'ftash                                                              ,quick                                                             dav unde_1                                                                        the                                                                              o.r during                                                                                            all  conci_irions.                                        used                             can be                                            at nighr                               thet              a cameraC;;;;:;-        dt  lgt  is                                                                        a C'anonet                                                                 owning                                                                  of                                                 enioy                                         Really                                                            l\s pleasures                                                   QL 19E.                   exposure                                     all times.                             at          lh"iioorirs
the "camera "orrrgro.f' cameras".
FEATURES OF CANONET QL 19E
 1, Electroncic Shutter : The volume of  light             inst (1) improper exposure during EE photog'    received by the CdS exposure meter is con-           raphy, (2) too long or too short a distance                                                                                                                                                        in-    verted into electrical currents and with the          durinB Flash-Auto photography, and (3)
   help of transistor, condenser and magnet             sufficient voltage of the mercury battery.    circuits the electronic shutter automatically        4. QL System : This is the revolutionary and   chooses the proper exposure. This electronic           unique automatic quick film loading mecha'
    shutter is shock-proof and highly durable'             nism developed by Canon for standard 35mm
    * Instant Response                                      film cartridge. Just place the film on the cam'
    The outstanding feature of the electronic            era and let the QL mechanism do the rest. The      shutter is its instant response to brightness                , QL mechanism winds the film quickly and
    wHen the camera is aimed at a subject'               accurately. Even beginners experience absol'
 2. Automatic Flash Mechanism : The trouble'             utely no failures' You can choose any type   some calculations that usually accompany           of film you want, color or black and white'
    flash photography have been completely eli-          from among the numerous varieties of 35mm
    minated. There is also no need to memorize            film cartridges.
    the guide numbers of the flash bulbs. Flash             5". ...Sharp Lens and Durable Body Structure:
    photography  is now as simple as EE photog'          The photographic qualities and color balance
    raphy because the proper exposure is auto'            of the Canon lens have already been proven
     matically set in accordance to the distance           throughout the world. The 45mm F1'9 lens    betwen the camera and the subject.                    of the Canonet, which established a new
 3. 3-Way Warning Lamp: The warning lamp           world record by selling over 2 million units'     that lights up inside the viewf inder is a safety               is guaranteed for the most uniform quality'
    device that warns the user from taking badly            Tfre boOy structure -of Canonet QL 19E is also
    exposed shots. This warning lamp warns aga'           guaranteed for durabilitY.
View original page 3Page 4 · Read text
www.butkus.us


Keep this page open while reading the instructions in the manual.
This will permit the position of each designation to be seen at a glance. On the
last page there is a photograph as seen from the opposite side.
View original page 4
Page 7 · Read text
r{F
               FoR cANeNEr    re                          elfseecrFrcAnoNs
 Type  :         35mm electronic shutter type EE camera.
 Lens    :            Canon lens SE 45mm Fl.9
                   5-element 4-component construction.
 E lectronic Shutter:F1.9 1 15 sec. - F16 I 5OO sec.    Programmed EE shutter witFi electronic                     circuits. 6 transistors, 3 diodes 1 condenser built-in.AUTO. Flash switch type
                   Shutter speed for flash photography  ...  1 30 sec.
                 Power source  . . . One MP type mercury battery.
Fifm Speed Scale: ASA 25-4OO.      DIN 15-27
Exposure Adjustment : Uses high performance CdS exposure meter. Accurate automatic exposure
                  adjustment with electronic shutter. EE Working Range: EV 5.8-17.
Finder:            Double-image superimposing system, coupled rangefinder. Marked finder with
                    parallax error automatically corrected. Under-exposure warning lamp indicat'
                   ing flash photography inside viewfinder.
Flash Synchronization : Shutter speed for flash photography  . . .  I 30 sec.
              When using directly connected type Flash D (exclusive for AG-1B bulb), calcula-
                    tions for flash photography are completely unnecessary due to automatic adjust-
               ment of aperture. When the distance from camera to the subject is improper I
                   for  f lash photography, the distance ring cannot turn. Synchronized to Canon
                   Speedlite 1OO, and aperture is automatically adjusted. With JIS B type socket.
Self-Timer:     Built in type coupled to electronic shutter.
Film Winding:   Single operation 120" winding lever type.
Film Loading:   Automatic film loading system with Canon's unique QL device. Uses standard
            35mm film in cartridge.
Film Counter:       Self-resetting type.
Film Rewinding:   Press rewind'button and rewind with crank.
Size   :              140 x 79 x31mm (lens protrusion  . . . 35mm)
Weight:         760 grams.
View original page 7Page 8 · Read text
www.butkus.us


                                                                                                                                                      ;.1

Load the mercury battery. The battery in a separate     * Clean mercury battery thoroughly with dry  cloth
envelope  is the power source for the electronic shutter.     before insertion. Perspiration or  fingerprints may
   I   Insert a coin into the groove of the mercury bat-    cause corrosion. Be cdreful not to insert an unclean
     tery compartment cover, turn  it to the left and     battery as it may damage the camera contact point.
remove the cover.                                            * When the camera is not to be used for a long period,
  f   Face the central contact of the mercury battery    remove the mercury battery and keep in a dry place.     inwards and insert. then screw the cover back in.    Gheck t.he mercury battery after loading it.
* For mercury battery, the National M'1P, equivalent     Press the battery check button while looking through
to the United States Mallory RM-lR is used.             the viewfinder. lf the red lamp, situated at the central
Life of the batteries under continuous use is approxi-    top part within the viewfinder (same as the flash pho-
mately two years.                                   tography indicating lamp) lights up, it means the
* Be careful not to insert the mercury battery in    mercury battery has sufficient voltage. When the
reverse. lf the (+) and (-)  poles of the battery are    lamp does not light up, replace the battery.
inserted in reverse, the shutter will remain open    The service life of a mercury battery is approximately                   release                                       is pressed.                        buttonwhen     the          shutter                                           Open    two years. After one year of use, however,  it is recom-                                     release button                            shutter                   press the             and    backthe         cover
and check to see whether the shutter blades open and    mended to check the voltage every now and then.
close.                                         The red lamp can be distinctly seen if the battery is
                                                    checked while aiming the camera at a dark place.
View original page 8Page 10 · Read text
t                                                       www.butkus.us


     I   Open the back eover.              2    Insert cartridge.
        Pull the back cover lock and the back         Raise the rewinding knob fully. After the
     will rise. Next, open the back cover to maximum.     cartridge has been inserted, push the knob back
   When the back cover is opened, the QL cover    into its former position, and then insert the
   also opens simultaneously and is ready for    fork into the axis of the cartridge. In case the
    loading the film.                              knob does not fully return, it can be easily put
   x The QL cover performs a very important     into proper position by turning it slighily to the
     function in film loading. This cover automati-     left or right.
      cally opens and closes together with the open-   3   Sei tilm tip to (-) mark.     ing and closing of the back cover. Do not                                             Face the cartridge to the front.                                   4    touch the QL cover.                                                   Hold the film down with the left hand so
                                                  that it does not rise as shown in the picture.
View original page 10Page 11 · Read text
The film is not proPerlY loaded             a
                                                                                                                                                                           if the film is sagging as illustrated.


                                         Take three unexposed shots.S   Ghecking of correct film loading.     7    When the back cover is half-closed, the         Press the shutter release button and then
QL cover presses down on the film. Check   wind the  f ilm advance lever. Repeat these
through the sprocket window whether the film    manipulations twice, and the film counter will
has been engaged correctly onto the gear and   advance to O. With the next winding of the
the cartridge will not rise.                          fifm advance lever, the camera is ready for the
* lf the film is sagging and cartridge will rise,      first shot.
  the correct film loading is not possible. Please       lf film feeding is being correcily performed,
 be very careful.                         the rewind knob will rotate when the   f ilm
                                           advance lever is wound. lf film sags, remove
 6   Glose the back cover.                   the sagging by turning the rewinding crank.Merely press the cover and it will be firmly
locked.
View original page 11Page 12 · Read text
www.butkus.us


 When the camera is aimed at the subject, the    the ASA side and.2L (in green) appears on theelectronic shutter of Canonet QL l9E automat-    DIN side simultaneously.
ically selects the exposure that perfecily fits   x The click stop always functions for correcily
the brightness. When it is too dark and flash     set positions. Correct exposure cannot be
photography is necessary, a warning lamp lights      obtained if the DIN and ASA figures are set
up inside the viewfinder.                              in reverse or if only one of the figures appears
  Before using the EE mechanism for taking       in the film speed window.
pictures, prepare the camera so that the follow-    ASA and DIN Scales are as follows:
ing two conditions are fulfilled:               ASA 25 32 40 50 64 80 100 125 160 200 250 320 400                                                                          '21     Set the                speed              film                         setting                               ring                              so that                                              the   DfN 15 16 17 18 tg 20                                                                                                        27 I-                                                        22 23 24 25 26 ,         speed     film                           being                               used                                       appears               of                 the film                                                       AUTO.Flash switch-over ring andin the film speed window. For example, when   2   Turn the
using an ASA 100 film, set the film speed          set the AUTO mark to the AUTO index (y).
setting. ring so that lOO (in white) appears on
View original page 12
Page 14 · Read text
www.butkus.us


 I   Wind the film advance lever.             the rectangular frame will appear on the film.
     By winding the lever, one frame of film   As the frame is coupled to the focusing and
is advanced and the shutter is charged. Simul-   the parallax error is automatically corrected,
taneously, the  f ilm counte r advances by one   the  f ield.of .view seen within the frame will
number.                                        appear on the film in its entirety.
2   Focus while looking through the view-
           f inder.
Correct focus is obtained by turning the focus-
ing ring so that the two images seen in the
center of the viewfinder coincide completely.
3   Determine the composition.
     The field-of-view which can be
View original page 14Page 15 · Read text
o                                                                   Photography                                             Warning                       release                                             Lamp                                                                                 in EE                               button.          the shutter4   Press                                                                                                                   is lightly pressed                                                                                   button                                           When                                                                          release                                                               the shutter                                         button      *                          the shutter                    to press        It is important
gently in order to avoid blurry pictures. When      ainreddarklampplaceswillwherelight upEEwithinphotographythe viewfinder'is impossible,When
the shutter is released, the film advance lever       this warning lamp lights up, it is recommended that
can again be wound.                               you stop shooting and switchover to flash photog-
* Please bear in mind that if the shutter release but-      * raphy.When you wish to take a hard'to-get picture, fully  ton is kept pressed it  will speed up battery con-      aware that it will be under'exposed, the shutter can
  sumption.                                          be released by pressing the shutter release button
                                             down deeper.
                                                      + Press the shutter release button slowly.  lf you
                                                          should press  it all the way down quicklv' the shutter
                                                                        will be released even after the warning lamp lights
                                                             up, and the  f unctioning of the warning larnp cannot
                                                be used to full advantage.
View original page 15Page 16 · Read text
www.butkus.us


Canonet QL 19E is designed so that the cor'
rect aperture is automatically obtained when
Flash D with AG-lB bulb, Flashcube or Canon
Speedlite LOO flashed, Guide number calcula'
tions are completely unnecessary. Use the
AG-18 bulb with exclusive Canon Flash D,
For flashcube, the super-small size Canon Cube
View original page 16
Page 17 · Read text
#
                              ,fbtl
                Y
                  df
    t   Turn the AL,!TO  . Flash switch over ring     figures there are two click stops. These click
      and set the film speed figure on the ASA    stops are for the following film speeds   :
  scale for flash use, of the film being used, to            32 40   64 80   125 60   260 300
                                                                                                 4oo  the flash index mark (7)                 ASA 25(click 50    100   200
 When using Ganon Flash D                                   stops)
                                                                                                              set  iet the ASA scale figure on the ring to the   When the AUTO. Flash switch over ring is                                                 at Flash, the shutter speed is set at 1/3O sec.  flash index mark (11 for Flash D.
                                             and the aperture is coupled to the rangefindqr When using Ganon Flash Gube
  Set the ASA scale to the flash index mark (/71    and is automatically set to the correct exposure.
  for Cube.                             p Remove the accessory shoe cover and
  There. are five ASA scale  f igures for  f lash use      attach the flash unit.  (Photo. 1)
                                                       o When using Flash D' engraved on the ring. They are: 4OO, 2OO,
  1OO, 50, 25. Between each of these engraved    1. Attach Flach D to the accessol.y shoe.
View original page 17Page 18 · Read text
www.butkus.us


 Canon Flash D is directly connected type,   * In the case of Canon Speedlite 1OO, manipula-
  flash photography can be taken just attaching     tion is completely the same as when AG.IB
   it to the accessory shoe. (Photo. 2)              bulb is attached to Flash D.
2. lnsert a bulb into the  f lash socket of Canon   x When AG-l bulb is used, the film speed for
  Flash D. Use flash bulb AG-LB. (Photo. 3)                   f lash use is increased by 2 graduations. For
oWhen using Ganon Gube Flash                example, when ASA 100  f ilm is used, set the
1. Attach the Cube Flash to the accessory      flash index mark {l)  to ZOO.  shoe and plug the Flash cord into the socket       . The accessory shoe cover is to protect the
  of the camera. (Photo. 4)                                                            f lash terminal. Therefore,do not take it off
2. Attach the Cube Flash on top of the flash    when not using the flash attachment.
  unit. (Photo. 5)
 * Flash socket is for Canon Speedlite 1OO,                                   S/€E) t  t fE :  Fl{ sr/ )  Canon Flash Quint or other' flash u4its.  -
                                                    fi- otG _t/U   Cto f_)
View original page 18Page 19 · Read text
Distance Coupling Range for  Flash Photog-
                    F/t6r 8 5.6 4 2.8

                  l.3m (#             9.5p

    Q.gm$$,116
    0.8m-3.7m

 a  Focusing                                                                      i.    Press the shutter release button gently. 5  Warninglamp Against lmproper Flash                     -j   When the shutter release button is pressed,the
After focusing has been completed, slowly press the    bulb simultaneously  flashes.
shutter button down halfway while looking into the         . When the bulb does not flash.  .  .
viewf inder.                                          Replace the bulb with a new one. There are times
x lf nothing appears inside the viewfinder, then eve'   when the circuit inside the bulb is broken.
  rythine is in order for shooting. You may now press     ls the battery in working order? Replace the battery
  the shutter button all the down to release.the  shutter'    with a new one if  it is old.
x lf the red lamp on the upper part of the viewfinder      !s the battery inserted in the correct position ?
  lights up, it is a warning that the distance to the    Check to see whether the battery is inserted as shown
  subiect is too long or too short and that proper     in the diagram.
  exposure cannot be obtained- In this case, change
  the shooting distance and focus once more.
 When performing Flash-Auto photography with this
 camera the  shooting distance, wherein proper
  exposure can be obtained, differs according to the
  speed of the  f ilm used. Please refer to the diagram.
  Proper exposures can be obtained if the subiect-to'
  camera distance is within the range indicated in the
  diagr:am.
View original page 19Page 21 · Read text
Li.,:",..:,i l;lla
                                  .,:i,:?
Since no further winding is possible when the      the rewinding crank becomes slightly lighter.
end of the film is reached, rewind the film into      This means that all the  f ilm has been rewound
the original cartridge, as explained below. As      except for the leader part. Stop rewinding
the exposed film is naked within the camera,      at th is stage.
             rollthe entire                  will be ruined if the cover is                                   3   Open the back cover.opened               rewinding.        before
                                   4   Remove the cartridge. I   Press in the rewind button.                                       Remove after raislng the rewinding knob com-2   Rewind with crank.                               plete ly.
F lf the exposed film, including the leader part,        ;: Wher': the lever is wound, the rewind button   is rewound completelv into the cartridge, there       will return automatically.
  is fear of light leaking into the cartridge         't: lf winding is continued even after the  f ilm is at
 when it  is taken out of the camera. When     an end, the  f ilm will tear and rewinding will
  rewinding has been completed, the rewind     become impossible.  lf this happens, open the
  button stoos revol,rins and the resistance on      back cover in a darl< room.
View original page 21Page 22 · Read text
www.butkus.us


When the self -timer is used, the shutter  is     o The self-timer can be used for both EE or
released approximately LO seconds after the    flash photography.
shutter release button is pressed.                      r When performing EE photography under dark
L. Wind the.film advance lever.                      conditions, first, lightly press the shutter release
2. Turn the self-timer lever in the direction of    button and check to see whether the warning
   the arrow approximately 90' until it stops.    lamp lights up inside the viewfinder betore
3. Press the shutter release button fully.         charging the self-timer lever.
View original page 22
From the M. Butkus archive. Original publisher and archive notices are retained.
Check the model and edition against your equipment.
PDF verified 2026-10-10.