Light meters
Capital Spot Meter User manual
User manual for Capital Spot Meter. 7 pages in English. Read the original PDF, download or print a copy without registration.
7 pagesEnglish0.9 MB PDF
Loading your manual…Open PDF directly
Document details
- Brand
- Capital
- Model / document
- Capital Spot Meter
- Document type
- User manual
- Language
- English
- Pages
- 7
- File size
- 0.9 MB
- Category
- Light meters
- Document date
- Not specified in catalog
Search available document text
Find a term, then jump to its page in the original PDF. Image-only pages may not be searchable; check the PDF for exact wording and diagrams.
Page 2 · Read text
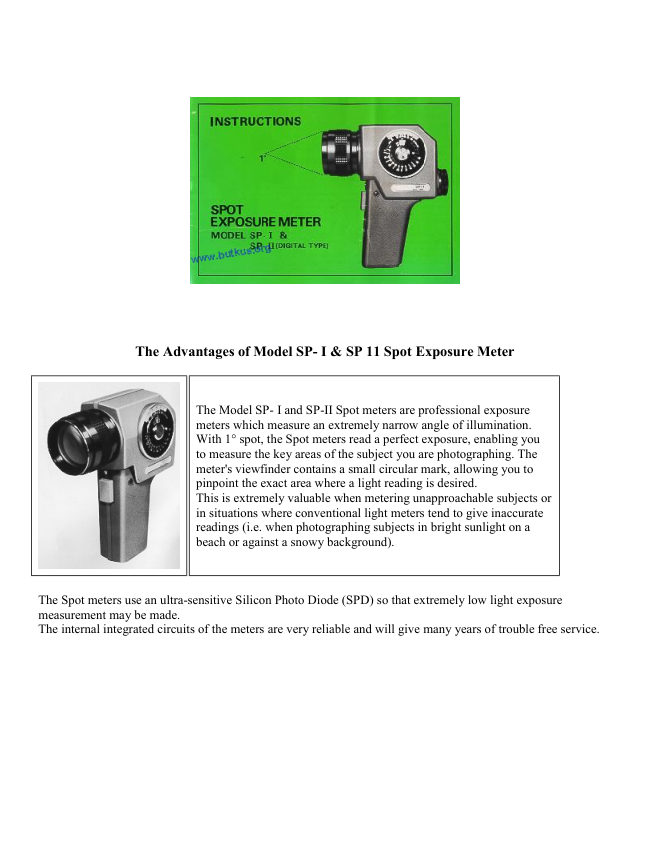
The Advantages of Model SP- I & SP 11 Spot Exposure Meter


                        The Model SP- I and SP-II Spot meters are professional exposure
                            meters which measure an extremely narrow angle of illumination.
                         With 1° spot, the Spot meters read a perfect exposure, enabling you
                                to measure the key areas of the subject you are photographing. The
                               meter's viewfinder contains a small circular mark, allowing you to
                              pinpoint the exact area where a light reading is desired.
                            This is extremely valuable when metering unapproachable subjects or
                                in situations where conventional light meters tend to give inaccurate
                             readings (i.e. when photographing subjects in bright sunlight on a
                           beach or against a snowy background).


The Spot meters use an ultra-sensitive Silicon Photo Diode (SPD) so that extremely low light exposure
measurement may be made.
The internal integrated circuits of the meters are very reliable and will give many years of trouble free service.
View original page 2Page 4 · Read text
13. Battery compartment
                   14. Socket for wrist strap
                   15. Indicator needle (Model SP- I )
                   16. LED display (Model SP-II)
                   17. Zero point (Model SP- I )
                   18. EV figures 2-18 (at ASA 100) (Model SP- I )


Operating the Spot Meter


                                                1. Loading Battery: Take off the cover of the battery
                                          case in the base of the handle and insert the battery.
                                Make sure that the battery is loaded correctly according
                                              to the plus and minus indications inside the handle.
                                           Press down on the battery and slide the cover back into
                                              place.


2. Battery Check: With the SP- I meter, the red LED lamp on the top left side of the handle grip will light
when the battery is still on good condition. When using the SP-II meter, battery check is indicated directly in
the view finder. There is no additional button to press. When the battery voltage starts dropping below usable
range, a series of 8's will appear in the viewfinder. This is an indication that the battery should be replaced.


                                            3. Setting ASA/DIN Film Speed: This is accomplished by
                                        turning the ASA/DIN scale to the required position
                                         indicated by the film speed you are using.
View original page 4Page 5 · Read text
4. Using Meter: Hold the meter body grip pointing with your fore-finder to the switch button. View through the
eyepiece and accurately place the subject you are photographing in the light sensing circle in the center part of
the viewfinder.

a) When using the model SP- I meter, push the switch button and read the number at the position where the
needle stays still.

b) When using the model SP-II meter, push the switch button and read the number that the LED display is
indicating.

Now, transfer the number you have read in the viewfinder to the EV scale. The correct combination of shutter
speeds and apertures will be indicated on the scales in the exposure dial of the left side of the meter body. You
can select a suitable combination according to your photographic needs.

5. The Model SP-Q Digital Spot meter employs a flickerless circuit, enabling measurements under fluorescent
light. A hold circuit enables the display to be frozen when the hold button is depressed. Since the model SP-II
Digital Spot meter indicates EV numbers in the finder by means of a LED digital display, metering is easy with
little chance of error. In addition, metering a subject in the dark may also be easily accomplished because of
brilliant EV display in the finder.
The meter is very simple in use. You will notice, however, that some metering situations will cause the digital
display to vary from 0.1 to 0.2 EV numbers rapidly. This is where the hold button comes into use. The hold
button is located on the side of the meter. Pressing this button will freeze the LED display at one numerical
value. Once this button is released and the trigger is released, however, LED display will disappear. This hold
button will allow you to hold the display for as long as you have this button depressed.

6. Use of Filters: In case where filters are to be used on the camera lens, the exposure reading should be made
by placing the filter in front of the meter's lens while taking a reading. This gives you the correct exposure
including any filter factors automatically.  (Filter size of 43mm)

7. Zero Adjustment for SP- I Meter: If the needle does not return to the Zero mark when the meter is not in
use, adjustment can be made by slowly turning the Zero adjustment screw to the right or left until the needle
comes to a stop in the center of Zero mark.
View original page 5
Page 6 · Read text
Methods of measurement
The Spot Exposure meter can be used in a number of ways. Among these methods are:

A) General measuring of half tone reading method: This method is used to measure a half tone area or
primary interest area of an object. In this way, the photographer is assured of a perfect exposure in relationship
to his primary interest. For instance, if you are photographing a model against a varied background, the
background would not be as important perhaps as the model's face. In order to get a proper exposure, therefore,
you would take an exposure reading off the model's face. With this method of metering, your subject would be
properly exposed, regardless of the background. This method can be employed in regards to such things as
sports events, stage scenes or other high contrast lighting situations.

B) Averaging method: This is a method to measure an average light on a subject from a camera's location.
With this method you would measure a highlight, a medium area and a shadow area. With these three readings,
you would then take an average and expose your film according to that average. If the difference between the
highlight and shadow area is within the range of reproducible contrast ratio of the film, the results will be good.
When, however, the difference exceeds this range, the highlight area will be overexposed and the shadow area
will be underexposed. For black and white film, the difference is approximately seven EV numbers. For
ordinary color film, it is approximately five EV numbers. If the difference in your scenes is greater than the
reproducible contrast ratio of the film, decide exposure value by measuring the primary subject area as in the
general measuring method.
The following two methods utilize the IRE scale:

C) Highlight or while level reading method: This method was developed especially for color television
filming, and can be applied for movie making and still photography. Reproducibility contrast ratio differs
according to film type. the ratio is 1 : 10 for block and white film and 1 :20 for television. The Spot Exposure
meter is provided with an IRE scale. On the IRE scale, the reproducible image range lies between 100% and
10%. Proper exposure can be achieved by measuring the highlight area of an object first and setting the IRE
scale on 100%. In this case, only the shadow areas to be reproduced on the color film which occur above
the 10% indicator will be reproduced. Other area having light value falling below the 10% level will appear as
unrelieved shadow. In such a case, additional illumination must be supplied.

D) Shadow or black level reading method: This method is just the opposite of the above. With this method
you will be measuring light value of a shadow area and set it on the IRE scale. At the 10% mark, the numerical
value read is an adequate exposure value. In this case, shadow detail to be reproduced on color film should
occur between the 10% index and the 100% index or light level, Other areas having light falling above this
index will appear washed out. Accordingly, when using additional illumination, it is necessary to reduce the
light value to fall within this 100% index or to increase the reflected light. This measuring method is employed
for bringing out detail of subjects with backlighting or for fully reproducing shadow area at night.

Addendum : The Spot Exposure meter comes complete with IRE scale which is designed especially for
professional photographers in the areas of television filming, movie making and commercial photographs. This
scale is based on the representative film sensitivity index used by the Japanese private broadcasting unit and
was made specifically for television viewing, especially where a strict exposure control is required.
The IRE makings also indicate the respective divisions of the linear gray scale. The triangular index in the
center which is used on most general exposure meters is the standard index and shows the average or optimum
film exposure levels. The steps between 60% and 80% on the IRE scale are generally specified as a light level
for facial tones. These will allow you to use your Spot exposure meter more effectively.
The Spot exposure meter is precision engineered to give the very best results for many years. The all plastic
body requires no special care, however, never drop or bump the meter unnecessarily. It should be treated as the
fine optical and electronic instrument it is. Avoid storing the meter in places with extremes in temperature or
humidity. The lens should be kept clean and free of finger prints. It is advisable to remove the battery from the
meter if you are not going to use it for some time.
View original page 6
From the M. Butkus archive. Original publisher and archive notices are retained.
Check the model and edition against your equipment.
PDF verified 2026-10-10.