Film cameras
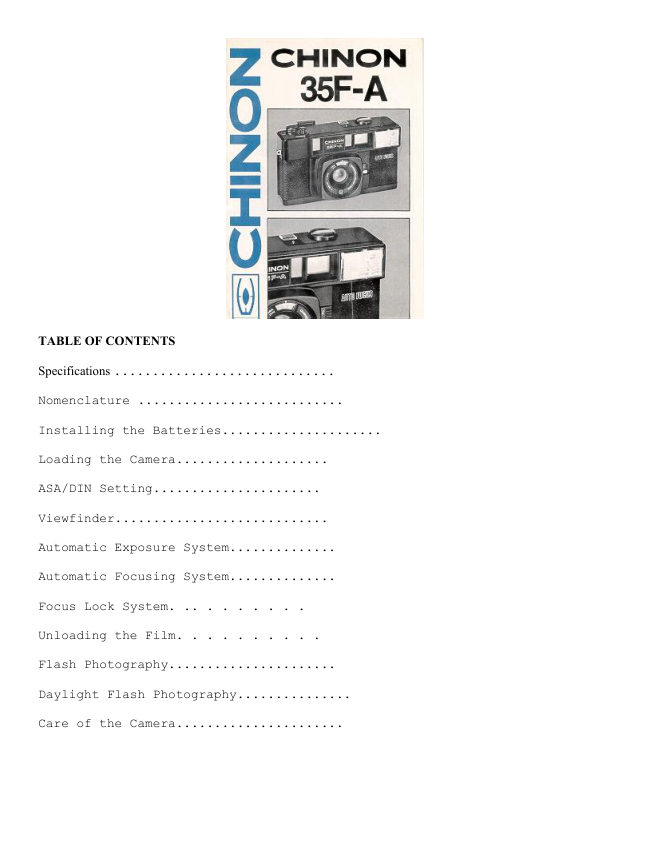
Chinon 35F-A User manual
User manual for Chinon 35F-A. 12 pages in English. Read the original PDF, download or print a copy without registration.
12 pagesEnglish0.7 MB PDF
Loading your manual…Open PDF directly
Document details
- Brand
- Chinon
- Model / document
- Chinon 35F-A
- Document type
- User manual
- Language
- English
- Pages
- 12
- File size
- 0.7 MB
- Category
- Film cameras
- Document date
- Not specified in catalog
Search available document text
Find a term, then jump to its page in the original PDF. Image-only pages may not be searchable; check the PDF for exact wording and diagrams.
Page 2 · Read text
TABLE OF CONTENTS

Specifications .............................

Nomenclature ...........................

Installing the Batteries.....................

Loading the Camera....................

ASA/DIN Setting......................

Viewfinder............................

Automatic Exposure System..............

Automatic Focusing System..............

Focus Lock System. .. . . . . . . .

Unloading the Film. . . . . . . . . .

Flash Photography......................

Daylight Flash Photography...............

Care of the Camera......................
View original page 2
Page 3 · Read text
SPECIFICATIONS

Type: 35mm EE compact automatic focusing camera with built-in flash.

Negative Size: 24mm x 36mm

Film: 35mm film

Lens: 38mm f/2.8, 4 glass elements in 3 groups.

Viewfinder: Bright frame, Parallax compensation mark and auto focus frame.
Low light level indicator (red LED), AF operation indicator (green),
    strobe ready light (orange) and focus mark.

Shutter: Programmed electric shutter (EV 6-17: ASA 100) with automatic
lock system at low voltage.
    Shutter speeds from 118-1/500 sec.

Exposure Meter: CdS automatic exposure system, ASA 25-400 (DIN 15-27).

* Focusing:  Automatic focusing system with range of 1.2M-oo (3.9 ft. -
00) with focus lock system.

Film Wind: Single stroke

Film Counter: Automatically indicates number of exposures and resets to
zero when the camera is opened.

Film Rewind: Folding rapid crank type.

Flash Unit: Built-in auto flash unit.

Guide Number: 12 (ASA 100)
                        39 (ASA 100: ft.)

Recycling Time: Approximately 7 sec. with alkaline batteries.

Effective Flash Distance:
    1.2 - 3.5 M (ASA 100)
    3.2 - 10.7 ft. (ASA 100)

Number of Flashes: Approximately 250 with alkaline batteries.

Power Source: Two 1.5 V " AA" size batteries.

Dimensions: 133 (L) x 75 (H) x 54 (W) mm    (5.24"x2.95"x2.12")

Weight:  390 gr. (13.75 oz.)
View original page 3Page 6 · Read text
INSTALLING THE BATTERIES

     1. Slide the battery compartment cover along the arrow mark
     designation with your finger to open the battery compartment cover
     located at the bottom of the camera (fig. 1).


     2. Place two l.5V "AA" size batteries into the battery compartment so
     as to correspond with the positive ( + ) and negative (—) mark shown
     inside (fig. 2).


NOTE:

If the shutter release button does not release, -replace the batteries
with fresh ones. The shutter will be locked automatically when the battery
power is below an adequate level.

Alkaline batteries are usually recommended because of their long life.

If you do not use your camera for a long period of time, remove the
batteries and store them in a dry location. This will prevent the
possibility of battery leakage and further damage to your camera.

- Do not use Ni-Cad batteries.

LOADING THE CAMERA

     1. Depress the knob located on the back cover downward and open the
     back cover (fig. 3).

     2. Pull out the rewind knob all the way and insert the film cassette
     into the chamber with protruding end toward the bottom of the camera.
     Press in the film rewind knob. If it does not go in all the way, turn
     it until it does (fig. 4).
View original page 6Page 7 · Read text
3. Insert the beginning of the film into a slot in the take-up spool
     and engage the second perforation of the film with the teeth of the
     sprocket wheel.

     4.. Place your thumb lightly over the film on the sprocket wheel and
     operate the film lever until the upper sprocket wheel engages the
     film perforations and the film is securely wrapped around the take-up
     spool (fig. 5). Make sure that the film lies net by the guide rails
     and close the back cover firmly.


     5. Depress the shutter release button, then operate the film winding
     lever until the figure (1) is set opposite the pointer in the frame
     counter window. The film is now correctly positioned for the first
     picture (fig. 6).


NOTE:

     · For safety's sake: Rotate the film rewind lever in the direction of
     the arrow until a slight tension is felt.

     · After each exposure, the film rewind crank should turn to indicate
     the film is advancing properly. If it does not, the film was not
     loaded properly, either the film became detached from the take-up
     spool or the sprocket did not engage the perforations. Open the
     camera back, remove and reload the film following steps 2, 3, & 4.
View original page 7Page 8 · Read text
ASA/DIN SETTING
     1. Turn the ASA/DIN setting ring to select the desired ASA/DIN speed
     in the ASA/DIN speed window on the lens ring (fig. 7).


     2. Film speeds are normally shown on the film box cover.

VIEWFINDER

All information necessary for perfectly composed and exposed pictures is
indicated in the
viewfinder and on the viewfinder frame.


AUTOMATIC EXPOSURE SYSTEM

Your Chinon 35F-A camera is equipped with a Cds EE exposure system which
will control the exposure
level automatically for any picture taking situation.

Low Light Level Warning

When the low light level warning LED (red) illuminates on the viewfinder
frame, it shows that the light level is too low for taking a proper
picture. In such case, move the subject into a brighter illuminated area
or turn the strobe switch to the on position to utilize the camera's
built-in flash system.
View original page 8Page 9 · Read text
AUTOMATIC FOCUSING SYSTEM

Your Chinon 35F-A compact camera is equipped with an automatic focusing
system which focuses the subject instantly when taking the picture.

     1. Center the subject within the auto focus frame since the image
     within the frame is focused automatically.

     2. Depress the shutter release and be sure the auto focus indicator
     LED (Green) illuminates on the viewfinder frame. It indicates that
     the auto focus operation has been completed. The approximate distance
     from the camera to the subject is also indicated on the symbol mark
     scale in the viewfinder.

     3. At the instant when the shutter is released and the shutter
     release button is returned to its former position, the auto focus
     indicator LED goes out and the focus needle returns to the bottom of
     the scale.

NOTE:

35F-A has an automatic locking system which will lock the shutter release
button when the battery power supply is insufficient. Replace the
batteries when the shutter release button will not operate.

The auto-focus system will not function with a subject of extremely low
contrast or successive simple patterns such as a plain wall or leaves
composed fully in the viewfinder.

Be sure that your finger does not cover the Auto-focus windows. The
windows must always be clean, otherwise incorrect distance measurement may
result.

The shutter release is also locked when the shutter release button is
depressed too fast.


FOCUS LOCK SYSTEM

Depress the shutter release button until the auto focus indicator LED is
activated and hold the position. The camera locks the focus as long as the
auto-focus indicator LED illuminates and until the shutter release button
is fully depressed. This feature may be used to eliminate tricky focusing
situations such as a distant object situated between two people. In such a
situation, first focus on one of the people, depress the shutter release
halfway until the auto focus indicator LED illuminates, hold the shutter
release in the halfway position and recompose the subjects in the
viewfinder, then depress the shutter release fully (fig. 9).
View original page 9Page 10 · Read text
UNLOADING THE FILM

When the red figure "20" or "36" (corresponding to 20 and 36 exposure
film) appears in the film counter window opposite the index mark, all the
film has been exposed.

     1. Press the rewind release button on the bottom of the camera (fig.
     10).

     2. Unfold the crank on the rewind knob.

     3. Turn the rewind crank clockwise (fig. 11). Tension will be felt
     while the film is being rewound from the
         take-up spool into the cassette. Stop rewinding when the tension
     is relieved.

     4. Open the camera back. Pull out rewind knob all the way and lift
     out the film cassette.

NOTE:
     · Do not take the film out of your camera in bright sunlight.  You
     should process the film immediately for best results.
View original page 10Page 11 · Read text
FLASH PHOTOGRAPHY

Your Chinon 35F-A camera has a built-in autoflash unit. The auto-focus
system works even in semidarkness but not in total darkness. The autoflash
can be utilized between 1.2m (3.2') and 3.5m 10.7') at ASA 100.

1. Switch on the strobe switch (fig. 12).

2. Make sure that the strobe pilot lamp is illuminated either on the
viewfinder frame or on the top of the camera (fig. 13). The pilot lamp
usually illuminates a few seconds after the strobe switch is turned to the
"on" position when the batteries are fresh.

     3. Depress the shutter release button.
NOTE:  · Be sure that your finger does not cover the flash window.


DAYLIGHT FLASH PHOTOGRAPHY

If the main subject has less light falling on it than the surrounding area
and background, such as backlit situations or when the subject is beside a
sunny window in an interior, under exposure of the main subject will
result. In such situations, use the auto flash for the photograph even in
daylight. The exposure is adjusted automatically as for normal photography
(fig. 14, 15).
View original page 11Page 12 · Read text
CARE OF THE CAMERA

Your Chinon 35F-A camera is a precision instrument. When used with care,
it will provide years of trouble-free service. Protect your camera from
dirt, rain, dampness, and excessive heat. Avoid touching the lens. To
clean the lens wipe it gently with a soft lintless cloth or tissue. Do not
use eyeglass tissues as they might damage the lens coating.

Do not use chemical solution such as benzene and thinner for your camera.

IMPORTANT NOTE:

Do not open and touch the inside of the camera as the high voltage
(approx.300V) in the flash unit circuit might harm you.
View original page 12
From the M. Butkus archive. Original publisher and archive notices are retained.
Check the model and edition against your equipment.
PDF verified 2026-10-10.