Film cameras
Chinon Auto 357z User manual
User manual for Chinon Auto 357z. 15 pages in English. Read the original PDF, download or print a copy without registration.
15 pagesEnglish0.7 MB PDF
Loading your manual…Open PDF directly
Document details
- Brand
- Chinon
- Model / document
- Chinon Auto 357z
- Document type
- User manual
- Language
- English
- Pages
- 15
- File size
- 0.7 MB
- Category
- Film cameras
- Document date
- Not specified in catalog
Search available document text
Find a term, then jump to its page in the original PDF. Image-only pages may not be searchable; check the PDF for exact wording and diagrams.
Page 2 · Read text
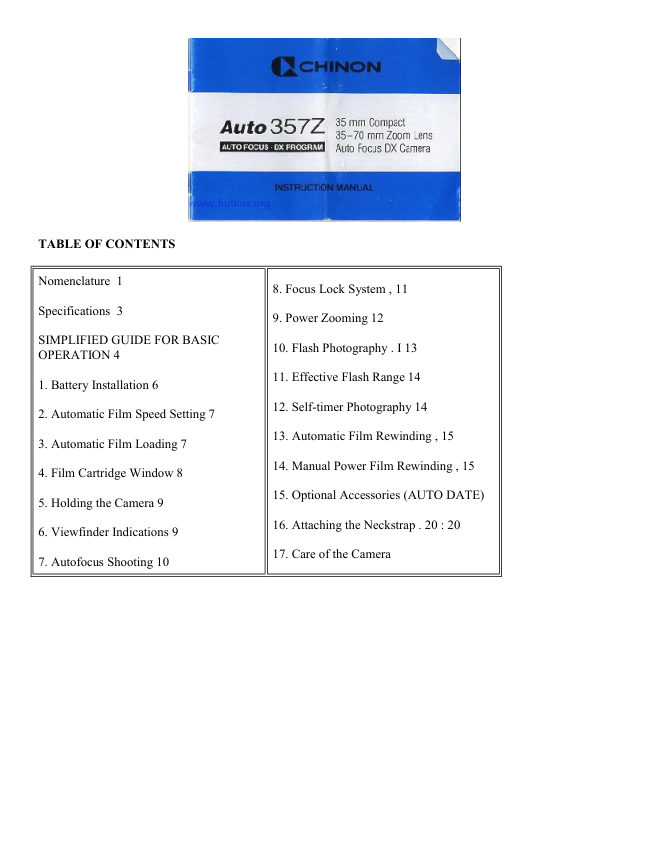
TABLE OF CONTENTS


Nomenclature 1
                                                 8. Focus Lock System , 11

Specifications 3
                                                 9. Power Zooming 12

SIMPLIFIED GUIDE FOR BASIC
                                            10. Flash Photography . I 13
OPERATION 4

                                            11. Effective Flash Range 14
1. Battery Installation 6

                                            12. Self-timer Photography 14
2. Automatic Film Speed Setting 7

                                            13. Automatic Film Rewinding , 15
3. Automatic Film Loading 7

                                            14. Manual Power Film Rewinding , 15
4. Film Cartridge Window 8

                                            15. Optional Accessories (AUTO DATE)
5. Holding the Camera 9

                                            16. Attaching the Neckstrap . 20 : 20
6. Viewfinder Indications 9

                                            17. Care of the Camera
7. Autofocus Shooting 10
View original page 2Page 4 · Read text
SPECIFICATIONS

MAIN FEATURES: -35 mm compact zoom camera

-Auto DX sensing programmed AE

-Fully motorized film transport

-Built-in sensor flash

-Built-in electronic self-timer

-Long life lithium battery

FILM TYPE: 135 size film

PICTURE SIZE: 24x36 mm

LENS: Aperture ratio: F/3.7-6.9

Focal length: f/35 mm-70 mm

Zooming: Power zoom

FINDER: Type: Actual image zoom finder

Magnification: 0.41-0.78x

Coverage: 82%

Diopter: -1.0 Diopter

Finder indications: Auto focus frame, parallax compensation mark, LED Indication: OK monitor (Green LED)

FOCUSING SYSTEM: Type: Infrared auto focusing system:

AF effective range: 1.0 (35.4")--inf.

Prefocus and cancelable: Yes

SHUTTER: Type: Stepping motor controlled changeless shutter

Type of shutter release: Electromagnetic release

Shutter speed range: Approx. 1/50 sec.-1/500 sec.
View original page 4
Page 5 · Read text
EXPOSURE METER: Type: Programmed AE

Photo cell: CdS

Exposure range: W: EV 9.5-17.0, T: EV 11.3-18.8

Film speed sensing: Automatic for ISO 100, 200,

400 and 1000. ISO 100 setting for non DX films.

TRANSPORTATION: Film loading: Auto loading First frame setting: Automatic setting by closing film door


Film winding: Motorized winding                   Rewinding stop: Automatic

Film rewinding: Motorized rewinding                  Mid-roll rewind button: Yes

Rewinding actuation: Automatic                   Frame counter: Built-in

FLASH: Type: Sensor flash

Flashmatic: Yes                                        Effective range: W: 1.0-5 m (35.4"-16.4'),

Auto recharging: Yes                                T: 1.0-2.7 m (35.4"-8.9')

                                                  Recycle time: Approx. 3 seconds

OTHER FEATURES: Power source: Lithium battery pack (2CR5x1): replaceable

Battery checker: Yes
                                                         Strap: Attachable

Film door window: Built-in
                                                        Size: 137(L)x77(H)x61(W) mm (53x3.0x2.4") /

Tripod screw: Built-in: U-1/4"
                                 AUTO DATE: 137(L)x77(H)x64(H) mm /5-
                                                3X3.0X2.5")
Self-timer: Built-in: approx. 10 sec. /

                                                 Weight: 350 grams. (12.3 ounces) /3
Auto power shut off: Yes /

                                 AUTO DATE: 360 grams. (12.6 ounces) /
View original page 5Page 6 · Read text
Simplified guide for basic operation


                                                  2. Slide the main switch to the "POWER"
           1. Install lithium battery.
                                                                 position.


  3. Load the film correctly and close the      4. Be sure the frame counter shows "1" in
              back door                           the frame counter window.


                                                     6. Release the shutter by pressing the
5. Direct the AF mark toward your subject.
                                                       shutter release button gently.
View original page 6Page 7 · Read text
7. Automatic film rewinding starts at the
  end of the roll. The frame counter will             8. Remove the exposed film.
      show "S" upon completion.


1. Battery installation


                           (1 ) Use a coin and turn it toward the arrow mark to unlock
                            the battery cover. Open the battery cover by sliding it away
                       from the camera (Fig. 1).

                             (2) Place a 6 volt lithium battery (2CR5) in the battery
                        compartment in accordance with the positive (+) and the
                           negative (-) marks shown inside (Fig. 2).

                             (3) Slide the battery cover back to its closed position and
                          lock the battery cover (Fig. 3).

                         Note:

                       * When the shutter release is locked or when winding/
                         rewinding becomes extremely slow, replace the battery with
                          a new one.

                       * Battery performance declines in cold temperatures. Keep
                            the camera as warm as possible in cold weather.

                       * The lithium battery will last about three years when used at
                          a frequency of one roll of film of 24 exposures with 50% use
                           of flash on a monthly basis, at room temperature. (Chinon
                         Laboratory Testing)
View original page 7Page 8 · Read text
2. Automatic film speed setting
 The film speed is automatically set when using a DX
coded film of ISO 100 to ISO 1000 (Fig. 4). Non DX film
will be set to ISO 100. When using reversal film (Slide
Film), use films of ISO 100, 200, 400, or 1000.

3. Automatic film loading
 Always load and unload your camera in subdued light and
never in direct sunlight. This will greatly minimize the
possibility of fogging the film. (1 ) Open the back cover by
sliding the back cover release button downwards (Fig. 5).

(2) Insert the film cartridge into the film chamber (Fig. 6).


(3) Place the trimmed end of the film on the take-up spool
up to the film tip mark. Make sure that the film lies flat
between the film guides and that the film perforations
engage the sprocket teeth (Fig. 7).

(4) Close the back cover. The film will automatically
advance to the first frame and the frame counter will show
"1 " in the frame counter window (Fig. 8).

Note:

* If the frame counter does not show "1 " after the film is
loaded, open the back cover and reload the film.

* When placing the trimmed end of the film on the take-up
spool, the length of the film pulled out from the film
cartridge should not be too long or too short relative to the
film tip mark. If too much film is pulled out from the
cartridge, adjust the film length by pushing the film back
into its cartridge so that the trimmed end of the film will be
precisely placed at the film tip mark.

4. Film cartridge window
This camera is equipped with a convenient film cartridge
window so that you can confirm what type of film is being
used (Fig. 9).
View original page 8
Page 9 · Read text
5. Holding the camera

* Hold your camera firmly in both hands with at least one elbow at your side to ensure camera steadiness when
taking a picture.

* Do not cover the lens, flash unit, exposure metering window or auto focus windows with your fingers.

* Always press the shutter release button gently to pre- vent blurred pictures caused by camera shake.

6. View finder


                                             1. AF mark

                                             2. Parallax marks

                                             3. AF indicator LED (Green)

                                      Note:

                                  * When taking a picture closer than 1.2 meters
                                           (3.9 ft) the image area is indicated by the two
                                          parallax marks in the top left and right of the
                                         viewfinder. Compose the photograph within
                                          the imaginary zone extending from the corner
                                         of the parallax marks.


7. Auto focus shooting


                               (1 ) Direct the center of the AF mark toward the subject (Fig. 10).

                                 (2) Gently press the shutter release button halfway. The AF indication
                    LED (Green) in the viewfinder frame will light up (Fig. 11).

                                 (3) Fully press the shutter release button to take the photograph

                             Note:

                          * If the AF indication LED blinks continuously, the subject is too close to
                               the camera to be focused properly.
View original page 9Page 10 · Read text
8. Focus lock system


                             This feature may be used when the main subject is
                               located "OFF CENTER" in the viewfinder.

                               (1 ) Focus on the main subject by placing the subject
                              within the auto-focus mark and partially depress the
                                 shutter release button until the AF indication LED lights
                          up (Fig. 12).

                                 (2) While holding the shutter release button in this
                                 position, recompose the subject within the viewfinder
                           and fully depress the shutter release to take the picture
                                 (Fig. 13).

                                 (3) The locked focus setting will be held only as long as
                          you partially depress the shutter release button and the
                    AF indication LED remains lighted. This focus lock
                                feature can be cancelled by removing your finger from
                               the release button.


9. power zooming


                             This camera is equipped with a power zoom to enable
                          you to select the zoom range to compose the picture.

                               (1 ) Turn the power zoom lever to the right (TELE) or to
                               the left (WIDE) to change the zoom range (Fig. 14).

                                 (2) Select the ideal composition by turning the power
                       zoom lever while looking at the subject through the
                               viewfinder.

                                 (3) Press the shutter release button completely to take the
                             photograph.


Note:

* When the camera is not in use, the main switch should be turned to the "OFF" position in order to protect the
lens system from accidental damage.

* Never push or twist the lens barrel as this may cause damage to the zoom lens.

* The zoom system will not function while the shutter release button is depressed.
View original page 10Page 11 · Read text
10. Flash photography


                             This camera automatically senses the scene brightness
                           and fires the flash when needed.

                               (1 ) When the shutter release button is pressed halfway
                           and the AF indication LED blinks once and then
                                disappears, it means the flash is being charged. You must
                              wait until it glows steadily before you take a picture. If it
                            does not blink during the flash charging cycle or does not
                          glow at all, the battery is too weak and battery
                             replacement is required.

                                 (2) The flash will be fully charged in about three seconds
                        when using a fresh battery.


Note:

* The shutter cannot be released until the flash is completely charged.

* The flash will be charged even if the shutter release is kept fully depressed. The shutter will be released
immediately upon the completion of the flash charging cycle.

11. Effective flash range

         Wide                    TELE
ISO 100 3.3 to 16.4 ft       ISO 100 3.3 to 8.9 ft
ISO 200 3.3 to 23.3 ft       ISO 200 3.3 to 12.5 ft
ISO 400 3.3 to 33.1 ft       ISO 400 3.3 to 17.4 ft
ISO 1000 3.3 to 46.9 ft      ISO 1000 3.3 to 24.9 ft


12. Self-timer


                         The self-timer feature allows the photographer to be in the picture.

                               (1 ) Place the camera on a tripod or other firm support, and direct the multi
                    AF mark toward the subject (Fig. 15).

                                 (2) Press and hold the self-timer button on the top of the camera and then
                               press the shutter release button completely to start the self-timer operation
                                 (Fig. 16).

                                 (3) The self-timer indication LED will light up and the picture will be
                              taken in approximately 10 seconds. The self-timer indication LED will
                                     initially glow and then will blink for two seconds before the shutter is
                                 released.
View original page 11Page 12 · Read text
Note:

* To cancel the self-timer during its "count down", press the self-timer button once or slide the main switch to
the "OFF" position.

13. Automatic film rewind


                               (1 ) When the roll of film is completed, a delay of from two to three
                            seconds will occur before the camera automatically starts rewinding
                               the film. During the rewinding, the frame counter will count
                            backwards.

                                 (2) When the rewinding is completed, the motor will stop
                               automatically and the frame counter will reset to the start "S" position
                                 (Fig. 17).

                                 (3) Push the back cover release button down to open the back cover
                           and remove the cartridge from the film chamber. Be sure the frame
                              counter shows "S" before opening the back cover.


14. Manual rewind


                                       If you want to rewind the film before it has been fully exposed, push
                               the rewind button on the top of the camera. Use a ball-point pen or a
                                similar object which is not too sharp. The camera will then perform as
                                              it did under the "FILM REWINDING" section (Fig. 18).
View original page 12Page 13 · Read text
15. Optional Accessories (AUTO DATE)
(1) YEAR/MONTH/DAY, DAY/HOUR/MINUTES SETTINGS


                          (A) Year/month/day setting

                       Example: 24 December, 1990

                                1. With a ball point pen or similar object (fingernail), press the MODE button
                               for the year/month/day setting.

                                2. With a ball point pen or similar object (fingernail), press the SELECT
                            button to locate the "year" position. A blinking number will appear.

                                3. With a ball point pen or similar object (fingernail), press the SET button to
                                set "90".

                                4. Press the SELECT button to locate the "month" position above whose
                        number the "M" (month) indication always appears and whose number
                            appears blinking. Then, press the SET button until "12" appears.

                                5. Press the SELECT button to locate the "day" position. The blinking "day"
                              indicating number will appear. Then, press the SET button until "24" appears.


Note:
* Every time you press SET button, the number shown on the display window proceeds consecutively. When
you press and hold the SET button for more than a second, the numbers will change continuously.

                        B) Hour/minute setting

                       Example: 19:58 (7:58 PM)

                                1. With a ball point pen or similar object (fingernail), press
                              the MODE button for day/hour/minute setting.

                                2. With a ball point pen or similar object (fingernail), press
                              the SELECT button until a blinking "!" appears. Press the
                    SET button to start "00" second.

                                3. Press the SELECT button to locate the blinking
                           "minute" position. Press the SET button to set "58".

                                4. Press the SELECT button to locate the blinking "hour"
                               position. Press the SET button to set "19".
View original page 13Page 14 · Read text
(2) DATA IMPRINTING


                      When the above procedure (1) is completed, select, by
                               depression of the MODE button, the year/month/day,
                               month/day/year, day/month/year mode, day/hour/
                             minute mode or non imprinting mode that is desired.


Note:

* The data will not be sharply defined if the picture content on the bottom right hand corner of a horizontal
picture is white or yellow.

* Imprint display "-" in the upper right corner of the LCD will blink until the completion of the imprinting.

Make sure that the "-" appears lit on the LCD before releasing the shutter during imprinting.

· The Auto Date back is powered by the camera's battery. The following steps should be taken as soon as
possible to avoid any loss of date.

1. When replacing the battery, do so as quickly as possible. If the Auto Date back is left without a battery for
two to three hours, the time and date readings may be incorrect even after a replacement battery has been
installed.

2. If an incorrect LCD indication appears after the installation of a new battery, reinstall the battery in the
battery compartment or "reset" it by releasing the shutter.

3. Always check for the correct time and date indications after replacing the battery.

IMPORTANT

1. To clean the unit, use a dry cloth without any cleaning agent

2. Do not depress the buttons with sharp or pointed object such as a knife.

3. Rough handling may result in damage to the unit.

4. Keep the lithium battery out of the reach of children.
View original page 14Page 15 · Read text
LCD Information

1. Use the unit at temperatures between -1 0°C and +50°C (14°F-122°F) for normal operation of the liquid
crystal.

2. Do not expose the unit to the direct rays of the sun for a long time since the LCD may turn black at
temperatures above 60°C (1 40°F).

3. Performance of the LCD declines as the temperature becomes low.


16. Attaching the neck strap.
The strap goes alongside the body.

17. Care of the Camera

This camera is a precision photographic instrument. When used with care it will provide years of trouble-free
service. Protect your camera from dirt, rain, dampness and excessive heat. Avoid touching the lens. To clean the
lens, wipe it gently with a soft lintless cloth or tissue. Do not use eyeglass tissues as they might damage the lens
coating. Do not open and touch the inside of the camera as possible high voltage in the flash circuitry can be
dangerous. When the camera will not be in use for a long period of time, turn off the Main Power Switch and
store in a well ventilated, cool, dry place. Due to the sensitive characteristics of the micro computer built into
the camera, the camera may not operate properly even when a fresh battery is installed. It is not a malfunction.
If this should occur, turn the Main Power Switch "ON" and "OFF" or reinstall the battery again.
View original page 15
From the M. Butkus archive. Original publisher and archive notices are retained.
Check the model and edition against your equipment.
PDF verified 2026-10-10.