Film cameras
Chinon CP-X User manual
User manual for Chinon CP-X. 26 pages in English. Read the original PDF, download or print a copy without registration.
26 pagesEnglish1.7 MB PDF
Loading your manual…Open PDF directly
Document details
- Brand
- Chinon
- Model / document
- Chinon CP-X
- Document type
- User manual
- Language
- English
- Pages
- 26
- File size
- 1.7 MB
- Category
- Film cameras
- Document date
- Not specified in catalog
Search available document text
Find a term, then jump to its page in the original PDF. Image-only pages may not be searchable; check the PDF for exact wording and diagrams.
Page 2 · Read text
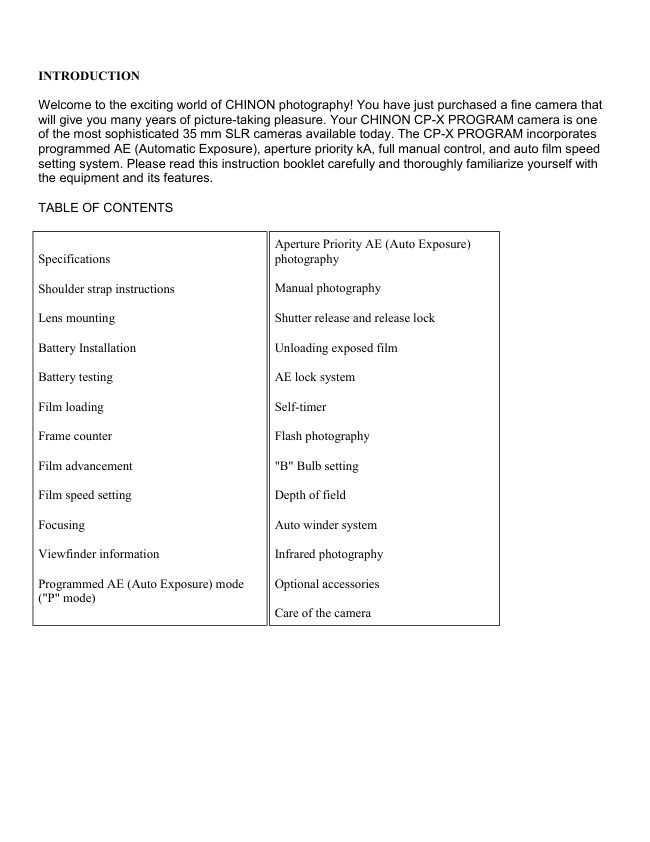
INTRODUCTION

Welcome to the exciting world of CHINON photography! You have just purchased a fine camera that
will give you many years of picture-taking pleasure. Your CHINON CP-X PROGRAM camera is one
of the most sophisticated 35 mm SLR cameras available today. The CP-X PROGRAM incorporates
programmed AE (Automatic Exposure), aperture priority kA, full manual control, and auto film speed
setting system. Please read this instruction booklet carefully and thoroughly familiarize yourself with
the equipment and its features.

TABLE OF CONTENTS


                                          Aperture Priority AE (Auto Exposure)
Specifications                            photography

Shoulder strap instructions               Manual photography

Lens mounting                              Shutter release and release lock

Battery Installation                       Unloading exposed film

Battery testing                   AE lock system

Film loading                                 Self-timer

Frame counter                              Flash photography

Film advancement                       "B" Bulb setting

Film speed setting                       Depth of field

Focusing                              Auto winder system

Viewfinder information                       Infrared photography

Programmed AE (Auto Exposure) mode      Optional accessories
("P" mode)
                                       Care of the camera
View original page 2Page 3 · Read text
NOMENCLATURE


1. Shutter release button                           5. Self-timer LED

2. Exposure mode select dial/ shutter speed      6. Shoulder strap eyelet
dial
                                                     7. Self-timer/AE lock switch
3. Film advance lever
                                                     8. Power grip attachment
4. Film counter window                       screw


9. Lens lock release lever                        15. Depth of field scale

10. Power grip (battery compartment)            16. Focusing ring

11. Accessory shoe (hot shoe)                   17. Viewfinder eyepiece

12. Film rewind knob and back opening knob     18. Metal focal plane shutter

13. Film speed dial (ISO)                        19. Film chamber

14. Aperture ring                                20. DX film contacts
View original page 3Page 4 · Read text
21. Film rail
                                               27. Take-up spool
22. Film guide rail
                                               28. Camera back
23. Power source contact
                                               29. Film pressure plate
24. Power winder electronic contacts
                                               30. Power winder coupler
25. Tripod socket
                                               31. Rewind button
26. Sprocket teeth


 SPECIFICATIONS

Type: 35 mm automatic compact SLR camera with TTL full aperture programmed AE (instant stop-
down
   re-metering), Aperture priority kA, manual exposure system, and auto film speed setting.

Picture Format: 24 x 36 mm.

Lens Mount: CHINON universal bayonet mount ("K" type mount).

Mirror: Quick return mirror.
View original page 4Page 5 · Read text
Shutter: Electromagnetically controlled focal plane shutter, stepless speeds from 1 sec. to 1/1000
sec.
  on automatic, maximum operation time at AE (A or P mode) is 8 seconds, 11 speeds from 1 to
1/1000 sec.
  on manual exposure. Electronically controlled automatic and manual exposure.

Shutter Release: Electromagnetic type shutter release with safety lock and provision for cable release.

Viewfinder: Fixed eye level pentaprism central split image with micro prism collar, 7 LED's indicate
over/
  under and proper exposure, flash ready, program kA, aperture priority kA, and manual exposure
mode.
  Slow shutter speed warning by blinking "OK" LED in viewfinder when the shutter speed is slower
  than 1/30 sec.

Viewfinder magnification: 0.87X (@50 mm, at infinity)

Viewfinder visibility: 92%

Exposure Meter: TTL center weighted full aperture system employing silicon blue cell.

Exposure Range: EV+ 1 (F1.4,1 sec.) to EV+ 19
  (F22,1/1000 sec.) @ ISO 100, F1.4/50 mm lens.

AE Lock: Built-in exposure memory lock system.

ISO Range: 25-5000 for DX-coded film with 1/3 EV segment.

  25-3200 for non-DX film with 1 /3 EV segment.

Film Advance: Single stroke in an arc of 130° with 25° stand off. Motorized film advance with optional
  power winder.

Film Loading: Multi-slot take-up spool type.

Film Rewind: By depressing the rewind button and cranking the rewind lever.

Film Counter: Automatically indicates number of exposure and resets to "S" when the camera back is
  opened.

Self timer: Electronically controlled at 10 sec. with flashing red LED.

Accessory Shoe: Hot Shoe type with "X" sync and a contact for CHINON dedicated flash.
  "X" Synchronization: "X" flash sync at 1/100 sec. with dedicated flash (1/60 sec. with non-dedicated
   flash).

Slow Synchronization: 1/60 sec. or slower at manual.
View original page 5
Page 6 · Read text
Power Source: Four 1.5 alkaline (LR44) or silver oxide (SR44, G13) batteries, or two 3 V lithium
batteries (CR-1/3N). Power Hold System: 12 sec. in manual exposure mode.

Battery Check: Built-in with LED indicator.

Accessories: CHINON power winders, Dedicated flashes, Info Back-2 data imprinting unit, Auto Date
data imprinting unit, Super multi-coated lenses, Deluxe carrying cases and many more.

Dimensions: 136(W) x 88(H) x 51(D) mm (5.35" x 3.46" x 2.01") Weight: 498 9 (17.57 oz)


SHOULDER STRAP
INSTRUCTIONS

Place the end of the shoulder strap through the retaining ring connected to the camera body lug. Fold
the shoulder strap over the retaining ring. Place the end of the strap through the plastic retainer. Pull
tight to secure. Thread the end of the strap through the metal buckle and pull tight to secure. Follow
the same procedure on the other side of the camera (Fig. 1, 2).


LENS MOUNTING

Your CHINON CP-X program is equipped with a CHINON "K" bayonet mount which accepts all
interchangeable lenses with the "K" bayonet mount. To attach the lens, match the red dot on the
camera body with the red dot on the lens (Fig. 3). Then insert the lens into the camera body and turn
it clockwise until the lens locks with a click. To remove the lens from the camera body, depress the
lens lock release lever, turn the lens counter clockwise as far as it will go, and lift it up from the body
(Fig. 4).
View original page 6
Page 7 · Read text
[Mike: note the 4 smaller batteries, 2 CR-1/3N can be used.

BATTERY INSTALLATION

       1. To remove the power grip from the camera body, turn the screw on the side of the power
       grip counter clockwise. (Fig. 5)

       2. Place four 1.5 V alkaline batteries (LR44) or silver oxide batteries (SR44, G13), or two
       lithium batteries (CR-1/3N) as illustrated inside battery compartment. (Fig. 6)

       3. Attach the power grip to the camera body by turning the screw clockwise to secure it.

NOTE:
       1. Make sure that the batteries are inserted correctly i.e., check polarity (+ and - ). The shutter
         will operate only when batteries are correctly installed and not exhausted. When replacing
       batteries, replace all batteries at the same time.

       2. If you do not use your camera for a long period of time, remove the batteries, and store in a
      dry location. This will prevent the possibility of battery leakage and damage to your camera.

BATTERY TESTING


       1. Set the Exposure Mode Select Dial to the "P" position (Fig. 7).

       2. Look through the viewfinder and depress the shutter release button halfway down to confirm
       at least one of LED indicators in the viewfinder illuminates (Fig. 8).
View original page 7Page 8 · Read text
3. When nothing illuminates, replace the batteries with a fresh set or check to ensure the
       batteries are correctly installed.

NOTE: Battery testing cannot be accomplished with the exposure mode select dial set at the "L" or
"B".

FILM LOADING


Pull up on the Film Rewind Knob until the Back Cover pops open (Fig. 9). Then insert the film
cartridge into the Film Chamber with the protruding end of the cartridge positioned to the bottom of
the camera. Push down the Film Rewind Knob and slightly turn the knob in either direction until it
"seats" properly into the film cartridge spool (Fig. 10). Insert the trimmed end of the film into one of
the slits on the Film Take-up Spool (Fig. 11).
View original page 8Page 9 · Read text
Turn the Exposure Mode Select Dial to "1000" setting and advance the film while holding the film
lightly down on to the transport sprockets. Release the shutter if necessary and advance the film until
the sprockets engage with the upper and lower perforations of the film (Fig. 12).


Then close the camera back firmly until it locks with a click. Now turn the film rewind knob gently until
all the slack is taken up and the rewind knob stops. Do not force or further rewind the film (Fig. 13).
Advance the film and release the shutter three times (Fig. 14). The rewind knob should rotate counter
clockwise as the film is advanced and the "1 " marking should appear in the frame counter window
(Fig. 15).
View original page 9
Page 10 · Read text
Turn the Exposure Mode Select Dial to the desired position. A convenient memo holder is provided
on the back of your camera. Whenever you load the film, just cut off the top of the film box and put in
the memo holder as a reminder (Fig. 16).

FRAME COUNTER


Your CHINON CP-X program is equipped with a frame counter which displays the number of
exposures made and resets automatically upon opening the camera back. At the very beginning, the
counter shows "S" indicating the start of the picture taking process. When a film is loaded according
to the procedure previously described, the counter displays "1 " indicating that the camera is ready for
the first exposure. Every time the film advance lever is fumed the counter will proceed one stop
forward. The number 24 and 36 are colored in orange to warn the end of commonly available films
(Fig. 17).

FILM ADVANCEMENT

When the film end is reached, the film advance lever may stop before the lever is fully turned. Do not
force the lever. Stop winding at once and rewind the film. Refer to "UNLOADING EXPOSED FILM."

FILM SPEED SETTING

       1. When using Decoded film: When using Decoded film, the film speed will be adjusted
       automatically no matter where the film speed dial is set. Applicable range of this auto film
      sensing system is ISO 25 to 5000. When using non-DX code film: When using film other than
     DX-coded film, pull up and rotate the Film Speed Dial to align the appropriate ISO number with
      the index mark (Fig. 18). Applicable range of this feature is ISO 25 to 3200.


NOTE: Film of the same kind may or may not be DX-coded. Be sure to check DX symbol on the film
box or DX information panel on the film cartridge before use.
View original page 10Page 11 · Read text
FOCUSING


At the center of the viewfinder is the split image with microprism collar which is then surrounded by
ground glass. When the camera is in focus the image on these focusing aids becomes sharpest.
While observing the subject through the viewfinder turn the lens focus ring until the upper and lower
split images match up to form a uniform image (Fig. 19). This split image focusing is particularly
helpful when the subject is dominated by vertical lines.


The microprism is also very helpful, when out of focus; the image on the microprism will appear to
shimmer (Fig. 20). When the focus is properly set, the subject image will be sharply defined in the
viewfinder. You can double check the focus setting by the image on the ground glass. You can also
focus indirectly.
View original page 11
Page 12 · Read text
Actually measure or estimate the distance to the subject and set the lens focus ring to the appropriate
setting (Fig. 21).

VIEWFINDER INFORMATION


                                         Manual photography
1. Program AE indication LED (green)

                                                Shutter release and release
2. Aperture priority AE indication LED (red)
                                                  lock

3. Manual exposure indication LED (red)
                                            Unloading exposed film

4. Over exposure LED (red)
                                 AE lock system
5. Correct exposure indication LED (green)
View original page 12Page 13 · Read text
Self-timer
6. Under exposure LED (red)
                                              Flash photography
7. Flash ready LED (red)
                                                "B" Bulb setting8. Split image
9. Microprism collar                                          Depth of field

10. Ground glass                                           Auto winder system

Programmed AE (Auto Exposure) mode ("P"                                                    Infrared photography
mode)
                                                Optional accessories
Aperture Priority AE (Auto Exposure)
photography                                         Care of the camera


PROGRAMMED AE (AUTO EXPOSURE) MODE ("P" MODE)

              1. Programmed Exposure mode ("P" mode)


Your CHINON CP-X program camera automatically selects the most suitable combination of shutter
speed and aperture for the optimum exposure. The programmed AE mode is ideal for general picture
taking by permitting quick and easy shooting, eliminating troublesome exposure setting according to
light condition.

1. Set the Exposure Mode Select Dial to the "P" position (Fig. 22).

2. Set the lens at its minimum aperture (Fig. 23). This setting is color coded green on your standard
50 mm lens to match the green "P" setting on the Exposure Mode Select Dial. Accessory lenses
should also be set at their minimum aperture.
View original page 13Page 14 · Read text
3. While looking at the indicator scale in the viewfinder, slightly depress the shutter
             release button. The "P" and "OK" LED indicators light up (Fig. 24). Further pressure on
             the shutter button will release the shutter. * The "OK" LED will blink when the
           programmed shutter speed is slower than 1/30 sec. Use of tripod or flash unit is then
           recommended.
II. PROGRAM characteristics


CHINON CP-X programmed AE characteristics are shown in the TABLE A. With a 50 mm F1.4 lens
both shutter speeds and aperture vary to obtain correct exposures as lighting conditions fluctuate
above EV 7 (Exposure Value 7): Below EV 7, only the shutter speed changes.
View original page 14Page 15 · Read text
Unlike other program cameras, CHINON CP-X camera accepts any existing "K" mount lens even in
the program mode. Generally, you should set the aperture at its minimum setting (largest number on
f-stop aperture ring]. Although a perfectly exposed picture will result at any selected aperture setting,
the program range is limited by not "stopping down" the lens to the minimum aperture. For example,
using the 50 mm V1.4 lens with its f/stop set at 5.6, the camera is controlled by the program
characteristics of f/1.4 through f/5.6. Beyond f/5.6, the camera is controlled by the aperture priority
automatic exposure mode (See Table B).

APERTURE PRIORITY AE
(AUTOMATIC EXPOSURE)
PHOTOGRAPHY
View original page 15
Page 16 · Read text
After you have set the Exposure Mode Select Dial to "A" and selected the desired aperture, the
camera will automatically select the stepless shutter speed from 1 sec. to a fast 1/1000 sec. "A" mode
is convenient for taking pictures at specific aperture settings based on your individual needs.

              1. Set the Exposure Mode Select Dial to the "A" position. Set the desired aperture by
              rotating lens aperture ring (Fig. 25).
              2. When the shutter release button is depressed halfway, the exposure control circuit is
            energized and will be in the monitoring stage (Fig. 26). The "A" LED in the viewfinder
                 will light up along with one of the LED's of "OK", or over/ under indication.
* OK" LED will light up when correct exposure is obtained. * If the lens F stop or the aperture size is
too large for the lighting condition, the red over exposure indicator (ok) will blink (Fig. 27). When this
happens, stop down the lens diaphragm by turning the lens F stop ring or use a film with a lower ISO
number. Another alternative is to use an ND (neutral density) filter in front of the lens.

* OK" LED will blink when the shutter speed is slower than 1/30 sec. Use of a tripod is then
recommended, or you can increase the shutter speed by opening the lens aperture.


* If the computed shutter speed is even longer than 1 sec. (semi-darkness condition), the under
exposure indicator (a) will appear (Fig. 28). Open the lens diaphragm by turning the aperture ring or
use a film with a higher ISO number, or use a flash.

MANUAL PHOTOGRAPHY

You can manually control the CHINON CP-X when the camera is set to a preselected aperture or
shutter speed. This program camera is equipped with a convenient "Power Hold Circuitry" - automatic
shutoff after 12 seconds.

1. Set the required shutter speed on the dial (Fig. 29).
View original page 16Page 17 · Read text
2. Set the required aperture on the lens. Depress the shutter release button until the meter activates
and observe which mark is indicated in the viewfinder by an LED, so that correct exposure can be
obtained (Fig. 30).


There are two methods of selecting the correct exposure (M mode]

              1. For shutter-priority selection: Set the required shutter speed. Lightly touch the shutter
             release button to activate the metering system. Rotate the lens aperture ring until
              correct exposure indication LED "OK" in the viewfinder stays lit (Fig. 31 ).


              2. For aperture-priority selection: Set the required aperture on the lens aperture ring.
               Lightly touch the shutter release button to activate the metering system. Change shutter
           speed until the correct exposure indication LED "OK" in the viewfinder stays lit (Fig. 32).
* Other features at M mode

Power-hold circuitry:
When the shutter release button is pressed halfway down and then pressure is released, the camera
circuitry stays on for 12 seconds. This permits convenient manual exposure metering without risk of
accidentally taking a picture.

SHUTTER RELEASE AND
RELEASE LOCK


Your CHINON CP-X program camera features a two stage electromagnetic shutter release with
safety lock. When the shutter release button is depressed halfway, the electronic circuitry starts
functioning. When the button is fully depressed, it will trigger the shutter. Always hold the camera
steady and gently depress the shutter release button to make an exposure. The position marked "L"
on the exposure mode select dial is the shutter release safety lock position. When this is aligned with
the index mark, the batteries are disconnected from the circuitry and an exposure cannot be made
(Fig. 33). This position is also used when the camera is not to be used for a long time.
View original page 17Page 18 · Read text
UNLOADING EXPOSED FILM


When the film in the camera is fully exposed, the film advance lever will stop. Do not attempt to force
the lever any further but rewind the film and replace with a new one. Push in the rewind lock release
button at the bottom of the camera (Fig. 34). Unfold the rewind crank of the rewind knob. Turn the
rewind crank clockwise (Fig. 35). You will feel friction as the film is rewound from the camera, back
into the film cartridge. Suddenly, when the film is rewound completely, the friction decreases and the
rewind crank will turn with ease.


Then pull up on the rewind knob to open the camera back (Fig. 36). When the camera back is
opened, the frame counter will automatically reset to "S". The rewind lock release button on the
bottom of the camera will pop out to the normal position when the film advance lever is advanced
again. Your exposed film should be processed without delay.

AE LOCK SYSTEM
View original page 18
Page 19 · Read text
This camera has an AE Lock system. Under normal circumstances your CHINON CP-X program
camera will produce perfectly exposed photographs, due to the integrated automatic exposure
circuitry. However, some lighting conditions might occur that could mislead the system, such as
subjects with a very high contrast or strongly back-lit scenes. In such cases, the exposure memory
feature should be used.

1. Make sure that the Exposure Mode Select Dial is set to the "A" position (Fig. 37).

2. Press down the Self-timer/AE lock switch to the "AEL" position (Fig. 38).


3. Look through the viewfinder and center your subject in the split microprism center spot, and
depress the shutter release button halfway. "A" LED in the viewfinder will blink (Fig. 39). The
exposure will be memorized as long as the shutter release button is halfway depressed (Fig. 40).

4. Focus and compose the subject in the viewfinder as you desire, then press the shutter release
button all the way to take the photograph.

NOTE: Be sure to return the Self-timer/AE lock switch to the normal position (kA) after use.

* When the exposure mode select dial is set to the program mode "P", the exposure will not be
memorized.

SELF-TIMER


Your CHINON CP-X program camera is equipped with an electronic self timer with a red LED
indicator. The built-in self-timer electronically delays the shutter release for ten seconds. The camera
should be mounted on a firm support during self-timer operation. To activate the self-timer, place the
self-timer switch to the upper position and depress the shutter release button (Fin. 41). You will notice
the red self-timer LED blinking and two seconds before the shutter release the flashing frequency will
increase giving you or your audience time to smile.
View original page 19
Page 20 · Read text
The self-timer may also be utilized for releasing the shutter at low shutter speeds when a cable
release is not available. If you decide not to use the self-timer, you can cancel it even after it started
to operate. Just return the self-timer switch to the normal position for cancellation.


NOTE: When utilizing the self-timer with the exposure mode select dial set at "P" or the "A", it is
recommended to block the viewfinder with an eyepiece cover or similar item to prevent extraneous
light from interfering with the automatic exposure system of the camera (Fig. 42).

FLASH PHOTOGRAPHY

Your CHINON CP-X program camera is designed with a unique flash system, making flash
photography simple. The CP-X gives a wide range of flash use, such as X sync at fast 1/100 sec.,
flash photography at slower speeds is also possible.


1. Mount a CHINON dedicated flash to the camera (Fig. 43). Set the f- stop indicated on the exposure
calculator dial of your CHINON flash to the corresponding aperture ring on the lens. Set the exposure
select dial to the "A" position (Fig. 44).

2. A few seconds after your CHINON flash is turned to the "ON" position, the flash ready light will
illuminate. When the flash has reached adequate power, the camera's shutter speed is automatically
set to the 1/100 sec. flash sync speed, and the flash ready LED (red) in the viewfinder will light up.

3. With the exposure mode select dial set at "A", after the picture has been taken and before the flash
has recycled, the camera will automatically switch to the automatic exposure mode until the flash has
once again recycled.
View original page 20
Page 21 · Read text
Slow Synchronization (Manual
Mode Flash Photography)

If you desire to synchronize at a speed slower then 1/100 sec., set the desired shutter speed by
turning Exposure Mode Select Dial (Fig. 45). The shutter will be released at the selected speed. Set
the aperture as
indicated by the flash unit.


NOTE: When the shutter speed faster than 1/100 sec. is set with dedicated flash, the shutter speed
will be automatically set to 1/100 sec. after the flash is fully charged. Other electronic flash units can
be utilized with your CHINON CP-X program camera. When using non-dedicated automatic flash
units, set the Exposure Mode Select Dial to the "60" position. This sets the correct shutter speed
(1/60 second) on your camera for flash photography with non-dedicated flash units (Fig. 46).

NOTE: It is advisable to use only CHINON dedicated flash units or units designed specially for use on
CHINON cameras.

B (BULB) SETTING


The B setting is used for shooting night scenes or long time exposures. Set the Exposure Mode
Select Dial to the "B" position (Fig. 47). The shutter and mirror will move to the open (up) position
while the Shutter Release Button is depressed. Use of a cable release and a tripod is recommended
for stability to prevent camera movement during the time exposures.
View original page 21
From the M. Butkus archive. Original publisher and archive notices are retained.
Check the model and edition against your equipment.
PDF verified 2026-10-10.