Film cameras
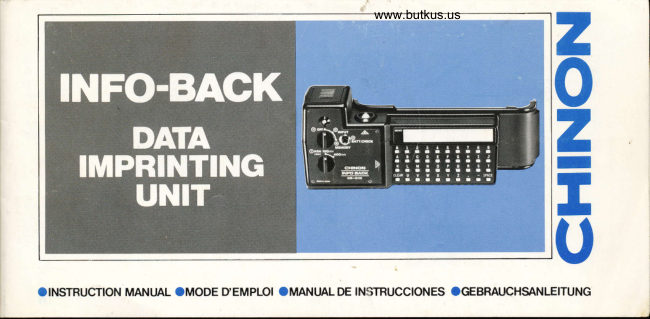
Chinon Info-back DB-010 User manual
User manual for Chinon Info-back DB-010. 29 pages in German, French, Spanish. Read the original PDF, download or print a copy without registration.
29 pagesGerman, French, Spanish8.2 MB PDF
Loading your manual…Open PDF directly
Document details
- Brand
- Chinon
- Model / document
- Chinon Info-back DB-010
- Document type
- User manual
- Language
- German, French, Spanish
- Pages
- 29
- File size
- 8.2 MB
- Category
- Film cameras
- Document date
- Not specified in catalog
Search available document text
Find a term, then jump to its page in the original PDF. Image-only pages may not be searchable; check the PDF for exact wording and diagrams.
Page 1 · Read text
www.butkus.us
                                         zoz
                                        II              U
OINSTRUCTTON MANUAL OMODE DEMPLOI OMANUALDE INSTRUCCIONES OGEBRAUCHSANLEITUNG
View original page 1Page 7 · Read text
NOMENCLATURE                     NOMENCLATURE
  .1.     Battery compartment cover                          1. Couvercle du logement de batterie
 2. Battery terminal                                  2. Contact de batterie
 3. Battery compartment                           3. Logement de batterie
                                                                         LED de charge de 4. lmprint LED/Battery voltage check LED              4. Diode LED d'impression/diode
 5. Mode selector switch                                             batterie
                                                              mode 6. ASA selector switch                               5. Sdlecteur de
                                                                  ASA T. Battery check button                              6. S6lecteur de sensibilite
 g  lmprint button                                    7. Touche de contrOle de la batterie
 9. Memo board                                     8. Touche d'impression
10. Key board                                     9. M€mo
1 1. Film pressure plate                              10. Clavier
                                                                           pression du film 12. Back cover detach pin                                     1'1. Plaque de
13. lmPrint slot                                      12. Axe amovible du couvercle arridre
 14. Back cover                                     13. Fente d'impression
15. Film cartridge pressure spring                     14. Couvercle arridre
                                                                            pression de la cartouche du film16. piezo ceramic buzzer (Audible signal)              15. Ressort de
                                                                                       1 6. Avertisseur pi6zo-c6ramique (signal sonore)


                                              @
View original page 7Page 8 · Read text
www.butkus.us
BEZEICHNUNG DER EINZELTEILE            NOMENCLATURA
  1.  Batteriefachdeckel                                   1. Cubierta del compartimiento de la pila.
  2.  Batteriekontakt                                    2. Terminal de la pila.
  3.  Batteriefach                                       3. Compartimiento de la pila.
  4.  Aufdruck-LED/Batteriespan  n u ngsprtlf -LED            4. LED de impresi6n/LED de comprobaci6n del
  5.  Betriebsartenwa  h lschalter                                estado de la pila.
  6.  Filmempf     i ndl ichkeitswahlschalter                               5.  Selector de modo
  7.  Batterieprrif knopf                                                  6.  Selector de ASA
  8.  Aufdruckknopf                                                      7.  Bot6n de comprobaci6n del estado de la pila.
  9.  Memo-Feld                                                          8.  Bot6n de impresio!n.
10.  Tastatur                                                             9.  Memoria
11.  Filmandruckplatte                                         10. Teclado
12. RUckwand-Abnehmstift                                   11.  Placa compresora de la pelicula
13.  Aufdruckschlitz                                         12. Pasador para desmontar la cubierta posterior
14. Rtickwand                                                13.  Abertura de impresion
15.   Fi  I mpatronenandruckfeder                              14. Cubierta posterior
16.  Piezokeramischer Summer (Tonsignal)                     15.  Resorte de compresi6n del portapelicula
                                                                16. Zumbador de piezocerdmica (Sehal audible)
View original page 8Page 13 · Read text
MOUNTING TO THE CAMERA:     MONTAGE SUR L'APPAREIL
                              PHOTO:Pull out the Film Rewind Knob until the
camera back pops open (Fig. 1). push      Soulever le bouton de rembobinage du
down on the retaining pin with your finger   film pour ouvrir le couvercle arridre oe
nail until the top of the back cover shaft is  I'appareil (Fig. 1). Appuyer avec un
disengaged from the hinge (Fig. 2). pull     ongle sur la goupille de fixation jusqu'd
outward at the top of the hinge until the    ce que I'axe du couvercle arridre soit
back cover is fully removed from the         libdr€ de la charnidre (Fig. 2). Extraire
camera body.                                  I'axe par le sommet de la charnidre
To mount the lnfo Back to the camera.      pour sdparer le couvercle du boitier de
reverse procedure is required.                 I'appareil.
                                          L'6l6ment "lnfo Back" se monte sur
                                                  I'appareil en suivant la procddure
                                                 inverse.


                                              @
View original page 13Page 14 · Read text
www.butkus.us
            MONTAGE AN DIE KAMERA:     MONTAJE A LA CAMARA:
                Den FilmrUckspulknopf herausziehen,      Tirar de la perilla de rebobinado de la
                       bis die Kamerarrickwand aufklappt        pelicula hasta que la parte posterior de
                     (Abb. 1). Den Haltestift mit dem             la cdmara se abra (Figura 1). Apretar
                    Fingernagel nach unten drticken, bis      hacia abajo el pasador de reteinci6n
                     sich das Oberteil der                  con la uha hasta que la parte superior
                    Rrickwandhalterung vom Scharnier lOst   del eje de la cubierta posterior se libere
                      (Abb. 2). Oben am Scharnier nach        del gozne (Figura 2).Tirar hacia afuera
                  auBen ziehen, bis die Rtlckwand ganz    en la parte superior del gozne hasta
                  von der Kamera getrennt  ist. Zum       que la cubierta posterior quede
                   Anbringen der Info-Rrickwand, dieses    completamente desmontada del cuerpo
                    Verfahren in umgekehrter Reihenfolge    de la cdmara.
                      durchf Uhren.                            Para colocar la cubierta posterior,
                                                                seguir el procedimiento de desmontaje
                                                 a la inversa.


@
View original page 14Page 15 · Read text
INSTALLING THE BATTERY:       MISE EN PLACE DE LA PILE:
Slide out the Battery Compartment Cover    Faire coulisser le couvercle du
 (Fig. 3) from the top of the Info Back. Pull   logement de batterie dispos6 au
out the Battery Terminal (with the 2 leads  sommet de l' "lnfo Back". Retirer le
attached) from the Battery Compartment    contact de batterie et ses deux fils du
(Fig. a). Plug in a 9 V transistor battery     logement de batterie (Fig. a). Y
(S-006P, 6F22, MN1604 type or           brancher une pile transistor (type
equivalent). tne correct positioning of the  S-OOGP, 6F22, MN1604 ou 6quivalent).
positive (+) or negative (-) end of the     La position correcte des bornes                www.butkus.us
battery is shown on the battery. Insert the   positive (+) et n6gative (-) est indiqude
battery into the Battery Compartment with  sur la pile. Insdrer la pile dans le
the battery terminal upward (Fig. 5) and    logement de batterie en disposant le
replace the battery compartment cover.     contact de batterie vers le haut (Fig. 5)
NOTE: The mode Selector Switch should    et remettre en place le couvercle.
be set to the "OFF" position when the unit  REMARQUE: R6gler le s6lecteur de
is not in use. Failure to do so will result in  mode sur la position "OFF" (Arr€t)
a completely drained batterv in             lorsque l'6l6ment ne fonctionne pas. Si
approximately four days. The Info Back will  I'on n'en tient pas compte, la pile est
make approximately 80O imprints with a    entidrement d6chargde en quatre jours
fresh battery.                                 environ. L'appareil permet d'inscrire
                                           environ 800 caract€res avec une pile
                                           neuve.
View original page 15Page 16 · Read text
www.butkus.us
              EINSETZEN DER BATTERIE:       INSTALACION DE LA PILA:
                Den Batteriefachdeckel  (Abb. 3) oben       Retirar la cubierta del compartimiento de
                  von der Info-RUckwand herausschie-        la pila (Figura 3) de la parte superior de
                    ben. Die Batterieklemme (an der beide      la cubierta posterior. Extraer el terminal
                    Leitungen befestigt sind) vom Batterie-    de la pila (con los dos cables unidos) de
                    fach herausziehen. Eine 9-V-Transistor-    su compartimiento (Figura 4). Introducir
                      batterie (Typ S-006P,6F22, MN1604     una pila de 9 V (Tipo S-O06P,6F22,
                    oder gleichwertig) hineinstecken. Die                                               MN1604 o equivalente). El polo positivo
                       Batterie entsprechend ihrer Markierun-     (+) y el negativo (-) vienen claramente
                  gen (+ und -)  polaritiitsrichtig einlegen.   marcados en la pila. Introducir la pila en                    Die Batterie mit der Batterieklemme                                                        su compartimiento con el terminal hacia
                  nach oben in das Batteriefach einsetzen                                                                      arriba (Figura 5), y volver a colocar la
                      (Abb. 5) und den Batteriefachdeckel                                                                   cubierta del compartimiento de la pila.
                    wieder anbringen.                                                 NOTA: Cuando la c6mara no estd
                 HINWEIS: Wenn das Geriit nicht          siendo usada, el selector deberd
                   verwendet wird, sollte der                                                              colocarse en la posicion de apagado
                      Betriebsartenschalter  auf "OFF" gestellt    (OFF). Si no se pusiese en esta
                   werden, da die Batterie sonst in etwa       posici6n, la pila se agotaria en
                        vier Tagen vollkommen leer ist. Mit        aproximadamente cuatro dias. Con un
                  einem frischen Batteriensatz kdnnen mit                                                             iuego nuevo de pilas podrdn efectuarse
                   der Info-RUckwand ungefiihr 8O0         aproximadamente 8O0 impresiones.
@                 Aufdrucke gemacht werden.
View original page 16Page 17 · Read text
BATTERY TESTING:             CONTROLE DE LA PILE:
Turn the Mode Selector Switch (Fig. 6) to   Tourner le s€lecteur de mode (Fig. 6)
INPUT position an depress the Battery      sur la position INPUT et appuyer sur la
Check Button (Fig. 7). lf the battery is in    touche de contrOle de batterie (Fig. 7).
good condition (battery potential is high     Si la pile est bien chargde (si son
enough), the indicator LED will illuminate.    voltage est suffisamment 6lev6),
lf the LED fails to illuminate, the battery is   I'indicateur a diode LED s'allume. Si
too weak and should be replaced. When      celui-ci ne s'allume pas, la pile est trop
the battery is replaced, the Mode Selector   faible et doit 6tre remplacde. R€gler le
Switch shoule be set to the "OFF" position.  sdlecteur de mode sur la position
                                      "OFF" pour remplacer la pile.


                                              @
View original page 17Page 18 · Read text
www.butkus.us
                           BATTERIEKONTROLLE:         COMPROBACION DE LAS PILAS:
                               Den Betriebsartenwahlschalter  in die      Colocar el selector de modo (Figura 6)
                                          Stellung "INPUT" bringen (Abb. 6) und    en la posici6n de entrada (INPUT) y
                                  den BatterieprUf knopf drricken.             oprimir el bot5n de comprobaci6n de la
                                        (Abb. 7). Wenn die Batterie noch voll ist    pila (Figura 7). Si la pila estd en buenas
                                        (Batteriespannung reicht aus),            condiciones (con potencia suficiente),
                                          leuchtete das Anzeige-LED auf. Wenn      el indicador LED se iluminard. Si el LED
                                   das LED nicht aufleuchtet,  ist die         no se ilumina, la pila estd muy
                                                   muB            desgastada y deberd cambiarse porl                                           Batterie zu schwach und
                                     ausgewechselt werden. Beim              otra nueva. Cuando se cambia la pila el
                                   Auswechseln der Batterie ist der           selector de modo deber6 colocarse en
                                         Betriebsartenwahlschalter  auf "OFF" zu    la posici6n OFF.
                                                stellen.


         @
View original page 18Page 21 · Read text
2. Set the Mode Selector Switch         2. R6gler le sdlecteur de mode (Fig. 9)
    (Fig. 9) to the INPUT Position.             sur la position INPUT.
3. Check the batterY.                   3. Contr6ler l'6tat de la batterie.
4. Before you inPut Your data, we        4.  ll est recommandd de noter les
   recommend that You jot down the        donndes d entrer sur le m6mo avant
   data on the Memo Board with a          de commencer I'opdration (Fig. 't0).
   pencil (Fig. 10).                     30 caractdres au maximum Peuvent
  Up to 30 characters can now be           €tre introduits dans l'6l6ment en
   key-punched into the unit bY             appuyant sur les touches                                          www.butkus.us
   depressing the aPProPriate               correspondantes du clavier. Le
   character keys. This unit is             systdme est muni d'un disPositif
   equipped with dual stage audible         sonore d deux signaux diffdrents.
    signal.                                  Premier signal: Un signal sonore
   Stage one: a single audible signal         simple indique que l'6l6ment
   which indicates that the unit is             enregistre correctement les 25
   properly recording the first 25            premiers caractdres de l'information.
   characters of information.               Deuxidme signal: Un signal sonore
   Stage two: a dual audible signal that      double prdvient que les cinq
   warns you when the last five (26-30)      derniers caractdres (de 26 a 30)
   characters of information is being         sont en cours d'enregistrement et
   recorded by the unit and the unit is      que l'6l6ment approche le niveau
   approaching maximum inPut level.        maximal du nombre d'entr6es.            @
View original page 21Page 22 · Read text
www.butkus.us
                          2. Den Betriebsartenwah  lschalter auf     2. Colocar el selector de modo
                    "lNPUT" stellen (Abb. 9).                    (Figura 9) en la posici6n INPUT.
                          3. Die Batterie prUfen.                   3. Comprobar el estado de la pila.
                          4. Vor der Dateneingabe empfehlen wir,   4. Antes de introducir los datos,
                        die Daten kurz auf dem Memo-Feld         nosotros le recomendamos que
                       (Abb. 1O) mit einem Bleistift zu           apunte los datos en la memoria
                          notieren. Durch Drricken der               (Figura 10) con un ldpiz.
                      entsprechenden Zeichentasten           Oprimiendo las teclas de caracteres
                    kdnnen nun bis zu 30 Zeichen in die       apropiadas podrdn introducirse
                         Einheit eingetastet werden. Diese          hasta 30 de ellos en la unidad. Esta
                         Einheit besitzt ein zweistufiges            unidad estd equipada con una sehal
                       Tonsignalsystem.                          audible de dos pasos.
                      Stufe 1: ein einfaches akustisches        Paso uno: Una seial audible que
                         Signal, das anzeigt, daB die Einheit         indica que la unidad est6 grabando
                         die ersten 25 Informationszeichen         apropiadamente los 25 primeros
                           richtig aufzeichnet.                        caracteres de informaci6n.
                        Stufe 2: ein doppeltes Tonsignal,         Paso dos: Una sehal audible doble
                     das Sie warnt, wenn die letzten frinf       que le avisa cuando estdn
                        Informationszeichen (ZO-30) von         grab6ndose, por la unidad, los cinco
                       der Einheit aufgenommen werden            riltimos caracteres (26-30) y que
                    und die Kapazitcitsgrenze  erreichl          6sta se aproxima al nivel de entrada
@                        wird.                                   m6ximo.
View original page 22Page 23 · Read text
NOTE: Do not dePress the keYs with     REMARQUE: Ne Pas enfoncer les
   any sharp objects such as ball point       touches d I'aide de tout objet pointu                                                         tel qu'un stylo bille ou un couteau.   pens or a knife.
5. Set the Mode Selector Switch to the     5. Placer le sdlecteur de mode de la
  MEMORY position (Fig. 1 1)  f rom the        position d'entrde (INPUT) sur la                                                 position de mise en mdmoire   INPUT position.                                   (MEMoRY) (Fig. 11).6. Depress the shutter of the camera
   and take the Picture in the normal        6. Appuyer sur I'obturateur de                                                     I'appareil et prendre la photographie   manner.
  NOTE: Information will not clearlY        de fagon normale.
   imprint on the bottom of the film        REMAROUE: L'information inscrite
   frame when the bottom of subject is      au bas de I'image n'apparait Pas                                              clairement si la base du sujet est   white or yellow.
 7. Now you are ready to imprint the data     blanche ou jaune.
   onto the film. SimPlY dePress the       7.  ll est maintenant possible d'entrer
   IMPRiNT Button (Fig. 12). You will         les.donndes sur le film' APPuYer
    notice the red "scanning" LED            simplement sur la touche INPUT
    illuminate and staY on during the             (Fig.  t 2). On Peut alors remarquer
    entire scanning Process' When the       que la diode rouge de "balaYage"

                                              @
View original page 23Page 24 · Read text
www.butkus.us
                ZUR BEACHTUNG: Die Tasten nicht     NOTA: No oprimir las teclas con
                         mit scharfen Gegenstdnden, wie zum       objetos muy agudos como por
                         Beispiel Kugelschreibern oder einem       ejemplo boligrafos o cuchillos.
                    Messer drricken.                      5. Colocar el selector de modo de la
                  5. Den Betriebsartenwahlschalter  von         posici6n INPUT a la posici6n
                     der Position "lNPUT" auf             MEMORY (Figura 11).
                 "MEMORY" stellen (Abb. 1 1).          6. Oprimir el obturador de la cdmara y
                  6. Die Aufnahme wie gewohnt machen        tomar la fotografia de la manera
                    und den Ausldser drricken.                   usual.
                   HINWEIS: Die Information wird nicht      NOTA: La informaci6n no quedard
                          klar unten am Bild aufgedruckt,            impresa de forma clara, en la parte
                  wenn der Hintergrund weiB oder gelb         inferior de la pelicula, cuando la
                                     ist.                                         parte inferior del objeto fotografiado
                   7. Nun kdnnen die Daten auf den Film        sea blanco o amarillo.
                         Libertragen werden. Dazu einfach die    7. Oprimiendo el bot6n INPUT
                       Eingabetaste (INPUT) drticken              (Figura 12) Vd. podrd introducir los
                       (Abb. 12). Sie werden feststellen,          datos en la pelicula. Durante todo el
                    daR das "Abtast"-LED aufleuchtet         proceso de exploraci6n, el LED rojo
                    und wdhrend des ganzen                se mantendrd iluminado, cuando se
                                                         aBague esto indicard que los datos
                                                       ya han sido transferidos a la
@
View original page 24Page 25 · Read text
f

   red LED turns off, the information        LED s'allume au cours de la durde
   has been transferred to the film          de balayage des donndes. Lorsque
   frame. As long as the Mode Selector        celle-ci s'6teint, I'information a 6td
   Switch is set to the MEMORY              transf€r€e sur I'image. Tant que le
   position, the information will be             sdlecteur de mode est Placd sur la
   "stored" indefinitely and can be             position MEMORY, I'information
   repeatedly imPrinted on the film            entrde est gard6e en m6moire et
   frame; picture after Picture.                peut €tre inscrite de nouveau sur les
8. The data being stored in memorY          images, photo aprds Photo.
   can be cleared bY switching the       8. Les donndes gard6es en m6moire
  Mode Selector Switch to the INPUT        peuvent s'effacer en commutant le
   or OFF position                             sdlecteur de mode sur les positions
   NOTE: The batterY will last for           INPUT ou OFF.
   approximately 4 daYs  if the Mode        REMARQUE: La Pile durera environ
   Selector Switch is left at the               quatre jours si le sdlecteur de mode
  MEMORY position.                        est placd sur la Position de mise en
                                            mdmoire.
View original page 25Page 26 · Read text
www.butkus.us
   Abtastprozesses anbleibt. Wenn das        pelicula. Siempre que el selector de
   rote LED ausgeht, ist die Information      modo est6 en la posici6n MEMORY,
   auf das Bild uibertragen. Solange der       los datos serdn almacenados y   Betriebsartenwahlschalter  auf                  '  podrdn imprimirse repetidamente en
  "MEMORY" gestellt  ist, wird die             la pelicula para cada fotografia.
   Information unbegrenzt                8. Los datos almacenados en la
   "gespeichert" und kann immer           memoria pueden borrarse colocando
   wieder auf den Film gedruckt                 el selector de modo en las
   werden, Bild um Bild.                     posiciones INPUT o OFF.
8. Die im Speicher geladenen Daten       NOTA: Si el selector de modo se
   kdnnen duch Stellen des                  deja en la posici6n MEMORY, la pila
   Betriebsartenwah  lschalters auf           dura16 aproximadamente cuatro
   "lNPUT" oder "OFF" geloscht                dias.
   werden.
  ZUR BEACHTUNG: Wenn mAN den
   Betriebsartenwahlschalter  auf
  "MEMORY" gestellt  ltiBt, ist die
   Batterie nach etwa vier Tagen leer.
View original page 26
Page 27 · Read text
CAUTIONS:                   PRECAUTIONS:            voRslcHrsMAssREGELN' J
1. Do not depress the keys with any    1. Ne pas enfoncer les touches d I'aide 1. Die Tasten nicht mit irgendwelchen
   sharp objects such as ball point       de tout objet pointu tel qu'un stylo      scharfen GegenstAnden, wie z.B.
   pens or a knife.                                   bille ou un couteau.                      Kugelschreibern oder einem Messer
2. Do not use cleaning solution such as 2. Ne pas employer de solution de         wiederdrtjcken.
   lacquer, thinner or MEK, it will           nettoyage telle que vernis, solvant  2. Keine aktiven Ldsemittel wie z.B.
   dissolve plastic components.          ou MEK qui ddtdriorerait les pidces    Lack, Verdtinner oder MEK
3. To clean the unit, use a soft cloth     en plastique.                          verwenden, da sonst die Plastikteile
   without any solution.                3. Employer un tissu doux sans              aufgel0st werden kdnnen.
4. Rough handling may result in              solution pour nettoyer l'6l6ment.   3. Zum Reinigen der Einheit ein
  damage to the unit.                  4. Ne pas manipuler brutalement           weiches Tuch ohne Ldsemittel
5. Do not print twice on the same film      l'6l6ment pour 6viter de                  verwenden.
   frame otherwise the data will be         I'endommager.                      4. Unvorsichtige Handhabung kann zu
   garbled.                            5. Ne pas imprimer deux fois la m€me    einer Beschiidigung der Einheit
6. Do not advance film while the red       image sinon les inscriptions ne            ftihren.
  LED is illuminated.                       seront pas lisibles.                  5. Dasselbe Bild nicht zweimal
                                   6. Ne pas faire d6filer le film lorsque la     bedrucken, da die Daten sonst
                                          diode LED rouge est allum6e.           durcheinanderkommen.
                                                                          6. Solange das rote LED leuchtet, den
                                                                                    Film nicht weitertransportieren.
                                    @l                                                                    I
View original page 27Page 28 · Read text
www.butkus.us
PRECAUCIONES:
1. No oprimir las teclas con objetos
  muy agudos como Por ejemPlo
   boligrafos o cuchillos.
2. No usar ninguna clase de
   disolventes para limpiar la cdmara
   ya que 6stos Podrian disolver sus
   componentes Pldsticos.
3. Para limpiar la cdmara usar un pafro
   suave sin disolvente alguno.
4. Manejar la cdmara con sumo
   cuidado.
5. No imprimir datos dos veces en la
   misma pelicula ya que 6stos se
   altera16n.
6. No avanzar la pelicula mientras que
   el LED rojo estd iluminado.
View original page 28
Page 29 · Read text
Because we continually strive to
improve our products, we may change
specifications without prior notice.

Le constructeur se r€;serve le droit
d'apporter toutes modifications de
 caract6ristiques sans avis pr6alable.

Da wir stdndig danach streben, unsere
Produkte zu verbessern, behalten wir
uns eine Anderung der technischen
Daten ohne Ankirndigung  vor.

Las especificaciones est6n sujetas a
cambios sin previo aviso debido a
mejoras del producto.
View original page 29
From the M. Butkus archive. Original publisher and archive notices are retained.
Check the model and edition against your equipment.
PDF verified 2026-10-10.