Film cameras
Chinon LED Promaster (Illustrated and ) User manual
User manual for Chinon LED Promaster (Illustrated and ). 9 pages in English. Read the original PDF, download or print a copy without registration.
9 pagesEnglish0.8 MB PDF
Loading your manual…Open PDF directly
Document details
- Brand
- Chinon
- Model / document
- Chinon LED Promaster (Illustrated and )
- Document type
- User manual
- Language
- English
- Pages
- 9
- File size
- 0.8 MB
- Category
- Film cameras
- Document date
- Not specified in catalog
Search available document text
Find a term, then jump to its page in the original PDF. Image-only pages may not be searchable; check the PDF for exact wording and diagrams.
Page 5 · Read text
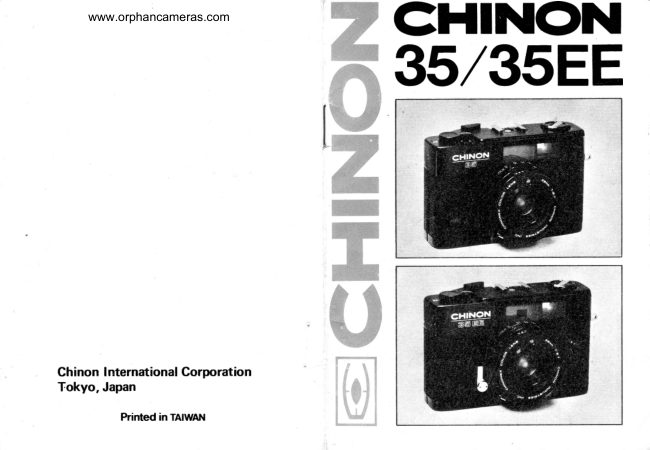
35/35 EE COMPACT


1. Film winding lever                       16. ASA/DIN setting ring
2. Film rewind lever/Back cover release     17. Focus ring
3. Flash contact and shoe                   18. Viewfinder
4. Film counter window                    19. Flash cord socket
5. Shutter release button                    20. Function control ring
6. Strap lug                                21. Back cover
7. Self-timer lever (35 EE Only)            22. Film compartment
8. Film rewind release button               23. Guide rail
9. Tripod screw                            24. Sprocket
10. Battery compartment cover              25. Film take up spindle
11. Lock for function control ring           26. Film counter setting pin
12. DIN film speed                         27. Eye piece
13. ASA film speed                        28. Pressure plate
14. US electric eye                         29. Film roller
15. F 2.7 38mm lens                        30. Rewind spindle
View original page 5
Page 6 · Read text
INSTALLING THE AUTOMATIC EXPOSURE CONTROL (ELECTRIC EYE)
BATTERY (Fig. 4, 5)

The US electric eye is powered by a long-life 1.3V mercury battery (Mallory PX-675 or
equivalent). The battery is supplied with your camera either installed, or packed separately
in the camera box.

To install the battery, use a coin to unscrew. Drop the battery into the opening with its
positive (+) side up and replace the battery cover. When you replace the battery, wipe the
fresh battery with a clean dry cloth. The average life of the battery is one year.

(Fig. 6, 7, 8, 9)
Lift up the FILM REWIND KNOB/BACK COVER RELEASE until the back cover
snaps open.
Drop the 35mm film cartridge (12, 20 or 36 exposures) into the left chamber. Press in the
film rewind knob and fold the rewind crank.

Pull out the end of the film and insert the end into any slot of the FILM TAKE-UP
SPINDLE. Advance the film by turning the film winding lever. Repeat until the sprocket
teeth engage the film perforations on both top and bottom and place in the guide rail
properly. Close the back cover firmly. Press the SHUTTER RELEASE BUTTON and
advance the film forward. Repeat until No. 1 is visible in the FILM COUNTER
WINDOW. The camera is now ready to shoot the first picture.

AUTOMATIC EXPOSURE (Fig. 10, 11)
Turn the ASA/DIN setting ring on the top of the lens and set the ASA speed in
accordance with your film rating. Make sure the ASA rating is as indicated on the data
supplied with the film. The ASA speed rating appears
in the slot on the top of the lens and the DIN rating in the slot on the bottom of the lens.
Hold the lock lever for the FUNCTION CONTROL RING and rotate until it snaps into
the AUTO index position. Exposure is then automatically programmed for the automatic
shutter speed and lens iris setting for any picture taking.

VIEWFINDER (Fig. 12)
All the information necessary for composed and perfectly exposed picture is indicated in
the viewfinder.

Parallax Mark (a)
When taking the pictures closer than four feet (1.5m) from the camera to the subject, the
subject should remain within the yellow parallax frame.


Too bright light conditions (b)
When the light is too bright for taking a picture,
the needle moves into the upper red warning zone. Use an ND filter (Neutral Density
Filter) for the lens to cut down the light.
View original page 6
Page 7 · Read text
Proper exposure (c)
If the exposure needle stays between the top and bottom red signal zone, the proper
exposed films will be produced.

Insufficient light conditions
When the exposure meter needle moves down to the LOWER RED WARNING ZONE,
the correct exposure is no longer possible. When that happens, move the subject into a
brighter light condition or use a flash lamp.

RANGE FINDER (35 EE ONLY) (Fig. 13)
Sight through the Viewfinder. Rotate the focusing ring until the double image in the
center of the field is super-imposed.

It is possible to measure or estimate the camerato-subject distance in meter or feet and set
the figured distance on the distance ring.

The distance scale on the distance ring is visible through the bottom right corner of the
viewfinder.

Numerals to the left in the viewfinder indicate the shutter speeds and the right ones
indicate the f/stops or lens aperture settings.
If you press the shutter release button the needle in the viewfinder will stop for a moment
and the shutter will open for proper exposure.

REWINDING FILM (Fig. 14, 15)
After exposing all the film rewind the film into the cartridge before opening the back
cover. Press the FILM REWIND RELEASE BUTTON on the bottom of the camera and
wind the FILM REWIND CRANK as illustrated until you feel a loosening of tension as
the film leaves the TAKE-UP SPINDLE. Pull out the FILM REWIND KNOB and open
the BACK COVER and remove the film. You should process the film immediately for
best results.

TAKING FLASH PICTURES (Fig. 16)
When taking pictures indoors in insufficient light, use a flash gun or strobe attachment.

Your CHINON 35/35 EE is automatically adjusted for correct flash exposure by setting
the guide numbers index. Depress and hold the FUNCTION CONTROL LOCK LEVER

and rotate the FUNCTION CONTROL RING until the flash mark (      ) lines up with
the GUIDE NUMBER. The DISTANCE RING can then only be rotated within the range
of the proper exposure setting.

A cordless flash gun can be installed directly on the electrical contact in the shoe. If the
flash gun has a cord, connect the flash contact plug into the FLASH CORD SOCKET on
the side of the camera.
View original page 7
Page 8 · Read text
Now observe through the viewfinder and rotate the focusing ring until the double image
in the center is super imposed. Press the SHUTTER RELEASE BUTTON.

When setting the FUNCTION CONTROL RING to the Flash picture setting, the camera
is automatically set at the shutter speed of 1/30th second. The CHINON 35/35 EE has
also X synchronization for M, FM bulbs or electronic units.
The intermediate guide numbers are indicated as follows:

                (40)            •          (20)           •          (10)
    56             •         28             •         14             •    m G. No
   180            •         90             •         45             •         ft
               (130)           •          (65)            •          (32)


SELF-TIMER (35EE ONLY) (Fig. 17)
The SELF-TIMER can be used for both normal and flash pictures.

When using the SELF-TIMER place the camera on a tripod or any firm support. Advance
the film and turn the SELF-TIMER down. Press the SHUTTER RELEASE BUTTON. A
click will be heard after 8 seconds and the shutter will be released.

BULB EXPOSURE (Fig. 18)
Press and hold the FUNCTION CONTROL RING LOCK LEVER and rotate the FUNC-
TION CONTROL RING until the "B" (Bulb) is lined up with the index mark. The lens
will stay open at full aperture of f/2.7 as long as the SHUTTER RELEASE BUTTON is
held down.

When a long exposure is necessary because of insufficient light or at night, it is possible
to use the bulb exposure. Place the camera on a tripod or any firm support and use a
standard cable release.

CHINON 35 (Fig.19)
Your CHINON 35 camera is operated in the same manner as the CHINON 35 EE with
one exception: Focusing. Since the CHINON 35 incorporates a Zone Focusing System
(Estimation) please refer to the following paragraph.

HOW TO FOCUS YOUR CHINON 35
The distance scale is used for focusing (Fig. 20). First estimate or measure the camera-to-
subject distance in feet (white figures) or in meters (orange figures). Then turn the
focusing ring until the figure representing the determined distance is opposite the index
line. In figure 20, for example, the lens is adjusted to a camerato-subject distance of 2.1m
(7 feet).

NOTE:
The 38mm f/2.7 CHINONEX Color Lens on your camera is of the highest quality and
View original page 8Page 9 · Read text
affords maximum depth of field. Because of this technological feature, distance
measurement is not always critical and an average setting of 7 - 8 feet on the distance
scale will produce desirable photographs. It is, therefore, recommended to spend a few
moments familiarizing yourself with the focusing capabilities of your new CHINON 35.
View original page 9
Related documents and language editions
From the M. Butkus Camera Manual Library. Original publisher and archive notices are retained.
Check the model and edition against your equipment.
PDF verified 2026-10-10.