Film cameras
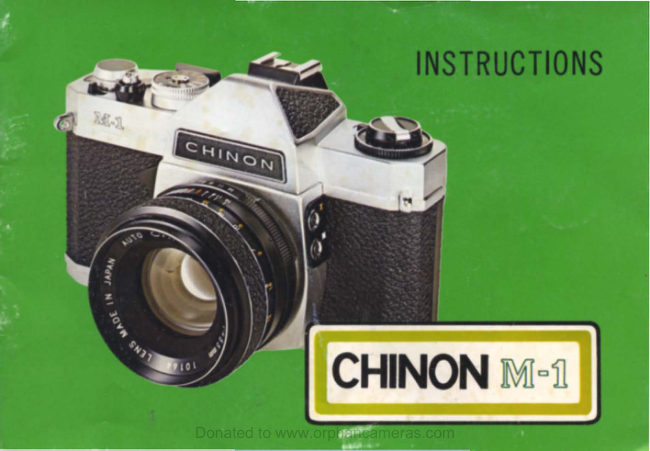
Chinon M-1 User manual
User manual for Chinon M-1. 16 pages in English. Read the original PDF, download or print a copy without registration.
16 pagesEnglish1.6 MB PDF
Loading your manual…Open PDF directly
Document details
- Brand
- Chinon
- Model / document
- Chinon M-1
- Document type
- User manual
- Language
- English
- Pages
- 16
- File size
- 1.6 MB
- Category
- Film cameras
- Document date
- Not specified in catalog
Contents
Search available document text
Find a term, then jump to its page in the original PDF. Image-only pages may not be searchable; check the PDF for exact wording and diagrams.
Page 3 · Read text
"  Viewfinder eyepiece                           _. FIlm ra,l                     FIlm pressure plate
   Battery test light                    Tropod socket                Film chamber cover
"  Film chamber                       Shutter                                       J1 Sprocket teeth
l2 F,lm guide ra,l                                rt Rew,nd button
  CdS battery compartment cover   _ Take up spool
                 Donated to www.orphancameras.com                       3
View original page 3Page 4 · Read text
IMPORTANT I
        BASIC STEPS  IN
       PHOTOGRAPHING

       11  Insert CdS battery with plus
            (   ) side up IFig.  31.
      21 To  test  battery  condition,                                            fI16         ~
        depress   the   battery  test
         button and observe test light
           ,Fig.  41.
    3  load 35 mm film In 20 or 36
        exposure cassette (Fig.  51.
      41  Set ASA lor DINI speed  dial
           In accordance with the film
        speed specified on the  film    fll 7
        box (Fig.  61.
      ,51  Set either the shutter speed
         or lens opening according to
        your photographic need (Fig.
            7l.
      161 Focus the lens (Fig.  81.
      1]1  Release the shutter (Fig. 81.                                                                      f'l. a
Donated to www.orphancameras.com
View original page 4Page 5 · Read text
F••  10

LOADING THE CAMERA
Use 35 mm f,lm on 20 or 36 exposure cassette               all the way  turn  ot untol  ot does
It is recommended to load and unload camera                                                3  Insert  nd of film ~nto slot on take up spool
on subdued light. eg shadow of your own body                                                 and engage perforat.on of 101m woth tooth
and not in direct sunlight.                                                                    In spool slot  Place thumb lightly ov  r 101m
 1  Pull up folm rewind knob untol camera back         on bottom sprocket wheel and operate 101m
    pops open  Swong open camera back  Fig          advance lever unt.1 upper sprocket wh    I
   9                                             engages folm perforatIons.  When advance
 2  While rewind knob  oS  st,lI  fully  pull d up           lever stops.  free  ot by depressing shutter
     onsert folm cas ett  onto chamber woth pro           release on top of camera  Make sure that
    truding end toward bottom of camera Press            folm  lies flat between guide rails  Fig. 10
     in folm rewind knob     If  it does not go ,n          Close camera back f"mly.
                                                                                     5                   Donated to www.orphancameras.com
View original page 5Page 6 · Read text
Fl.  II                                             Fl.  12

 4  Operate  film  advance   lever,  depressing
                                     SETTING FILM SPEED (ASA DIN)    shutter  r lease unt"  figure "1"  '5 lined up
    ,n the exposure counter window    In this     The ASA  or DIN  speed of the f,lm .sspec,f,ed
    position the camera  15 ready for the  first     on  the f"m box  or  In  the  Instruction sheet
    exposure to be made  Fig. 11  ,               packed with the 101m.
   To be certain that the film transports cor        Pull up and rotate the outer rim of the shutler
     reclly, take up any 101m slack in the cassette       dial until desired ASA DIN number of the 101m
    by turning the re,wlnd crank clockwise  till      appears In the window on the top of the film
    resistance 15 felt. When advancing the film      shutter speed dial  Fig. 12
    the rewind knob should turn antlclockwlse
    ThIS  15 evidence that the  film  is loaded
    correctly      If  It does  not.  start  loading
    again
6                   Donated to www.orphancameras.com
View original page 6Page 7 · Read text
Fl.  13                                                         Fl.  14

Also rotate fIlm type Indicator dial so that the
film type inserted shows to Its pointer  Fig. 13 .    CORECT EXPOSURE
This will remind you of the type of  101m you      Correct exposure can be made by  settong F
are using.                                           stops on the lens and correct combination  of
Some ASA  DIN  numbers are represented by      shutter speed.   As the CHINON M1 camera
a dot only  The chart below specifIes the ASA      has a  bUilt in through the lens CdS exposure
 DIN  numbers                                      meter. you can take correctly exposed photo
                                                graphs
ASA   ...                •    ,......  n                                                                    I'     I'        1  See the subject through viewfInder  Press
     ......... 1»      •       ..       •      "        II           down the exposure meter switch  Fig. 14   .  .-...............                                     ~               n  a"   "     'I                                                                                  I.                                                                                           II            DependIng upon the subject. rotate  either      "DIN    ..                                        71    It    11   U     IS    "            shutter speed dIal or F stop ring until the                            ..         "                                                                                        7                    Donated to www.orphancameras.com
View original page 7Page 8 · Read text
Fi,. 15                                       Fi,  16


                         1                                                       Fi,  17                                       Fi,  18


    exposure Indicator needle in the viewfinder         speed or biller lens openinll must be set
   comes to the complete horizontal position                Fill. 17 .
       Fill. 15.   If the needle is above the hori·      2  When the  Iillht level is too low and you are
    zontal position,  it Is overexposed  Fill. 16.          unable to obtain the correct exposure com
    Chanlle the shutler speed to a faster speed          blnation as stated above, the red warnIna
    or use a smaller lens openinll so that the             sillnal will appear in the exposure indlcat·
    correct exposure combination can be ob               inll zone in the viewfinder  Fill. 18,.
    tained.  If the needle is below the horizontal,        When the red warninll sillnal appears with
      it is under exposed so that a slower shutler          needle in position, use a flash unit.

8                   Donated to www.orphancameras.com
View original page 8Page 9 · Read text
FOCUSING
                                     Rei ase th  exposure meter switch and  slid
                         AUTO MANUAL  control on  the  lens  to Auto
                                     poslt,on  Fig. 19.
                               Turn th  d,stance ring  first  ,n one  dlrect,on.
                                  then in the opposite direction unt,l microprosm
                                     d,sc in the centre of the image  In the VIew
                                   F'll  19                                      f.nder IS sharp  Fig. 20. P,cture IS now focused
                             The d.stance scale may also be used for focus
                                     Ina  EstImate or measure the camera to sub
                                        lect dIstance in feet or in metres. then turn the
                                   focusIna rlng.  So the fiaure represent,na that
                                  dIstance IS opposIte the ondex  lone.


  In focus


oUl of focus
                                                                         9
      Donated to www.orphancameras.com
View original page 9Page 10 · Read text
RELEASING THE SHUTTER                SETTING THE SHUTTER
Hold the camera as ste dy as possIble and     The length 01 t,m   lor the "1m to be exposed
press the shutter release slowly and smoothly.       to Ioght can be adjusted by shutter speed set
When using slower sp  ds rangmg Irom 1 30        ting.  "60"  1 60 second  IS recommended lor
to 1 second and "B"  bulb  ,n poorly lot areas.      subjects not ,n motIon
use a tripod or other lorm support to prevent
                                                                             It 's recommended to use shutter speeds rangblurrong the picture.
                                                         mil Irom 1 125 to 1 1000 lor subjects m mo
                                                                 tion.  1 1000 second speed will best "Ireeze"
                                                           last action

                                        The" B" sett,ng can be used lor long exposures
                                                     at n,ght. uSlnll street Ioghts or  electric  s'lIns,
                                                       or und  r poor Iollht condItIons when flash un,t
                                                                        's not used


10
                    Donated to www.orphancameras.com
View original page 10Page 11 · Read text
UNLOADING THE CAMERA
                    When the red figure" 20" or" 36" correspond
                           ing to 20 and 36 exposure film appears in the
                        exposure counter window lined up to the index
                       mark. the end of the film has been reached.

                      Take the following steps for rewinding film Into
                         cassette'
                       1  Unfold crank on rewind knob  Fig. 21  .
     Fl.  21               2  Press in  all the way rewind release button
                          on camera bottom  Fig. 22 ..
                       3  Turn rewind crank lever clockwise.  Tension
                                       ,s relt as the f,lm Is rewound from the take
                         up spool Into the cassette   Stop rewind
                               'ng when tension Is released. Open camera
                          back by pulling out rewind knob  all  the
                       way  and remove the film.
                         Have film processed without delay.


    Fl. 22


Donated to www.orphancameras.com                      11
View original page 11Page 13 · Read text
Fl. 24                                                     Fl. 25

SELF TIMER                           FLASH PICTURES
The self timer permits the photographer to get     Most types of flash bulbs and also electronIc
Into the pIcture   Place camera on  trIpod or       flash can be used for flash pIctures
other form support  trIpod socket  IS on bottom     When uSlnll flash bulb No 5. 58 25. 258. M5.
of camera  G  t camera ready for exposure as     M58. M2. M28. AG I. 6. 68. 8. connect flash
usual.  Push down     If tIm  r lever  FIll 24         cord to flash socket   .. M'   When  uSlnll ele
                                                        ctronlc flash or SM flash bulb, connect the flashDepress shutter release to start self tImer  Ex
                                                    cord to flash socket  .. X..  FIg 25posure WIll be mad  approxImately 8 seconds
after th  release has been pressed               The use 01 Nos. 5. 58. M5 and M58 flash bulbs
                                                 as well as electronIc flash  Nos. 6. 68. 8 flash
                                                    bulb  IS recommended for shutter speeds from
                                               1 30 to 1 125 sec.
                                            The use of Nos M2. M28. AGI. AG18 SM flash
                                                   bulbs IS recommend d for shutter speeds from
                                                                               13                   Donated to www.orphancameras.com
View original page 13Page 14 · Read text
1 30 to 1 60  sec.   Cordless lIash  units are
slipped into the accessory shoe on the top of    CHANGING THE LENS
the camera.  The accessory shoe may also be     A 55 mm lens  is the proper  focal  length  tor
utilized for a flash unit having a synchro cord.      general purpose picture taking.   Any Ch,non
                                                      telephoto and wide angle lens or Pentax. Prinz·
                                                              lIex or Sigma  lens mount can be used.   To
MULTIPLE EXPOSURE                        remove the lens, push up the exposure sWItch
To superimpose two or more exposures on one      on the camera body, holdIng It in one hand and
negative. support the camera on a rigid tropod       grop the lens WIth  the other, turning counter
to ensure correct framing.  Make the  first ex       clockWIse until  It 's removed
posure in the normal way, then, WIthout movIng                                           To replace the lens, turn clockwise until secured
film transport lever, slide the multiple exposure                                                                 in position fInger tight
lever  Fig. 26  as far as  It WIll go to the  left
A red signal appears ,n ItS cutout window In
dlcatlng that the film  transport  lever can be
wound. but WIll only set the shutter and not
transport the film  On releaSing, a second ex
posure is made on the same f,lm frame   This
procedure can be repeated to obtain any num
ber  of  exposures on  one  negat,ve      If  the
multiple exposure lever has been set but is in
fact not required. you can manualiy push  It
back to cancel  its effect.
                                                                                                     Fla 26


14                    Donated to www.orphancameras.com
View original page 14From the M. Butkus archive. Original publisher and archive notices are retained.
Check the model and edition against your equipment.
PDF verified 2026-10-10.