Movie cameras & projectors
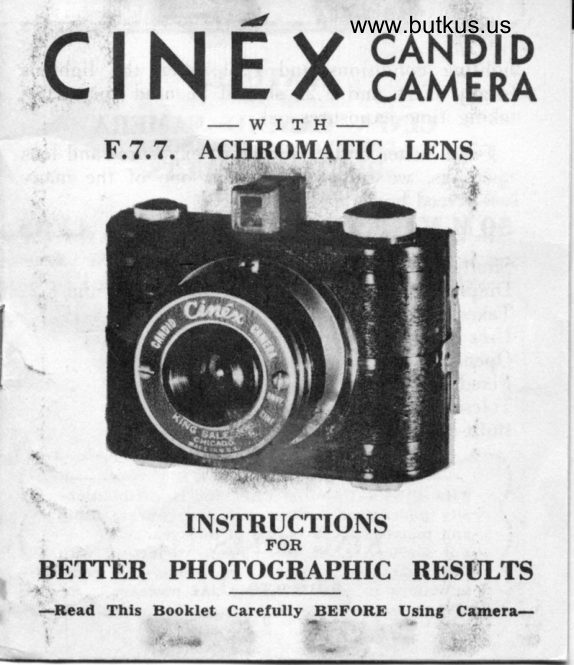
CINEX Candid Camera User manual
User manual for CINEX Candid Camera. 9 pages in English. Read the original PDF, download or print a copy without registration.
9 pagesEnglish1.5 MB PDF
Loading your manual…Open PDF directly
Document details
- Brand
- Cinex
- Model / document
- CINEX Candid Camera
- Document type
- User manual
- Language
- English
- Pages
- 9
- File size
- 1.5 MB
- Category
- Movie cameras & projectors
- Document date
- Not specified in catalog
Search available document text
Find a term, then jump to its page in the original PDF. Image-only pages may not be searchable; check the PDF for exact wording and diagrams.
Page 1 · Read text
;clNExtiil,?llwww.butkus.us
     F.7.7. ACHSOMATIC-wITH-                  ,ir#l*


!:
         INSTRUCTIONS
                    roR
BETTER PHOTOGRAPHIC RESTILTS
        Thls Booklet Carefully                      BEFORE Uslntt1    Ctncrr- -Bcld                             ?.    i                                   'f. r+,.a                     '--
View original page 1Page 3 · Read text
1
                                                                                                                                                                                                              I
' ffi                                        t-f    r-or-(r-at-xrrDor-ar<-at-Dlt-(t-!xrD{r-

          FEATURBS
                OF THE
    CINEX CANDID CAMERA
          COMBINED TO ASSURE YOU


                                                                                                                                                                                                                                                                                                                                                             ltl       BETTER RESUTTS
 50 M.M, F,7.7. ACHROMATIC LENS
 Shutter Speeds of Bulb and I/40                                    i{
 Diaphragm Openings of F.7.7., F.ll, F.16, and F.22
 Takes 16 Pictures on a Roll    Size IY+" * L\/s" Uses Standard Kodak 127 or- Agfa AB Film
 Opening for Cable Release
 Fixed Focus
T"lescopi.-Vi.* Finder
 Built-in Standard Tripod Socket

  lololoa....ttttt';.....t'o"a.....tooo'......t'ttt......tott'.....'o'ooo.....""o.....lo"ooaa_
           GUARANTEE                                  :
 t,  THE CINEX CANDID CAMERA is uncondition-    j
      ally guaranteed against defective workmanshipr'r:    l. i
 ii   and;";  materiali"tu"irr  forfor aa periodperiod ofof oneone year.year.                !t ti   For service, return this camera to factory wlth    j
 !.t  this guarantee attached and twent5r-five cents  i       stamps to cover handling and postage.           ! it'l1aaaat"t.aaaao."tt
                        "ooaa  aoot"toa.a    a..t"t.aaaloo."..raa          ao..".oaaa    aao.".oaaaaa..'nra          ajlo;
View original page 3Page 6 · Read text
www.butkus.us
    Place the film in the lower reeeptacle; now
  break the seal in which the roll is held in place.
  Pull the end of the red paper toward the empty
  spool. Thread the end of the red paper through
  the broadest side of the slit in the spool. Now turn
  the film winding key two or three times toward the
  right so that the paper will begin to roll on to the
  empty spool.
    Replace the back and push eatches down firmly.
                                         camera'   The film is now properly placed and the
  is shut. Follow directions for winding very care-
   fully.
 TO WIND FILNT
  tTlunx rHE FILM wINDING rsv slowly while watch-
   I   ing the lower red window on back of camera.
 When the figure "1" appears in the center of the
   first lower red window, the camera is ready for the
   first picture to be taken. As soon as you have taken
  the picture be sure to wind figure "I" to the other
  red window. You are now ready to snap your
  second picture. Repeat process after every picture.
                                  6
View original page 6Page 7 · Read text
When figure "8"            the eenter of uppcr
window (nearest to"ppears,infilm winding k"y) you will
have taken 16 pictures.
  IThen you have taken all the pictures keep turn-
ing the key until the complete roll of film (includ-
ing the red protective paper) is all wound on the
top roll.
  Open back of camera as when loading, remove
roll of film; now seal roll with piece of gummed
paper which you will find on the end of the roll,.
so that it cannot run loose.
    TO TAKE PICTI]RBS
ffoto  rHE cAMnnl, with the sight as close to thert   eye as possible_, keeping the camera firmly
against the face. Make sure the object or subject
you are taking is framed within the finder.
  The camera must be held level. Should the sub-
ject be below your eye level, like a small animal,
the camera should be held down level with the
center of the subject.
                               6
View original page 7Page 8 · Read text
roSor'.&riiiiriii;:i;.'-|;l;:;,;-,r;;,-Lir53,;www.butkus.us
TIilTE EXPOSURES
                                                  leverfo  rAKE TIME ExposuRE plcruREsr pr€ss  I   from 40 to "Bulb". This lever is on the right
 side of name plate, when camera is facing you.
  You may take time exposures either by holding
camera as motionless as possible against your face
 ltrd using 1 ca-blg releaie (cable release opening is on left side of shutter), or by placing the camera
on a firm object such as a table or thuir. After
sighting your object press shutter release, keeping
your finger on it, counting the number of secondi
of exposure_ desired. When the required number
of seconds has expired, remove yorr finger from
the shutter release. If no more time           are
desired, adjust for instantaneous pictures,"*poiur"sby push-
ing lever back to 40.
I,ENS OPENINGS
tT""  Drsc DTAnHRAGM opENrNGs are F.7.7., F.ll, .a F.I6 and F.22. When taking instantaneous
pictures, we suggest you use F.7.7. under normal
View original page 8Page 9 · Read text
Iighting eonditions and F.lf when the light i,
bright. F.l6 and F.22 should be used only when
taking time exposures.
  For a better understanding of exposures and Iens
openings, w€ suggest yery repd one of the many
Iow-priced books on th'e subject.
  In taking instantaneous pictures, be sure that the
sun is directly behind your back. If the sun shines
directly into the lens, pictures will be fogged.


           "G'[Is"

       KING SALES CO.
             Chicago, fll.
                                         I
View original page 9From the M. Butkus archive. Original publisher and archive notices are retained.
Check the model and edition against your equipment.
PDF verified 2026-10-10.