Film cameras
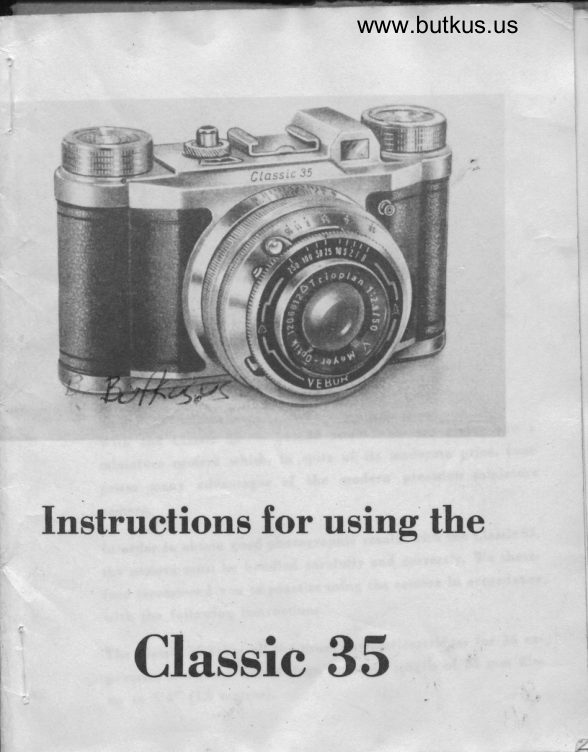
Classic 35 camera User manual
User manual for Classic 35 camera. 11 pages in English. Read the original PDF, download or print a copy without registration.
11 pagesEnglish3.0 MB PDF
Loading your manual…Open PDF directly
Document details
- Brand
- Classic
- Model / document
- Classic 35 camera
- Document type
- User manual
- Language
- English
- Pages
- 11
- File size
- 3.0 MB
- Category
- Film cameras
- Document date
- Not specified in catalog
Search available document text
Find a term, then jump to its page in the original PDF. Image-only pages may not be searchable; check the PDF for exact wording and diagrams.
Page 3 · Read text
Vith the Claesic 35   24x36 mm   we rrc givin; you r                         -                  -miniature camera *'hidr, in epite of its moderate price, com'
prises many advantagee of  t,he modern preciaion miniature
camera.

fn order to obtain good photographic regulte with the Claseic 35,
the camera must be handled earefully and correctly. We there-
fore recommend you to practise. using the camers in accordance
with the following inetructions.
The Claeeic 35 takes all the usual daylight cartridges for 36 ex-
posuree, miniature film fillinge, and any length of 35 mm film
tp to 5'4" (1.6 metree).
View original page 3
Page 4 · Read text
www.butkus.us


                              15
                               7


                                                                                        Ill. No.l

    Explanation ol signs
  4. Film-transport knob
  5. Picture counting medranism
  6. Adjurttment ring for counting disc
  7. Shutter-wimding lever
  8. Shutter-release knob
  9. Film'rewind knob
' 12. Eyd-piece of optical viewfinder
 15. Syndrronized flash contact
View original page 4Page 5 · Read text
Digitally signed by mike
                                                               butkus
                                                           DN: cn=mike butkus,        mike        o=orphancameras, ou=29,
                                                               email=mike@butkus.org,
                                                       c=US
                                                                    Date: 2018.10.26 19:14:44         butkus -04'00'


 1. Safety-knob for baae-plate
 2. Empty epool to receive the film
 3. Swing-out ba&plate to facilitate
    loading the film
10. Fil,m-dramber with cartridge
11. Spro&et-teeth to catdr the Glm
    perforation
13. Tripod bushing
14. Baee plate
View original page 5Page 6 · Read text
www.butkus.us


                                ,ii1'J'n;


                                                                                                                      lll. |[o.3
A. Loading and Changiog the Film
 I. Opening the cantera
   Hold the camera with the base-plate upward (14, Ill. No.2)
   and the lene turned away from you. Push the safety-knob
    (1, nl. No. 2) on the base-plate to the left, and lift the
   ba,se-plate off.
2. Inserting the film spool
   Take the receiving spool (2, Ill. 3) from the open camera,
    in,sert the beginnirrg of the film into the olit in the spool,
   fold about 5 mm of the film sharply badcward and pull the
View original page 6Page 7 · Read text
film toward,e the alit so that it becomee tight. Now plaee thc
film into the camera (Ill. No. 3), payin,g attention that the
pegr of the'film-tranEport (4) and rewind (9) knobe cat&
the coree of the film spool and receiving epool.
 Closing the carnera
Cloae down the camera ba& and place the base-plate into
the camera with the bla& lodge on the inside facing the
bad< to trhe camera body. Pueh the safety'knob (l)  to the
right.
 Film-transport
T,urn the film-traneport knob (4' Ill. No. l) as fer as it will
go in the direction of the arrow' and the counting me&e'
 nia,m (5) wi,ll advance by one stroke. Pueh the ehutter-wind'
 ing lever (?) upwarda, w,hereupon the shutter release knob
 (8) has to be preeaed down. Thie performance hae to be re'
 poate'd twice more in order to transport the required por'
 tion of unexposed film from the cartridge into the picture
 gate.
 Now set the counting medranism (5) to number "36" by
 meant of the adju,atment ring (6, Ill. t), turn the film-ttane'
 port knob (4) as far as it will go (the 'stroke of the coun'
 ting medraniem will then point to number "I")  and push the                                               I
 ehutter-win.ding lever (?) upwards. The camera ie now ready
 for the first expo,sure. Eadr time the film hag been trana'
 ported, a red mark          in the little opening between tho                      .appears
 film-transport kno  an the ehutter'release knob'
View original page 7
Page 8 · Read text
www.butkus.us

5. Changing the film
  After the 36 exposureo have been made you will notice I
   certain reeietance in windig the film. This is a eign that the
  whole length o'f film hae been expoaed and hae to be re-
  wound into the cartridge.
   Pull out the film-transport knob (4, Ill.  l) until it atops and
   turn it a little to the right. It will now snap in. By turning
  the rewind-knob (9) in the direction of the arrow the film
    i's spooled ba& into the certridge. Now rotate the film-
   trancport knob (4) to the left     in the direction of the                                        -  arrow    until it clidrs ba& into its normal position.          -
  After thia, the camera can be opened as degcribed in pera-
  graph I and the cartrid,ge with the expoeed film taken out.
   T,he film should not be exdranged in briglit aunlight, but, if
   po,ssi,ble, in the ahade. It  is advieable to wrap the cartridge
  in lightproof paper or in the pa&ing material in whidr  it
  wag delivered, before taking  it to be proeoeeed.
  The new film can now be loaded as described in paragraph2.
View original page 8Page 9 · Read text
B. The Technique of Exposing
  The Classic 35 is supplied with, a Triopl an 112.9, focue
    5'0 mm, and a Vebur Shutter.


 I. Focusing
   Focusing io performed ,by turning the broad focusing ring
    (E, Ill. No. 4) between 2'LLU and infinity (oo) until the de-
    sired.distance is oppoeite the red mark. (M' Ill. No. 4).
 2. Setting the diaphragtn
   The diaphragm (:  effective leng aperture) is eet by turning
   the knurled ring (8, Ill. No. 4) gntil the red mark (P,Ill.4)
View original page 9Page 10 · Read text
www.butkus.us


                               Instant  exposur'es:
                          Turn the front knurled
                                 ring (V, Ill. 5) until the
                               red mark (K,Ill.5) stands
                                   a,bove the desired epeed.
                                Win'd up the shutter by
                                      pushin'g the windin,g lever
                                      (Sp. Ill. 5) upwarda as far
                                                      a,s it will go. The expo€ure
                               can now be made by de-
                                               p reosing the shutter-release
                             knob (8, Ilt. l).
    Trime' exp'o,qures (B): Turn the knurled ring (V, Ill. S)
    until the mark (I(' ltt. 5) etands a,bove rhe ..8". \Find up
   the ehutter ae degcribed under 'olngtant expo€ures". Depress
   the shutter-release knob, and the shutter will open. It  re-
    maing. open until, a.fter any ,desired lenght of time, the pree-
   suro is relaxed.
     It  i,s advisable to use a tripod and a ca,ble releaee when
   ma'king timo exposures.

C. Locking Device againet Double Exposures
   T,he lo&ing device against double expooureE ia coupled with
   the shutter and ie put into action the moment the ehutter is
   releaged. The shutter cannot be released again hefore the
    film is advanced,by turning the film-transport knob (4rIll.1),
  and the ,shutter-winding lever (7, Ill.  l) hae been puehed
   upwardo.
View original page 10Page 11 · Read text
D. The Synehronized Flash Contaet
     The Classic 35 ie equipped with a eyndrronized contact for
     fash and etrobe (15, Ill. 1). The shutter muet be eet at
       l/zrth sec. or longer. Contaet takee place at the full opening
      of the shutter.

 A few Hintg with regard to Exposurer
    7. Ad.uance the film immediately eadt. exposure!
    2. Speed and diaphragrl are closely connected. The more light
       is taken auay by stopping dou:n to number 8, 7I, ore nt'ore
     on the diaphragm scale, the longer uill haue to be the ex-
      posure time.
     For exarnple:  Il in a certain case the speed has to be
      tlnoth sec. utith an aperture ol ll5.A, the exposure can also
     be made in ilsoth sec. u;ith an aperture ol ll8, or in rlzsth
                                                                   either        sec. usith llll.  These exantples can be continued in
        d,irection. The onley d.ifference in the pticture is the depth
      ol sharpness.
    3. The aduantage ol the small aperture (8, 11 and' 16) is an
      extensiae depth ol sharpness, uhidt means that the fore'
      ground and badtground appear sharp in the picture. On the
I      other hand., the u:id.e aperture permits high'speed exposures,
      with less risk ol blurring the picture by unsteadiness.'When
       taking lioely scenes, it is usually necessary to set the shutter
      at high speed and to use a usider dperture.
View original page 11From the M. Butkus archive. Original publisher and archive notices are retained.
Check the model and edition against your equipment.
PDF verified 2026-10-10.