Flashes & lighting
Cobra Macroflash User manual
User manual for Cobra Macroflash. 39 pages in German, French, Spanish, Italian. Read the original PDF, download or print a copy without registration.
39 pagesGerman, French, Spanish, Italian1.8 MB PDF
Loading your manual…Open PDF directly
Document details
- Brand
- Cobra
- Model / document
- Cobra Macroflash
- Document type
- User manual
- Language
- German, French, Spanish, Italian
- Pages
- 39
- File size
- 1.8 MB
- Category
- Flashes & lighting
- Document date
- Not specified in catalog
Search available document text
Find a term, then jump to its page in the original PDF. Image-only pages may not be searchable; check the PDF for exact wording and diagrams.
Page 4 · Read text
www.butkus.us
English
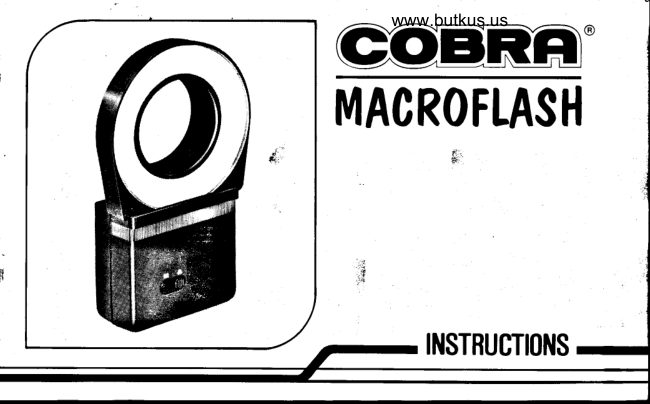
WHAT'S WHAT ON THE MACROFLASH ?
1.  Flash area
2.  Auto sensor
3.  Auto/Manual switch
4.  Battery compartment lid
5.  Series Vll screw ring                                                                                                                     !
6.  Flash guide table
7.  Test button/Ready light
8.  Power'ON' switch
9.  PC cord socket
10. PC connection cord
11. Focusing wheel
12. Hot-shoe adapter

The MACROFLASH  is an automatic and manual flash unit designed for close-up photography.
In order to gain the maximum benefit from your MACROFLASH, please read the following instructions
carefully before use.
View original page 4
Page 5 · Read text
COBRA MACROFLASH - RTNG FLASH
IMPORTANT  - Please read the following points before using this flash unit.
 1 . Some zoom lenses have a design where the threaded section moves into the body of the lens when
   zoomed to certain focal lengths. Please note that this type of lens can be unsuitable for use with the
   MACROFLASH.
2. The central lens area of the MACROFLASH has a width of 50mm. Therefore, you should ensure that your
    lens does not have a front glass element width in excess of 50mm (this does not mean the thread size but
    the actual width of the glass).
3. Do not use the MACROFLASH with lens focal lengths of less than 50mm, as vignetting will occur.
4. AF lenses - When attaching or removing the MACROFLASH, we recommend that you switch the lens to
   manual focus. This will avoid strain on the autofocus gearing.
    All lenses - For ease of fitting, move focus to infinity or to minimum focus, depending on lens style.
5. We recommend that you mount your camera onto a suitable table{op/low level tripod before attaching the
   MACROFLASH.
6. Please remember that electronic flashguns work at very high voltages, therefore protect from damp
    conditions and never dismantle yourself.  lf the unit should need attention, return it to your COBRA dealer.
7. Every effort has been made to make this instruction book as clear, comprehensive and accurate as
    possible. However we cannot be held responsible for problems arising from specific camera or lens
   design.  lf you are uncertain as to whether your camera equipment is suited to the MACROFLASH, please
    contact your COBRA dealer.
View original page 5Page 6 · Read text
www.butkus.us
BATTERY
         'A'STALLATTON1. Slide the battery compartment lid in the direction of the arrow and then move up to expose compartment.
2. lnsert 2xAAsize alkaline batteries, taking note of the diagrams on the inside of the compartment. Ni-Cad
    batteries may also be used, but we strongly advise against the use of zinc-carbon batteries due to their
    short life and tendency to leak.
3. Keep the battery contacts clean and remove batteries  if the unit is not to be used for 2-3 weeks.
ATTACH'NG THE MACROFLASH
1. Select a lens ring (5) that suits your lens (the thread size is usually noted on the lens, i.e. @ 49mm).  lf the
    size of ring for your lens is not included, you should be able to obtain one from your local photographic
    dealer.
2. Carefully screw the ring onto the threaded section of the focusing wheel (11 ).
3. Offer the MACROFLASH to the lens and carefully turn the focusing wheel (11) anti-clockwise until the
    threads join and resistance is felt (tighten firmly but do not overtighten).
4. Connect the male end of the PC connection cord (10) to the female socket of the MACROFLASH.
   Depending on your type of camera, either connect the other end to the PC (or X) socket of the camera or
    to the socket on the enclosed hot shoe adapter. (12).
     *    You will find that most modern cameras do not feature a PC socket and you will therefore need to fit the
    adapter (12) to the hot-shoe of your camera in order to fire the flash.
5. The adapter can be fitted with the cord socket facing the front or facing the rear of the camera. Use
   whichever way suits your style of camera
6. Use the MACROFLASH in the upright position whenever possible i.e. with its body below the lens.
View original page 6Page 7 · Read text
SW'TCH'NG ON THE MACROFLASH
 1.  set your camera to its flash sync speed (refer to camera's instruction book).
 2.  Push the 'ON' switch (8) until the green indicator lamp lights. After a while the ready lighVtest button (7)
     will blink, indicating that the unit is ready to use. NOTE: The design of the MACROFLASH means that  it
     will continue to recycle as long as the green light on the 'ON' switch (8) is lit.  lf the MACROFLASH  is still
     fully charged when you wish to discontinue use, simply pack  it away as normal and  it will discharge  itself
    safely over a short period of time, with no further battery drain.
3. In order to 'form' the MACROFLASH's  high-energy capacitor, fire a few test flashes with the test button (7)
    before use.
FOGUS'NG THE T.EA'S
Manualfocusing type
Focus lens in the normal way. With some lenses, the barrelwill turn when focusing, in this case you may find
it easier to turn the focusing wheel (11 ) instead.
Autofocus type
Most AF lenses are of the moving barrel type as detailed above. The focusing wheel (11 ) may be too tight for
the lens' autofocus motor to move  it and you should therefore switch the lens to manual focus and proceed as
above to avoid placing strain on the AF motor.
View original page 7Page 8 · Read text
www.butkus.usEXPOSURE CONTROL
AUTOMATIC
1. Slide the auto/manualswitch (3) to 'A
2.  lf you are using ISO 100 film, set your camera's lens to /5.6, making sure that the subject is between 30 &
   90cm from the lens. The Automatic Sensor (2)will controlthe exposure.
3. For other film speeds, check the flash guide table (6) on the rear of the unit.

MANUAL
1. Slide the auto/manual switch (3) to 'M'
2. Refer to the Flash guide table (6) on the rear of the unit. You now have a choice of how to proceed. Either:
   A. Move your subject so that you are happy with its appearance  in the vieyfinder and check the distance
   from the lens barrel.  lf, for example, you are using ISO 200 film and your-subject  is 40cm from the lens,
   you should select an aperture setting /16.
    B. Proceed as above but pre-select a desired aperture setting and, depending on your film speed, move
    the subject so that it is sharp in the viewfinder at the distance for that aperture.  i.e.  lf you desire an
    aperture of /8 and are using ISO 400 film, your subject should be 120cm from the lens.
General note for both Automatic and Manual use
lf photographing an object or using a background that is very dark in colour (or black) or very light in colour (or
white), you may need to alter the aperture setting from that recommended on the flash guide table (6). For
white, open the aperture by 1-2 stops (i.e. recommended: /5.6 open lo f 4 or f 2.8) For black, close  it by 1-2
stops (i.e. recommended. /5.6 close to /8 or /11 ). Some trial and error may be required and we therefore
recommend that you'bracket' exposures.
View original page 8Page 9 · Read text
sPECTF'CATIONs
Guide Number:         5m @ ISO 100
Maximum distance @ f2:  2 5m @ ISO 100
Recycling time:                  1 0 seconds
Number of flashes:        120 (approx.)
Angle of coverage:         800
Auto setting:          f56@lso100(m)
Auto effective range:       30-95 cm (1-3 '1 feet)
Lens suitability:             focal lengths more than 50mm
Flash rotation:             3600 possible
Power source:            2 x AA sized Alkaline
Dimensions:             150x90x36mm
Weight:                  20Og (without batteries)

Specifications are subject to change without notice.
The MACROFLASH  is fully guarantee for a period of one year against defedts in materials or workmanship to
the original owner and we will repair, free of charge, should the product fail during this period.
Particular care must be observed in the event of damage or malfunction caused by normal wear and tear,
improper care, accident, negligence, unauthorised repair or battery leakage as these are outside the scope of
the guarantee. However, in that event we will carry out the necessary repair(s) at a reasonable charge.
THIS GUARANTEE IN NO WAY AFFECTS YOUR STATUTORY RIGHTS AS A CONSUMER
I
View original page 9
Page 11 · Read text
Frangais
LES ELEMENTS DU MACROFLASH
1. Zone de flash
2.  Capteur automatique
3.  Interrupteurauto/manuel
4.  Couvercle du compartiment batterie
5.  Bague de vissage s6rie Vll
6.  Tableau d'indices de flash
7.  Bouton d'essai/T6moin d'6tat pr6t
8.  Interrupteur de mise sous tension
9.  Prise de cordon PC
10. Cordon PC
11. Roue de mise au ooint
12. Adaptateur de pied-sabot

Ce MACROFLASH  est un flash automatique  et manuel destin6  dr la photographie rapproch6e

Afin de tirer le meilleur parti possible de votre MACROFLASH, pridre de lire les instructions suivantes
soigneusement  avant de I'utiliser.


10
View original page 11
Page 12 · Read text
www.butkus.usMACROFLASH COBRA. FLASH ANNULAIRE
IMPORTANT  - V6rifier les points suivants avant d'utiliser ce flash
1. Sur certains objectifs zoom la partie filet6e pendtre dans le corps de l'objectif lorsque  le zoom est mis A
    certaines distances focales. Pridre de noter que ce type d'objectif peut ne pas convenir pour utilisation
   avec le MACROFLASH.
2. La zone centrale du MACROFLASH  a une largeur de 50mm.  ll faut donc s'assurer que la largeur de
     lentille (compte non tenu de la largeur de filetage) de votre objectif ne soit pas sup6rieure d 50mm.              \
3. Ne pas utiliser le MACROFLASH sur des distances focales de moins de 50mm car  il y aura d6gradation.
4. Objectif AF - En fixant ou en deposant le MACROFLASH,  il est pr6f6rable de mettre I'objectif sur mise au
    point manuelle afin d'eviter toute sollicitation excessive de I'entrainement de I'autofocus.
   Tout objectif - Pour faciliter le montage, amener la mise au point d l'infini ou au minimum, selon le type
     d'objectif.
5. Avant fixer le MACROFLASH,  il est conseill6 de poser l'appareil de photo sur une table ou sur un tr6pied
   bas appropri6.
6. Se rappeler qu'un flash fonctionne d de trds hautes tension.,  ll faut dont le prot6ger contre I'humidite et ne
   jamais tenter de le d6monter soi-m6me. Si l'appareil exige une intervention,  pridre de le retourner d votre
    concessionnaire COBRA.
7. On s'est efforc6 de rendre cette notice d'instructions aussi claire, compldte et pr6cise que possible. Nous
   d6gageons cependant toute responsabilite  pour des probldmes qui proviendraient de la conception de
    I'appareil de photo utilis6 ou de son objectif. En cas d'incertitude sur la convenance de votre 6quipement
   pour emploi avec le MACROFLASH, pridre de contacter votre concessionnaire COBRA.
View original page 12Page 13 · Read text
INSIALLAT'ON DE LA BATTER'E
1. Faire coulisser  le couvercle du compartiment dans le sens de la fleche puis le relever pour exposer  le
    compartiment.
2. Ins6rer deux batteries de taille AA en prenant note du sch6ma dans le compartiment. On peut aussi
     utiliser des batteries Ni-Cd mais nous d6conseillons vivement l'emploi de batteries Zn-C en raison de leur
    courte vie utile et de leur tendance d fuir.
3. Garder les contacts dans un 6tat propre et sortir les batteries  si le flash ne sera pas utilis6 pendant deux
   ou trois semaines.
FIXATION DU MACROFLASH
1. Choisir une bague de vissage (5) convenant d votre objectif  (la taille de filetage est normalement
    indiquees sur l'objectif, par exemple ,€ 49mm). Si le jeu de bagues ne convient pas pour votre objectif,
   vous pourrez trouver une bague appropri6e chez votre marchand photographe.
2. Soigneusement  visser la bague sur la partie filetee de la roue de mise au point (11).
3. Presenter  le MACROFLASH a l'objectif et soigneusement  tourner la roue de mise au point  ('l 1) dans le
   sens anti-horaire jusqu'd ce que les filets se joignent et qu'une r6sistance  soit ressentie (serrer fermement
   mais non excessivement).
4. Relier I'extr6mite m6le du cordon PC (10)d la prise femelle sur le MACROFLASH.  Selon le type d'appareil
   que vous poss6dez, soit relier I'autre extr6mite d la prise PC (ou X) de I'appareil, soit d la prise sur
    I'adaptateur  (1 2) de pied-sabot*.
     * VoLJS constaterez que la plupart des appareils de photo modernes n'ont pas de prise PC et qu'il vous

12
View original page 13Page 14 · Read text
www.butkus.us        faudra donc monter I'adaptateur  (12) sur le pied-sabot de votre appareil de photo afin de pouvoir
       d6clencher  le flash.
15.  Selon ce qui vous convient le mieux, vous pouvez installer l'adaptateur de manidre d ce que la prise du
       cordon soit tourn6e vers I'avant ou l'arridre.
                  ll est recommand6 dans la mesure du possible d'utiliser le MACROFLASH dans la position debout, c'est d^b.
t        dire avec le corps en dessous de l'objectif.
  ALLUMAGE DU MACROFLASH
   1. Amener votre appareil de photo d la vitesse de synchronisation avec le flash (se reporter au manuel
         d'instruction de I'appareil de photo).
   2. Appuyer sur le bouton 'ON' (8)jusqu'dr ce que le t6moin vert s'allume. Aprds quelques instants, le bouton
        d'essai/t6moin  d'etat pr6t (7) clignote, indiquant que I'appareil est pr6t d servir. REMARQUE: Le
     MACROFLASH  continue de se recycler aussi longtemps que le bouton 'ON' (8) est allume. Si le
     MACROFLASH  est toujours charg6 alors que vous souhaitez interrompre son utilisation,   il suffit de
        I'emballer normalement.    ll se d6chargera sans probleme assez rapidement, sans decharge ulterieure de
          la batterie.
   3. Afin de "former" le condensateur haute energie du MACROFLASH, proc6der d quelques flashes d'essai d
         l'aide du bouton d'essai (7) avant de I'utiliser.
View original page 14Page 15 · Read text
MISE AU PO'NT
Objectif manuel
La mise au point se fait normalement.  Sur certains objectifs, le barillet se mettra d tourner pendant la mise au
point. Dans ce cas,  il peut 6tre plus commode de tourner la roue de mise au point (11).

Objectif autofocus
La plupart des objectifs AF sont d barillet tournant.  ll se peut que la roue de mise au point (11 ) soit trop serr6e
pour permettre son entrainement par le moteur de mise au point automatique.  ll vous faudra donc mettre
l'objectif sur mise au point manuelle et proc6der comme plus haut pour 6viter de trop charger le moteur AF.
COMMANDE D'EXPOS'//TTON
AUTOMATIQUE
1. Amener le contact auto/manuel (3) sur'A
2. Si vous employez un film ISO 100, amener l'objectif d f5.6 en veillant d ce que le sujet soit d une distance
   de 30 d 90cm de I'objectif. Le capteur automatique (2) controlera l'exposition.
3. Pour les vitesses de film diff6rentes, se reporter au tableau d'indices de flash (6) sur le dos du flash.                                           l

                                                                                                                   -t


14
View original page 15Page 16 · Read text
www.butkus.us    MANUELLE
                '1       . Amener le contact auto/manuel (3) sur 'M'
    2. Se reporter au tableau d'indices de flash (3) sur le dos de l'appareil. Vous pouvez proc6der de deux
         fagons:
        A. Positionnez votre sujet de manidre d ce que vous 6tes satisfait du tableau offert par le viseur et v6rifiez
            la distance par rapport au barillet d'objectif. Si par exemple vous utilisez un film ISO 200 et que votre sujet
          est d 40cm de l'objectif, vous devez choisir I'ouverture   f 1 6.
         B. Proc6dez comme ci-avant mais pr6s6lectionnez une ouverture souhait6e, fonction de la vitesse de
          votre film, puis deplacez le sujet jusqu'd ce qu'il soit bien defini dans le viseur pour I'ouverture choisie. Par
         exemple,  si vous souhaitez une ouverture f8 et utilisez un film ISO 400, votre sujet devra se trouver  it
       120cm de l'objectif.

    Remarque 96n6rale pour emploi automatique et manuel
      Si vous photographiez un objet en utilisant un fond soit trds fonc6 en couleur (noir) ou trds clair en couleur
      (blanc), vous pourriez devoir varier le reglage de l'ouverture par rapport d celui recommand6  sur le tableau
       (6). Pour le blanc, ouvrir I'ouverture de 1 d 2 crans (par exemple,  si f5,6 est recommand6,  passer dtf4 ouf2.8).
     Pour le noire, r6duire I'ouverture de 1 d 2 crans (par exemple,  si f5.6 est recommand6,  passer d f8 ou  f'l  'l ).
    Une certaine exp6rimentation  est n6cessaire  et  il et recommand6  d'inscrire les taux d'exposition dans des
       limites donn6es.
,l


                                                                                                         15
   II
View original page 16Page 17 · Read text
S P E C' F T CAT' O N S TE C HA"QUES
Num6ro guide:          5m pour ISO 100
Distance maximum pour f2: 2,5m pour ISO 100
Temps de recyclage:              1 0 secondes
Nombre de flashes:         120 (environ)
Angle de couverture:         800
R6glage auto:                 f5,6 pour ISO (m)
Champ de rdglage auto:     30-95 cm
Convenance d'objectif:       distances focales sup6rieures d 50mm
Rotation du flash:             possible sur 360o
Energie:                   2 batteries alcalines de taille AA
Encombrement:          150x90x36mm
Poids:                     200 g (sans batterie)

Ces caract6ristiques  sont sous r6serve de changement sans pr6avis
View original page 17
Page 19 · Read text
Deutsch
/  WELCHE TEILE FINDEN sIE   MACROFLASH?                           'M   1. Den Blitzbereich
   2.  Den automatischen Sensor
   3.  Denautomatischen/manuellenSchalter
   4.  DenBatteriegehdusedeckel
   5.  Den Schraubenring der Serie Vll
   6.  DieBlitzhinweistabelle
   7.  DieTesttaste/Bereit-Lampe
   8.  Den Schalter Strom AN
   9.  Die PC-Kabelbuchse
   10. Das PC-AnschluBkabel
    11. Das Fokussierrad
   12. Den'Hot-Shoe'-Adapter

    Der MACROFLASH   ist ein automatischer und manueller Blitz, der fUr Nahaufnahmen  bestimmt  ist.
      Bitte die nachstehenden Anleitungen sorgfdltig durchlesen, damit Sie alle Vorteile aus lhrem MACROFLASH  '1
     ziehen kdnnen.                                                                                                                                                                                                                                                                                                                                                                  I

     18
View original page 19Page 20 · Read text
www.butkus.us                           !  COBRA.MACROFLASH - RINGBLITZ
   i

   I   WICHTIG! Vor der Benutzung dieser Blitzeinheit bitte die nachstehenden Anleitungen durchlesen.
   1. Manche Gummilinsen haben eine Konstruktion, wo das Gewindeprofil  in das Linsengehduse bewegt wird,
      wenn sie schnell an bestimmte Brennweiten geschwenkt werden. Bitte beachten, daR diese LinsenausfUh-
1       rung fUr die Verwendung  mit dem MACROFLASH  ungeeignet sein kann.
   2. Der zentrale Linsenbereich des MACROFLASH hat eine Breite von 50mm. Sie sollten deshalb
         sicherstellen, daR lhre Linse vorne kein Glaselement hat, das groBer als 50mm  ist. (Dies betrifft nicht die
       Gewindeabmessung  sondern die tatsiichliche Glasbreite.)
   3. Den MACROFLASH  nicht bei Linsenbrennweiten  von weniger als 50mm benutzen, sonst  tritt Vignettieren
          ein.
   4. AF-Linsen  - Beim Aufsetzen bzw. Abnehmen des MACROFLASH  empfehlen  wir, daB Sie die Linse auf
       manuelles Fokussieren  schalten. Das verhindert die Belastung des automatischen Fokussiergetriebes.
        Alle Linsen  - FUr das muhelose Aufsetzen und bedingt von der LinsenausfUhrung den Fokus auf
        unendlich bzw. auf den kleinsten Fokus einstellen.
    6  Wir empfehlen, daB Sie lhre Kamera vor dem Aufsetzen des MACROFLASH  auf einer passenden
        Tischplatte/einem  niedrigen Stativ montieren.
                                                                                                            sie mtissen                                                           hohen                                                               Spannungen stehen,                                                            unter                                                              sehr                                                    Blitzgerdte                      daB elektronische                  denken,         Bitte daran l6I                                                                                                              die Einheit                                                                      Wenn                                                                    auseinandernehmen.                                                         niemals                                                                       selber                                            und sie                                 geschutzt werden                 vor                     Feuchtigkeit        deshalb
        gewartet werden muB, sie dann zu lhrem COBRA-Fachhdndler bringen.
      7.  Wir haben uns die groBte Muhe bei der Ausarbeitung  dieser Anleitungen gegeben, damit sie so deutlich,
       umfassend und genau wie moglich sind. Wir kdnnen aber keine Verantwortung  fUr die Probleme
       ubernehmen,  die aus der bestimmten Kamera- bzw. Linsenausfuhrung  entstehen. Wenn Sie sich nicht
        sicher sind, ob lhre Kamera fUr den MACROFLASH  geeignet  ist, dann bitte lhren COBRA-Fachhiindler um
        Rat fragen.                                                                                   19
View original page 20Page 21 · Read text
AU SWECH SELN DER BATTERTE
1. Den Batteriegehdusedeckel   in der Richtung des Pfeils schieben und ihn dann nach oben klappen.
2. 2x AA Alkalibatterien  einsetzen und dabei die Diagramme im Gehduse beachten. Ni-Cad-Batterien
   konnen auch benutzt werden, aber wir raten dringend davon ab, daB Zink-Kohlenstoffbatterien  eingesetzt
   werden, weil sie nicht lange halten und zum Auslaufen neigen.
3. Die Batteriekontakte sauber halten und die Batterien herausnehmen, wenn die Einheit 2-3 Wochen lang
    nicht benutzt wird.

M AC RO F LAS H. B E F E sT' G U N G
1. Den Schraubenring  (5) wiihlen, der lhrer Linse entspricht. (Der Gewindedurchmesserwird normalerweise
    auf der Linse angegeben,  d.h. ,€ 49mm.) Wenn der richtig groBe Ring fUr lhre Linse nicht geliefert worden
      ist, dann konnen Sie ihn sicherlich von lhrem Fachhdndler  vor Ort beziehen.
2.  Den Ring vorsichtig auf das Gewindeprofil des Fokussierrades   (1'1 ) schrauben.
J. MACROFLASH an der Linse befestigen und das Fokussierrad  (11 ) vorsichtig so weit nach links drehen,
    bis die Gewinde eingreifen und Sie einen Widerstand fUhlen (festschrauben,  aber nicht zu fest anziehen).
4.  Das Aufsteckende des PC-AnschluRkabels  (10) in die MACROFLASH-Buchse  stecken. Bedingt von lhrer         I
   Kameraausfuhrung  entweder das andere Ende in die PC- (bzw. X)-Buchse der Kamera oder in die Buchse
   des beigelegten'Hot-Shoe'-Adapters*  (12) stecken.
     *    Wie Sie               sicherlich                           haben                                                   Kameras                                                                       keine PC-Buchse,                                                                             und                                                                                    aus dem                      wissen,                                      die                                        meisten modernen
                                     (12)   Grunde          mussen                    Sie                                                   Kamera montieren,                                                                                damit Sie                                                                                                          blitzen                                                                                             konnen.         i.{                     den Adapter                                     am'Hot-Shoe'                                                               lhrer


20
View original page 21Page 22 · Read text
Der Adapter kann so befestigt werden, daB die Kabelbuchse nach                                            www.butkus.usvorne bzw. nach hinten zeigt. Die
          Methode benutzen, die am besten fUr lhre Kamera geeignet ist.tl5tt    6  Wir empfehlen, daB Sie wenn immer m6glich den MACROFLASH  senkrecht halten, d.h., das Gehduse
 If           sollte unter der Linse sein.    DEN MACROFLASH ANSCHALTEN
             lhre Kamera auf die Blitzsynchronisierbelichtung   einstellen (die Kameragebrauchsanleitung   einsehen). I    1.     2. Den 'AN'-Schalter (8) drUcken, bis die grune Anzeigelampe aufleuchtet. Kurz danach blinkt die Bereit-
           Lampe/Testtaste  (7) auf, und jetzt ist der MACROFLASH betriebsbereit   ist.
          Hinweis: Die Konstruktion des MACROFLASH bedeutet, daB er so lange  liiuft, wie die grUne Lampe im
           Schalter (8) aufleuchtet. Wenn der MACROFLASH noch voll geladen  ist, Sie ihn aber nicht mehr
          verwenden mdchten, ihn wie Ublich aufbewahren. Nach einem kurzen Zeitraum entladet er sich ohne
          Gefahr und ohne weitere Entladung der Batterien.
     3. Bei der Ladung des MACROFLASH-Hochleistungskondensators vor der Benutzung zuerst mit der
           Testtaste (7) ein paar Testblitze abfeuern.
          Fokussierung der Linse
   Rrt    Verfahren fiir das manuelle Fokussieren
       Die Linse wie Ublich fokussieren Bei manchen Linsen dreht sich das Gehduse beim Fokussieren, und in
      diesem Falle ist es vielleicht einfacher, wenn Sie statt dessen das Fokussierrad  (11 ) drehen. I


                                                                                                           21
View original page 22Page 23 · Read text
Verfahren fiir das automatische Fokussieren
 Die meisten AF-Linsen haben wie oben beschrieben  ein bewegliches Gehduse. Das Fokussierrad  (11 ) kann
 vielleicht so festsitzen, daR der Motor fUr das automatische Fokussieren es nicht drehen kann, aus dem
 Grunde sollten Sie die Linse auf manuelles Fokussieren schalten und wie oben verfahren, damit der AF-Motor
 nicht belastet wird.
 BEL'(;HTUA'GSRE GLER
Automatisch
1. Den automatischen/manuellen Schalter (3) zu ,A schieben.
2. Wenn Sie einen ISO 100 Film einlegen, lhre Kamera auf 6.6 stellen und aufpassen, daB ein Abstand von
   30 bis 90cm zwischen dem Gegenstand und der Linse vorhanden ist. Der automatische Sensor (2) regelt
    die Belichtung.
3. Bei einer anderen Lichtempfindlichkeit  die Blitzhinweistabelle  (6) hinten auf der Einheit einsehen.
Manuell
1. Den automatischen/manuellen Schalter (3) zu 'M' schieben
2. Die Blitzhinweistabelle  (6) hinten auf der Einheit einsehen. Sie haben jetzt zwei Verfahrensm6glichkeiten:
   A. Den Gegenstand  verschieben, so daB er gut aussieht, wenn Sle ihn durch den Bildsucher betrachten.


22
View original page 23Page 24 · Read text
www.butkus.usISO 200 Film eingelegt haben und   und den Abstand vom Linsengehduse messen. Wenn Sie z.B. einen
    ein Abstand von 40cm zwischen dem Gegenstand und der Linse vorhanden ist, dann sollten Sie die
    Blendeneinstellung   fl 6 benutzen.
    B. Wie oben verfahren, aber die gewUnschte Blendeneinstellung  voreinstellen und bedingt von der
    Lichtempfindlichkeit  den Gegenstand so verschieben, so daB er im Bildsucher bei dem Abstand fur die
   bestimmte Blende scharf aussieht,  d.h., wenn Sie eine Blende von E haben mochten und einen ISO 400
    Film benutzen, dann sollte sich der Gegenstand in einem Abstand von 120cm zur Linse befinden.

Allgemeiner Hinweis  ftir das automatische und manuelle Verfahren
Wenn Sie einen Gegenstand fotografieren oder einen Hintergrund haben, der sehr dunkel (oder schwarz)
bzw. sehr hell (oder weiB)  ist, dann mUssen Sie vielleicht eine andere Blende als die in der Blitzhinweistabelle
(6) angegebene  einstellen. lm Falle von weiB die Blende um 1-2 Anschldge offnen (d.h. wenn 6.6 empfohlen
wird auf f4 oder 2.8 offnen). lm Falle von schwarz sie um 1-2 Anschldge schlieBen (d.h. wenn f5.6 empfohlen
wird auf E oder f11 schlieBen). Sie mussen das ein paarmal ausprobieren, und wir empfehlen deshalb, daB
Sie den Gegenstand dreimal fotografieren. Ein Bild ist unterbelichtet,  eins ist Uberbelichtet und eins ist korrekt
belichtet.


                                                                                            23
View original page 24Page 25 · Read text
SPEZ'FTKAT'ONEN
Hinweis-Nr:        5m @ ISO 100
                               ISO 100Max. Abstand @f2:     2,5m @Laufzeit:               10 Sekunden
Anzahl der Blitze:         ca. 120
Abtastbereich:        B0o
Auto-Einstellung:  66@ ISO 100 (m)
EffektiverAuto-Bereich:  30-95cm
Linseneignung:      Brennweiten von mehr als 50mm
Blitzdrehung:        360o moglich
Batterien:             2 x AA-Alkalibatterien
Abmessungen:     150x90x36mm
Gewicht:              2009 (ohne Batterien)

Die Spezifikationen  unterliegen Anderungen ohne vorherige Benachrichtigung.


24
View original page 25From the M. Butkus archive. Original publisher and archive notices are retained.
Check the model and edition against your equipment.
PDF verified 2026-10-10.