Film cameras
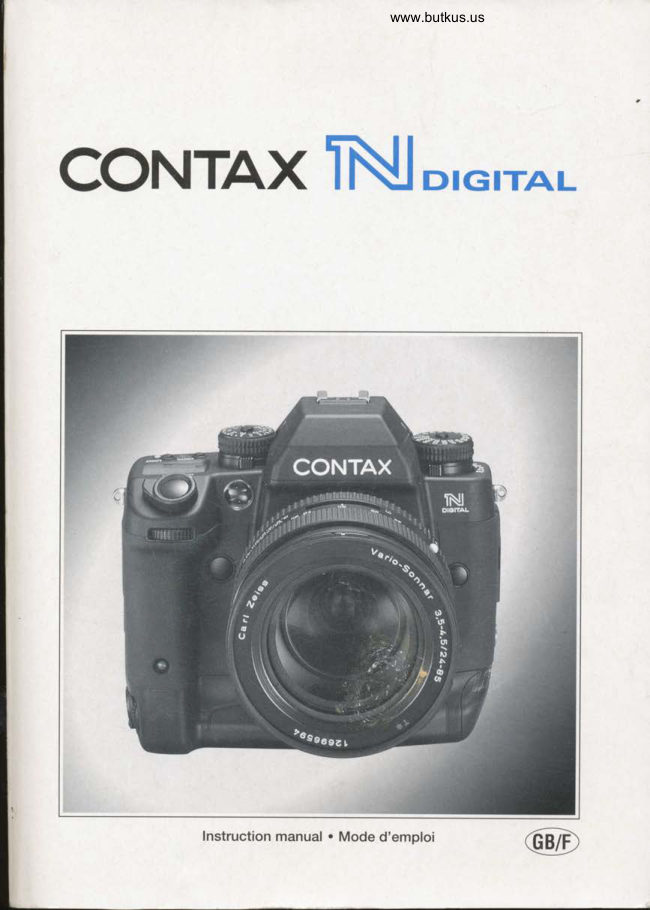
CONTAX N Digital User manual
User manual for CONTAX N Digital. 114 pages in French. Read the original PDF, download or print a copy without registration.
114 pagesFrench10.1 MB PDF
Loading your manual…Open PDF directly
Document details
- Brand
- Contax
- Model / document
- CONTAX N Digital
- Document type
- User manual
- Language
- French
- Pages
- 114
- File size
- 10.1 MB
- Category
- Film cameras
- Document date
- Not specified in catalog
Search available document text
Find a term, then jump to its page in the original PDF. Image-only pages may not be searchable; check the PDF for exact wording and diagrams.
Page 1 · Read text
www.butkus.us


                 DIGITALCONTAXN


                        Instruction manual . Mode d'emploi
View original page 1Page 2 · Read text
Thank you for purchasing the Contax N Digital camera. Please read these
instructions carefirlly before using the camera to ensure proper use and long
service life.
This camera is a full-frame single-lens reflex camera equipped with a full-size
35mm GCD sensor, providing  it with the same handling characteristics as a
conventional 35mm film camera. This attention to detail allows  it to be used with
the same high degree of attention to image creation as any Contax film camera.
The N Digital carries on the Contax tradition of building "cameras for the creation
works of art," by providing both auto focus (AF) and manual focus (MF) modes for
optimum response to all photographic subjects and situations.
The Contax N Digital is also equipped with the following new features; please read these
instructions carefully before using the camera to ensure proper use and long service life.
1. Full-size 35mm (24mm x 36mml digital camera with greater than six million pixel
   resolution
2. Wide variety of recording format (image quality) settings
3. Multiple white-balance modes
4, lmage storage media supported includes CompactFlashrM Type l/ll, and IBM MicrodriverM
5. Photographic (recording) functions:
   1 Auto-focus mode with diagonal s-point auto-focus detection and manual focus mode
  z High-speed shutter designed to draw optimum performance from Carl Zeiss T* lenses
  3 Focus Automatic Bracketing Control (Focus ABC) function to automatically  shift focal
      point for editorial considerations.
    I A wide variety of accessories are available to expand the range of artistic possibilities
,t These Operating Instructions have been written based on the use of CompactFlashrM memory cards. General
   handling procedures are the same, however, when IBM MicrodriverM media are used.

 The photographs used in these instructions are simulated images provided for the purpose of
 exolanation.


  Attaching the Strap
         l Attach the protector to         2 Attach the triangular     3 Pass the strap through the protector
        the Strap lug.                        ring to the Strap lug       and triangular ring and attach  it as
                                                        shown on the diagram.


       Protective cover
View original page 2Page 3 · Read text
About the Provided Acce.sson'es    www.butkus.us

Before beginning to use the camera, please confirm that all accessories are included in your
package. In the event that something is missing, contact your dealer immediatelv.
C Contax N Digital camera
12 Strap
Q 4c adapter (electrical cord provided differs depending on region of sale).
@ Battery charger (units marketed outside the U.b. are irovided with power cords for their specific    regions).
'g Chargeable AA batteries (4)q CCD parameter disc: contains information unique to the camera's CCD image sensor.
@ CONTAX RAW DATA DEVELOPER (see page OO;
@ te ee 1394 cabte (see page g6)


                      @


                                                                                                        /zF\
                                                                 13,


                                                             t9,
View original page 3Page 4 · Read text
Contents

lntroduction
   Attaching the Strap
   About the Provided Accessories  ................ 3   SIMPLE SHOOTING PROCEDURE
   Caution and Warning Symbols  ................... 6      1. Using the Program Auto-exposure
   Hand ling Precautions ..................................  6     Mode                              ..................44  Names of Parts                                   ...... 10      2. Confirming and Erasing 1mages............46   Display Panel and Viewfinder Display ......12
                               APPLIED PHOTOGRAPHIC
                             TECHNIQUES
                                          O  Selecting the Recording Format
                                                       (lmage Quality)           .....................49PREPARATIONS BEFORE                                          a  Selecting the ISO              .................50SHOOTING                                          o  Setting the White Balance  ..................... 51
   1. Charging the Batteries  ..........................  1 6          1. Taking Photos with the Aperture Priority
   2. Loading Batteries and Confirming                Mode: "Av" (Aperture Priority Auto
     Charge Capacity           ..................17          Exposure) Mode ("Av" stands for
   3. Mounting and Removing Lenses ..........18          "Aperture value".)            ................53
   4. Adjusting the Diopter               .......... 18         2. Taking Photos with Shutter Speed Priority
   5. Loading/Removing CompactFlashrM                  Settings: "Tv" (Shutter Priority Auto
    Memory Card.........         ..............19          Exposure) Mode ("Tv" stands for "Time
   o. Adjusting the LCD Monitor                   value".)                            ...............54
   Luminance                        .........2O         3. Taking Photos in the Program Auto
   7. Setting the Time and Date ....................21          Mode: "P" (Program Auto Exposure)
                            Mode                              ..................55
BASIC OPERATIONS                                   4. Taking Photos with the Exposure Set
                                                       Manually: "M" (Manual Exposure)  1. Main Switch                          .......23                            Mode                              ..................57  2. Shutter Release Button              ...... 23                                                                    5. Using the Bulb Exposure Mode "B" .....58  3. Switching the Drive Mode .................... 24
  4. Front Command Dial .............................25         6. Taking Photos with Exposure                                                 Compensation ...........           ..........59  5. Mode Dial ...........           .................25
  6. Rear Command Dial ..............................25         <Using the Exposure Compensation dial>                                                       <Taking Photos with the Exposure
  7. (:'  ln""ording Format)/                       Auto Bracketing Control Mode
    BACK Button                         .....26          (Exposure ABC mode)>
  B. W.BAIJ <J 1ente4 Button...................... 26          <Taking Photos with the AE Lock>
                                                                    7. Using the Self-Timer.............................. 64  9. Display Button             .....................26
 10. -g lerase;/ MENU Button ...................27         8. Checking the Depth of Field .................65
   '1                                           Socket            ...........65  1. Holding the Camera ............................. 27         9. Cable Switch
 12. Vertical Position (Portrait Format)
     Photography ...............           ........ 28   FLASH PHOTOGRAPHY
                                                1. Flash Photography Using the
FOCUSING                                 CONTAX Tl-A Flash  ................................ 67
                                                  2. Taking Photos Using a  1. Selecting the Focus Frames .................30
  2. Focusing in the Autofocus Mode ..........32       CONTAX TLA360 Flash ......................... 70                                                  3. Taking Photos with Other Flashes  3. Focusing Manually           ..............36
  4. Taking Pictures with the Focus Shifted             Using the X Contact  ..............................72
       in Three Different Steps
     (Focus ABC mode) ................................ 38   ADDITIONAL OPERATIONS USING
                            THE FRONT COMMAND DIAL
SELECTING THE METERING MODE       1. Using the Command Dial as
  1. Types of Metering Modes and Their                   .the Exposure Compensation Dial .........74                                                       Using the Command Dial as   Features                            .............41       2.
  2. Metering Range             ...................42
View original page 4Page 6 · Read text
Gaution and Warning Symbols
  These Operating Instructions feature the following caution and warning symbols to indicate items of special
  importance. Be sure to read the contents of these warnings carefully, and use the features correctly.


                                                                                       rikerihood or resurtins in death A onnc=*  | l[";,tJ3"JJ[*llfiSfi,""i1'ff,,:*':l  il;""?,l'n'

                         symbol                                       indicates                         fnis                                             handling procedures which may result in death or personal A  Wnnru1p6- -- |                                                   properly.                            injury                                                       if not followed                          |

                                                                                          in injury to the user' or phvsical A caumoN  | ffiJl["il:ffi:nii,""Tf,ff:#]"}#x1;:"''

Handling Precautions
<Precautions for Operating the Camera>
             o  lf camera or batteries become hot, emit smoke or a burning smell, or display other
                      abnormal symptoms, remove them from the camera immediately to prevent fire. When
                        handling the batteries, take precautions to avoid being burned.
             a Never attempt to disassemble or modify the camera, since you may receive a severe
                             electric shock.
             o Do not operate the electronic flash at close proximity to a person's eyes (especially
                       those of an infant), since eye damage may result.
             o Do not look through the camera directly at the sun or other strong light source, since
                       your eyesight may be damaged.
             o Do attempt to take pictures while driving or walking, particularly when looking through
                        the viewfinder or at the LCD monitor, since you may cause an accident.
             a When taking pictures, remain aware of your surroundings and what is happening
                      around you.

             o Clean the camera well after using  it at the beach or other locations subject to large
                        concentrations  of sand or dust. Salt air may promote corrosion of metal components
                    and damage or short circuits in electronic parts, causing the camera to emit smoke or
                        catch fire. Sand inside the camera may result in internal damage and operating
                         malfunctions.
             o  lf the camera is brought quickly from a cold place to a warm room, condensation may

                                                  parts,                                         in                             circuits                                     electronic                                                causing                                                            the                                                     camera                                                                         emit smoke                                                                          to                                                                                          or catch fire.                                                                                 WheneverA cnunoru      form on the lens and internal parts. Such condensation may result in damage or short                          possible,                                 avoid                                         subjecting                                                   the                                                                 to                                              camera                                                       sudden                                                                                                                                                                                                            if                                                               changes                                                                                                          in temperature,                                                                                  and
                       condensation occurs, turn off the camera power quickly and leave  it off until all
                       condensation  is gone.
              o This camera is a precision electronic instrument, and should be protected from
                       impacts and falls that might cause damage to internal parts or the shorting of circuitry.
              o When taking the camera overseas or using  it to record important events, check its
                        operating condition and take test pictures beforehand to confirm proper operation.

o This camera is not designed to be waterproof, and cannot be used in the rain or under water.  lf the camera
  should inadvertently be exposed to water, it should be taken quickly to a Contax Service Center for
   insoection.
a To remove dust and dirt on the lens and viewfinder glass, blow off with an air blower or wipe gently with a soft
   lens brush.  lf they are soiled with fingerprints, wipe off lightly with lens tissue. Wipe off dust and dirt on the
   mirror lightly with a lens brush.
o Clean the camera body by wiping with soft cloth. Never use benzene, thinner, or other volatile solvents or
   cleansers, since such substances will damage the body materials.
View original page 6Page 7 · Read text
www.butkus.us
o Do not remove the CompactFlashrM memory card or IBM MicrodriverM while the card access LED is flashing.
o Interference may occur in recorded or played back images when the camera is used in areas subject to strong
   electromagnetic interference (e.9., near a television set or stereo speakers).
o Do not direct the camera lens directly toward the sun when shooting, since the CCD element may be
   damaged.
o Dropping the camera may cause damage to internal parts even though the camera may appear superficially
   undamaged. Always take the camera to a Contax Service Center for inspection  if it is dropped.
o Do not attempt to touch the insides of the memory card slot. since damaoe or malfunction mav result.

  Microcomputer Protection Circuit:
  Thts camera incorporates a safety circuit to protect  its microcomputer against strong external static
   electricity.
  Though rarely,  it may fail to function because this safety circuit has come into action. In this case, set the
  main switch to OFF, remove the batteries, reload them and use the camera aoain.

  For best performance, we recommend the use of genuine Contax accessories. Contax is not responsible for
  any accidents or damage caused by the use of accessories made by other manufacturers or fashioned by the
   user.


  Photographs taken of professional performances, exhibitions, displays, or copyrighted materials may be
  used only for your own personal enjoyment, and only with the consent of the copyright holders. Other use
  may constitute violation of applicable copyright laws. Be aware that some performances, exhibitions, or
  displays may impose restrictions on photographic or other recording even when the purpose of such
  recordings are personal enjoyment.

  Test Photos and Warranties
  Make it a practice to take test shots before beginning any important photography session, in order to confirm
  that images are being recorded properly. Contax will not be held responsible for failure of photographs to be
  recorded or transmltted to a computer as the result of any defects in recording media (CompactFlashrM  or
  IBM MicrodriverM).

<Storing the Camera>

                o Store the camera in a well-ventilated  location, avoiding damp or dusty areas, drawers
                          or boxes                                  containing                                              mothballs,                                                          or in laboratories                                                                            or other                                                                                      locations                                                                              where                                                                                            chemicals
                           handled.                                 Exposure                                                 to such chemical                                                       fumes can                                                                                      resultA caunoru      are                                                                                                         in damage                                                                                                       to the                                                                                            camera's
                               circuitry, resulting in short circuits and causing the camera to emit smoke or catch fire.

o Do not place the camera in places that may be exposed to high temperatures for extended periods of time
   (the beach in summer, a closed car under bright sun, etc.). Such high temperatures may cause adverse affects
   or damage to the camera, batteries, or CompactFlashrM memory cards.
a Remove the batteries before storing the camera for extended periods of time, to prevent battery leakage and
   resulting damage.
<Display Panel and LCD Monitor>
                a Strongly rubbing or pressing against the LCD monitor screen can cause damage or
                         other malfunctions.  lf dirt or dust adheres to the surface, use a blower brush to
                    remove the dirt. In the event of severe soiling, wipe gently with a soft cloth or

                                                 lf the                 o                     LCD monitor                                         should become broken, take precautions to prevent personal injuryA crurtoru |   chamois.                             glass                       from                                   fragments.
                 a  lf the LCD monitor breaks and its liquid contacts your skin, quickly wipe away any
                       remaining liquid and wash the skin with soap and water. lf the liquid should enter the
                        eyes, wash with clean running water for at least 15 minutes, then seek medical
                           attention immediately.
o Due to the innate characteristics of LCD panels, a few pixels may appear permanently lighted or may not light
   at all. This is not a malfunction, and does not affect the recorded image in any way.
O The LCD monitor may appear difficult to see in some outdoor lighting situations.
                                                                                            7
View original page 7Page 8 · Read text
<Precautions Regarding the Handling of Nickel-Metal Hydride Batteries>
             o Do not recharge or place batteries near sources of high heat (near flames, heaters, or
                               in direct sunlight, etc.), or in places exposed to flammable gasses, since the batteries
                  may generate heat, emit smoke, or rupture.
             o Do not allow the positive (+) and negative (-) terminals of batteries to be short-
                           circuited by metallic wires or object, since batteries may generate heat or emit smoke
                         or flames.
             o Do not store batteries together with keys, necklaces, coins or other metallic objects,
                                                                                                    short-circuits'                                                                       terminals,                                                                        causing                                                       the                                                              battery                                 may                                               contact                              the                                   objects                        since    onrucen                                                                      may generate heat,                                                                                            in fire,                                                                              since they                                                                      of them                                                      or                                                    dispose                                       try                                                batteries,                                    to heat                  Do notA             o
                        emit smoke or flame, or rupture.
             a Do not attempt to disassemble or modify batteries, since they may generate heat,
                        emit smoke or flame, or the internal battery liquid may enter your eyes, causing
                        blindness or other personal injury. lf battery liquid should enter the eyes, wash the
                     eyes with clear running water and seek medical attention immediately.
                        I Use only the designated battery charger to recharge batteries. Using other chargers
                  may cause batteries to generate heat, emit smoke or flame, or rupture.

                a Never place batteries in a microwave oven or other container exposed to high-voltage,
                        since battery liquid may leak, or the battery may generate heat, emit smoke or flame,
                         or ruoture.
                                                                                               personal                                                                            your                                                                                                skin, causing                                                                         liquid                                                 may                                                                        contact                                                       Battery                                                 batteries.                   Do not                           use                                     leaking    wnnrurruc  I                                                                                                  with clean                                                                              immediately                                                            wash                                                               contact                                                                               skin,                                                            liquid                                                does                                        In                                 the                                   event batteryA                  '  injury.
                           water.
                  a Do not use broken or ruptured batteries, since they may generate heat, emit smoke or
                         flame. or cause electrical shock.

                   Do not place batteries in water of any kind, or allow them to become wet, since the
                           batteries may generate heat, emit smoke or flame, or cause electrical shock.
                   Do not use or attempt to recharge wet batteries, since they may generate heat, emit
                   smoke or flame, or cause electrical shock.
                  Do not store batteries in locations accessible to small children, since injury could

                                                 or subject them to strong impacts, since they may be damaged                              throw                                         batteries                  Do not
                                                      fluid.A crurloru     andresult.                             leak                                    battery
                    Whenever possible, use batteries at room temperature (20'C t 5"C). The battery
                         capacity and usable time between recharging may be reduced in situations of extreme
                       heat or cold, such as during mid-summer or deep winter weather, or when batteries
                         are left in a hot location (e.9., inside a closed car exposed to sun). Such conditions
                  may also shorten the usable service life of the battery.
                 When not using batteries, store them in a cool, dry location.

                   Nickel Metal Hydride Batteries
                  Use and Recycle
View original page 8Page 9 · Read text
www.butkus.us
<Battery Charger and AC Adapter Handling Precautions>

              o Be sure that charger and Ab adapter plugs are connected securely before use. Loose
                        plugs and poor contacts can cause generation of heat, fire, and electrical shock.
             o Do not attempt to modify the AC adapter's cords, or subject them to unreasonable
                            force. Damage to the cords can cause fires and electrical shock.  lf cords become so
                   damaged that their wire cores are exposed, discontinue use and consult your dealer
                          or Contax Service Center.
            O Do not attempt to remove covers, disassemble, repair or modify your charger or AC
                         adapter, since dangerous electrical shock could result.
              o Charger or AC adapter plugs that have become laden with dirt or household dust
                       should not be                                 used or                                         approached                                                             metal                                                          with                                                                            objects, since                                                                                                        electricity                                                                                          might                                                                                           be
                                   throughA wanrurnc      transmitted                                             the                                                  metal, causing                                                                                     fire                                                                      or personal                                                                                             electrical                                                                                     shock.                                                                                                                   In the                                                                                                 event of
                       heavy soiling of a plug, remove  it from its outlet and clean away the dirt before
                           reusrng.
             o In the event that a charger or AC adapter plug emits smoke or unusual smell or sound,
                          or if it is damaged by impact or falling, cease use immediately. Continuing to use a
                   damaged plug could result in fire danger. In the event of damage to a plug, consult
                       your dealer or Contax Service Center.
             a Do not connect a charger or AC adapter plug to any power source other than normal
                      household AC current. Using non-designated voltages or currents can cause fire
                      danger or electrical shock.

             o Use only the designated AC adapter and charger. Using other adapters may result in
                        accidents and fire danger.
             a Never attempt to splice the AC adapter cord, or subject  it to severe twisting, bending,
                          or stretching.
             o Do not handle the charger or AC adapter with wet hands, since personal electrical
                                                result.                      shock could
                              graspA cnunoru  o Always                                      the plug body (not cord)when removing the AC adapter plugs from
                    camera and power outlet. Pulling on the cords could cause breakage or other damage
                           to the wires, resulting in danger of fire or electrical shock.
             o  lf you observe any damage to the charger or AC adapter, including broken wires and
                            faulty plug contacts, discontinue use and consult your dealer or Contax Service
                          Center.

o Prolonged use may cause the AC adapter to feel warm; this is a normal phenomenon and not a malfunction.
r When not using the AC adapter for an extended period of time, first remove the plug from the camera body,
  then disconnect the adaoter from its AC outlet.
a  lf you wish to use the AC adapter while batteries are loaded in the camera, first set the camera's power switch
   to OFF, then connect the AC adapter before turning on the camera again.
o The AC adapter has been designed for exclusive use with this camera. To prevent the danger of fire and
   electrical shock, do not use the adapter with products other than the specific digital camera for which  it was
  designed.

* CompactFlash is a registered trademark of SanDisk Corporation.
x Windows is a registered trademark of Microsoft Corporation  in the United States.
* Microdrive is a tiademark of International Business Machines (U.S.A.)
*  All other corporate and brand names are the registered trademarks or trademarks of their respective owners.
View original page 9Page 13 · Read text
www.butkus.us

<Rear Display Panel>

                                                   Recording format (image quality) setting (P. 49)
                                                            . RAW
White balance                                             . TIFF
 setting (P.51)                                o JPEG1
 o One-touch oreset                                      . JPEG2
 o Default value selection                    O JPEG3                    Custom digital
                                                                                                function mode (P. 93)


        [-,5H"iTlH,q'^q',qffi:Hg

                Remaining exposure counter (P. 49)       Loaded memory card    Remaining battery
                                                              detector  (P. 107)          capacity (for playback) (P. 17)

<Display panel illumination>
The display panel can be illuminated when viewing conditions require. The light turns on and off
each time the LIGHT button is pressed.
o  lf other dials or buttons are operated while the display panel is lit, the duration of illumination  is automatically
  extended. The display panel light turns off as soon as the shutter is released.


                                                                                        13
View original page 13Page 14 · Read text
Venmo @mike-butkus-camera  Ph. 2083
PayPal Name  Lynn@butkus.org      www.PayPal.me/lynnbutkus
View original page 14
Page 16 · Read text
www.butkus.ust
        In addition to providing a centralized source of information regarding focus, aperture, and shutter
     speed, the Contax N Digital's viewfinder also displays an Exposure meter and Remaining exposure
      counter.
     The viewfinder display turns on when the operations below are performed, then automatically turns
       off after 16 seconds to save power.
   e When the main switch is turned on.
   @ When the exposure check button is pressed or shutter button is half-pressed while the main
        switch is turned on.
                lf some action is taken, such as changing apedure, shutter speed or any dial is used while the
         viewfinder display is lit, the display time is extended another 16 seconds.
     r The time display (power hold time) can be changed. (Page 91)

     The vievvfinder display turns off in the following cases:
    o During shooting.
    o When the battery is spent.
     r When the exposure mode lever is set to ISO or CF.
                                         CSHI, or SETUP.    o When the Mode dial is set to fl,
    <Exposure Meter>
     The exposure meter inside the viewfinder appears differently depending on the exposure mode:
   C Auto exposure (Tv, Av, P mode): displays exposure compensation value
   6D  Y   Atby timedefaultof purchase,to display thethe camera's"exposureexposurecompensationmeter value."display Thisduringdisplay"evaluativecan bemetering"changed ifis set
           desired to show the difference between evaluative metering and central weighted averaging,
            or the difference between evaluative metering and spot metering (for details, see P.91).
   O Manual exposure "M" and flash exposure "X": displays the difference between the selected
       exposure setting value and the optimum exposure according to the set metering mode.
   O guln exposure ("8"): No display
View original page 16Page 17 · Read text
PREPARATIONS
    BEFORE SHOOTING


For battery charging, consult the instruction sheet provided with the supplied
accessory charger.
o The Nickel Metal Hydride (N|MH) batteries are not pre-charged when shipped from the factory, and must be
  charged before loading in the camera.


T6
View original page 17Page 18 · Read text
www.butkus.us

                     1 Raise the Battery holder release knob and                         ^ rotate in the direction of the arrow to I                            remove the Battery holder.
                                         I  Insert fully charged NiMH batteries into the                                                   holder.  Battery holder                        -  Battery
                                           Following the symbols on the holder, insert the batteries
                                      so that their polarities (+/-) are aligned correctly.
       Battery h                   o For battery charging, consult the instruction sheet provided
      reteasek                                   with the supplied accessory charger.
                                                  Ordinary                                          AA                                                                       alkaline batteries                                                                        cannot be used, since they do 2                           o                                                                              capacity.                                                 not provide                                                                      sufficient
                       vQ rotateLoad thetheBatteryreleaseholderknob clockwiseinto the camerato lockandin
                                     place.
                             o Fold down the release knob to return it to the original position.
                             a Even when fully charged batteries are used, continuous shooting
                                                      or low-temperature conditions may result in the terqporary
                                             appearance of a "low-battery"  indicator ("8a" or "$"). In this
                                                     event, rotate the main switch between ON and OFF two or three
                                                      times. This will cause the batterv indicator to be renewed:  if the
                                         "E!" or "|sl" Oattery indicator appears, the battery has sufiicient
                                                     remaining capacity for continued use.

                        Battery capacity         For extended use indoors, use of the accessory
                      during recording.      AG adapter is recommended to conserve
                                             batteries. Connect the adapter to the External
                                  power socket.
         Battery capacity during playback.
                       JPEGl
  \-zEEk             $


<Confirming Remaining Battery Capacity>
The battery capacity indicator "e"  has the following meanings:
            Battery capacity indicator
                                                          Meaning
       Recording                Playback

      @                      H                    Sufficient capacity for continued use

        ga                                                Battery capacity becoming low                               $

        _CZF\l/                 /t\                                                     Time to charge           (Flashing)                 I
                  \l/-cf-/t\                                    No remaining charge; camera will not operate                                                                                            tlU
           (Flashing)

                                                                                                        LI
View original page 18Page 19 · Read text
<Mounting Lenses>
                              Remove the camera body cap and the lens                   1                                                                     I-  rear cap.
                           Lens mount
                          mark         )  Align the mount mark on the lens with the
                                  -  lens mark on the camera, insert the lens,                                 then turn  it clockwise until a click is heard and
                                   the lens is firmly engaged.
                            o Use Contax N-mount lenses.
                             a Contax 645 system lenses can be used by mounting them on
             Lens mark                      an NAM-1 mount adapter. (Page 100)

                          <Removing Lenses>
                                 Press the Lens release button and turn the lens
                                counterclockwise allthe way until it stops, then
                                          pull  it forward to remove it.
                             a When changing lenses, take care not to touch the surface of
                                                the lens or the interior of the camera. Also, avoid changing
                                                  lenses in environments where the camera  is exposed to high
                                               dust concentrations, since damage or soiling of the contacts
                                      may result, leading to malfunction.


                                  This camera is equipped with a built-in diopter      <Adjusting the diopter>                                   correction mechanism. Turn the Diopter
                                 adjustment dial and adjust for your vision.
                                   The adjustment range is -3D to +1D (Diopter).
                             a  lf the diopter cannot be sufficiently adjusted using the
                                           camera diooter correction mechanism, use the optional FM
                                               type diopter lens.

                                   The diopter adjustment range is as follows:

                                          Diopter lens      Adjustment range
                                                       Built in           -3D to +1D    <Attaching a diopter lens>
                                FM -3            -6D to -2D
 Diopter lens                        FM +2            -1D to +3D
                              <Attaching a Diopter Lens>
                                Remove the camera Eyepiece ring and screw in the
                                           diooter lens.
                         Eyepiece ring
          _\---tsye cupvlffi

18
View original page 19Page 20 · Read text
www.butkus.us

                           <Loading>
      Memory card cover        1 Raise the Memory card cover release knobI                                 - and rotate in the direction of the arrow to
                            open the compartment door.

                                                                                                               is                                 )  Contirm that the Memory card eject knob                                                             insert a CompactFlashrM                                 -  depressed, then
                          memory card into the compartment.
                                Be sure the "<" marked surface of the card is aligned
                                         with the camera's LCD monitor side. then oress in the
                                      card straight until it stops.
                           a  lf the Memory card eject knob is protruding, press  it down
                                                 before inserting the memory card.
release knob                    a  lf the memory card meets resistance and cannot be inserted
                                         more than part way, do not attempt to force it, since damage
                                                    to the camera will result.2
                Q Close the Memory card cover.                                                  a,t
                                        Fold down the Memory card cover release knob and
                                             return to its original stored position.


 Memory card eiect knob


                         <Removing>
                                 Neve remove a GompactFlashrM memory cardI
                                       while the Card access LED is flashing, since the
                                     card may fail to record a picture. Damage may
                                     occur to recorded data or to the camera itself.
                                        I  Open the Memory card cover, and press the                                 - Memory card eject knob so that the knob
                                     rises up.
Memory card eject knob
      CompactFlashru memory card        I  Press the Memory card eject knob again to2                                -  remove the CompactFlashrM
                            a When the Memory card eject knob is pressed, the
                                           CompactFlashrM memory card will be ejected slightly; grasp  it
                                                 with your fingers and pull from the camera.

                                  See P. 83 for instructions on formatting
                                     CompactFlashrM memory cards.


                                                                                      l9
View original page 20Page 21 · Read text
<Precautions Regalding use of CompactFlashrM and IBM MicrodriverM Media>
 a CompactFlashrM and IBM MicrodriverM media are high-precision devices, and should not be subiected to
   dropping, bending, strong impact or vibration. Such treatment may damage the device.
 o Do not use or store these devices near televisions, speakers or in other areas exposed to strong magnetic
    fields or static electricity, since recorded photographic data may be damaged.
 o Do not expose CompactFlashrM or IBM MicrodriverM media to liquids, since the media may be permanenly
   damaged.
 o To preserve valuable photographic data, store CompactFlashrM and IBM MicrodriverM media in their proper
    protective cases.


                                   This adjustment allows the control of bright-
           Display button                ness of the rear panel LCD monitor screen
                            when performing REC review after shooting,
                                     playing back images, or otherwise viewing
                               images on the monitor screen.

                     1 Hold the Display button depressed as you                                   -  rotate the Rear command dial untilthe
                            BRIGHTNESS CONTROL mode is selected.         Rear command dial
                                 While watching the image on the screen, adjust
                                   the luminance as desired.
                                     Luminance scale marks will appear in the monitor to
                                             assist in the adiustment.


                                          I  Release the Display button to confirm the                                                                 value.                                   -  selected adjustment
   E-=I

       Luminance
         adjust scale


20
View original page 21Page 22 · Read text
www.butkus.us

                    1 With the Main switch set to ON, hold the                        ^ Mode dial lock release button depressed1                                  while setting the Mode dialto SETUP.
                                  The SETUP menu will aooear on the LCD monitor.
                                        tf Rotate the Rear command dial so as to
                                 -  move the blue cursor and select the 13th
       Mode dial               menu item "DATE," then press the " +J "
                                    button.
                                  The DATE/TIME ADJUSTMENT menu will appear on the
                             LCD monitor, and the Year display will appear in the blue           SET_UP2                                   window.
                Q Rotate the Rear command dialto set the                      v  Year, then press the " +J " button to
                                   confirm.
                      IThe blue cursor window will move to the                          ^ Month position; once again rotate the Rear
                         command dial to set the Month, then press the3                                                                              't 4"  button to confirm.
                            a Pressing the BACK button will cause the cursor to return to
                                               the Year display.
                                 (  Similarly, set the Day, Hour, and Minutes                      v  positions.
                                 (  When completed, the blue cursor window                      v  will move to the Year-Month-Day display
                                     (Y.M.D); use the Rear command dialto select
                                  the display order you prefer (Year-Month-Day
                                     (Y.M.D), Month-Day-Year (M.D.Y), or Day-
                              Month-Year (D.M.Y)), then press the " +J "
                                  button to confirm your selection.
                                  The monitor display will return to the DATE/TIME
                             ADJUSTMENT menu item. This completes the settinq
6                                      procedure.
                            a At any point during the setting process, pressing the MENU
                                               button will return the setting to its previous value.
                            o Pressing the BACK button to return to the SETUP menu will
                                                   also cause any changes to be reset to their previous values.


                                                                                     2l
View original page 22Page 24 · Read text
www.butkus.us

                              The Main switch is used to turn the power on
 <When off>       <When on>                               and off and to activate the AEL (AE lock) mode.
                             a Set the Main switch at the click position to prevent accidental
                                                    ooeration.     r\=2       at;n )                                OFF: When the red mark is not visible
                                 The camera power is off.

                              ON:
                                    The camera oower is on.

                               AEL:
                                   Use AEL when you want to lock the exposure (AE lock).
                                       Automatic exposure lock is used to maintain a set
                                     exposure even when composition or lighting conditions
                                      change.  lt is often used when photographing backlit
                                          subjects or when a particular brightness value is chosen
                                       as the main subject within the frame.  lt is also used
                                when a subiect that is constantly  lit moves through a
                                     background with varied brightness values. (For details,
                                      see page 62.)


                              The Shutter release button operates in two                           Shutter                                     release     steps.  Hatfpressure                           button
                          When the Shutter release button is half-
       +                   pressed, the Viewfinder display turns on and Fuff pressure              \         /                the autofocus and metering functions are
                                    activated. When pressed further (full pressure),   -R(ffin                                   the shutter is released and the photo is taken.
                                                                        I   lr-l

a Before loading a CompactFlashrM memory card, practice pressing the Shutter release button to confirm the
  sensation produced at the half-pressed position.
a Press the Shutter release button gently with the pad of your finger to help prevent camera shat(e.


                                                                                     23
View original page 24Page 25 · Read text
The drive modes described below can be selected according to the subject and scene.
"S" ... Single-frame mode
A single frame is recorded each time the camera Shutter release button is pressed.
"C",,. Continuous shooting mode
While the Shutter release button is held depressed, pictures will be recorded continuously at a rate
of up to 3 frames per second (actual rate of recording depends on shutter speed, ISO sensitivity,
recording format, and battery condition).
rg2r rq),orr ... Self-timer mode
Set this mode to use the self-timer. For details. see oaoe 64.
                                          I  Press the DRIVE button to set the drive                         ^ mode. I                                                   All the drive modes appear on the Top display panel and
                                          the currently selected drive mode flashes.
                                   )  Turn the Front command dial until the
                                   -  desired drive mode indicator is flashing.                                  The drive mode switches as follows when the Front
                               command dial is turned.

                                        "S" <---+ "C" <-> ",U2",-r "$to"
                Q Press the DRIVE button to set the selected
                                            The Top display panel returns                                 "  drive mode.
                                     to the normal display.
 2


                     Front command dial
 3

            9     ,,ll  F5.E   .?
           E\N  IET
      www.butkus.us


24
View original page 25Page 27 · Read text
fne (:.  / BACK button is used in the following
                                way:
                                                         ti) In the " 0  " mode: To select recording format (P. 49);
                                                   to select Custom function "A" (with Display button).     oi               (2) In other modes: to return to previous steps or menu
                                               contents.
                \(
             /BACK button


                              The W.BAL (White Balance)  / +J (Enter) button
                                              is used in the following way:
                                                  11) ln the " 0  " and "PC" modes: To change the white
                                          balance from its default value, and to confirm the
                                                  selection; to select Custom function "8" (together
                                             with Display button).
                                                     i2r In other modes: to confirm functions and contents.
   W.BAU <J 6utt.t


                             The Display button is used in the following way:             Display button
                                     ,1 In the " O " mode: To switch the REC review disprav
                                       between Zoom display, Histogram display, and
                                         Standard image display, to switch between REC
               q.                               review display and Custom functions "A" and "B"
      o                              duringbuttons).non-display settings (together with other
                                                     ,.? In the " fEl " mode: To switch between Photo data
                 fi                                 display, Zoom display, Histogram display, and
             MENU                           Standard image display.
                                                      .3r LCD monitor luminance adjustment (with Rear
                                 command dial (P. 20))


26
View original page 27From the M. Butkus archive. Original publisher and archive notices are retained.
Check the model and edition against your equipment.
PDF verified 2026-10-10.