Film cameras
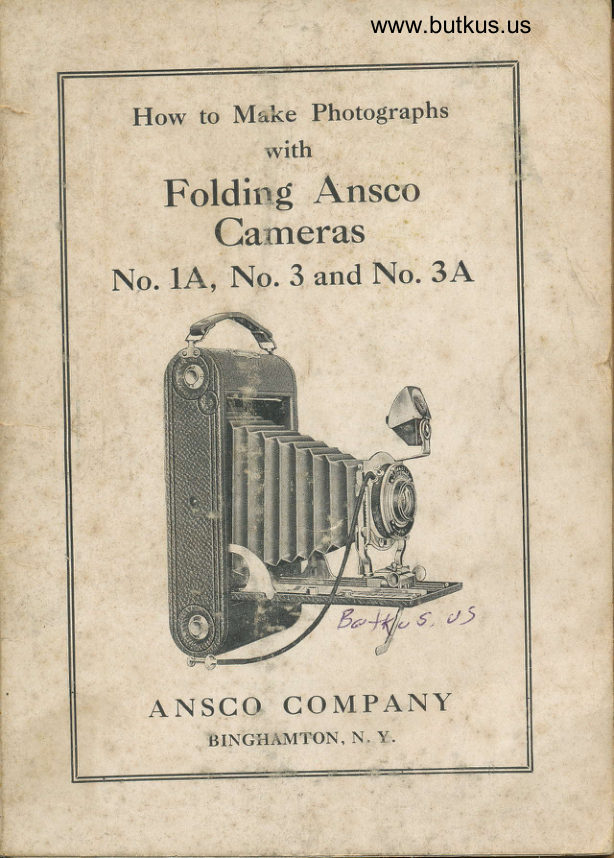
Ansco Folding No 1A, No. 3 and No. 3A User manual
User manual for Ansco Folding No 1A, No. 3 and No. 3A. 37 pages in English. Read the original PDF, download or print a copy without registration.
37 pagesEnglish7.4 MB PDF
Loading your manual…Open PDF directly
Document details
- Brand
- Ansco
- Model / document
- Ansco Folding No 1A, No. 3 and No. 3A
- Document type
- User manual
- Language
- English
- Pages
- 37
- File size
- 7.4 MB
- Category
- Film cameras
- Document date
- Not specified in catalog
Search available document text
Find a term, then jump to its page in the original PDF. Image-only pages may not be searchable; check the PDF for exact wording and diagrams.
Page 1 · Read text
www.butkus.us

 How to Meike PhotograPhs
             with
   Folding Ansco
     Cameras
No. 1A, No. 3 and No. 3A


  A N SCO CO M PANY
         BINGIIAMTON' N. Y.
View original page 1Page 3 · Read text
ANSCO COMPANY
          BINGHAMTON, N. Y.


         NEW YORK CITY
 ANSCO BUTLDTNG, 129-131 w. TWENTY_SECOND STREET


          SAN"FRANCISCO, CAL.
               171-173 sECoND srREEl


           TORONTO, CANADA
            347 eorleroo srREET, wEsr


           ANSCO COMPANY
       308 N. urcnrcAN AvENUE, cHrcAGo, IIr.


          ANSCO LIX,{ITED
143-149 GREAT IoRTLAND srREET, LoNDoN, w., ENGLAND
View original page 3Page 6 · Read text
www.butkus.us

            PART I.
               SECTION ONE
             Loading, with Film
  The roll film cartridges for FororNc Axsco cameras are
protected with black paper so as to load and unload in
daylight; but it must be borne in mind that as the black
paper is the only protection from light, the cartridge must
be kept tightly wound at all times to prevent light from
fogging the sensitive surface of the film.


                       Removing the Back
  L Select a position where the light rs subdued, preferably
at a table, on which to rest the camera.  Release the hinged
catch at one end-and remove the metal back so as to have
access to the soool chambers.


                         Springing Out Spool Pin
View original page 6Page 7 · Read text
Ansco Company

              II. An empty spool with a slit in it will be found in the
       winding end of the camera. This forms the reel on which
       the film is wound after exposure. The full spool is to be
        placed in the recess at the opposite end of the-camera. To
       accomplish this, pull out the spool pins as shown in the
          illustration.
             III. Drop the ANsco SpBenBx Frr-lr cartridge into this
        recess so that the black paper will unwind from the top of
        the roll.
          Norp.-If the cartridge  is inserted wrong end up, the black paper instead
          of the film will come next to the lens, and absolute loss of thi: dicture will            result.


                                     Inserting the Cartridge
         IV. Release the -sp.ool pils by pressing them until they       spring back into their original position, thus engaging th-e
        spool and securing the film cartridge so that it revolves upon
       them.
                              Digitally signed by mike
                        butkus
                      DN: cn=mike butkus,mike       o=orphancameras,
                       ou=29,
                        email=mike@butkus.org,
                     c=USbutkus Date: 2018.12.07 09:03:08
                             -05'00'


                             Threading the Black Paper
View original page 7Page 8 · Read text
www.butkus.us

 Intt urtioo Bookfo, No. 1A, No.S ond No.SA Foliling Anrro S

   V. Cut with the thumbnail the gummed slip that holds
 the end of the black paper. pass Ihe paper orr", th" t*o aluminum rollers and fhr-ead  it into the stit in the reel. Be careful, in so doing that                       lhe paper draws straight urrd trr". l'urn the winding key sufficiently to keep the pJper taut.


                 Turning Key to Wind Paper on Reel
   VI. _ Replace the camera back, being careful to put iton right- side up (the red window at th1 lower risht hand
corner of the No. 1,A. and No. 3 and at the upper Gft hand
corner of the No. 3A.) and to engage, first, the^rabbet imme_
diately below the spool pin in the end of the camera opposite
to the winding key, then close down on the body bt tne
Ar.rsco. To lock it, slide back the metal catch. The'back oithe Attsco should be handled carefully, especially when
detached from the camera, as even a slight'bend wouid makeit  fit badly. In. putting  i.t ol, the ribbet should
pq$ectly before closing the back, otherwise no end of tro"ubje"rgug"will follow.
      -To  VII.           bring               the                           first                                     position                           film into                                                    key                                           give the                                                                                                              'a        fifteenabout.              turns,                  then                     watch                                  the-                               red wiridow                                                       untilpointing         hg1d.                appears.                         After                               wind very slowly until                                   .that,                        -    figure          1 is inthe                 front of                            red                              window.                        the
View original page 8Page 9 · Read text
['

                  PART I.
                      SECTION TWO
                  Loading with Plates


          The No. 3 and No. 3,A. For,nrNc ANsco may be converted
            into dry plate or film pack cameras by means of the Axsco
          Combination Back attachment. shown in the illustrations.
         The No. 3 combination back fits the No. 3 FolorNc ANsco,
          and the No. 34. combination back is for the No. 3A FornrNc
          ANsco.
         The combination back replaces the regular back of the
          camera and is put on exactly in the same way as the regular
           back, in accordance with directionS on page 5.
          The No. 1A For.orNc ANsco does not take a combination
          back attachment.


           The attachment has a ground glass for focusing and a dry
            plate holder to carry two plates. In using glass plates the
            blate holder must be loaded in a dark room, that is, a room
          irom which all white light has been excluded, but lighted
            with a ruby lamp.


L
View original page 9Page 10 · Read text
www.butkus.us


                                                                          7Instruction Booh for No. 14, No.8 anil No.8A Foliling Ansco

   I. To load the holder, the metal clamps at the end are
released, the end strip removed, and one dry plate dropped
into each section of the holder.
   II. Insert the plate holder in the back of the attachment
which opens by means of an actuated spring.
   III. Draw out the slide of the holder nearest the camera
so as to leave one plate uncovered before setting off the
shutter.
   It may be desired sometimes when using plates to forego
focusing on the ground glass and be guided by the focusing
scale. If so bear in mind that the focal plane for film and
the focal plane for plates are not the same, ancl that the
distances of the focusing scale measured for fihn will not do
for plates. Re sure that for dry plates you use the scale on
the camera indicated for plates.
   If it is desired to use filrlr packs, a film pack holder must
be used in place of the dry plate holder. The ANsco film
pack holder is furnished in the two sizes to fit these cameras.
 To load the holder, swing back the slide locks on each
side, remove the slide and drop in the film pack. Lay the
slide in the recess on the end of the holder, hold the tabs
away from the slide, push the slide into place and swing
back the locks.
  In using the adapter with Axsco Combination Back, be
sure to hold the ground glass frame firmly against the holder
when pulling off the tab, to prevent light from leaking on
the film.
View original page 10Page 11 · Read text
PART II.
       The Shutter and the Lens
  The For,ornc ANsco cameras are furnished with either
rapid symmetrical lens or Modico anastigmat lens, F 7.5, and
four different shutter equipments. It is necessary to become
thoroughly familiar with the working of the shutter before
attempting to make exposures  if success is to be expected.
  The shutter controls two things:  ( 1) the duration or "speed"
of the exposure-i. e., the rapidity with which the picture is
taken, and (2) the size of the stop or lens opening. These
two, speed and stop, bear an important relation to each other,
and should always be considered together. With subject and
light conditions unchanged, a fast shutter speed requires a
large stop, while a slow shutter speed permits a small stop.
  On the Bionic and Capax shutters, the different speeds are
given on a graduated plate on the front of the shutter, at the
top, just above the lens. The speeds on the Bionic shutter
are 1-10, 1-25, 1-50 and 1-100 second, and B (bulb) and T
(time). The speeds on the Capax shutter are I,l-2, t-5,l-25,
1-50, 1-100 second, B and T. The speed is set by moving the
pointer to the desired position on the scale.
  On the Bionic and Capax shutters the speeds are repeated
upon another plate on the lens flange, just behind the pointer
at the top of the shutter.
  At the rear of this plate on the lens flange at the top of the
Bionic and Capax shutters is a plate with another set of mark-
ings. These indicate the stops or lens openings, which in the
illustrations are U. S. 4, 8, 16,32 and 64 on the Bionic shutter,
and U. S. 4, 8, 16, 32,64 and 128 on the Capax shutter. To
obtain any desired opening the stop pointer is moved along         J
the scale to the desired opening by rneans of the lever at the
bottom of the shutter. This opens or closes the iris diaphragm
to give an opening of the indicated size.
  The Ilex General and Ilex Universal shutters operate on a
somewhat different principle. The speed is regulated by
revolving the disc at the top of the shutter until the desired
speed figure or letter B or T appears just above the pointer
at the top. The graduated plate for stops or openings is also
on the front of the shutter, at the bottom, and the size of open-
ing is regulated by moving the pointer to the proper figure.
  In the illustrations, the stop or aperture markings are all
on the Universal System (commonly referred to as U. S.).
This is the system in use with rapid rectilinear and rapid
symmetrical lenses. Moving the pointer from the first num-
View original page 11Page 12 · Read text
www.butkus.us

Instruction Booh for No. 1A, No.3 anil No.SA Folding Ansco 9

ber, or full opening, on the shutters designated in accordance
with the universal system, to the next larger number, indicates
that the lens opening has been reduced one-half, thereby
necessitating double the length of exposure, as only one-half
as much light can then reach the film. The next larger number
indicates an increased diminution of one-half, or to one-fourth
the size of full opening, requiring a corresponding  increase
of exposure time, and so on. For the relative values of the
diaphragm stops marked in U. S. and F systems, the table
on page 13 should be consulted.
  The different shutter equipments of the For-orNc ANsco
cameras are described below:
              Bionic Shutter
  This shutter is self-setting, of efficient construction, with
concealed and protected mechanism that prevents  its getting out
of order.


                               Bionic Shutter
View original page 12Page 13 · Read text
10                 Ansco Company

            In addition to time and bulb it has the following range of
          exposure: l-70,7-25,1-50 and 1-100 second.
           For Symmetrical Class model the diaphragm openings are
         U. S.4,8, 16, 32 and 64 (also L28in the No.3 and No.3A).
            For F 7.5 Anastigmat Class model the diaphragm openings
           are F 7.5, ll,  16,22, 32 and 45. (See table on page 13.)
                 It has a finger release and flexible wire plunger.
                     Ilex General Shutter
          The Ilex General is a fast automatic shutter provided with
         a wheel arrangement for controlling the different speeds.
             In addition to time and bulb it has the following range of
          exposure: 1-5, 1-10, 1-25, 1-50 and 1-100 second.


                                              Ilex General Shutter
          The diaphragm openirrg" ir" the same as are given for the
           Bionic Shutter, described on page 8.
                 It has a finger release and flexible wire plunger.


ti-
View original page 13Page 14 · Read text
www.butkus.us

 Iu.stnrctiotr. Ilooh.[or No. IA, No. 3 and No. 3A Foliling Ansco  I 1

            Capax Shutter
  The Capax Shutter is a self-setting shutter of highest
capacity and efficiency, handsome in appearance, neatly
finished and with all working parts fully concealed and
protected.
  In addition to time and bulb it has the following range of
exposure:
   1 second, l-2, I-5,1-25, 1-50 and 1-100 second.


                           Capax Shutter
  For Symmetrical Class model the diaphragm openings
are U. S. 4, 8, 16, 32, 64 and 128.
  For F 7.5 Anastigmat Class model the diaphragm openings
are F 7.5,I1,16,22,32 and 45. (See table on page 13.)
   It has a finger release and flexible wire plunger.
View original page 14Page 15 · Read text
12                 Ansco Company

            Ilex Universal Shutter
  The 'Ilex Universal is essentially the same in construction
as the Ilex General, described on page 10.
  In addition to time and bulb it has the following range of
exposure:
  1 second, l-2, t-5,1-25, 1-50, 1-100 and 1-150 second.


                            Ilex Universal Shutter

  The diaphragm openings are the same as are given for the
Capax Shutter, described on the preceding page.
   It has a finger release and flexible wire plunger.
View original page 15Page 16 · Read text
www.butkus.us

 Instruction BoohJor No.1A, No. I anil No. 3A Foliling Ansco 13

   Table of U. S. and F System Equivalents
  On the shutters fitted with anastigmat lenses, the diaphragm
or lens openings are marked in accordance with the F system
 (focal system), which is based upon the ratio of the aperture to
the focal length of the lens. Thus a lens of six and one-half
inch focal length, which will cover the focal plane sharply when
the lens aperture measures one inch in diameter, has a speed of
F 6.5 according to the F system-rneaning  that the ratio of
aperture (diameter) to focal length is as one to six and one-
half.
  There are two systems of lens markings, the other being
the U. S. (universal system), in use with rapid rectilinear
and rapid symmetrical lenses.
  To avoid any possible confusion, the U. S. equivalents of
the F system are given in the following table:
         F  7.5 equivalent to U. S.   3.5
                                          4        F8      "    u.s.        F 11.3    "     U.S.  8        F16       "       u. s. 16         F 22.6    "       u. s. s2         F32      "         lJ. s. 64         F 45.2     "    .   U. S. 129
         F 64       "         lJ. S. 256
  In the universal system, doirbling the number always
indicates a halving of the exposure value of the opening. In
other words, if one second is the correct exposure at U. S. 4,
then 2 seconds will be required at U. S. 8, 4 seconds at U. S. 16,
8 seconds at U. S. 32, and so on. In the F system, the Stop
numbers do not double in the same manner, but there is the
same correspondence between successive stops as r-narked
on the shutter. To translate stop values from one system to
the other is a simple matter  if it be borne in mind that stop
16 is the same in both systems;i. e., U. S. 16:F 16.
         Depth of Focus Tables
  The following tables give the distances between which an
object will be sharply defined when the focus is set at the
given points on the distance scale of Ansco cameras. The
distance at which the lens has its maximum depth of focus-
the so-called hyperfocal length is also given. When the
View original page 16Page 17 · Read text
14                    Artsco Com.pany

camera is focused at an object at this distance, everything
will be sharp that lies between infinity and a point the distance
of which from the lens is given in the last column. This
distance, it will be noted, is exactly one-half of the hyperfocus.
   For Lens of 6% inch Equivalent Focus
               No. 3A FolorNc ANsco
                                                Hy-    For-            i
       Focus    Focus    Focus    Focus     Focus      per-   ward       6 feet     10 feet    15 feet    25 feet    5O feet     focus   to in'
                                                                                  finity
       In focus   In focus   I" f**     I" fr*"    In focus           from
      between  between  between  between  between
 F     feet        feet        feet        feet         feet       feet      feet
  /.5     J.   /        .zlrc.e  ----.|-rs.2lr7 .l ffi-20.6br.7 35             tt7 .3   58.6
 8     5.          .11r1     rs.2lL7 .3 20.sl32 .3 34.3         110        JJ
11              8 .8111.4  12.6118.4 19 136.3 30.7          80     4016     J.4t        .4112.2   rt .712o.6 17.r14s.8 26.r                 27.5
   For Lens of. 4% inch Equivalent Focus
             No. 1A and No. 3 Fororxc Axsco

                                            40.2128.4                                                       206.2ll         .5        6.6       i 5
                                                       .9127 .61261                                                 a  4r       5                                                       .8     |         .4 87.5        6.6 18.68.6 1111 ..97  12.212 l1e.811719.4ll8 .111 t5.26.9  8.112.8   rr .2 22 . slr6   56.2123.6 inf.  ll16  5   7 .4 17 .5 r4.7 10 29.rlr3   30.9119   '         I   I
            Bubbles in Lenses
   It is practically impossible to elirninate small air bells or
bubbles in the manufacture of optical glass for anastigmat
lenses, because of the fact that in the process of manufacture
various chemicals must be fused together a given length of
time at a certain temperature. At the critical moment the
process must be stopped whether all the air has been driven
but or not. This ii necessary if the optical qualities of the
          retained.      areglass-             bubbles are caused by the air left in the glass       small  The
and should be taken as a guarantee of quality rather than a
detriment to a lens, for the actual loss of light is inappreciable
and the bubbles even when near the surface have little or no
effect on the optical quality of the image or the speed of the
lens.
View original page 17Page 18 · Read text
www.butkus.us

                  PART III.
                   Making, the Exposures
              Before making an exposure with the FolorNc Awsco, either
           time or instantaneous, be sure  of. four things:            First-That the shutter is set"for the flroper speed.
           Second-That the diaphragm stop is set at the proper
            opening.
            Third-That the camera is focused.
           Fourth-That an unexposed section of film is turned into
              position.
         To make the exposure, press the wire plunger or press
          down the finger release. This automatically opens and closes
          the leaves of the shutter, unless the pointer has been set
            for T (time) or B (bulb). In making a time exposure, one
            pressure is needed to open the shutter and a second to close
                 it when the time is up. In the case of a bulb exposure, the
            shutter remains open as long as the pressure is continued,
             closing as soon as it is released.
          1. Exposure Simplified-Instantaneous
         Exposures           BuftuJ, 6t 5
           The chief cause of non-success in photography is incorrect
            exposure, especially underexposure. Learn to expose correctly
          and you have the secret of success.
           Exposure is controlled mechanically by two features
          on the camera-the shutter speed and the diaphragm opening
           or stop. The amount of light admitted to the filn'r is deter-
          mined by the positions in which the indicators for shutter
            speed and stop are set.
           With inexpensive lens and shutter the possible variations
             in stop and speed are few, while with the more expensive types
           the variations possible are more numerous, but it is not neces-
           sary to be confused by the range of exposures possible with
           a high-grade equipment.
          The great majority of pictures made by amateur photog-
           raphers are instantaneous exposures or "snapshots"-that
               is, exposures made at a shutter speed sufficiently short to
           permit holding the camera in the hand. The slowest snapshot
           shutter speed that will assure success is 1-25 second, and
              this is the speed ordinarily used.
!l           Having fixed this point in mind, remember that for bright
          sumnrer sunlight, with an open subject between the hours
View original page 18Page 19 · Read text
t6                 Ansco Company

          of 10 A.M. and 3 P.M., the standard snapshot exposure
                i" t-ZS second at U. S. 16 (F 16). This is the regular snapshot          speed which has usually been provided for in the past on
             fixed-focus box cameras-equipped with achromatic lens.
              All the cameras for which-this instruction book has been
           oreoared are equipped with lenses which are faster than box
            t"rn"r. lensesjlenies which, because they can be used at            larger stops, permit an increase over the above-rnentioned
             sta"ndard e*po"r.lt" with the camera held in the han-d,.thereby
            allowins snapshots over a wider range of light conditions and
            of-  lishtness or darkness in the subject.         TE make the most of your equipment, therefore, consider
            1-25 second at U. S. 8 (F 11) the standard snapshot exposure
                f.or sunlit subjects. In'a few cases of intense light this .may
           Drove somewhat more than necessary, but the latitude of the
         hlm emulsion will usually take care'of the excess, while the
           extra allowance will assure a higher average of success at
                  it   ott   end of the scale-earlieiin the morning, or later in           the" afternoon,"t      or in the less actinic light of fall and winter.
           With 1-25 iecond at U. S.8 (F 11) the standard snapshot
            exposure, then for hazy light, or cloudy da-ys, .or.darker. sub-
               ieits. or later in the afternoon, or in the weaker llght ol- wlnter,
            itick'to the same shutter speed (1-25 second) and increase                tir"         by opening the l-ens to U. q. 4 (F 8 or F 7'5)'' If
            iiiL-pio."aure'do'es""pot"re        not promrse enough- exposure'.place the
          camera on a tripod or other support and gtve a bulb or tlme
                                             on.                                     farther            exposure,-'-b"ti-itingas explained                                              snapshot expos.ure rvithout                                a standard                                tirus from
           .nu"g" oi stritter speed will prevent cohfusion and make good       J
             results--Ai-ifr"habitual.                      i"uihor", where there is an open_unobstructed view          and diffused sunlight, cut down the standard_exposure^from      I
            i-x  r""""a at U. 5. s'(F 11) to 1-25 second at U. S. 16 (F-16)'
            o, to-i-ZS it U. S.32 iF 22) in rare cases where,the sunlight
                 i, in1".t*" in the middle hours of the day and the_view is of
          op"* b"n"n or sky and water. This for June and July, the
            b;i;h;;i-;onths.   For late August and September at the
             ,frl%,ll  ir i"tao- advisable for best results to decrease below
                               16.                        S.                  U.                  at             l-25-                                                    the different                                       good, negatives                                              with                     learned                           to get             Hr"ilg                           -a                                                              matter                                                                        is a simple                                                   seC-ond, it                                 o{t-ZS                            speel                       shutter                   at             st;;s
             to substitute the other shutter speeds.
t
View original page 19Page 20 · Read text
www.butkus.us

           Instruction Book for No. 1A, No.3 anil No. 9A Folding Ansco 17
           For instance, 1-50 second at U. S.8 (f  11) gives tJr-e lame        amount of exposure to the film as 1-25 second at U' S' 16
          ip tOl. but is twice as efficient in stopping motion. Likewise
           i-100 recond at U. S. 4 (F 8) gives the same amount of exposure
         as 1-50 at U. S. S (F 11), but is twice as efficient as the latter
                                     motion.                          stoPPing                         for         combination--it                              rJckon                                                 all snapshot e.xposures first on                     planib                      i. a good
         a basi" of"the 1-25 second shutter speed, and then, if desired,t          iranslate then-r to the equivalent at a faster shutter speed,
           as above.I          With folding hand car-neras' -1-25 second is the best all-         around shutter'speed.  It is not fast enough for ph.otographing
          rapidly moving objects near the camera'. but it will stop most
           u"'"rui" motio"n th-e amateur as a rule desires to catch. F'or
         ;;bi;G  more speedy than the average, simply.set-f.or. a higher           shutter speed and open the lens to correspond. It, however'
         the lisht^conditions-are such as to demand the largest stop
         at l-fS second for adequate exposure, the attempt.to use a
               f,igt          speed wili result in underexposure, and must be
          abandoned."i-"tiuiter
              In manv cases faster motion than the average can be stg'pped
           *iifroui iirange of shutter speed or stop by taking the simple          orecaution tJset farther off or photograph the object at an
          Inel"-.in.tead-of broadside. A good point to rentember
               i. ?ir"1 lf vou double the distance-between yourself and the
           oni".t             the chances of arresting its motion with the
         same siutter"ou"doublespeed.
         The foregoing data in regard to exposure apply to average                                                    going to trop-l           liqht condit-ions in the United States. Tourists                ic-al countries should reduce exposures somewhat,. approxlmat-
                                                                          in summerI          ins what would be correct for seashore photography
             i"itr" U"it"J Stut"". When photographing under completely
         thansed liqht conditions, m-any experienced photog-raphers
           folloi the -practice of exposing and developing a preltmtnary
              ioii u, i chbck-up on their judgm-eg-t of exposure values, thus
            assuring the succ-ess of results to follow.
             In eeneral. correct exposure, neither over nor under, should
                                                                               ouer         al*av? be tire aim, but in case of doubt always- risk
              i"ttt,ir than underexposure, for while the latitude of a photo-            *iu"tii. emulsion *itl tak6 care of a slight excess it cannot          Juppty an image not imparted to it by the lens.
View original page 20Page 21 · Read text
18                 Ansco Company
 2. Time Exposures
   All exposures made in slower time than 1-25 second are
 known, as time exposures,-and in all cases it is necessary to
 have the camera supported by a tripod, or resting uporr some
 thing.solid. to prevent any movem-ent'of the .a]meia, which
 would result in a blurred picture.
  To make time exposures the following rules should be
 observed:
   F1nsr.-Set             top                   pointer at T (time). This adjusts the   ,. snutter          Ior tlme                 exposures.
   Exposures of 1-10, l-5, l-2 and 1 second can be made auto-
 matically by                -setting the pointer at the place indicated on the upper scale of the shutters fitted for such automatic exposures.
  SBcoNo-Set the lower pointer at U. S. 16, 32, 64'or l2g.
 For instructions concerning the use of stops or'diaphragm
 openings, see page 28.
  Tnrnl-Press the release. This opens the shutter. When
 time is up, again press release. Thii closes the shutter.
3. Bulb Exposures
  The term "bulb exposures" is given to time exposures which
 the op-erator desires to control_by holding the shutter open
at will, a single pressure of the- wire plunger opening ihe
 blades of the shutter, which remain open uitil the pre"ssure
 is released.
  The following rules govern the makine of bulb exDosures:
  FInsr-Set the upper pointer at B (bulb). This'adjusts
the shutter for bulb exposures.
  SBcoNo-Set the lower pointer at U. S. 16,52,64 or 128 as
desirecl. For instructions concerning the use of stops or
diaphragm openings, see page 28.
  Tnrno-Press the release to open the shutter, and remove
pressure to close it.  This makes the exposure. The shutter
will remain open as long as the pressufe is maintained and
will close the instant the pressure-is released.
  Norn.-Do not oil any part of the shutter. In case of accident returnshutter to your dealer or to Ansco Company, Binghamton, lq. y- io,repalrs,
  .As a general rule make exposures by pressing the wire plunger and notwith the finger release, as the wire releis6 is lessiikely toliritrEiamlia.
View original page 21
Page 22 · Read text
www.butkus.us


                PART IV.
        Opening and Focusing on the Subject
f"             I. Press the concealed button at the side of the camera and
       push down the bed of the camera to the limit of motion. or
          until it snaps.
I


                                  Opening the Front
View original page 22Page 23 · Read text
20                 Ansco Cornpany


                                                                     t


                                                 +
                        Extending the Bellows
                (Front of No. 1A Folding Ansco shown)

   II. Draw the bellows out to the end of the track. or until
it clamps.
   III. Set the focusing lever at the distance required as
marked on the scale.
  Norn.-The focusing scale is marked by feet and meters, and corre-
sponds to the distance between the camera and the object.
View original page 23From the M. Butkus archive. Original publisher and archive notices are retained.
Check the model and edition against your equipment.
PDF verified 2026-10-10.