Film cameras
Ansco Junior 1A - 3A User manual
User manual for Ansco Junior 1A - 3A. 21 pages in English. Read the original PDF, download or print a copy without registration.
21 pagesEnglish5.4 MB PDF
Loading your manual…Open PDF directly
Document details
- Brand
- Ansco
- Model / document
- Ansco Junior 1A - 3A
- Document type
- User manual
- Language
- English
- Pages
- 21
- File size
- 5.4 MB
- Category
- Film cameras
- Document date
- Not specified in catalog
Search available document text
Find a term, then jump to its page in the original PDF. Image-only pages may not be searchable; check the PDF for exact wording and diagrams.
Page 1 · Read text
www.butkus.us

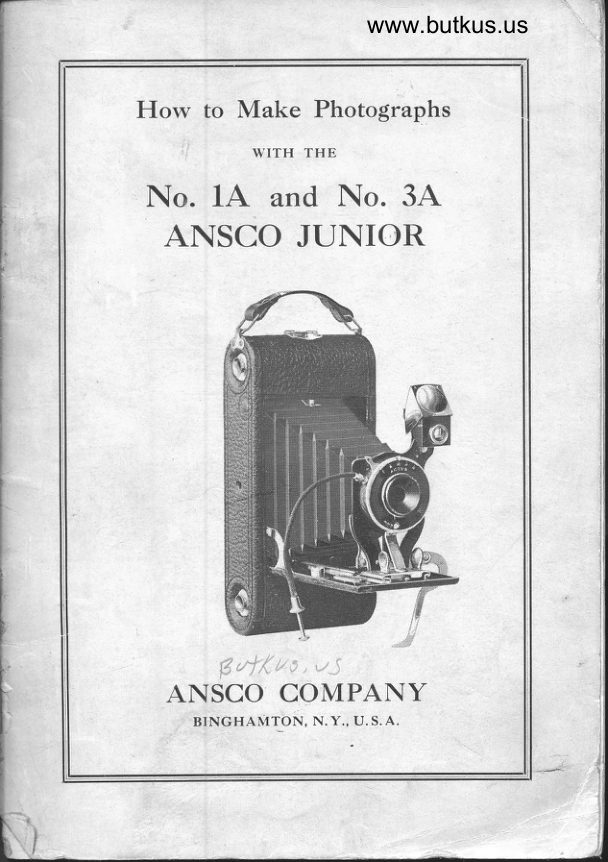
How to Make Photographs

           WITH THE
 No. 1A and No. 3A
 ANSCO JUNIOR


                                    i')t         t   ,
 ANSCO COMPANY
      BINGHANITON,  N.Y., U. S. A.
View original page 1Page 3 · Read text
ANSCO COMPANY
          BINGHAMTON, N. Y.

         NEW YORK CITY
ANSCO BUII.DING, 129-131 W. TWENTY-SECOND STREET
          ,      BOSTON, MASS.
                 46 conxnlll
           CINCINNATI, OHIO
              228 eest FrFrH AvENuE
          KANSAS CITY, 1\4O.
               920 cnexo AVENUE
          MINNEAPOLIS, MINN.
       THTRD STREET AND FIRST AVENUE NoRTH

        SAN FRANCISCO, CAL.
                171-173 sEcoND srREEr
             'I'ORONTO, CANADA
              347 loBletDE srREET, wES'r


          ANSCO CON{PANY
        WEST JACKSON BOULEVARD, CHICAGO,  rLL.

          ANSCO LIMITED
143-149 GREAT poRTLAND srREET, LoNDoN    ENGLAND
View original page 3Page 4 · Read text
www.butkus.us

Ffow to Make Photographs

              WITH THE
  No. 1A and No. 3A
  ANSCO JUNIOR


                Price 7O Cents


                                                     'I
   ANSCO COMPANY
         BINGHAMTON, N. Y.
View original page 4Page 5 · Read text
ORDER FILM BY NUMBER
  ANsco Frrn are designated by the
numbcrs and letters on the ends of the
cartons. The rrumber indicates the
size, and also the camera for which it
is intended, and the letter the number
of exposures.
  The No. 1A Awsco JuNron takes
pictures 2% * 4y', and No. 6A or 68
is the ANsco Frrnr for this camera.
 A stands for 6 exposures, and B for
12.
  The No. 3A ANsco JuNron takes
pictures 312*5!l,andNo. 18A or 188
is the ANsco Frru for this camera.
 A stands for 6 exoosures and B for
10.


    Norn.-The  black paper used for ANsco ro11 film
cartridges  is superior to  all others. The numbers
thereon are printed with special ink, then coated with
a thin layer of gelatin.  This does away with number
View original page 5Page 6 · Read text
www.butkus.us


How to Make Photographs
with the No. 1A and No. 3A
Ansco Junior
 nO   not attempt to load the camera-thatis, ro
 LJ    insert the film cartridge, until by examining      the camera carefully, you have become
famiiiar with the purpose and the use of every one
of its parts. The instructions in this book will
help you to do it.
   The No. lA-Axsco Juxron takes film cartridges
for six or twelve cxposures. The No. BA ANsco
JuNron takes bartridges for either six or ten
exposures. The cartridge is protected by black
paper so as to load and unload i4 dayiight; but it
must be borne in mind that the black p"p"r is the
only protection from light and that, therefore, the
cartridge must be kept tightly wound at all times
to prevent light from fogging the sensitive surface
of the fi1m.                  \
Loading with Fitm
   Select a position where the light is subdued,
preferably at a table, on which to rest the camera.
For absolute safety the loading should never be
done in the glare of bright sunlight.
View original page 6
Page 7 · Read text
Release the hinged catch at the top of the
camera. This will allow the back of the camera to
be removed, giving access to the film receptacles.
Then lay the camera flat on its face while the cart-
ridge is inserted in the back.
Inserting the Cartridge
   The inside of the back of the camera consists
of a focal plane-that is, the square opening, next
to which comes the film while making the picture,
and two chambers or receptacles to hold the spools,
namely, the film spool and winding spool.


                         Inserting the Cartridge

   The empty spool or winding reel will be found
in the chamber which has the winding key.
   The film cartridge is placed in the other chamber.
    Pull out the spool pins by means of their heads
on the outside of the camera so that they will
remain in that position. Drop the film cartridge
into place in the chamber so that the black paper
witl inwind from the top of the ro11. Push the
spool pins back into their original position, thus
engaging the spool and securing the film cartridge.
                                     4
View original page 7Page 8 · Read text
www.butkus.us
 Threading the Black paper
    Hold the camera lengthwise and., with the thumb
 of the left hand, press gently on the film cartridge
 to        t4" spool frorn unwinding; then with ifi"   -keep right hand, cut the white paper                              ^reaches6inder. Unwind slowly until the black papgr        the *i"ai"g
 spool, threadirg the. paper in the slit of the spoof
 The winding key i.s then turned sufficiently t; secure the paper and to keep it as taut as por.ibl..


                                                                                                                                            Digitally signed by mike butkus
                                                                                                         DN: cn=mike butkus,                  mike          o=orphancameras, ou=29,
                                                                                                                 email=mike@butkus.org, c=US
                                                                                                                          Date: 2018.12.07 09:45:32
                                                                                                                                         -05'00'                    butkus


                      Threading the Black paper

  Be       careful                   start             to                         paper                     the                                 straight.                                               the                                                 "orr"rrrrnIfpaper      does          not             wind                       true,                                              will                          tfe                 nm                                               the
flanges, causing no end of trouble.
   R"place the back of the camera, making every-  . .
lfi"g. secure. Remember, however, that the firstfi1m is not yet in position. It  will take about
twenty five half turni of the key to bring No. 1 i;front of the red window. The ru- must%e wound
slowly, So as to stop the moment the tro*b", .o*".exactly opposite the window.
View original page 8Page 9 · Read text
When the figure 1 registers, it shows that the
           first section of film is in position for making an
          exposure.


                The Actus Shutter


      The Shutter
         To meet with Success it is necess ary to become
          familiar with the operation of the shutter.
          The shutter controls the rapidity with which the
          picture is taken, and the rapidity must vary accord-
            ittg to the strength of the light and the stze of the
          lens opening or diaphragm used.


t\                                                                                                                                                                                        "{"
View original page 9Page 12 · Read text
www.butkus.us
                Operating the Camera
                                                                                                                                                           t Snapshots  t t      1. Instantaneous Exposures-t


                                       Opening the Front
        To take instantaneous pictures the object must
      be in the broad open sunlight, but the camera
        should not. The sun should be behind the back or
        over the shoulder of the user.
il.                       Focusing
              I. Press the concealed button as shown in the
          illustration, and push down the bed of the carnera to
        the limit of motion, or until it snaps.
              II. With the thumb and forefinger of the right
       hand extend the bellows until the pointer is opposite
       the desired position on the focusing scale, which is
View original page 12Page 13 · Read text
l
                    -l|                                                                                                                         ..
found at the front at the right hand side of the
camera. This scale is marked 6, 10, 15, 25, 50 and
100 feet, and when the pointer is set at any one
mark on the scale the object to be photographed
should be at that distance from the lens of the
camera. On releasing the pressure, the bellows is                 l.l
locked securely at the focus distance. To change
focus, release the beliows and shift the position of                                                                                   l
the camera front by bringing the pointer 1o the new          ."1)
figure corresponding to the changcd distance of the
object to be photographed. Any object at 100 feet             I
or beyond will be taken care of by setting the focus
at 100. Practically universal focus is secured when
the focus is set at 25 feet, that is, the cameras will
always make good pictures when focus is set at
25 f.eet, although for fine work accurate focusing
should be done.
   To photograph a high building at close range it
is necessary to secure a position in ar opposite
building which wilt permit the camera to be pointed
at the center of the perpendicular lines of the build-
ing. If an attempt is made to photograph a high
building while standing near by, pointing the camera
upward, the side lines of the building will converge
torvard the top in the photograph, thus spoiling the
picture.                                                                           '
    If the object be low down, like a small child or
a dog, the camera should. be held down level with
the center of the object.
Locating the Ima$e
   Aim the camera at the object to be photographed
and locate the image in the finder. For a hor.zontal
picture hold the camera on its side, reversing the
View original page 13Page 14 · Read text
www.butkus.us
finder. Always look into the finder from directly
over it-not at an angle. F'or a vertical picture the
camera must be held upright.
Ansco Self-Leveling Finder


   The view finder on the Axsco Juxron-       cameraspossesses a distinct advantage in  that it is self-
leveting. It is a desirable thing to know that the
camera is being held perfectly 1evel whert art exposure
is being m?de.  The Axsco"self-leveling  view^finder                      -is equipped with a sensitive pendulum bob, hung at
the center of the finder hood. When the white
pointer at the bottom of the pendulum coincides
with the white dot in the center of the top of the
finder, the operator knows that the camera ii exactly
level and that there will be no danger of spoiling
the symmetry of the picture by having tha finei
askew.

                                             11
View original page 14Page 15 · Read text
$
                         .tI

    After making the exposure, turn the winding
 key to the right until the next number registers,
 which shows that the film is in position for the
 next exposure.
     It is good practice to wind the film for the next
 exposure immediately after taking a picture. This
 wl1l avoid the possibility of making two exposures
on the same film.
     It is easier to take att instantaneous picture
when the object is in broad daylight than in'any
other way; but with care, the best results are
obtained when it is slightly cloudy or hazy. In fact,
in taking groups and portraits in the open air, a
cloudy day is preferable if a good likeness is to be'
secured. The main thing in outdoor portraiture is
to have a good deal of light without actually placing
the object in the sun. Very good results are
obtained by placing the subject on a bright sunny
day in the shade of a cornstack or haystack.
2. Time Exposures
    Set the camera in such a position that the finder
will embrace the view desired. The camera should
not be pointed directly at a window, as the glare of
lighb witl blur the picture. If  all the windows
cannot be avoided, pull down the shades of such as
come within the range of the camera. The camera
should be placed on a tripod, table or some other
firm support. Center the object in the finder and
set the shutter at T. One pressure will open the
shutter, and another will close it.  The length of
exposure is largely a matter of practice a.rd iudg-
ment, and is governed by the amount of light upon
the object to be photographed. The length- of
exposure is controlled by the size of the lens opening
or diaphragm used
View original page 15Page 16 · Read text
www.butkus.us
      Time Needed for Interior Exposures
        The table given is figured on the exposures
         being made between the hours of 10 A. M. and 3
     P M., and using diaphragm U. S. 16. If the stop
        U. S. 128 is used, give eight times the time of the
        table. The smaller the stop, the sharper the
           picture.
                      u o.Ytil:""%ltJ whd ow
            Brightsunlightoutside.",,a                   ....4seconds((.l          Hazvsun...                ...;....10    $                Clotidy bright.                                  . ..  . ..20             Cloudydull......;.            ;.....40    "
                          White Walls
                         Only One Window
                Bright sunlight^ndoutside.              ..  . . 6 seconds$           Hazysun...                ........15           Cloudybright.              ......30    "            Cloudydull..                .......60    "


  .l
 1,             Mediurn Colored Walls and Hangings                   and Only One Window
   !              Bright sunlight outside.                       , . . .L2 seconds$           Hazysun...                   ...30   4           Cloudybright.               ......60              Cloudy dull..                                        . . ..  . .120  "
               Dark
View original page 16Page 17 · Read text
Dark Colored Walls and Hangings and   r
               Only One Window
     Bright sunlight outside.                      . . . .40 seconds
    Hazysun...                     ........80       (
    Cloudy bright.                            . . .2 minutes 40       '(
    Cloudy dull. .                             . . .5 minutes 20
                                                                  '.1o;r  'To Make a Portrait
    Placc thc sitter in a chair partly facing the light,
and turn the face slightly toward the camera, which
should be at the height of an ordinary table.
Center the image in the finder. For a three-quarter
figure the camera should be from 6 to 8 feet from
the figure; and for a full figure, 8 to 10 feet. The
background should form a contrast with the sitter.
      To Obtain a Larger Portrait
  Use an ANrsco Portrait Attachment, which consists simply
of an extra lens that slips over the regular lens and in no way
affects its operation except to change the focus, thus enabling
the operator to work closer to the subject. This makes it
possible to obtain a larger and shar pl y defined image on the film.
  For all cameras which are fitted with a focusing arrange-
ment the following table applies   :
    'i'n "1""'* '"u';**  ';"          "i:'""?""'                    s       (  1'n .if100 i"o   4    4   Ti{!'."u3"6n
Time Exposures in the Open Air
   Time exposures in the open atr rnay be made
providcd diaphragm U. S. 128 is used, but the ex-
posure must be a great deal shorter than for interiors,
as follo'nvs:
    With sunshine... .                            l-5 second
    With light clouds.         from 1l to L             t(
    With heavy clouds.         . .. .from 2 to 5 seconds
   The foregoing figures are for objects placed in the
open air, with no trees overhead.
                                      l4
View original page 17Page 18 · Read text
I                   f                   www.butkus.us
       I
    1.
        No accurate directions can be given for- objects          in shadow, under                           _porches or undei trees.  e"p"ri_         ence only can teach the proper exposure to give.
        _ _ li.me exposures cannot be m,d.e white th,e comera is         held in the hand. It must be placed. on soie-                                                       firm          support, suclt, as a tripod, chair ir table.
 f                                                  t3c",/4,.g .,5

      t        Recapitulation as to Diaphragms
        q q  B-;t'qr inslantaneous exposures at r-25 second.
 +      on cloudy bri,ght days.
    I             U.,f . t6 f or. alt ordinary instantoneous exposvrres         wkett,    th,e sun slt,ines.
             S. 3z ;t'or ,instantaneous exposures when the                 .f/.            sunliglt't is urnt'sually strong and t'here are no hea,y
         shadozas such as views at thi seashore or on the iater;             a.lso                       i,nter,ior                ;for                        time exposures, the t,ime for wltich is                    ,in         giaen                        th,e to,ble.
         No.64:fo, interiors; neaer for instantaneous         erposures
                                           ouldoors, cloudy                tz8 for                   lime e.x-posures         -weath,er;!r,o. nener                                                 er.posures.                       for in.stantameous
                                                                   cloud,y           ,  The .t.t*r..requi,red for _making exposures on+      days zuith the smallest diaphrigm,^ will range from         r-5 s.econd to 5 seconds, aciord.ing to the tigit,'The
 .1         smaller the stop, the sharper the piclure.
 I                                      zuill be the\?                     failure                                             resurt if you use smail,           dto,. phrdgmsAbsolute                         instatttoneous                                         exposures.                  Jor
      Removing the Film
        No dark room is re_quired for changing the spool.
       T4"_ operation shouldf however, ne"pe?torm"?- fu,
       subdued light.
                                                t5
View original page 18Page 20 · Read text
I  j                            www.butkus.us
  I

   I
   I

  I     ANSCO SPEEDEX FILV-The Film
  I         which combines speed and quality.
 I    j            Obtain an Ansco Speedex Film Booklet

     I              for complete directions in making perfect
              negatives.fI
o It    CYKO PAPER-After the negative comes
           the finished print. The Cyko Manual
            is   complete text book on the art of           ^            producing perfect prints.
     YOURS FOR THE ASKING    If you                                          -          have neither of the above books and
           your dealer is out of them write to us
              for one or both.
     CHEMICALS-For best results on Ansco
             film and Cyko paper use Ansco chem-
            icals. They are carefully standardized
          and compounded under the supervision
             of expert chemists.
View original page 20From the M. Butkus archive. Original publisher and archive notices are retained.
Check the model and edition against your equipment.
PDF verified 2026-10-10.