Film cameras
CORONET BOX Camera User manual
User manual for CORONET BOX Camera. 9 pages in English. Read the original PDF, download or print a copy without registration.
9 pagesEnglish0.7 MB PDF
Loading your manual…Open PDF directly
Document details
- Brand
- Coronet
- Model / document
- CORONET BOX Camera
- Document type
- User manual
- Language
- English
- Pages
- 9
- File size
- 0.7 MB
- Category
- Film cameras
- Document date
- Not specified in catalog
Search available document text
Find a term, then jump to its page in the original PDF. Image-only pages may not be searchable; check the PDF for exact wording and diagrams.
Page 2 · Read text
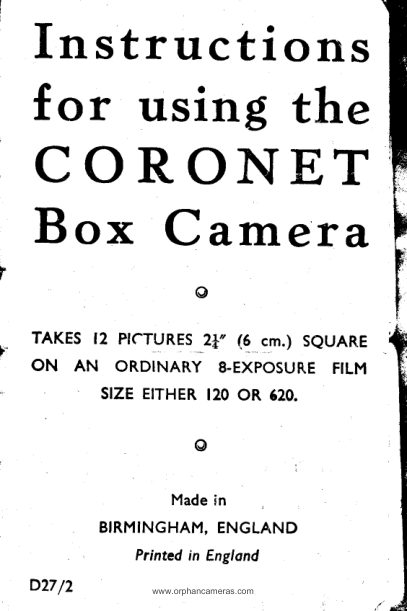
In structions
  for  using the
 CORONET
 Box Camera
                o

   TAKES12 PTCTURES2+  f6 cm.) SeUAREF
  ON AN ORDINARYS.EXPOSUF.EFILM
           stzE ETTHERt2o OR 620.


                                                           ;

                 Made in
          BIRMINGHAM, ENGLAND
                    Printed in England
   D27/2                www.orphancameras.com
View original page 2Page 3 · Read text
IMPORTANT
 HOW  TO  OPERATE  THIS CAMERA
  Before attempting to take a photograph, first
make yourself familiar with the various move-
ments and fittings as shown  in Fig. No.   I  to
avoid mistal<es.


   SYNCHROI{ISED                   V IE WFINDER
   A T T A C H M E N T
   sruosA

        LOCKI NG
         K N O B
      T I M E S L I D E                   T
       COLOU R
          F I L T E R

  SHU T T E RL E V E R


                      Fig. I
  The above  is an  illustration  of  the  s),n-
chronised Box Camera for use with the Coronet
Flaslr Unit.    lf your camera is one of the non-
synchronised models,   it   will   not  contain
fitting A.
  The lens in this camera is set to take clear
sharp photographs at  all distances from  8' 6"
to  irifinity. On the left-hand side of the front
of the camera are three  levers.  The lower
lever connects with the shutter, the upper slide
View original page 3Page 4 · Read text
.,                                                       ',  enables.                    Time                                 pictures, whitst        Lou .!9 take
 Ene mtdcileslide controls the colour filter.
   When  this  lever  is_ pushed right- in  (its
 normal^position) the Colour Filtei is not  in
 use.  when   tlre lever  is  'Fila;;pulled out  to   its
  fullest extenr, the Colour        .oines into operation.
   Use of Colour Filter. The filter is speciallv-'Jf   I
 designed for use when  t"t inJ- pict,ir*          I
 landscapes;  rrees and *ooai"n[-;-- ;;";;       I
 with pienry of sky and clouds;  ;nC ;;;i;;       I tY.?li!._t:,            purpose                           is to.produce                               a greater stnerentrat:onljs             between                        the  renderiiqs                                                ol    I
 various tones rhan the film would n"im"ff"    I
 record.  lt shouldonly be usedwhen .f,"1"'ii    I
 plenty.,ofgood sunlighton ttu  .roiu.l;-;r- ;;    I natural.lyreducesthJ amount of ligirt-iurrint
 through the lens. For this reason"it-canalso  II De usecl         to            ivoid                over                                                                                 I                   exposureo-wr'uwhennir,u-stakinsu;           :,T     i,"'o":'.,              lliruTi            o?i,li[r,                 A  The Coiour  iilt'er should not be used wheri-'ql
taking pictures of peopie, as  it  miv-*r"i""ii'                      I
 unn.aturalanpearanceto flesh ton"s.     "                  I
': :j:i,:"T|i-#:il:3fi"iT#ini!or theseInsrructions).      oiil,T-,;0"|
                                                                                 I
  HOW TO LOAD YOUR CAMERA         I
  Thiscameracan be loadedi.ndaylight,but do    I          in direct suntighr-atwayigit  ,;;;;;
lf".rL:*                                                                     I
,h5'::hJ:fJffJi,*I5"-,10?.nr.::"

                          www.orphancameras.com
                                           |
View original page 4Page 5 · Read text
out the inner body of the camera by pulling
   gently the side carrying the winding knob.
     Attached to the side you will find the spool
   holders and film winding arrangement.
      lnsert spool of film in the holder at the bottom
    of the metal interior, with the end of the PaPer
   pointing towards the square metal opening.
   Gently break and remove the gummed band
    that fastens the new spool of film.  Lead the
   paper carefully over the rollers and across the
   opening in the interior, as illustrated in Fig. 2.

                         t
l*..                                   l                       1
                       Fig.2
     Unfold the end of the red paper and thread
      it through the longer slot in the empty spool.
   Give the spool two or three turns to make quite
    certain that the paper is held securely. Take
   care that this paper fits squarely into the slot,
   otherwise the film will not wind properly.
      Also take great care to see that, the spools
    are  firmly  seated on  the  prolecting spool
    centres and that the windint  key  is properly
   engaged.
View original page 5Page 6 · Read text
Now close the carnera by replacing side and
turning locking knob in the direction indicated.
Turn the winding key in the dir:ection of the
arrow,  at the same time watching the  red
window at the back of the camera until No.   I
is visible.
  The  film  is now  in  position  for  the  first
picture to be taken.

      TAKING  PHOTOGRAPHS
  Snapshots.   Point the camera at the subiect
you wish to photograph, and stand so that the
sun is either behind your back or shining over
your shoulder. You must  not photograph
towards  the  light  or towards  the sun.
  Focussing.     lf your camera has a focussing
lens, be sure to  adjust this correctly  before
taking your snapshot. The lens can be focussed
in either of two  positions.  The one marked
"DIST"  is for  all subjects more than 20 feet
frorn the carnere. That rnarked "NEAR"   is fsr
subjects between 20 feet and 8|  feet.    For
subiects from  8{ feet to 3 feet away use the
Close-up Lens referred to at end of these in-
structions.  This must be used with  the lens
at the "NEAR"   setting.
  Make certain that what you are photograph-
ing is centred in the viewfinder, and look into
it from  directly overhead, not  at an angle.
What you see in the viewfinder will appear in
the picture. Never tilt the camera up in order
to photograph the top of a building.   lf you do,
the  building will appear to be leaning back-
wards in your photograph.

                         www.orphancameras.com
View original page 6Page 7 · Read text
Hold the camera steady and gently press the
shutter lever with the thumb of the right hand.
The lever only has to be moved once and will
automatically return to the correct position for
taking the next snapshot.
  Tirne  Exposures.      lf you want  to  take a
photograph indoors, or out of doors when the
sun  is not  shining, you must give a time
exPosure.
  To do this, you must first pull out the Time
Lever (see Fig. l) as far as it will come.  Rest
the camera on something solid, such as a chair
or table  wall. or gate.  Take care to  place  it
near to the edge of the supporr so that no part
of  it is included in the picidre.
  Press the shutter lever'to the other end of
!h"   slgt,  and  give  the  correct  exposure
(depending on  subject being photographed),
then release the lever. This closesthe shutter.
_ Be sure to press the Time Exposure Slide
back  again  before  cornmencing   to  take
Snapshots
  You  have now  taken  the  first  exDosure.
lmmediatelywind the film on to No. 2, ahd thus
avoid taking two exposures on one section of
the film.
      I N D O O R  P H O T O G R A P H Y  W I T H
             F L A S H U N I T
   Full  instructions are given  in  the  leaflet
supplied with the CORO-FLASH Unit.
    U N L O A D I N G   Y O U R  C A M E R A
  This camera can be unloaded in daylight, but
to avoid all possibility of fogging the edges of

                     6
View original page 7Page 8 · Read text
the fifm you rnust avoid dirJ    light, and do the
    unloading indoors in an out of thq way corner,
    or in the shade.
       After the last picture has been taken, continue
     to turn the winCing key untii the end of the red
    paper has passedthe red window.
     Open the camera as already explained.
     Remove the exposed spool of  film, taking
    care that the paper does not loosen on the
    spool while you are so doing.
     A gummed slip will be found attached to rhe
    end of the paper.  Moisten it, and then stick
    the  red paper down  with   it.    (lt  is best to
    fold under about half-an-inchof the red paper
    before moistening the slip).
     The film  is now ready for developing either
    by your local photographic dealer or by yourself.
      Transfer the empty spool to the top spool
    holder, taking care to see that the slotted end
    of the spool is engaged by thewinding  key.
      Re-load the camera with a fresh spool of film.
I,I           PITFALLS TO  AVOID
     Do  not take snapshots indoors  or" in very
   shady places,or on dark days. You will only
   waste your time, your film and your patience.
     Do not leave the camera about in the glaring
   sun for any length of time.
     Do not let seasidesand or dirt get into the
    camera,.or you will have the shutter stick.
     Do not move the shutter  lever more than
   once for  " snapshots."

                               www.orphancameras.com
View original page 8Page 9 · Read text
{MPORTANT
  The winding key-toin  this camera has been
soecially designed    enable users to   fit any
make o? either 120 or 620 size roll films, obtain-
able from photographic dealers or chemists'
  620 filmi  can-be' rolled on  to  either  120
or  620 emPty spools.  120 size films must
only be woi:na on to  120 size emPty spools.
     ..""JBi,Er                         '          "          Close-uP Lens
  This lens has been calculatedspeciallyfor use
with this camera,and will give beautiful pictures
at distances down to 3 feet.
    Obtainablefrom good-classdealersor chemists
  Everv Coronet  Camera  is carefully  tested
before ieaving the factory.   Shculd an;l defect
subsequently-arise,-if           it  will be corrected with-
out charge   the camera is returned  accom-
panied bi  stamps value 176 to  cover cost of
ieturn  p6stage and packing.  (Overseas pur-
chasers should communicate with  a Coronet
stockist in their own country.)    This service
covers only defects arising from faulty materials
or workmanship.
L.F.No.
                  Ffn
C.E.No;
CODE No.                                                   I
  CORONETLIMITED,BIRMINGHAM'19
View original page 9From the M. Butkus archive. Original publisher and archive notices are retained.
Check the model and edition against your equipment.
PDF verified 2026-10-10.