Film cameras
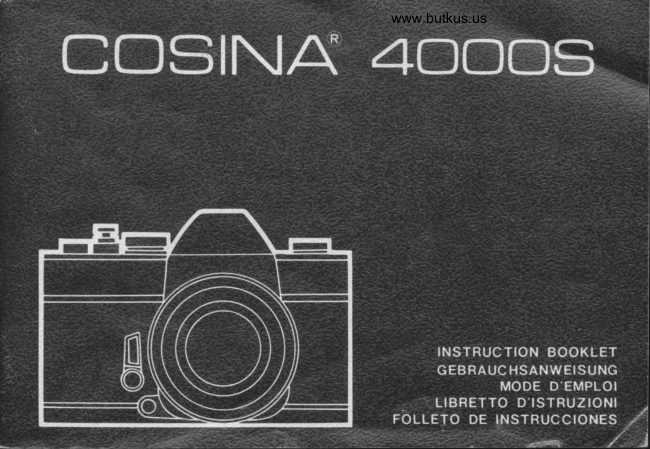
Cosina 4000S User manual
User manual for Cosina 4000S. 64 pages in German, French, Spanish, Italian. Read the original PDF, download or print a copy without registration.
64 pagesGerman, French, Spanish, Italian9.3 MB PDF
Loading your manual…Open PDF directly
Document details
- Brand
- Cosina
- Model / document
- Cosina 4000S
- Document type
- User manual
- Language
- German, French, Spanish, Italian
- Pages
- 64
- File size
- 9.3 MB
- Category
- Film cameras
- Document date
- Not specified in catalog
Search available document text
Find a term, then jump to its page in the original PDF. Image-only pages may not be searchable; check the PDF for exact wording and diagrams.
Page 2 · Read text
ENGLISH
         -  Welcomequality camerasto the designelexciting worldwith theof seriousCosina. photographerYour new camerain mind.is oneAndof thea familyname ofCoiinaprofessionalis your   @            assurance of superbly crafted optics and outstanding mechanical performance and reliability.


              I)EUTSCH
           Wir begrti$en Sie in der aufregenden Welt der COSINA. lhre neue Kamera gehort zur Familie der
       ,^  professionellen Oualitdtskameras, die unter Berricksichtigung der Ansprtiche ernsthafter Foto-        l9l grafen entwickelt wurde. Der Markenname COSINA ist lhre Gewdhrfr.ir r.iberragende Optik,
            hervorragende Technik und Zuverldssigkeit.


            FRANqATS
           Bienvenue dans le monde passionnant de Cosina.Votre nouvel appareil photographique est un
    A  moddle de la famille des appareils de qualit6 professionelle, congu pour le photographe averti. Et           lt   le nom de Cosina est pour vous l'assurance d'une optique superbement travaill6e, d'une
           performance m6can ique remarquable, et d'u ne robustesse      i nsu rpassable.


              ITAI,IANO
            Benvenuti nel mondo eccitante della COSINA. La Vostra nuova macchina fotografica fa parte di
       al  una famiglia.di macchine di _q_ugliti professionale studiate tenendo presente le esigenze'del piir         !,   serio fotografo. Ed il nome COSINA d l'assicurazione di un'ottica superbamente cbstruita, e di
             prestazioni meccaniche eccezional  i.


           ESPANoL
            Bienvenido  al mundo emocionante de li COSINA. Su nueva cilmara pertenece a, una familia
     a  de c5maras de calidad profesional que han sido disefiadas pensando en el fot6grafo serio.      |p Y el nombre COSINA es su garantia de 6ptica espl6ndidamente fabricada y de funcionamiento
           mec6nico destacado y de precisi6n.
\
.^.t.*_..\
View original page 2Page 4 · Read text
Bitte spenden Sie 2,50 Euro, um diese Website über E-Bay zu unterstützen ... www.PayPal.me/butkusView original page 4
Page 8 · Read text
www.butkus.us    t ENc,LtsH I
3                                       Your camera is designed to accept black &
 Loading the Film                            white or color film in standard 20- or 36-
 Einlegen des Filmes                              exposure cassettes.                                       To load the camera:
 Ghargement de l'appareil                       1. Fold out the Rerruind Crank (21)and pull up
 Come caricare la pellicola                      on it sharply until the Rear Cover (31lsnaps
 Carga del film                                        open. The Exposure Counter (6) will auto-
                                                            matically reset to "S" (Start).
                                             2. Place the cassette in the Film Chamber (221
                                               with its protruding end facing the camera
                                                                 base.
                                             3. Push down on the Reilrind Knob (18) and
                                                     turn it in either direction until  it drops into
                                                                              its normal position.
                                            4. Draw the film leader across the camera back
                                         and insert it into one of the slots in the
                                                 Take-up Spool (29). NOTE: To bring the
                                                              slot into a more convenient position, rotate


                  www.butkus.us
       FigS                Fis6                                           Fis8
View original page 8Page 9 · Read text
4     it in the direction of the arrow with your
    finger.   Advance the film making sure both sides are  @ Setting the Film Speed5.    fully engaged on the Sprockets(28).      @ Einstellen der Filmempfindlichkeit
6. Close the Rear Cover and press firmly until  @ Affichage de la sensibilit6 du film
     at snaps            shut.                      O Posizionamento della sensibilitti                Rerruind Crank (21) carefully in          the7. Rotate                                                                               della Pellicola   the direction of the arrow to take up any
   slack in the film. Alternate advancing the      I  Determinaci6n de la sensibilidad del film   film and firing the Shutter Release Button
   (5) until the number "1"  is opposite the
   index mark in the Exposure Counter
   Window (6). As you advance the film the
  Rewing Knob should rotate counter-
   clockwise indicating the film is moving
   smoothly through the transport. lf  the
   Knob does not rotate, open the Rear Cover
  and re-load the camera.


                  Fis9                                             Fis10                    @
View original page 9Page 10 · Read text
www.butkus.us


                                                 camera determine the correct shutterEach type of film - color or black & white -      yourhas its own sensitivity to tight. This sensitivity       speed/f-stop combinations for a given lighting
is assigned a numerical value described as an        situation.
ASA rating (U.S.A. Standard) or a DIN rating      Each time a film with a new film speed rating is
(Europe and most other countries). In most       loaded in the camera, the film speed MUST be
cases, both ASA and DIN ratings are imprinted      set in the Film Speed Window (7,) to assureon the film package, as well as the data sheet       accurately exposed photographs.
packed with the film and the film cassette     To set the film speed:
itself  .                                        1. Lift up on the outer collar of the ShutterThe higher the film speed rating, the more        Speed Dial (9) and rotate  it until the ASA
sensitive the film is to light that is, less light is        number or representative index mark isrequired for a proper exposure. The film speed,          opposite the green index line.
therefore, is an important element in ensuring      2. Release the collar to lock the film speedthat the through-the-lens metering systems of            setting in the camera.
                    NOTE: The following scale represents the ASA
                           film speeds and indicator marks on the Index:

         6     Ct     t00   m0    |00    Nt(}   t60     IO                    .-                                  .                   !             o  |                                      .    |                                                                        T-               32                         0t             $                   80                                               t25-._ 160-^. t 50o 320o  t $0. 60.  a t00. l2c,.'-i-. oo 250.
View original page 10Page 12 · Read text
www.butkus.us


Handing the Camera
Handhabung der Camera
Tenue de I'appareil
Come maneggiare la macchina fotografica
C6mo manejar la c6mara


                                                  Proper camera handling is extremely important
                                                    fortaking crisp, sharp photographs. The follow-
                                                  ing pictures below show you how to hold the
                                        camera correctly when taking pictures and
                                                  develop good handling techniques.


          Fis12            Fis13 g
View original page 12Page 13 · Read text
Long Shutter Speeds and Time Exposures
Langzeiten und Zeitaufnahmen
Pose longue et Temps d'exposition
Lunghe velociti dell'otturatore e tempi di exposizione
Velocidades del obturador a gran distancia y esposici6n de largo tiempo


                                      When exposures take 1/30 second or longer the
                                                        possibility of camera movement is increased
                                                                     signif icantly, particularly with longer than
                                              normal focal length lenses. Since camera move-
                                      ment is the primary cause of poor pictures
                        l                                             taken at slow shutter speeds, always try to use a
                                                  t                                   tripod or other stable support along with an
      I+d                                            accessory cable release to keep camera "iiggle"
                                           to an absolute minimum. For your conveni-
                                             ence, your camera has both a built-in Cable
                                                   Release Socket (4) and a Tripod Socket (32)to
                                            accommodate these accessor ies.
          Fis14                  @
View original page 13Page 15 · Read text
I[enctlsn
I
    lnfrared PhotograPhY                                                      Infrared light rays focus on a plane slightly
   lnfrarot-Aufnahmen                            behind that of light rays in the visible spectrum.
    Prises de vues en infra-rouge             To compensate for this when using infrared
    Fotografie a raggi infrarossi                      film, focus normally on your subiect and note                                                  the subject dista.nce on the lens Distance Scale    Fotograffa infraroia                                                       (17) opposite the Distance Reference Mark(14).
                                      Turn the Focusing R ing until this distance
                                                           setting is opposite the Infrared Index Mark(13).
                                      IMPORTANT: Infrared radiation varies with
                                                  the degree of infrared rays in the atmosphere.
                                     Use the  inf rared focus setting only as an
                                                     approximation. For best results, use the small-
                                                        est f-stop lighting will allow to provide suffici-
                                             ent depth of field to include all important
                                                    elements of the picture in the zone of accept-
     @Normal focus                                    able sharpness.
     @Normaler-Brenpunkt
     @Mise au point normale
    QFuoco Normalmente
    @Foco normale

                                                                       @lnfrared focus
                                                                        @lnf ra rot-BrennPunkt
                                                                                       iftvtise au point en infra-rouge
                                                                         tl)Fuoco infrarosso
                                                      @Foco infrarojo

           Fis17        @  Fis18
View original page 15Page 16 · Read text
I ENGLISH I
 ro                                           www.butkus.us
@ film plane Reference Mark                         Setting the Exposure
@ f itmeUenenmarkierung                            Richtige Belichtung
                                                   R6glage de I'exposition€  Rerrire du plan-film
                           piano della               Regolazione dell'exposizione0 T."o di riferimento del
                                 pellicola              Determinaci6n de la exposici6n
@ Marca de referencia del plano del film


 In close-up photography  it sometimes becomes
 necessary to measure exact subject-to-film dis-
 tances. A Film Plane Reference Mark (()) has
 been engraved atop the camera (2) to indicate
the exact position of the  f i lm plane. Atl
measurements of   subject-to-f ilm  distances
 should be taken from this mark.


             Fis19                      (E                     Fis20
View original page 16Page 17 · Read text
I encursx     I
 Yfr,  Cosina 40OOS has a built-in center-        Meter ON Button (5). The lens will stopweighted averaging exposure meter which meas-       down to the f-stop pre-set on the Aperture
ures the light coming through the lens and          Rins (10).
enables you to set the proper exposure for a         2. Rotate the Aperture Ring on the lens until
given lighting condition. Two sensitive Cad-        the viewfinder needle centers within the
mium Sulfide (CdS) cells behind the camera         open ends of the Exposure Index Brackets.
pentaprism read the light in the overall picture       When centered, the correct shutter speed/
area yet place emphasis on the central portion           f-stop combination has been obtained for
of the scene. This is particularly important in          the lighting conditions in the picture.
obtaining accurate exposure readings in scenes        3.  lf the needle will not center regardless of
where there is an over-aboundance of sky in the          the f-stop setting, change the shutter speed.
background or where backlighting or sidelight-               lf the needle is on the "+" side, the picture
ing is present.                                            will be over-exposed; use a faster shutter
To take an exposure reading:                        speed setting to align the needle in the
1. Turn the meter on by gently pressing           brackets. lf on the "-"  side, the picture will   half-way down on the Shutter Release/       be under-exposed; use a slower shutter
                                                      speed setting.
                                        NOTE: You may reverse the procedure  if
                                             you wish to use a specific f-stop for depth
                                                 of field control (See Page 20). In this case,
                                                          set the f-stop you desire on the lens-Aper-
                                                        ture Ring and rotate the Shutter Speed Dial
                                                        until the needle centers in the Exposure
                                                     Index. Remember, however, shutter speed                 rnv                 settings must be made in accordance with                                                 the engraved speeds only. Do not set the
                                                            Dial between marked speeds.
       Fis21                  Fis22

                                      (E
View original page 17Page 18 · Read text
www.butkus.us

  Taking the Picture                            Aperture Release Button
  Die Aufnahme                                    Blendeniiffnungstaste
  D6clenchement                           Bouton de d6clenchement d'ouverture
  Come scattare la fotografia                     Tasto per  il rilascio dell'apertura
  Toma de la fotografia                          Pulsador disparador de la abertura

                                       When the Shutter Release Button (5) is pressed
                                                       half-way down, the metering system is activated
Once you have set the exposure, check the     and the lens stops down to the f-stop pre=set
composition of your picture and press down all     on the lens Aperture Ring(10). lf you wish to
the way on the Shutter Release Button (5) using       re-compose your photograph or check the focus
a slow, steady pressure to take the photograph.        prior to taking the picture, press the Aperture
Advance the film for your next shot.                 Release Button (16). This opens the lens to its
                                     maximum f-stop allowing you to view your
                                                         subiect through a bright, clear viewf inder.


          Fis23                                          Fis24                                      (D
View original page 18Page 19 · Read text
t-NGLtsH  I
t4
  Rewinding the Film                     When you'2O have finished taking all your pictures                                                            (either    or 36 exposures), rewind the film   R0ckspulen des Filmes                                                 back into its cassette as follows:
  R6embobinage du film                                      1 . Press the Rewind Release Button (27 )on the
   Riavvolgimento  della Pellicola                    camera base.
                                                                                          and   Rebobinado del film                                   2.  Lift up the Film Rewind Crank (21)                                                  turn it in the direction of the arrow until
                                           you feel the film tension lessen. This indi-
                                                          cates the  f ilm has been completely rewound
                                                                into the cassette.
                                                                   3. Open the camera back by pulling up sharply
                                   on the Rewind Crank and remove the
                                                   exposed cassette.
                                NOTE: AVOID DIRECT SUNLIGHT
                          WHEN LOADING OR UNLOADING
                                    YOUR CAMERA.


           Fig25             1@ Fis26
View original page 19Page 20 · Read text
www.butkus.us


Taking Flash Pictures                     A. Fla*r Equipment with PC Cords
Blitzaufnahmen                    The 4OO0S provides  f lash teminals for.
Prises de vues au flash                       both "X" (2O) and "M" (191 synchronization.
Fotografie con il flash                    The choice of terminal depends upon the type
                                                           used and shutter speed desired.Fotografiando con flash                     of equipment
                                            B. Cordless Electronic Fla*r
                                                                               lf you will be using an electronic flash unit with
                                                     built-in hot shoe contact, the  f lash can be
                                                    attached directly to the Hot Shoe (1) atop the
                                             camera pentaprism. The camera and flash will
                                          then be fully synchronized through the con-                             Fis27                                                    tacts in the shoe with any shutter speed up to
                                          and including 11125 second. NOTE; The Shut-
                                                ter Speed Dial index for 1l125th second is
                                          marked in red as a reminder for electronic  flash.
                                                  synchronization and is color-coded to the "X"
                                                 marking on the Hot Shoe itself.


                            Fis28
View original page 20Page 21 · Read text
ENc-LrsH  II
                                   Your Cosina 40O0S has a  built-in Self-t6                                      Timer (111 which delays the shutter release
                                         trom 7 to 15 seconds. This enables you to
   Using the Self-timer                           include yourself in your own pictures and is
   Selbstausltiser                                 also of benefit in close-up and photomacro-
   Emploi de I'autod6clencheur               graphy where camera movement must be                                                  reduced to a minimum.  Uso dell'autoscatto                                         To activate the Self-Timer:
   Usando el Autodisparador                  1. Move the Self-Timer lever in the direction of
                                                           the arrow.
                                                          (Fsr maximum delay, move the lever until  it
                                                                 stops)
                                            2. Press the Shutter Release Button (5)to start
                                                           the Self-Timer moving.


  www.butkus.us
             Fig29

                                       (D
View original page 21Page 22 · Read text
www.butkus.us
T7
  Changing Lenses
  Wechseln der Objektive
  'Change ment d'objectif                                          The universal thread lens mount of your Cosina
   Per cambiare la lente                       Camera affords you the opportunity of select-
  Cambio de objetivos                         ing  f rom the hundreds of universal thread
                                         mount lenses and optical accessories available.
                                          To attach your lens:
                                               1. Hold the camera securely in the palm of
                                                     your left hand.
                                               2. Grasp the lens firmly around the lens barrel
                                            and align the lens threads with the camera.
                                               3. Turn the lens clockwise until it is firmly
                                                       seated. lf the lens is difficult to screw in,
                                                  remove  it and inspect the threads for dirt or
                                                         other foreign matter.
                                          To remove your lens:
                                               1. Hold the camera as above.
                                            2. Grasp the lens  f irmly around the lens barrel
                                            and turn it counter-clockwise about three
                                                                    full turns and lift it carefully away from the
                                                     camera body.
                                     IMPORTANT: Do not touch the reflex mirror
                                                           in the camera body when attaching or removing
                                   a lens. Dust particles can be removed with a
             Fis30                              blower or soft camel-hair brush.

                                     (D
View original page 22Page 23 · Read text
'n1E                                    Whenfront youof andfocusbehindon a specificthat subjectsubject,willan areaappear
   Depth of Field                                 acceptably sharp in your picture. This area, or                                               zone, of acceptable sharpness is .DEPTH OF   Schdrfentiefe                                               FIELD.
   Profondeur de champ                       Depth of field is determined by the f-stop you
   Profonditi di campo                           select and the distance from the subiect in
   Profundidad del campo                      focus to the film plane' As you get closer to                                             your subject, or as you open your lens (e.9.
                                           from f16 to f2.8), the depth of field becomes
                                                   shallower. By stopping your lens down (e.9.
                                                                                                                                f rom t2.8 to   f 16), this depth or zone of
                                                      acceptable sharpness can be increased.                                   Fig31                                              Another factor in depth of field is the focal
                                                   length of the lens being used. As a rule, the
                                                     longer the focal length of a lens the shallower
                                               the zone of acceptable sharpness becomes; the
                                                       shorter the focal length, the greater the depth
                                                    of field. K'nowing the depth of field limitations
                                                    of your lens can enhance the creativity of your
                                                          pictures. A deep zone of acceptable sharpness                                  Fis32         provided by shorter focal length lenses is ideal
                                                for "snapshooting" whqn there isn't time to
www.butkus.us                                     focus properly, as in fai't action photography.
                                              Shallow depth of field Can be used to throw
                                                           distracting foregrounds and backgrounds out of
                                                   focus to add separation between a subiect and
                                Fis33              its surroundings.

                   @
View original page 23Page 24 · Read text
www.butkus.us


Auto-Manual Switch
Auto mati k-/Manuel l-Scha lter
Commutateur auto/manuel
I nterruttore auto/manuale
 I nterruptor Auto/Manual


                                   When using nonautomatic accessories (bellows,
                                                          etc.), it is sometimes required that you disen-
                                            gage the automatic diaphragm feature of your
                                                   lens. Most standard lenses for your Cosina
                                         Camera as well as most universal thread mount
         Fig34                                     lenses provide an Auto/Manual Switc6133l for                                                           this purpose.
                                   To disengage the automatic feature, move the
                                            Switch to "M" (Manual). To engage the auto-
                                                matic diaphragm, return the Switch to the "A"
                                                 (Automatic) position.


         Fis35

                 @
View original page 24Page 25 · Read text
lQ   Snecifications, COSINA 40003
Camera Type: 35mm single lens retlex with center-weighted  averagrng through-the-lens  metering system.
 Film Size and Capacity: 35mm perforatecl  film in 2O or 36 exposure  cassettes.
 Film Format: 24mm x 36mm
 Lons Mount: Universal thread mount.
Shutter: Vertically moving metal Copal Square shutter with speeds from 1/lOOOth second to 1 second plus B (Bulb).                                                                                                                                                 I
Solf-Timer: Built-in variable timer with 7 to 15 second delay. Activated by shutter release button.
Exposure Mster: Two sensrtive Cadmium Sulfide (CdS) cells located on either side of viewfinder eyepiece behind pentaprism read light
      comtng through lens. Cross-coupled to shutter speed control and frlm speed dial Metering emphasis is plac.ed on central portion
       of the oicture area as seen in vrewfrnder.
EIposur8cont'o|:Stop.down,match.need|esystem.correcteXposUreindicatedbya|igningneed|ewithineXposUrebracketsinviewfinder.                                                        -Exposure Range: EV 3 to EV l8 at ASA lOO (DlN 21) with Cosinon 55mm  f 1.4 automatic lens.
Film Speod Range: ASA 25 to 32OO; DIN 15 to 36.
PowerSupply:  Single 1.35-volt Mercury batterv (Mallory RM-675, Everyday E-675 or equivalent).
Shutter Rel€ase: Two-stage. Half pressure activates through-the-lens metering systems; stops lens down to shooting aperture. Full pressure
        activates shutter.
Viewfinder: Fixed eVe-level penlaprism type with silver coating to increase viewfinder brightness approximately 30%. Magnification 0.81X at
        infinity with Cosinon 55mm f1.4 lens. Field o{ view covers 93% of actual picture area (horizontal). Meter needle and exposure index
        brackets  visible.
 Focusing: Microprism center spot surrounded by ground glass area on Fresnel filed for rapid focusing.
 Reflex Mirror: Instant return tvpe with front surfaced coating.
 Flash Synchronization;
      With Class "M" bulbs -  1 to l/1OOOth second.
                        Flash      With Electronic                                 1                                      to                                        1/l25th                       "X" -                                   provided                        lash Ffa*r                                                                                                camera pentaprism.                                                 "M".      Contacts:            Two  f                           terminals                                                                                            into                                                                                         shoe atop                                      "X"second.and                                                                                           rccessory                                                                                       built                                                 "X" contact                                              -                                                                                            prevention                                                                                                  mechanism.                                                     lever.                                                                    rotation.                 Single                                    advance                                                                                  exposure                                     filmFilm Advance:                      stroke                              rapid                                                 180"                                                                               Burlt-in                                                                      double
Exposure Counter: Progressive type from "S" (Start) to 36. Counter automatically  resets to "S" when rear cover  is opened.
Film Loading: Rear cover opened by lifting up rewind knob. Multi-slotted take-up spool.
Film Rewind: Film transport released by pressing rewind button on camera base. Rapid rewind crank.
Dimenstion (body only):3.8" x 5.7" x 2" (97mm x 146mm x 52mm) Weight (body only):25.6o2. (72591
Accessories Includod: Shoulder/Neck-strap ''O" rings, battery, and shock-preventing hot shoe cover.                                                        1


                                                                                                                                                                       '!
                                                                                                                                                                                                                                                                     .l-f
                   @                                                                                                                                          ..                                                .4.,&
View original page 25Page 27 · Read text
3 Seite5-o(Fiss-9)
                                                                   6.  Schliefjen Sie die Rrickwand indem Sie sieEinlegen des Filmes                                                     gegen das Gehduse drUcken.
lhre Camera arbeitet mit Kleinbildfilmen Typ         7. Drehen Sie den Riickspulknopf (18) leicht135, 24 x 36mm. Color-oder SchwarsweifJ-          in Pfeilrichtung um den Film zu straffen.
filmen.                                              Transportieren Sie den Film mit dem
 Einlegen des Filmes in die Camera                       Schnellschalthebel und driicken Sie jeweils
1. Ziehen Sie den Ri.ickspulknopf nach oben,        den Ausloser (5) bis die Zahl 1 im Bild-
   bis die Riickwand (31 )  aufspringt. Das          ziihlwerk erscheint. Beim Filmtransport
    Bildzdhlwerk {6) wird dadurch automatisch         dreht sich der Riickspulknopf entgegen
    auf "S" (Filmanfang) zuruckgestellt.            dem Uhrzeiger Dies zeigt lhnen,dalS der
2. Legen Sie die Filmpatrone so in das Film'        Film richtig transportiert wird.
    fach l22l ein, dafj das riberstehende Teil der      Dreht sich der R0ckspulknopf nicht, ist der                 den                    Cameraboden weist.                 auf    Spulenachse                                                                                Wiederholen  Sie                                                                             eingelegt.                                            Film                                                      nicht richtig                                                  (18)                      Filmrtickspulknopf             den    Drr.icken Sie3.                                                           vorbesch                                                                  riebenen                                                                             Vorgang.                                               den    leicht hin und her drehend nach unten bis er
     e  i n rastet.
                   Filmanfang                                     iiber                                  die Film-4.            den   Ziehen Sie                                                          O)    frihrung                setzen                                in einen         und                     Sie ihn                                               der     /L Seite6 -7 (Fig1   Schlitze der Aufwickelspule (29) ein.       E instellen der F ilmempfindlichkeit  ACHTUNG: Um einen der Schlitze in eine
    bessere Stellung zu bringen, drehen Sie die       Jeder Filmtyp -color- oder SchwarzweifJ - hat                                                                                                       Diese    Aufwickelspule von Hand in Pfeilrichtung.       eine besondere Lichtempfindlichkeit.                                                     Lichtempfindlichkeit wird in Zahlen ausge- 5.  Transportieren Sie den Film mit dem       dr0ckt. In ASA in den USA, in DIN in Europa                                                      dalj                                    darauf,                   Achten Sie    Schnellschalthebel.                                                                         Ldndern. Diese                                                    meisten                                                         anderen                                 und den                                          in den                                     richtig    beide Seiten der Perforation                                          Angabe                                                              der Filmpackung.                                                       finden                                                          Sie auf   Zdhnen der  Filmtransportwalzen l28l      hoher die angegebene Zahl um so lichtempfind-Je
     liegen.                                                  licher ist der Film, d.h. ftir die Aufnahme wird
                   @                                                            ;I
View original page 27Page 28 · Read text
www.butkus.us
wenig Licht benotigt. Die richtige Einstellung      11125 Sekunde, 2  f;'j,r 1/2 Sekunde usw. Die
der Empfindlichkeit ist daher besonders      Zahl "1"  stellt eine Belichtungszeit von  1
                                                                                                    Verschlufiwichtig, damit die Lichtmess -  Systeme der     Sekunde dar. Bei "8"  bleibt der
Camera die richtigen VerschlufJzeit -  / Blenden       solange offen wie der Ausltiser gedriickt  ist.- Kombinationen ermitteln kann.                    Diese Einstellung wird bei Nacht- oder Zeit-
E instellen der F ilmempfindlich keit                 aufnahmen gebraucht.
1. Heben Sie den Rdndelring des Ver-      Drehen Sie zur Einstellung der Verschluffzeit
   schluf3zeitenknopfes (9)  nach oben und      den VerschlufJzeitenknopf bis die gewr.inschte
   drehen Sie diesen nach links oder rechts bis        Zeit = Zahl gegenriber der Markierung steht.
   die entsprechende ASA   Zahl gegenriber      Bei heiterem oder leicht bewolktem Himmel                              -                 nehmen Sie 11125 Sekunde. Bei Innenauf-   dem grtinen Indexstrich steht.
2. Lassen Sie dann den Ring los, so dafJ er     nahmen in gut erleuchteten Rdumen 1/60
   wieder einrasten kann. Die Empfindlichkeit      Sekunde. Die entg0ltige Bestimmung richtet
     ist damit eingestellt.                                sich nach dem Motiv. Je mehr Bewegung desto
                                                     schneffer die erforderliche Zeit frir scharfe
                                                Aufnahmen.ACHTUNG: Die Tabelle zeigt die Skalen-
markierungen und die diesen entsprechenden
ASA - Werte. (Seire 7)
                                       Seiteg(Fisl 2-1315 SeiteS(Fisl1)           6
Einstel len der Verschl u8zeit                 Handhabung der Camera
Der Verschlufi regelt die Zeitdauer des Licht-     Die richtige Handhabung der Camera ist f0r
 einfaf   f es auf den Film. Die Zeit des Offnens      eiwandfreie, scharf e  Auf nahmen absolut
und Schliefiens des VerschlufJes wird in Bruch-      wichtig Die folgenden Abb. zeigen lhnen die
teifen einer Sekunde, die den Zahlen auf dem       richtige Haltung der Camera bei Ouer- und
 VerschlufJzeitenknopf entsprechen, gemessen;      Hochaufnahmen.z. B. steht 1000 ftir 1/10OO Sekunde, 125 fnr
View original page 28Related documents and language editions
From the M. Butkus archive. Original publisher and archive notices are retained.
Check the model and edition against your equipment.
PDF verified 2026-10-10.