Film cameras
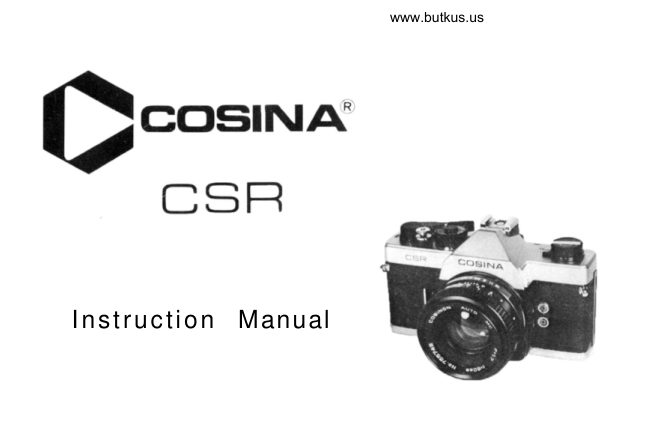
Cosina CSR User manual
User manual for Cosina CSR. 17 pages in English. Read the original PDF, download or print a copy without registration.
17 pagesEnglish1.5 MB PDF
Loading your manual…Open PDF directly
Document details
- Brand
- Cosina
- Model / document
- Cosina CSR
- Document type
- User manual
- Language
- English
- Pages
- 17
- File size
- 1.5 MB
- Category
- Film cameras
- Document date
- Not specified in catalog
Search available document text
Find a term, then jump to its page in the original PDF. Image-only pages may not be searchable; check the PDF for exact wording and diagrams.
Page 2 · Read text
DESCRIPTION OF PARTS

  1. Film Plane Reference Mark
  2. " X " Synchr. Hot Shoe
  3. Film Advance Lever
  4. Cable Release Socket
  5. Shutter Release/Meter ON Button
  6. Exposure Counter Window
  7. Shutter Release Lock Lever
39. Multi-exposure Lever
  8. ASA Film Speed Window
 9. Shoulder Strap Lugs
10. Shutter Speed dial
11. Rewind release Button
12. Aperture Ring
13. Self Timer
14. Aperture Scale
15. Infrared Index Mark
16. Aperture/Distance Reference Mark
1 7. Depth Of Field Scale
18. Aperture Release Button
19. Distance Scales
20. Film Rewind Knob/Rear Cover Release
21. AEC Terminal
22. " X " Flash Terminal
                   Auto/Manual Switch 35
                     Spot/Average Meter Selector Switch 38

                                                     1
View original page 2Page 6 · Read text
www.butkus.us

index mark  in  the Exposure Counter Win-    FILM REMINDER CLIP
dow  (6).  As  you  advance  the  film  the                                           The  Film Reminder  Clip  (33) accommodatesRewind Knob  should  rotate  counterclock-                                                     the end panel of a 35mm film cassette packagewise indicating the film  is moving smoothly                                                            to  act as a constant reminder  of the type ofthrough the transport.  If the Knob does not                                                        film  loaded   in  the  camera.  The end  panelrotate, open the Rear Cover and re-load the                                                 should  be  changed  each  timer  a  differentcamera. NOTE:  If the Shutter Release But-                                                    film-type is used.ton does not operate, make sure the Lock
Lever (7) is set at " A " (Advance).


                                                  4
View original page 6Page 7 · Read text
SETTING THE FILM SPEED
Each type of film — color or black & white —
has  its own sensitivity  to  light. This sensitivity
is assigned a numerical  value described as an
ASA rating (U.S.A. Standard)  or a DIN rating
(Europe and  most  other  countries).  In most
cases, both ASA and DIN ratings are imprinted
on the film package, as well as the data sheet
packed  with  the  film  and  the  film  cassette
itself.
The  higher  the  film  speed  rating,  the more
sensitive the film  is to light that  is, less light  is       www.butkus.us
required for a proper exposure. The film speed,
therefore,  is an important element  in ensuring
that  the  through-the-lens metering systems  of
your  camera  determine  the  correct  shutter
speed/f-stop combinations  for a given lighting
situation.
Each time a film with a new film speed rating is
loaded  in the camera, the film speed MUST be
set  in  the  Film Speed Window  (8)  to assure
accurately exposed photographs.
To set the film speed:
1.  Lift up on  the outer  collar  of  the Shutter
   Speed Dial  (10) and rotate  it until the ASA
   number  or  representative  index  mark   is
   opposite the green index line.
2.  Release  the  collar  to  lock  the  film  speed
    setting in the camera.
The film speed range is from ASA 25-3200.
                                                     5
View original page 7Page 8 · Read text
www.butkus.us

SETTING THE SHUTTER SPEED
The shutter controls the length  of time  light  is
allowed  to  strike the film. The speed at which
the  shutter  opens  and  closes  is measured  in
fractions  of  a second  that correspond  to the
numbers on  the Shutter Speed  Dial  (10).  For
example 1000  is 1/1000 second, 125  is 1/125
second, 2 is 1/2 second, and so on. The number
"1"  on  the  Dial  represents one  full second of     FOCUSING THE LENS
exposure. When  set  to  " B "  (Bulb) the shutter                                               To  assure  the  sharpest  possible photographs,remains open as  long as  the Shutter  Release                                                    your COSINA CSR has a horizontal split-image,Button  is depressed. This setting  is  for use  in                                                   surrounded with a micro-prism, focusing spot inpictures  of  night  scenes and  where  available                                                           the viewfinder which exaggerates  in-focus andlight exposures are beyond  the exposure read-                                                       out-focus images.ing capabilities of your camera.                                               As you  look through  the viewfinder, turn theTo  set  the shutter speed,  rotate the  Dial  until                                          LENS FOCUSING RING (37) until the split-offthe number representing the speed you desire is                                                    image becomes as one complete image  in theopposite  the  index  mark.  Generally speaking,                                                         viewfinder. When  this  occurs,  the  image  haswhen  outdoors   in  bright  or  hazy  sunlight,                                                   been brought into focus.1/125  second  is suitable for most photographs.
When  indoors  in a  well-lit room, 1/60 second
should  be  sufficient  to  record  your  subject,
depending upon  the  film you  are using.  Final
determination  of a shutter speed setting should
be made based on the action-stopping needs for
your picture,  i.e. the more action, the faster the
shutter speed required.


                                                      6
View original page 8Page 9 · Read text
SETTING THE EXPOSURE                             6.  The  proper  exposure  of    f i l m   is  obtained
Your Cosina CSR has a  built-in LED system,          whenever  the green o p t i m u m lamp lights. The
which  measures  the  light coming through  the            range  that  the green o p t i m u m light  lights  is
lens and enables you to set the proper exposure             0.3 E V .
for a given lighting condition.
To take an exposure reading:
1. Winding of the Film Advance lever (3).
2. Switch  the meter on by gently pressing the
    shutter speed  button  half-way down. The
    lens will stop down  to the F-stop pre-set on
    the aperture Ring.
3. When one of the LEDs located at upper side
    of the viewfinder lights, the meter circuit is
   powered by batteries.                            Selecting the Metering System
4. When  the red warning  light  (+)  lights   it  is
   meaning  of Over-exposure.  In  this case the       Your Cosina Camera has two separate through-
   diaphragm ring of the taking lens should be         the-lens  metering  systems — one  for "Spot"
    turned  to the direction of the arrow or the         readings and one  for "Average"  readings — to
    shutter  speed  dial  should be  turned  to a         assure  highly  accurate exposure measurement
    higher speed  until  the green optimum lamp        even in the most difficult lighting conditions.
     lights.                                                     " A V E R A G E " Readings
5. When the red warning lamp  (-)  lights,  it  is                                          When the Meter Selector Switch  is set to  " A , "   meaning of Under-exposure.  In this case the                                                          the meter reads  the amount of  light  falling on   diaphragm ring of the taking lens should be                                                          the  entire  picture  area  as  seen  through  the   turned   to  the  direction   that  the  arrow                                                 camera viewfinder.    indicates or the shutter speed dial should be                                              The Average metering system should be used   turned  to  the opposite direction  until  the                                             when  all  elements  of  the scene  to be photo-   green optimum lamp lights.                                                   graphed  are  evenly  illuminated  and  where
                                                        strong back- or side-lighting is not present.
                                                     7
View original page 9Page 10 · Read text
www.butkus.us

"SPOT" Readings                     APERTURE RELEASE BUTTON
When  the Meter Selector Switch  is  set  to the      When the Shutter Release Button (5)  is pressed
green  " S , " the meter reads approximately 10%       half-way down,  the LED  metering system  is
of the scene you are photographing. The cross        activated and the lens stops down to the f-stop
visible underneath the microprism in viewfinder        pre-set on  the  lens Aperture Ring (12).  If you
represents the picture area covered by the Spot       wish  to re-compose your photograph or check
metering system.                                       the focus prior to taking the picture, press the
The Spot metering system is extremely valuable       Aperture Release Button  (18). This opens the
when the subject being photographed  is much        lens  to   its maximum  f-stop  allowing you  to
lighter or darker than the surrounding area, as       view  your  subject  through  a   bright,  clear
in a portrait against a bright sky.                       viewfinder.
Additionally,  when  the  principle  amount  of
light  is striking the subject from behind (back-
lighting)  or from  the side (side-lighting), using
the Spot Meter assures that a proper exposure is
made  of  that  portion   of  the  subject  most
important to you.


                                                      8
View original page 10Page 11 · Read text
DEPTH OF FIELD
When you focus on a specific subject, an area in
front  of  and  behind  that  subject  will  appear          www.butkus.us
acceptably sharp  in your picture. This area, or
zone,  of  acceptable sharpness  is DEPTH OF
FIELD.
Depth of  field  is determined by the f-stop you
select  and  the  distance  from  the  subject  in
focus  to the  film  plane. As you  get closer  to
your  subject,  or as you open your  lens  (e.g.
from  f16  to  f2.8),  the depth of  field becomes
shallower.  By  stopping  your  lens down  (e.g.
from   f2.8   to  f16),   this  depth  or  zone  of
acceptable sharpness can be increased.
Another  factor  in depth  of  field  is  the focal    TAKING THE PICTURE
length  of  the  lens being  used. As a  rule,  the                                             Once you  have  got  the green dot  lighted on,longer the  focal  length  of a lens the shallower                                                   check  the  composition  of  your  picture  andthe zone  of acceptable sharpness becomes; the                                                          press the Shutter Release Button  all way downshorter  the  focal  length, the greater the depth                                                            giving  a  slow,  steady  pressure on   it  to  takeof  field. Knowing the depth of field limitations                                                  photograph.of your lens can enhance the creativity of your                                               Advance the film for your next shot.pictures. A deep zone  of acceptable sharpness
provided by  shorter focal length lenses  is ideal
for  "snapshooting" when  there  isn't  time  to
focus properly, as  in  fast action photography.
Shallow depth  of  field can be used  to throw
distracting foregrounds and backgrounds out of
focus  to add separation between a subject and
its surroundings.

                                                      9
View original page 11Page 12 · Read text
www.butkus.us

USING THE SELF-TIMER              TAKING FLASH PICTURES
Your COSINA CSR  has  a  built-in  self-timer      Cordless Electronic Flash
which  delays  the  shutter  release  approx.  10           If you will be using an electronic flash unit with
seconds. This enables you to include yourself in       built-in  hot  shoe  contact,  the  flash  can  be
the  picture and  is also  of  benefit  in close-ups      attached directly  to the Hot Shoe (1) atop the
and  macro  photography  where  the  camera      camera pentaprism. The camera and  flash will
movement must be reduced to a minimum.           then be  fully  synchronized  through  the con-
To activate the self-timer.                                 tacts  in  the shoe with any shutter speed up to
1. Move the self-timer lever  in the direction of      and including 1/60 second. NOTE: The Shutter
    the arrow until  it stops.                        Speed  Dial  Index for 1/60th second  is marked
2.  Press the shutter release button  to start the        in  red  as  a  reminder   for  electronic  flash
    self timer moving.                                synchronization and  is color-coded  to the  " X "
   A  red  light blinks to indicate the self-timer      marking on the Hot Shoe itself.
   working.


                                                      10
View original page 12Page 13 · Read text
CHANGING LENSES                AUTO-MANUAL SWITCH
The universal thread lens mount of your Cosina     When  using nonautomatic accessories (bellows,
Camera  affords you  the opportunity of select-        etc.),   it  is sometimes required  that you disen-
ing  from  the  hundreds  of  universal  thread       gage  the automatic diaphragm  feature of your
mount  lenses and  optical  accessories available.        lens.  Most  standard  lenses  for  your  Cosina
To attach your lens:                             Camera as well as most universal thread mount
1. Hold  the camera  securely  in  the palm  of        lenses provide an Auto/Manual Switch  (35) for
   your  left hand.                                            this purpose.
2. Grasp the lens firmly around the lens barrel      To disengage  the automatic  feature, move the
   and  align  the lens threads with the camera.      Switch  to  " M "  (Manual). To engage the auto-
3.  Turn  the  lens clockwise  until   it  is  firmly       matic diaphragm, return the Switch to the " A "
    seated.   If  the  lens  is difficult  to screw  in,       (Automatic) position.
   remove  it and  inspect the threads for dirt or
   other foreign matter.
To remove your lens:
1.  Hold the camera as above.
2. Grasp the lens firmly around the lens barrel
   and  turn   it  counter-clockwise  about  three
     full  turns and  lift  it carefully away from the
   camera body.
IMPORTANT: Do  not touch the  reflex mirror
in the camera body when attaching or removing
a  lens.  Dust  particles can be removed with a
blower or soft camel-hair brush.


                                                                                   11
View original page 13Page 14 · Read text
www.butkus.us

Multi-exposure                       REWINDING THE FILM
Your camera  is equipped with multi-exposure      When  you  have  finished  taking  all  your  pic-
system.  This  enables you  to make  tricky  or         tures, rewind the  film back into  its cassette as
fantastic  pictures. Two  or more shots can be        follows:
exposed on a single frame when the following         1.  Press  the Rewind Release Button  (11)  be-
procedure is repeated.                                         side the speed dial.
1. Shoot first scene.                                        2.  Lift up  the  Film Rewind  Crank  (23) and
2. Turn MULTI-EXPOSURE LEVER  to  the            turn   it  in  the direction  of  the arrow  until
    direction of arrow.                               you  feel  the  film tension  lessen. This indi-
3. Shoot second scene.                                     cates the film has been completely rewound
                                                                   into the cassette.
NOTE:                                                                 3. Open the camera back by pulling up sharply1.  For  this  multi-exposure  the  darker  back-                                                    on  the  Rewind  Crank  and  remove  the   ground  of  subjects  will be more effective.                                                    exposed cassette.   An exposure-compensation  will be needed                                           NOTE:   AVOID   DIRECT  SUNLIGHT   when  the background  is bright.  In case  of                                    WHEN   LOADING  OR  UNLOADING   double-exposure    one-step-under-exposure                                      YOUR CAMERA.   from the correct setting should be given to
   each shot. (Compensate with shutter speed
    or F-number.)
2.  As long as multi-exposure system is operat-
   ed  the  film counter remains  at  the same
   number.


                                                     12
View original page 14Page 15 · Read text
INTRODUCTION OF COSINA AEC ADAPTER

A.  Specifications:
System:      Aperture-preferred      Automatic Exposure Control adapter.
Battery:            Toshiba 4G13 type 6V silver oxide  battery.
Operating range:   EV4 (F1.4 1/8)  - EV18 (F16 1/1000) with ASA100.
EE operating diagram:
                     F1.4       EV 4  - 11
                    F5.6       EV 8  - 15
                 F16        E V 1 1 - 1 8            (in case film speed is ASA 100)
B. Procedure of use:
1.  Insert the battery to the battery compartment (+ side face up).
2. Turn the speed dial of AEC adapter until the engraving of 1000 comes to the white indication.
3.  Set the speed dial of camera at 1000.
4.  Pull up the cock which lies on the top face of the adapter.
5.  Insert the adapter to the accessory shoe of camera.
6.  Lay down the cock as previously positioned.
7.  Engage the pin of speed dial of camera with the slot of speed dial of adapter.
8.  Fix the adapter by turning the lock-dial clockwise.
9.  Insert the plug to the socket.
C.  Operation:
1. Advance the film.
2.  Set the camera to the object which you want to take picture of, and press the release button half
   way down.
3. Then, immediately, the meter circuit is powered and one of the LEDs in the viewfinder will light.
    At  the same time, the motor of adapter starts running.  It runs just until the center positioned
   green LED lights and stops.


                                                                 13
View original page 15Page 16 · Read text
www.butkus.us

4. When the green LED  lights,  it means that the exposure condition is correct. Now, you can press
    the shutter release button all way down.
5. When  either      or      red LED  light and  the motor  keeps  running, you should  rotate the
   diaphragm ring and choose another F stop until green LED lights.
6. When  red LED      lights,  it means overexposure, so you should rotate the diaphragm ring  to
    (right), in other words, to smaller aperture.
7. When red LED      lights,  it means underexposure, so you should rotate the diaphragm ring to
     (left), in other words, to bigger aperture.
8.   If the green LED does not  light though you have already set  to maximum aperture,   it  is out of
   EE range.  It is the same mean,  if the both red LEDs light at the same time.


                                                               14
View original page 16Page 17 · Read text
SPECIFICATIONS
Lens Mount:   M=42ф    P=1.0    screw mount, Flange back focus distance 45.45mm
Shutter:               Magnetically  controlled Cloth Curtain  Focal  Plane shutter with  the speed
                     from 4 sec. to 1/1000 sec. plus B and Mechanical 1/50 sec.
                          Flash synchronization at X (1/60 sec.)
                            Electrically controlled Selftimer of 10 sec. with winking Warning Signal lamp
Viewfinder:            Fixed Pentaprism type, Magnification 1x (with f=55mm lens), Dioptry 0.9,
                             field of view 93% for both vertical and horizontal. Focusing to be made by
                         horizontal    split  image  and  surrounding  Micro-prism,  Indications   of
                   Optimum, Over and Under exposures.
Metering System:     Match LED system by stop-down metering. Average & Spot metering.
Film Speed Range:    ASA 25   3200
Auto-exposure range:  EV 3  (F1.4 1/4 sec.) - EV 18 (F16 1/1000 sec.)
Film advance:       180°      rotation with Stand-off angle 30° Provided  with multi-exposure device
Shutter Release:      Equipped  with  built-in  Lock  dial and  Stop-down  release  button.  Half
                        pressure stops down  the  lens shooting aperture and  Full pressure activates
                         the shutter
Exposure Counter:     Progressive type from S (start) and automatically resets to S
Rear Cover:          Removable Door-hinge type with Film Reminder Clip on  its back
Electrical Source:     S-76 Silver battery 1.5V x 2
                        Battery  test by LEDs of metering built-in the viewfinder with  half pressure
                           of the release button
Size (Body):      136.5        x 83.2 x 51 (mm)
Weight:               540 gm


                                                                        PRINTED  IN JAPAN
View original page 17From the M. Butkus archive. Original publisher and archive notices are retained.
Check the model and edition against your equipment.
PDF verified 2026-10-10.