Film cameras
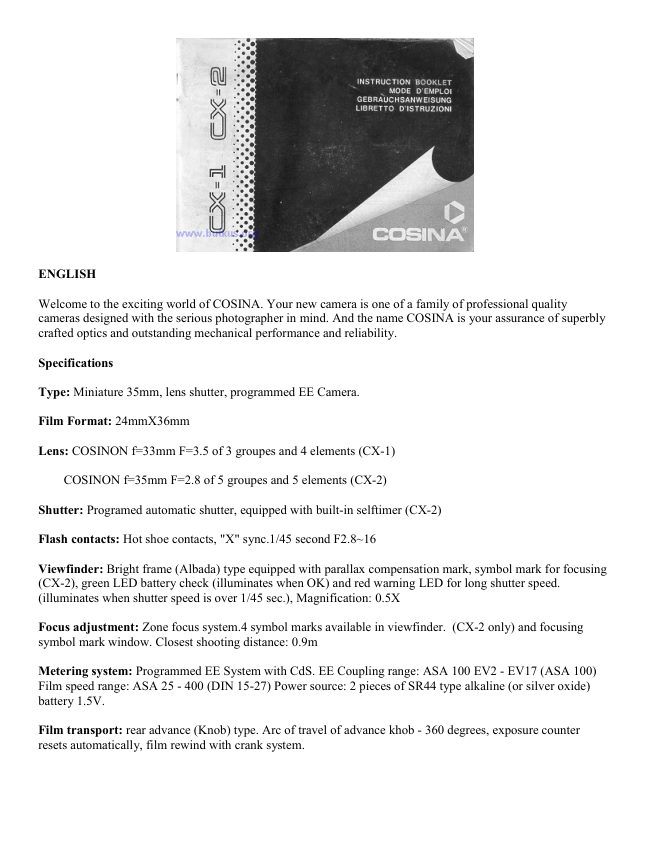
Cosina CX-1 / CX-2 User manual
User manual for Cosina CX-1 / CX-2. 11 pages in English. Read the original PDF, download or print a copy without registration.
11 pagesEnglish1.5 MB PDF
Loading your manual…Open PDF directly
Document details
- Brand
- Cosina
- Model / document
- Cosina CX-1 / CX-2
- Document type
- User manual
- Language
- English
- Pages
- 11
- File size
- 1.5 MB
- Category
- Film cameras
- Document date
- Not specified in catalog
Search available document text
Find a term, then jump to its page in the original PDF. Image-only pages may not be searchable; check the PDF for exact wording and diagrams.
Page 2 · Read text
ENGLISH

Welcome to the exciting world of COSINA. Your new camera is one of a family of professional quality
cameras designed with the serious photographer in mind. And the name COSINA is your assurance of superbly
crafted optics and outstanding mechanical performance and reliability.

Specifications

Type: Miniature 35mm, lens shutter, programmed EE Camera.

Film Format: 24mmX36mm

Lens: COSINON f=33mm F=3.5 of 3 groupes and 4 elements (CX-1)

   COSINON f=35mm F=2.8 of 5 groupes and 5 elements (CX-2)

Shutter: Programed automatic shutter, equipped with built-in selftimer (CX-2)

Flash contacts: Hot shoe contacts, "X" sync.1/45 second F2.8~16

Viewfinder: Bright frame (Albada) type equipped with parallax compensation mark, symbol mark for focusing
(CX-2), green LED battery check (illuminates when OK) and red warning LED for long shutter speed.
(illuminates when shutter speed is over 1/45 sec.), Magnification: 0.5X

Focus adjustment: Zone focus system.4 symbol marks available in viewfinder. (CX-2 only) and focusing
symbol mark window. Closest shooting distance: 0.9m

Metering system: Programmed EE System with CdS. EE Coupling range: ASA 100 EV2 - EV17 (ASA 100)
Film speed range: ASA 25 - 400 (DIN 15-27) Power source: 2 pieces of SR44 type alkaline (or silver oxide)
battery 1.5V.

Film transport: rear advance (Knob) type. Arc of travel of advance khob - 360 degrees, exposure counter
resets automatically, film rewind with crank system.
View original page 2
Page 5 · Read text
2. Inserting the Batteries


                                1. Unlock the Battery Chamber Cover (21) by turning it
                            counterclockwise with a coin.

                                2. Insert two 1.5V LR44 (A-76) type alkaline (or SR44 TYPE silver
                            oxide) batteries into the battery compartment, with the plus (+) side
                             facing upwards.

                                3. Replace the Battery Chamber Cover (21) by turning fully
                             clockwise.

                                4. Note: Clean the batteries with a dry cloth or paper before inserting
                         and thereafter at regular intervals. Make sure that the batteries are
                               inserted correctly, i.e., check polarity. The shutter will operate only
                           with batteries are correctly installed and not exhausted.


3. Battery Testing


                                                                   1. Test the batteries when
                                                                    --a new set of batteries has been
                                                                  inserted.
                                                                   --the camera has not been used for a
                                                         long period of time
                                                                   --the camera is being used
                                                          continuously for many hours.


2. To test the batteries, turn the Lens Auto-Cap/ Shutter Release Lock (15) fully clockwise and depress the
Shutter Release Button (3) slightly.

3. If the batteries are in good condition, the green LED located in the upper part of the viewfinder will light up.

4. If the green LED fails to illuminate, the batteries are too weak and need to be replaced or they are incorrectly
inserted.

4. Film Loading
View original page 5Page 6 · Read text
To load the camera:

                                1. Press the shutter release button to clear the camera mechanism.

                                2. Open the camera back by folding out and lifting up the film rewind
                           crank (8) until the back clicks open.

                                3. Insert the film cassette into the film chamber (18) then push down
                             the film rewind knob (9) and turn it slightly to lock the cassette in
                              place.

                                4. Pull film leader across the camera back and insert the end of leader
                               into one of the slots in the film take-up spool (25).

                                5. With the film rewind crank in the folded out position, rewind the
                             film slightly to remove any slack in the film cassette. Recheck to see
                                that the film remains secured to the take-up spool and that perforations
                             are aligned with the sprocket wheels (24). Fold down rewind crank.


6. Close the camera back cover (26) firmly till it clicks indicating that the cover is locked in the closed position.
Advance the film by alternatively winding the Film Advance knob (1) and pressing the Shutter Release button
(3) until the frame counter (3) resets between "0" and "2". As the Film Advance knob is wound, the film rewind
knob should rotate, indicating that the film is advancing properly. The camera is now ready for the first
exposure.

5. Frame Counter


1. The Frame Counter (2) displays the number of exposures made and resets automatically upon opening the
Back Cover (26).

2. When the Back Cover (2) is open, the Frame Counter (2) indicates "S" the start of the picture taking process.

3. When a film has been loaded in the manner previously described (see 'Film Loading'), the counter should rest
between "0" and "2", indicating that the camera is ready for the first exposure.


4. The counter will advance one mark for every frames used.

5. Only even numbers are shown. The dotted square marks indicate the odd frame numbers.

6. The number 12, 20, 24 and 36 are colored orange to indicate the end of commonly available films.
View original page 6Page 7 · Read text
6. Advancing the Film


                                 1. Make sure the film has been loaded properly.

                                 2. To advance the film, simply rotate the Film Advance knob (1)
                             counter clockwise until it makes one rotation.

                                 3. At the end of a film, the knob may stop before it is fully rotated.
                          Never force it.

                                 4. Do not attempt to wind on further, but depress the Film Rewind
                             button (22) and rewind the film back into the cassette.

                                 5. For ultimate convenience, the Cosina "Auto-winder CX-W" has
                          been designed to attach to the baseplate of the CX-2, providing
                            continuous film advance up to 1 fps.


7. Film Speed Setting

1. The ASA/DIN Speed of the film is specified on the box or in the instruction sheet packed with the film.

2. Set the Film Speed Indicator (13) to required ASA/DIN setting by turning the Film Speed Knob (12).
Note: Undetended position must not be used.

3. Always check that the film Speed Indicator corresponds with the ASA rating of the film in use.


8. Holding the Camera


                                                 1. Rest the camera on your left palm so as to turn the
                                              lens focusing lever with fingers.

                                                 2. Hold the camera body lightly, with your right fore-
                                              finger lightly on the shutter button.

                                                 3. Press your left elbow lightly against your body and
                                         look into the viewfinder steadying the camera against
                                        your face. The right arm should be relaxed while
                                          holding the camera.
View original page 7Page 8 · Read text
Note:
1. Don't push the Film rewind knob when advance the film.

2. Must be careful not to cover the photosensor lens and the camera lens with your fingers when taking picture.

9. Focusing and Setting the Composition
View original page 8
Page 9 · Read text
1. Set the Focusing Symbol Mark (14) by moving the Focusing Lever (17). As symbol marks are visible in
viewfinder too, focusing can be set through viewfinder. (CX-2 only)

2. Set the symbol mark according to approximate distance of your subject.

3. Place the subject you want to take within the bright line frame in viewfinder.

4. When taking picture at     (0.9m) the subject should not extend beyond the parallax compensation mark.


10. Shooting


For automatic exposure with the Cosina CX-2 sim ply:

1. Set the Aperture Lever s to "Auto"

2. Turn the shutter release lock clockwise

3. Advance the film with the Film Advance knob (or
Auto-winder if fitted)

4. Depress the shutter release button 3 slightly. (Green
LED is indicates batteries are O.K.).

5. When Red LED is illuminated ( indicating a shutter
speed below 1 /30th sec.) the camera should be held
very steadily or preferably set up on a tripod. The
shutter release button should then be pressed very
steadily to avoid camera shake. (To ensure correctly
exposed photographs, we recommend the use of the
Cosine CX-11 "Auto Flash" whenever the Red LED
signal appears).

6. Finally, check very carefully that your subject is
properly framed within the viewfinder before releasing
the shutter.
View original page 9
Page 10 · Read text
11. Self-Timer


(CX-2) The self-timer delays the firing of the shutter
mechanism for approximately 10 seconds, allowing you to
include yourself in the photograph when desired. Before
activating the self-timer, the camera should be set up on a
tripod or solid surface and focused at the appropriate distance.
To Activate Self-Timer: 1. Rotate the self-timer lever (6)
clockwise as far as it will go. The Self-timer is now "wound",
ready for use.


12. Rewinding The Film


When the last frame of your film has been exposed:

1). Depress the Film Rewind button (22) on the camera

2). Fold out the Film Rewind crank 48) and turn in the
direction of the arrow.

3). When the crank turns (8) freely (without tension ) or
"drag", pull up the rewind crank until the camera back
clicks open.

4). Remove the cassette of exposed film out of direct
sunlight and replace with fresh film cassette if required.

5). Return rewind crank to original position and close
camera back.
View original page 10
Page 11 · Read text
13. Flash Photography


                                       The ultra-compact Cosina CX-11 "Auto-Flash"
                                             has been specially designed for use with the
                                           Cosina CX-2.

                                                       1). Slide the CX-11 "Auto-Flash" into the hot shoe
                                                            I of the CX-2.

                                                       2). Move the Aperture Lever I) to the appropriate
                                                 aperture setting by pushing in the direction of the
                                           arrow and moving the lever up or down.

                                               (For full details, see the instruction sheet supplied
                                             with the CX-11 "Auto-Flash)


14. Photographing with the Autowinder "CX-W"

The Cosina Autowinder "CX-W" has been specially designed to couple with the Cosine CX-2, allowing
automatic wind-on facility up to 1 frame per second.

Attaching the CX-Autowinder:

1). Attach the Autowinder to the base of the CX-2 ensuring that the winder electrical contacts (19), winder
Coupling (23) and hole for winder locating pin (29) are properly aligned.

2). Tighten the screw.

3). Set the Autowinder power switch to the "ON" position.

(For full details see the instruction sheet supplied with the CX-Autowinder).
View original page 11Related documents and language editions
From the M. Butkus archive. Original publisher and archive notices are retained.
Check the model and edition against your equipment.
PDF verified 2026-10-10.