Film cameras
Cosina Flash 35E User manual
User manual for Cosina Flash 35E. 53 pages in German, French, Spanish, Italian. Read the original PDF, download or print a copy without registration.
53 pagesGerman, French, Spanish, Italian4.2 MB PDF
Loading your manual…Open PDF directly
Document details
- Brand
- Cosina
- Model / document
- Cosina Flash 35E
- Document type
- User manual
- Language
- German, French, Spanish, Italian
- Pages
- 53
- File size
- 4.2 MB
- Category
- Film cameras
- Document date
- Not specified in catalog
Search available document text
Find a term, then jump to its page in the original PDF. Image-only pages may not be searchable; check the PDF for exact wording and diagrams.
Page 1 · Read text
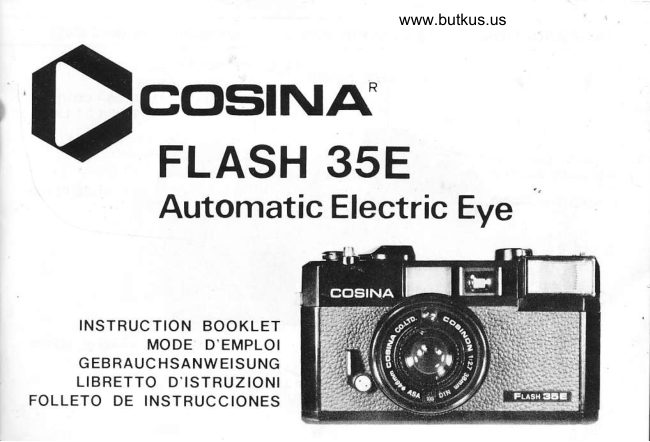
www.butkus.us
D?ffiin-
       Automatic Electric Eye


     INSTRUCTION BOOKLET
         MODE D'EMPLOI
    GEBRAUCHSANWEISUNG
     LIBRETTO D'ISTRUZIONI
FOLLETO DE INSTRUCC IONES
View original page 1Page 4 · Read text
id
          ,- @ lnserting Battery
  eMtsE EN PLAcE DEs PILES
 @ Einlegen der Batterie
 Q lnserimento batteria
 Q lntroducci6n de la Pila
     (1 ) Turn the battery cap of battery compart-
      ment(t 8) 19; exposure'meter counter-clockwise
     by pressing it with finger tip. Put battery into    F_     the compartment, facing positive (+) side
       forward. Tighten the cap clockwise.
    (2) Open the door of battery compartment for
        r1ro6u-11s56( 1o). lnsert 2 pcs. of AM-3 type
       battery according to the instruction stamped on
       the door. Close the door steadilY.


                                       www.butkus.us
              Fis3                Frg4
View original page 4Page 5 · Read text
www.butkus.us
                                                              FtgT         FigB  4                                                                E
 @ Film Loading
 eMtsE EN PLACE DU F|LM
 @ Filmeinlegen
 (p lntroduzione della pellicola
 @Carga de la Pelicula
(1 ) Open the back-door by sliding the unlock
   button to the direction of arrow. At the time
   the film counter resets automatically to "S"
    position.
(2) Pull up the rewind knob(13) 6nfl place a 35mm
   film cartridge in the patrone chamber(17]-  cor-
    rectly. Then, push down the rewind knob.
(3) lnsert the end of film into any slot of film-take-
   up-spool(22) and advance the  f ilm slightly with
   advance lever(1). Be sure the perforations of
   film are engaged with teeth of sprockel2ll.
   Then, close the backdoor.
(4) Rotate the rewind knob to the direction of
   arrow until it becomes harder. Then, advance
   film with advance lever until the film counter
    indicates "1".
  NOTE: Do not load or unload the   film
   cartridge under direct sunlight.                   @
View original page 5Page 6 · Read text
iel
   B
   @Setting the film speed
                    SENSTBTLTTE  e REGLAGE DE LA
 @ Einstellen der Filmempfindlichkeit
 O Regolazione per la sensibilitd della pellicola
  @Ajuste de la sensibilidad de la pelicula
   (1)Check the film speed (ASA number) of your
               f ilm.
   (2)Set the ASA number by rotating the film-speed-
        ring(7).
     NOTE: Undetented position must not be used.


                                                                                               Figl'1


                    6
View original page 6Page 7 · Read text
Merci de faire un don de 2,50 € pour soutenir ce site via E-bay ... www.PayPal.me/butkus


Bitte spenden Sie 2,50 Euro, um diese Website über E-Bay zu unterstützen ... www.PayPal.me/butkus
View original page 7
Page 9 · Read text
6
   Setting the composition
  VUSEE
   Einstellung
  Composizione  dell'i magine
  Composi6n de la lmagen

Setting the composition
(1)Place the subject you want to take within the frame in viewfinder(13).
(2)When taking picture at I  (1m), the subject should not extend beyond the parallax
   compensation mark.
(3) As symbol marks are visible in viewfinder, focusing can be set through viewfinder.
View original page 9
Page 10 · Read text
www.butkus.us
        ,aI                                                                               iE
   Exposure confirmation
  EXPOSITION CORRECTE
    Bel ichtu ngs- Ei nstel lu n g                                         VIEWFINDE R   Control   I o dell'esposizione
  Confirmaci6n de la Exposici6n
(1)When needle is indicating within the yellow
   zone, exposure is correct. You can release the
   shullsp(3). The numbers in the yellow zone
   mean aperture sizes.
(2)When needle is indicating within the red zone,
   exposure  is under. As it is too dark, strobe-flash
   should be used.  NOTE: Do not forget to take out the lens cap               Fig14    :il
  when you photograph.                                                                      l. PARALLAX COMPENSATION MAR K
                                                                   2. BRIGHT FRAME
                                                              3. RANGE OF CORRECT EXPOSURE
                                                              4. METER NEEDLE
                                                                         5. APERTURE SIZE NUMBER
                                                              6. UNDER.EXPOSURE WARNI NG ZON
                  o
View original page 10Page 11 · Read text
l-tihj  g
       Photographing with strobe-flash
     PHOTOGRAPHI ER AU FLASH ELECTORONIOUE
      Aufnahmen mit Blitzgerdt
       Fotografare con il lampeggiatore incorporato
       Fotografa con el Flash Estrobosc6pico

     (1)Slide the flashcover('11) on top of camera to
        the direction of arrow and set it to "ON". At
       the same time the strobe-f lash is switched
       "oN".
                                                                          www.butkus.us      (2) After 5 - 7 seconds the pilot lamp(12) on toP       of camera and ready lamp( 16) left-side of
        eyepiece(15) illuminate. Now, the strobe  is
        ready to flash.
      NOTE:  lf  it takes longer than 30 sec. to
         illuminate, change batteries.
      (3) Make sure that focusing-ring is correctly set,
        before releasing shutter. As the aperture size
         varies automatically according to the set of
         focusing-ring, correct exposure can always be
         obtained.
                    o
View original page 11Page 12 · Read text
www.butkus.us
                                                                                               iel
(4) After the shot,the  f lash-cover must be returned
   to "OFF" position to save battery life. Never
   keep the flashcover open when the camera  is
   not in use.


          Fig16                      Fis17


                                   (D
View original page 12Page 13 · Read text
lei   I       Rewinding & Unloading
     REEMBOBINAGE ET DE CHARGEMENT
       Filmrtickspulung
       Riavvolgimento ed estrazione della pellicola
       Rebobinado y descarga
       (1) Depress the rewind-5u11en(2o) on the bottom
         of camera.
       (2) Pull up the rewindcranp(13) 3n6 wind it to the
         direction of arrow. The film has been com-
          pletely rewound when you feel the film tension
           lessen.
       (3) Open the backdoor and take out the cartridge.


                           Figl B                         Fig19
View original page 13Page 14 · Read text
www.butkus.us
     10                                                                                       rEl
       ADVICE FOR PHOTOGRAPHING
        PETITS CONSEILS      ee        TIPS fiir gute Aufnahmenro.@   CONSIGLI PER FOTOGRAFARE               +
      CONSEJOS PARA FOTOGRAFIAR MEJOR   0


                                                                            Fis2 0

       Most of unsharp picures are caused by camera-shake.  ln order to take good pictures you
       should hold the camera steadily. Press your elbows to yourbody and depress the shutter
         release button softly.

      Value a shutter chance
       Natural and vivid expression or action may never come again, therefore a shutter chance
       is very impcrtant. For snapshot on  f ine day you should just previously set the
        focusing-ring at hl (3m), so that the scene from 2m to infinity could be always sharp.
      You can, then, concentrate yourself on the shutter chance.

                      @
View original page 14Page 15 · Read text
El     tl
  @ Backlisht
             Jour   @Contre
  @ Gegenlicht-Aufnahmen
    QControluce
  Q Luz de fondo
   A person who is standing in front of bright back
    ground will look dimly lighted as in silhouette in
     the photo,  if you release the shutter without doing                Fis21
     the following procedure.
    Compose subject in the viewfinder and then aim
    camera downward to avoid the strong back light.
     Depress the shutter release button halfway down
     to hold the meter needle reading. Lift camera up to
    the original position and continue to press the
     shutter release button rest of the way down to
     shoot the compensated exposure.
    This automatic exposure compensation can also be               Fig22
    made by taking a very close reading of the subject.
     Close to the subject, so close as no backlight visible
    in viewfinder, and depress the shutter release
    button halfway down and step back, keeping the
    button partially depressed. Compose the subject
    and release the shutter.                (E
View original page 15Page 16 · Read text
www.butkus.us             tr  t2
@ Selftimer
E RETARDATEUR
@ Selbstausliiser
o Autoscatto
Q Autodisparador
The selftimer enables you to include yourself in
pictures. Fix the camera on a tripod and turn the
selftimer-lever(6)  fully to the left and then depress
the shutter release button all way down. The
shutter will operate aprrox. 8 sec. later.
NOTE: Do not stand in front of camera when you
depress the button.


                                                                    Fis2 3


                                     (E
View original page 16Page 17 · Read text
tr    13
   €)NoncE oN NorEs usE
  O ruores
  @ Bemerkunqen fiir den Gebrauch
     l) avvenreruzE D'uso
      runrureNrMrENTo    I    Do        not leave the camera exposed direct to the sun for long time or in a car parking under
     the sun. Or it will effect badly to the sensitivity of film, battery and function of camera.
    Shock, moisture and salinity may cause defect of camera. Please handle the camera
     gently and patronize  it so long.
     Put the lens-cap on the lens, when the camera is not in use.
    When you do not use the strobe-flash for long time, you should sometimes put batteries
      in and lighten the flash to aboid a deterioration of the chemical condenser.
    When the meter needle does not come up from the red zone though the camera is aimed
     to a bright place, the battery has been weakened. Change batteries.
    With fresh batteries the flashing interval is 5 - 7 seconds and it will become longer and     longer. lf  it takes longer than 30 seconds, the batteries have been weakened. Change
      batteries.
    Bad contact may occur  if the batteries are dirty with perspiration or oil. Clean them with
     dry cloth before inserting them to the compartments.
       lf the camera is not in use for long time, the batteries should have been taken out from
     camera.
       It is better to prepare spare batteries when you go to long trip.
                     @
View original page 17Page 18 · Read text
www.butkus.us
                                                                                              rEl Specifications
 Type: 35mm lens shutter programmed EE camera with built-in strobe-ftash
 Lens: Cosinon f=38mm F=2.7 of 3 groups and 4 elements
 Sh^utter: Programmed automatic shutter, equipped with built-in selftimer. Shutter speed:
 1164 - 1/360 sec. non step. Smallest aperture size: F19 (automatic), F16 (manual)
 tVleterlng system: Programmed EE system with CdS. EE coupling range: With ASA 100 from
 EVg (F=2.7,1164l- to EVl7 lF=19,1/360). Film speed range:-frori ASA 25 to 400 (DtN
 15-271. Power source: 1 piece of H-C type mercury battery 1.3V
 Viewfinder: Bright-frame type, equipped with parallax conpensation mark, aperture size
 indicator and symbol mark for focusing and exposure warning mark (red). Magnification:
0.46 x
 Focal adiustment: Zone focus system. 4 symbol marks and 1 dot available in viewfinder and
on  f ocusing-ring. (1m, 1.5m, 3m, 5m, -l  Closest shooting distance: 1m
Film tra_nsport: Single action leVer system and self-cocking shutter. Arc of travel of advance
lever: 137 degrees plus 20 degrees stand-off angle. Easy loading system. Exposure counter:
Progressive type {reset automatically), Film rewind: crank system (depressing rewind button
on the bottom of camera)
Strobe-f lash: Auto-f lashmatic system; When switched on,  f lashmatic system   f unctions
automatically. Effective ranger within the symbol marks except Amark. iwith ASA 100)
Guide number: engaged with film speed (G.No. 14). Day-lightsynchronizataon can bemade.
Power source:          2                       type                              batterV             x AlVl3                                     (2 x 1.5V),                                                    Flashing interval: S - 7 sec. wilh fresh         Flashesbattery.              250                    times                         with                                  fresh Alkaline                                                 battery.
Other features: Pilot lamp, available under the flash cover and the left side of eyepiece.
Filter thread: 46mm@ (screw in), Diameter of hood: 48mm@
Dimensions: 132 x 75.5 x 54mm
Weight: 410 g
                                        (D
View original page 18Page 19 · Read text
F   I  Page 1-2(Fig 1-21
   DESCRIPTION
      1. LEVIER D'ARMEMENT
      2. COMPTEUR DE VUES
      3. DECLANCHEUR
      4. BAGUE DE MISE AU POINT
      5. CELLULE CdS
      6. LEVIER DU RETARDATEUR
      7. REGLAGE DE LA SENSIBILITE DU FILM
      8. INDICATEUR DE LA SENSIBILITE DU FILM
      9. SYMBOLES
    10. LAMPE FLASH
      1 1 . TIRETTE ON-OFF DU F LASH
    12. LAMPE TEMOIN
    13. BOUTON DE REEMBOBINAGE
    14. VISEUR
    15. OEILLETON DU VISEUR
    16. LAMPE TEMOIN
    17. COMPARTIMENT FILM
      1 8. COMPARTIMENT BATTERIE
    19. ECROU DE PIED
    20. BOUTON DEBRAYAGE DU REEMBOBINAGE
    21. ROUE DENTEE
    22. BOBINE RECEPTRICE
                    o
View original page 19Page 21 · Read text
1)tFl 4 Page5(Fig1
   REGLAGE DE LA SENSIBILITE
    1. V6rifier la sensibilit6 du film sur son emballage.
    2. R6gler la bague de sensibilit6 du film (7) en cons6quence.
    NOTE: les positions interm6diaires ne peuvent 6tre utilisdes.

  5 Page6(Fig1 2-131
    MISE AU POINT
    1. R69ler le symbole (9) avec la bague des distances (4) en fonction de l'6loignement du
          sujet.
    NOTE: le point entre 3 et - indique la distance de 5M'

      Pagez  6
    VISEE
     1. Cadrer le sujet que vous dlsirez dans les limites du cadre lumineux (14).
    2. Un sujetd 1ml ne doit-pas d6passer la marque de compensation de parallaxe.
    3. Utiliser les symboles dans le viseur pour rdgler la mise au point.

                                          (E
View original page 21Page 22 · Read text
www.butkus.us                                                                      F 7 Pase8(Fisla)
 EXPOSITION CORRECTE
 1. Tout le temps que le repdre se trouve dans la zone jaune, l'exposition est correcte.
    Les chiffres dans la zone jaune indiquent le diaphragme.
 2. Lorsque le repdre se trouve dans la zone rouge, il y a sous exposition  il faut alors
     utiliser le flash 6lectronique.
 NOTE: Ne pas oublier de retirer le capot protdge objectif.
                               VISEUR
                                                     1. REPERE DE LA PARALLAXE
                                                        2. CADRE LUMINEUX DU VISEUR
                                                     3. ZONE D'EXPOSITION CORRECTE
                                                 4. INDICATEUR D'EXPOSITION
                                                    6. ZONE DE SOUS EXPOSITION8 Pageg-l O(Figl 5-1 7)        5. DIAPHRAGME
PHOTOGRAPHIER AU FLASH ELECTRONIOUE
1. Faire glisser la tirette du flash (11) dans le sens de la fldche et positionner le sur   "ON" le flash est alors sous tension.
2. Aprds 5 a 7 secondes les lampes pilotes sur le dessus de l'appareil (161 et d gauche
   dans le viseur (12) s'allument. Le flash est pr6t ii fonctionner.
!Of!:   si les lampes ne s'allument pas au bout de 30 secondes  il faut changer les piles.3. V6rif ier que la mise au point est correcte avant de ddclencher. Le fait di 169lei la mise
-  au point rdgle automatiquement le diaphragme pour unee4position correci'e.4' Lorsque la photo a 6td prise, il est indisfensable de ram6ner la tirette du flash sur
   position "OFF" pour 6conomiser la dur6e des pi les. Ne pas laisser la tirette du flash
                  @
View original page 22Page 23 · Read text
F
        sur "ON" lorsque l'appareil n'est pas utilis6.

               1 (Fig18-1 9)   I  Pagel
   REEMBOBINAGE ET DECHARGEMENT
    1. Appuyer sur le poussoir de d6brayage (20) sous l'appareil.
    2. Tirer sur la manivelle de rdembobinage (13) et tourner dans le sens de la fldche. Le
       film sera entidrement rdembobini lorsqu'il n'y a plus de r6sistance en tournant la
        manivelle.
  lO Pase 12(F ig2O)
   PETITS CONSEILS
   La plupart des photos floues sont dues au "boug6" au moment du ddclenchement. Pour
   de bons rdsultats, l'appareil doit €tre tenu fermement en serrant les coudes contre votre
    corps et le ddclenchement trds souple.
   Pour avoir toutes les chances de ne pas fnanguer un sujet ou une situation qui a peu de
   chance de ce reprdsenter, par une belle journ6e ensoleill6e, laisser en permanence  la
   bague de mise au point sur.position &l (3ml la profondeur de champs sera de 2m d
      l'inf ini.


                    @
View original page 23Page 25 · Read text
Lorsque l'indicateur de la cellule reste dans la zone rouge alors que l'appareil est dirig6
vers une trds forte lumidre,  il est n6cessaire de changer la pile de la cellule.
Avec un jeu de piles neuves, I'intervalle entre les 6clairs du flash sont d'environ 5 d 7
secondes. Si cet intervalle atteint 3O secondes, il est n6cessaire de changer les piles qui
sont trop faibles. La transpiration ou les poussidres peuvent altdrer les contacts. ll est
n6cessaire de les nettoyer avec un chiffon propre avant de les  gl isser dans le
compartiment.


                   @
View original page 25From the M. Butkus archive. Original publisher and archive notices are retained.
Check the model and edition against your equipment.
PDF verified 2026-10-10.