Film cameras
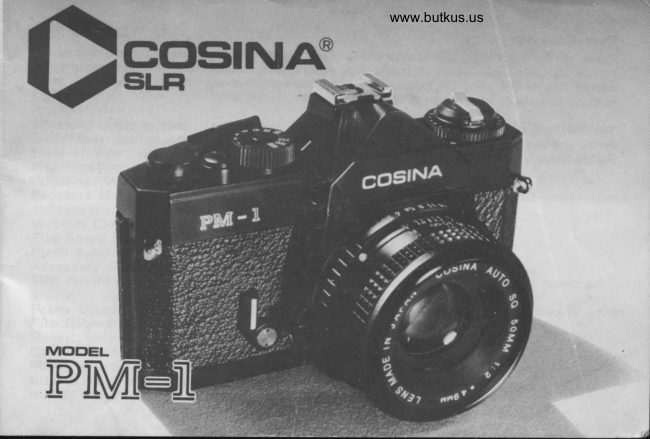
Cosina PM-1 User manual
User manual for Cosina PM-1. 24 pages in English. Read the original PDF, download or print a copy without registration.
24 pagesEnglish6.3 MB PDF
Loading your manual…Open PDF directly
Document details
- Brand
- Cosina
- Model / document
- Cosina PM-1
- Document type
- User manual
- Language
- English
- Pages
- 24
- File size
- 6.3 MB
- Category
- Film cameras
- Document date
- Not specified in catalog
Search available document text
Find a term, then jump to its page in the original PDF. Image-only pages may not be searchable; check the PDF for exact wording and diagrams.
Page 2 · Read text
Dear Customer.
Thank you for purchasing your Cosina PM1. Your camera is a precision instrument and should
provide you with many yeirs of trouble-free picture taking. Please read thls instructton
booklet fully before using the camera and should you encounter any difficulties, do not
hesitate to contact your nearest Photomarket store.
The PMI is a system camera that you can always expand and a full range of budget-priced
lenses and accessories are always available from Photomarkets. We sincerely hope your
PMl provides you with a great deal of pleasure as well as excellent pictures.
View original page 2
Page 3 · Read text
www.butkus.us
   COSINA PMl  SPECIFICATION
    Camera Type:35mm single lens reflex with open aperture through the lens metering. Fully
     interchangeable Pentax K mount lens fitting
     Film: Picture size 24mmX36mm from 35mm film
    Lens details: 50mm f2 SQ lens. 49mm filter size. K Mount
    Angle of View: 46"
    Shutter: Vertical metal focal shutter with speeds from lsecond to 1/1000th and B
     Self -Timer: Built-in, approx. 10 second delayed action
     Field of View:93'vertical and horizontal of the actual oicture area
     Magnification: 1:0.86 with standard SOmm lens
    Focusing: Microprism type
    Exposure Metering System: Open aperture through the lens (ffU) using match needle system
    and centnal weighted light metering system
    Minimum Close Focusing Distance: 0.5m
    Film Speed Range: ASA 25 to 1600
    Flash Synchronization Contact: X Contact
    Accessory Shoe: Hot shoe contact
,    Film Advance Lever: Single wind-on stroke with 135" throw and 30" stand-off 'meter-on'
      posit ion
    Frame Counter: From zero automatically advances, auto re-set to zero when camera is opened
    Film Rewind: Raoid rewind crank
    Mirror: Instant-return mirror
    Camera Opening System: Hinged back by pulling the rewind knob up
    Power Source: Single H-C 1.35V battery
    Size & Weight: (body only) 133 x 85 x 48mm, weight 4509
   NOTE: Specification  is subject to change without prior notice
                                                                                 2
View original page 3Page 7 · Read text
LOADING THE BATTERY
An H-C 1,35 V Battery rs provided for use with your PM1.
1. To open battery compartment use a coin and turn carefully in an anti-clockwise direction
                                                      marks on battery match2. Load the battery correctly by ensuring that the + and -   those in the battery chamber. (lncorrect loading with polarities reversed' will cause
   non-function of the meter)
3. After inserting battery ensure that battery cover is replaced tightly
Please be careful not to contaminate the surfaces of the battery with sweat or dirt.
Contaminated batteries should be cleaned with a dry cloth. lf you do not intend to use your
camera {or a long period, please remove the battery. The life expectancy of the battery is
approx. one year with normal use and should be replaced after twelve months


                 Fig.3                                      Fig.4
View original page 7Page 8 · Read text
www.butkus.us
METER CONTROL SWITCH
1. After windrng the film on, lightly pull the film advance lever from.its."parked" position,
this will switch the exposure metelng system ON
2. When the frlm advance lever is returned to its "parked" positlon the metering system will
be swrtched OFF and the shutter will not fire
Always ensure that when the camera is not in use, the film advance lever is returned to its
normal "parked" posttion, fatlure to do so will result rn a rapid run-down of batterv life


                Fig.5
View original page 8Page 9 · Read text
LOADING THE FILM
Your Cosina PM1 takes standard 35mm film for colour prints, colour slides and black
and white film. To load the camera follow these instructions:
1. To open the camera pull up the rewind knob to the "up" position and the camera back
will sprrng open.
2. Load the film cassette into the chamber as indicated and return the rewind knob to its
origtnal position rotating the knob if necessary.
3. lnsert the leader of the film into the take-up groove of the spool and engage the film
perforations securely into the teeth of the spool.
4. Wind-on the film with the frlm advance lever and ensure that both sides of the film's
perforations are engaged in the sprockets, now close the back of the camera which
automatically locks.


                                   www.butkus.us
             Fig.6                         Fig.7                      Fis.8
View original page 9Page 10 · Read text
www.butkus.us
5. Lrft up the film rewind crank and genily turn lt in the direction of the arrow until  itstops and has taken u0 the  fi  I m slack.
6' Advance the film a couple of frames by winding-on and pressing the shutter button until
the first frame is in position 1 in the middle of O and 2 on the fiame counrer.
 lf your film is correctly loaded, the rewind knob will rotate as you wind the film on provideoyou have taken up the slack (see b above).
Always avoid loading your camera in direct sunlight and do not forget to return the advance
lever to tts "parked" position, thus ensuring that the meter is swiiched off and that theshutter will not be accidentallv  fired.


                Fis.9                                           Fis.l O
View original page 10Page 11 · Read text
SETTING THE ASA FILM SPEED
After loading the film set the ASA film
speed according to the ASA speed of the                                 ,?vfilm in use. (The ASA rating recommended
by the manufacturer is printed on the  f ilm                                                                                ,--9oo box, e.g. ASA.  . .) When using the film of
ASA100, for example, set the position 100
 of the film ASA setting dial to the ASAfilm speed scale.                           {--(9  ffiThe dial number of the film ASA is as                       =-Eindicated, and there are clicks corresponding    [_r)to the respective numbers.                                           -'\s    M


                                Fig.11
View original page 11Page 12 · Read text
www.butkus.us
SETTING THE SHUTTER SPEED
 1. Pull out the film advance lever slightly to first stop and rotate the shutter speed diat in
any dtrectlon untll the required speed clicks into place against the white line on the body.
2. Correct exposure is obtained by turning lens aperture nng unttl viewfrnder needle  is
                                       symbols.centralised in relation to * and -Always make sure that the speed required clicks into place, Intermediats setting will result
 In Incorrect speeds. The exposure meter cannot be used when set in the "B" position.
PMl SHUTTER INFORMATION
The shutter controls the length of time that light is allowed to reach the film. Each shutter
speed graduation is twice the preceding speed.
The PM1 operates from 1 sec. to 1/1000th and at the "B" setting the shutter will remarn
continually open while the shutter button is depressed. Your selection of shutter speed can
depend on a number of factors,  i.e., brightness and movement of your subject, the film youare ustng etc.
With the standard lens, it is advrsable not to use a shutter speed below a 1/gOth of a second
unless you are using a tripod. The table shown illustrates as a rough guide speeds with a

                                                           Brig htness       Shutter Speed (Seconds)
                                              General Indoors        1/30 to 1 /60
                                                Fine Outdoors          1/125 to 1/250
                                      Mid-summer Beach
                                          Snow-covered
                                                    Mountains       1/250 to 1 /500
                                             Quickly moving
                               Fi1.14              Subject                              10
View original page 12Page 13 · Read text
SETTING THE APERTURE                                Brightness               A pertu re
                                                                     Bright Indoors             t2 to f4   1:Aperture t2 I2.B f4  f5.6 fg    f1 1  f16
                                                                  Fine Outdoor            f8 to f11
                                                      Mid-summer Beach      a)^,n)\.-/ V                                                                                               t11 IO f1€                       \\r' \S.d@mru\\>/ \\>/ ry   Snow-covered     2: Lisht Am-ou.1t                                     1/32 1 /64       Mountains                 Ratio r  1/2 1/4 1/g 1/16
     The aperture ring usually has gradations marked as above, taking F2 lens.
                                                  Fig.15

    The aperture of the lens controls the amount of
     light passing through the lens to the  f ilm surf ace
         lf the scale of the aperture ring is increased by
    one (f2.8 to f4), the amount of light is half (as
     indicated in the above table).
    The aperture is determined in accordance with     the brightness of the scene, the setting of the               EFg17               BFg16    depth of the field, and the film in use.                                                When meter needle       When meter needle      1 . Turn the aperture ring so that the desired             indicates "-  ", increase     indicates "*  ", close
    aperture number is aligned with the lens mark.         aperture Dy turnrng        aperture by setttng
     2. Set the aperture ring so that the meter needle       lens aperture ring.         higher f-number on
                                                                                                                                                                                                                                                                                                                                                                                                                                                                   I ens.     rests between +' and   in the viewf inder while         Alternatively, set
     turning the shutter speed dial.                          slower shutter speed         Alternatively, set                                                        by turning shutter            faster shutter speed.      3. Appropriate exposure can be obtained when       speed dial.     the meter needle is centralised between
                svmbols.11  * and -
View original page 13Page 14 · Read text
www.butkus.us
HOLDING YOUR CAMERA
1. Rest the camera in the palm of your left hand ensuring that your fingers are free to
turn the lens focusing ring.
2. Hold the camera lightly with your right hand with your foreftnger placed lightly on the
   shutter release button.
3. Press your left elbow lightly against your body and look into the vrewfinder, at the
same time steadying the camera against your face, your right arm should be fairly relaxed
while holding the camera.


A tripod should be used for best results when using slow shutter speeds (under l/3oth)
or telephoto lenses. lt can also be effective to steady yourself and the camera bv
leaning against a wall or on the bonnet or roof of a car.


                                                              Fis.18
                                                                                    12
View original page 14Page 15 · Read text
FOCUSING THE CAMERA
    Focusing the lens for sharp pictures rs simply performed by looking through the
     viewfinder. In the centre of the viewfinder is a small round area for fine focusing
    and the image is in focus when lens focusing ring is truned until subject is sharply
    defrned in central micro-prism area. lt is also  possrble to focus correctly using the
    entire fresnel screen of the viewfinder.


  @

                                               Fis.2O                      Fis.21
           Fig.19
13
View original page 15Page 16 · Read text
www.butkus.us
RELEASING THE SHUTTER
When you press the shutter release button, the following occurs 1) tne len.s aperture stops-
down to the required aperture, 2) the shutter opens to enable the film to be exposed tolight. N. B. lf the shutter speed selected is slower than 1/3Oth of a second,
camera shake is likely to occur and we recommend the use of a tripod and cable release.
Never move the shutter speed dial while depressing the shutter button.


                                         Fis.22

                                                                               14
View original page 16Page 17 · Read text
REWINDING THE FILM
    You may rewind the film back into the cassette at anytime even if you have not finished tne
     film but. require urgent development of the  f ilm.
    1. Press the film rewind button and ensure that it locks in to its rewind oosition.
    2. Pull up the rewind crank and rotate it in the drrection of the arrow (you will feel the
     frlm rewinding).
    3. When the film is completely rewound, the pressure on the rewind crank will
     rmmedrately feel much lighter.
    4. You may now remove your film. Pull the rewind knob up until the back of  the
    camera springs open.
    5. Take out the cassette.
    6. Return the rewrnd knob to rts original position and close the camera back.
    Never open the back of the camera before the film is fully rewound into its cassette.  lf
    you encounter difftculttes, visit your nearest Photomarket or camera dealer.
    Always avoid direct sunlight when unloading the film.


                                                            www.butkus.us
                   Fis.23                                      Fig.2415
View original page 17Page 18 · Read text
THE .B' (BULBI SHUTTER SETTTNG           www.butkus.us
At the "8" setting the shutter will remain open while the shutter button is.depressed.
The "B" setting should be used to photograph night scenes etc., or special effects, but at
all times, a tripod and cable release should be used.


                    Fis.25

                                                                                     16
View original page 18Page 19 · Read text
TAKING PICTURES WITH THE SELF_TIMER
The self-timer device rs primarrly used for self portraits and the inclusion of the photographer
in group scenes etc., although it can also be used to steady the camera on a solrd sur  f ace
for long exposures where the speed used rs below 1/30th sec.
1. Wind on the  f ilm advance lever and fully turn the self-trmer antr-clockwrse as rndrcated.
2. By pressing the shutter release button the self - timer ts released and the shutter will
 frre . approximately ten seconds later.
Note: Only set the self-timer if you require rts use as it cannot be cancelled once sel.


                                                                     Fis.26
View original page 19Page 21 · Read text
DEPTH- OF. FIELD SCALE
    The distance behind and in front of the focussed distance within which the image appears
    acceptably sharp, is called the "depth-of-f ield "
    Listed below are factors affecting "depth of field".
     1. When the aperture is reduced (f2 lo ft6) the depth of field is increased. Thus more
    of the picture is sharply defined.
    2. When taking a distant scene, the depth of field is longer.
    3. Wide angle lenses provide longer depth of field.
  A depth of ,field scale is engraved on the various lenses. When the camera is. for example.
    focused on a sub;ect at say, 3m with the aperture set at f8, the subject area located
    within 8 at both sides of the "l" mark (approx.2m in the foreground and approx. Sm in
    the background), will be rn focus.


te                                                                Fis.29
View original page 21Page 22 · Read text
www.butkus.us
INFRARED PHOTOGRAPHY
Infrared light rays focus on a plane slightly behind that of
light rays in the visible spectrum. To compensate for this
when using infrared film, focus normally on your subject
and note the subject distance on the lens Distance Scale
opposite the Distance Reference Mark
Turn the Focusing Ring until this distance setting is opposite
the Infrared Index Mark.
IMPORTANT: Infrared radiation varies with the degree of
infrared ray in the atmosphere. Use the infrared focus                                Fig.3O
setting on,ly as an approximation. For best results, use the
smallest f-stop lighting will allow to provide sufficient depth
of field to include all important elements of the picture in
the zone of acceptable sharpness.


                                                                                    Fig'31lf it is diff icult to focus the lens with the  f ilter attached, focus the lens removing the filter
from the camera.
As to the infrared color film, follow the instructions of the film.
Determine the exposure according to the instructions of the filrir.

                                                                   20
View original page 22Page 23 · Read text
FITTING AND REMOVING THE LENS
Removing the Lens
Turn the lens counterclockwse until it stops while the
lens removal lever rs depressed. The lens can then
be withdrawn.
 Fitting the Lens
 Match the red point on the camera body with the red
 point on the lens barrel. Fit the lens to the body,
and turn it clockwise until it clicks in.
 Bayonet Mounting                                                                 Fig.32
This camera is equipped with the universal K mount
 bayone t.
Any wide-angle or telephoto interchangeable  lens with K
mount can be  f itted to Vour PM1 camera.


                                                                www.butkus.us
                                                                                  Fis.33
When fitting the  lens, turn it until it clicks in. lf the shutter is released when the lens
is not locked, an accurate exposure cAnnot be obtained.
The lens can be    f itted even in the dark by aligning the  f inger button against the lens
removal lever.
View original page 23Page 24 · Read text
www.butkus.us
CARE OF YOUR PM1 AND MAINTENANCE
Should your camera exposure meter needle fail to operate, please check as follows:
1. Check that a battery is inserted
2. Make sure that battery is not exhausted.
3. Ensure that the battery is loaded Into the camera in the correct position.
4. Check that the battery and camera contacts are clean.
Should you experience difficulties in rewinding the film into the cassette, check as
follows:
a) Make sure that the rewrnd button is fully depressed and locked in position.
b) Check that your film is correctly loaded.
c) Check.whether the film advance lever is pulled out from its parked position.
lf you exper ience further dif  f iculties, please do not hesitate to contact your nearest
Photomarket store.
USEFUL HINTS
We strongly recommend the use of a UV or skylight filter at all times. Not only will this
improve your pictures, but will also fully protect your lens from scratching and dirt. Should
your lens become marked, remove all dust with an Access blower brush, remove marks,  f inger
prints etc., with a lens cleaning cloth or lens tissue. Remember, the lens is one of the most
important parts of your camera.
Make sure the camera is kept well clear of sand, salt, dust, salt water, medicines, etc.
Do not store your camera in locations that may be subject to high temperatures, the boot
of your car, etc. When storing your camera away for long periods, follow these rules:
1. Fire the shutter
2. Remove the battery
3. Store in a dust free place with low humidity.
Further advice is always available from your Photonnrket store.
View original page 24
From the M. Butkus archive. Original publisher and archive notices are retained.
Check the model and edition against your equipment.
PDF verified 2026-10-10.