Film cameras
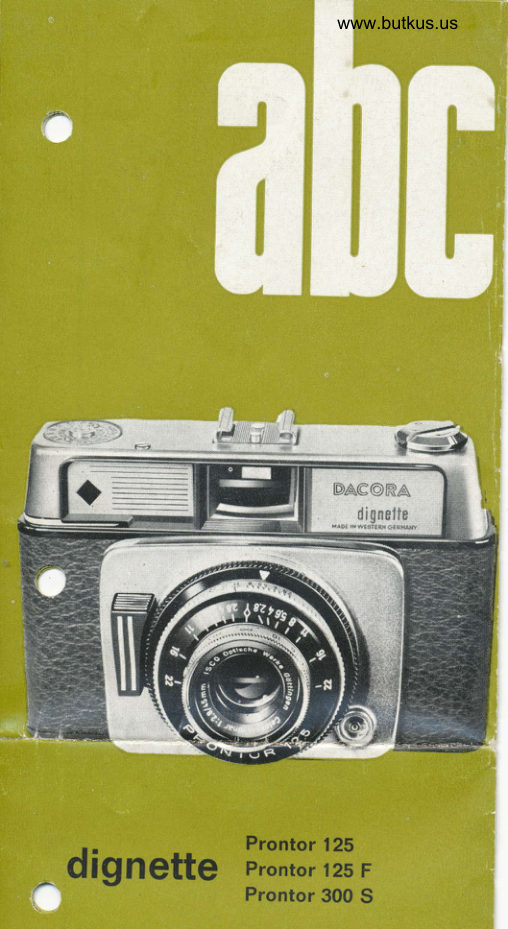
DACOR Dignette Prontor 125 DACOR Dignette Prontor 125F DACOR Dignette Prontor 300S User manual
User manual for DACOR Dignette Prontor 125 DACOR Dignette Prontor 125F DACOR Dignette Prontor 300S. 20 pages in English. Read the original PDF, download or print a copy without registration.
20 pagesEnglish8.5 MB PDF
Loading your manual…Open PDF directly
Document details
- Brand
- Dacor
- Model / document
- DACOR Dignette Prontor 125 DACOR Dignette Prontor 125F DACOR Dignette Prontor 300S
- Document type
- User manual
- Language
- English
- Pages
- 20
- File size
- 8.5 MB
- Category
- Film cameras
- Document date
- Not specified in catalog
Search available document text
Find a term, then jump to its page in the original PDF. Image-only pages may not be searchable; check the PDF for exact wording and diagrams.
Page 4 · Read text
Bitte spenden Sie 2,50 Euro, um diese Website über E-Bay zu unterstützen ... www.PayPal.me/butkusView original page 4
Page 6 · Read text
FILMEINLEGEN                       www.butkus.us
Das Auswickeln und Einlegen einer neuen Kletnbild-patrone sollte
moglichst im Schatten erfolgen. Der R0ckdeckel 6ffnet sich durch
Verschieben des Verriegelungsschiebers (t0).-herausgezogen.Die Kurb.el (Knoff bei.-digne.-tte F) wird             Nun wird die
Harrone In dre Sputenkammer eingelegt und die Kurbel drehend ein-
gedruickt, bis sie den Spulenkern faRt. Sodann wird der Filmanfano
iiber den Lichtschacht gezogen und in den Schlitz der Abwic'-  )ul;
eingehangt. Vor dem SchlieRen der Kamera ist unbedinqt zu b     .ten:
a) die Aufwickelspule mufJ den Film richtig gefaRt habe-nl Um dres zu
   erreichen, mufJ                 die Spule etwas vorgedrehl                                              werden; -.b)   dje.Ziihne             desfilmtransportrades                              missen in                                            die p;rforation (Durch-
   Iocherung des Films eingreifen (s. Abb).
INSERIMENTO DELLA PELLICOLA NELL'APPARECCHIO
Una nuova pellicola fotografica dovrebbe essere possibilmente tolta dal
suo involucro ed inserita nello apparecchio mantenendosl all,ombra
o per lo meno in posti dove la luce non sia troppo intensa.
 ll cop€rchio posteriore dell'apparecchio  si aiie facendo scorrere laleva di chiusura  (10).
La. manovella viene tirata verso I'esterno e la pelllcola viene inserita
nell'apposita camera per bobina, dopo dl che la'manou"ila viene sDinta
nuovamente verso I'interno con un movimento rotatorio, flno a qubndo
essa avra afferrato la tacca della bobina. L'inizio della Dellicola'viene
oro tirato in direzione della bobina di awolgimento ed ins;rito  In questa.
Prima di richiudere l'apparecchio bisogneri-assolutamente  asslcurarsi diquanto segue:
a) che lo^bobina.di awolgimento abbia ben afferatol'inizio della pellt_
   cola. Per effettuare tale controllo bastere girare un po, in avanti la
   bobi na.
b) | d_enti della ruota di trascinamento debbono combaciare con ta   perforazione della pellicola (Vedasi figura).
LOADING THE CAMERA
A,new_fllm..cartridge should preferably be inserted In subdued  light
onry. _r-or this purpose, open the back by shifting the back lockingslide (10).
Retract the film winder. Then insert the film cartrldge and depress the
       q"                              it, unrilyi4"f                                                     cartri-dge.                                     the                                                                         the                                                  Now'pull           .ygu                             .it.engagesrront end          ot             the  !9................rntitm over                        the light                                    tunnel and                                             thread                                                                     at through                                                                the slot
in the spool. Prior to closing th-e camera, make sure
   t19           ,fLl,r lst firmly inserted in the spool. To this end, turn the spool") silgnfly tomards
b) The teeth of the film feed sprocket engage the perforationr  the
   film (see illustration).                                               \
View original page 6Page 7 · Read text
t""o sprocket ensase the perforarion ^   the
CHABGEMENT" im U:;,,",1.1*,l,liDU FILM
Le d6ballage etla mise.en. place de la bobine devrait, pour autant que
possiote, etre ettectue e I'ombre. Le couvercle s'ouvre i  I'arriere, en
geplacant  .le verrou.(10). I irez et degagez le bouton. Lo bobine est mise en place dans son alv6ole
9!-19dans  I99rtonaxe derepouss6la bobine.en.tournant,La languettejusqu'ade d6butce quedu laftlmfourcheest alorss'engageiirEe
par-dessus de I'objectif et ins6rde dans lafente de la bobine Ot"rUoUi-
nage. Avant de fermer I'appareil, veillez a ce oue:
a) la bobine d.'embobinage ait bien saiste le filh. pour 6tre sor, tournez                     i.,-l,i.ic    .,.      p--:o                                l-.jrv,i-.                      "c,.        rtint-uresb)   les                soient                    bien                            entrees dans leg perforations du fllm    (voir fig.).
COLOCACION DEL FILM
El carrete. (de tamaio pequeio) se desprecintarey colocard, a ser posible
a ta sombra. La tapa posterior se abre corriendo el cierre (.10). Tras
sacar ta maniveta, se mete el carrete en el chasis y se va girando  la
manivela, de forma que 6sta penetre y agarre el cariete. Una vez esto
se.tira del extremo de la pelicula y, pasando previamente el film por la
9uia de deslizamiento, se introduce la lengueta (extremo del film) en la
ranura del carrete arrollador. Antes de cerrar la tapa hay qud tener
cuidado de que.
a) en el carrete arrollador est6 bien sujeta la pelicula, para lo      .l se
   empezar6 a enrollar aloo el film
b) los dientes de la rugditrans-portadora engranen en los aguleros que
   hay a lo largo del film (ver fig.).
View original page 7
Page 8 · Read text
www.butkus.us


FI LMEMPFI NDLICHKEITSEINSTELLUNG
Zur Vermeidung von lrrtUmern bei der Wahl der Blende oder Belich-
lichtungszeit  liifJt sich beim Einlegen des Films dessen Empfindlich-
keit auf der Filmmerkscheibe (12) einstellen. (Nicht bei dignette F)
BILDZAHLSCHEIBE
Beim Offnen des KamerarUckdeckele  (Einlegen des Films) springt die
Bildziihlscheibe (,|4) in die Anfangsstellung ,A". Das Zahlwerk zeigtdie Zahl der jeweils gemachten Aufnahmen an.
FILMTBANSPOBT UND DOPPELBELICHTUNGSSPERRE
Zwei Leeraufnahmen werden mit dem Schnellschalthebel  (.|1) ziigig bis
zum festen Anschlag durchgedruckt. Nach dem dritten Mal kann die
erste Aufnahme gemacht werden. Der Schnellschalthebel  (11) transpor-
tlert den Film beim Ausschwenken bis zum Anschlag um jeweils ein
Bild wajter. Die Dignette besitzt eine Doppelbelich-tungs-'und Leer-
schqr )rre, zweimaliges Belichten oder Weitertransport eines un-
belic. .Jn  Bildes sind daher ausgeschlossen.
EINSTELLEN DER KAMERA
Zundchst ist die Belichtungszeit zu ermitteln. Mittlere Gebrauchswerte
finden Sie in einer Belichtungstabelle,  vorteilhafter  ist aber ein elek-
trischer Belichtungsmesser. Die Belichtungszeit wird am Drehring (4)
auf die Doppelmarke eingestellt, gleichfalls der festgestellte Blenden-
,wert am Blendenring  (5).
ENTFERNUNGSEI NSTELLUNG
Zur Einstellung der Entfernung wird der Ring (6) gedreht, bis die ge-
rvonschte Zahl gegentiber der Markierung steht. Entfernungen bis zu
4 m sollten nach MOglichkeit gemessen oder abgeschritten werden.
REGOLAZIONE DELLA SENSIBIL]TA DELLA PELLICOLA
Per evitare errori nella scelta dei valori relativi al diaframma o al tempo
di esposizione,  all'atto dello inserimento della pellicola nell'apparecchio
si riportera la sensibilitd della pellicola stessa sull'aposito indicadore
(12. (Eccetto Dignette F)
View original page 8
Page 9 · Read text
REGOLAZIONE DELLA SENSIBILITA DELLA PELLICOLA
 Per evitare errori nella scelta dei valori relativi al diaframma o al tempo
 di esposizione, all'atto dello inserimento della pellicola nell'apparecchio
 si riportera la sensibilitd della pellicola stessa sull'aposito indicadore
 (12). (Eccetto Dignette F)
 INDICATOBE FOTOGRAMMI DA IMPRESSIONARE
 All'apertura del coperchio posteriore dell'apparecchio (per l'inserzione
 della pellicola), I'indicatore dei fotogrammi da impressionare torna auto-
 maticamente alla posizione di partenza "A". Ad ogni fotogramma scattato
 I'indi^rere Vi dard il numero dei fotogrammi gid impressionati     .        rl
TRAI .{AMENTO DELLA PELLICOLA E BLOCCAGGIO
 DELL' IMPRESSIONAMENTO DOPPIO
 Prima di eseguire le fotografie vere e proprie scatterete due fotografie
a vuoto agendo volta pervolta sulla leva di avanzamento rapido.  ll terzo
fotogramma potrd essere giir impressionato col motivo da Voi scelto. La
 leva d'avanzamento rapido trasporta in avanti la pellicola quanto basta
per una nuova fotografia. La Dignette d dotata di un doppio sistema
di bloccaggio contro I'impressionamento doppio e contro il trascina-
mento a vuoto, per cui 6 impossibile impressionare due volte lo stesso
fotogramma o trasportare in avanti un fotogramma non ancora impressio-
 n ato.
MESSA A PUNTO DELL'APPARECCHIO FOTOGRAFICOlnnanzi tutto bisognerir stabilire il tempo di esposizione della pellicola.
In qualsiasi tabella dei tempi esposizione portrete trova,re valori medi
da impiegare per le Vostre fotografie. Ancora meglio sarebbe, pero,
adoperare un esposimetro elettrico.  ll tempo di esposizione viene ripor-
tato sul dispositivo girevole per il tempo di esposizione (4) e lo stesso si
faccia per il valore del diaframma sul dispositivo girevole per il dia-
framma  (5).
REGOLAZIONE DELLA DISTANZA
Per la regolazione della distanza si giri il corrispondente dispositivo (6)fino a quando  il numero della distanza desiderata si trovi di fronte al
segno indicativo. Le distance fino a quattro metri dovrebbero essere
possibilmente misurate esattamente o accertate in base a passi.
FILM.SPEED'MEMORY' DIAL
To avoid incorrect settings of exposure times or stop numbers, the
film-speed indicator (,l2) should be set to the sensitivity of the film.
(Exceot Dicnette F)
EXPOSURE COUNTER
As the camera back is opened (loading the camera), the exposure
counter (14) returns to its starting position "A". The counter servesto inF\te the number of exposures made.
FILM IVANCE AND DOUBLE EXPOSURE PREVENTIONMove the rapid film advance lever (1'l) twice against its fixed stop.
After the   f  i lm advance has been actuated another time, the first
exposure can be made. Every time the rapid film advance lever (1 l)
is moved against its stop, the  fi lm is advanced by one frame. The
Dignette has both double exposure and no-exposure preventions,  thus
eliminating the danger of double or no exposures.
View original page 9Page 10 · Read text
www.butkus.us


FI LM EMPFI NDLICHKEITSEINSTELLUNG
Zur Vermeidung von lrrtrimern bei der Wahl der Blende oder Belich-
lichtungszeit laBt sich beim Einlegen des Films dessen Empfindlich-
keit auf der Filmmerkscheibe (12) einstellen. (Nicht bei dignette F)
BILDZAHLSCHEIBE
Beim Offnen des Kamerarilckdeckels (Einlegen des Films) springt die
Bildziihlscheibe (14) in die Anfangsstellung     Das Ztihlwerk zeigt                                         "A".die Zahl der jeweils gemachten Aufnahmen an.
FILMTRANSPORT UND DOPPELBELICHTUNGSSPERRE
Zwei Leeraufnahmen werden mit dem Schnellschalthebel  (11) zilgig bis
zum festen Anschlag durchgedrtickt. Nach dem dritten Mal kann die
erste Aufnahme gemacht werden. Der Schnellschalthebel  (11) transpor-
tiert den Fi lm beim Ausschwenken bis zum Anschlag um jeweils ein
3;16 wejter. Die Dignette besitzt eine Doppelbelichtungs- und Leer-
sch{  )rre, zweimaliges Belichten oder Weitertransport eines un-belic.--Jn Bildes sind daiher ausgeschlossen.
EINSTELLEN DER KAMERA
Zundchst ist die Belichtungszeit zu ermitteln. Mittlere Gebrauchswerte
finden Sie in einer Belichtungstabelle,  vorteilhafter  ist aber ein elek-
trischer Belichtungsmesser. Die Belichtungszeit wird am Drehring  (4)
auf die Doppelmarke eingestellt, glelchfalls der festgestellte Blenden-
wert am Blendenring  (5).
ENTFERN UNGSEI NSTELLUNG
Zur Einstellung der Entfernung wird der Ring (6) gedreht, bis die ge-
'"vtinschte Zahl gegenUber der Markierung steht. Entfernungen bis zu
4 m sollten nach M6glichkeit gemessen oder abgeschritten werden.
REGOLAZIONE DELLA SENSIBILITA DELLA PELLICOLA
Per evitare errori nella scelta dei valori relativi al diaframma o al tempo
di esposizione,  all'atto dello inserimento della pellicola nell'apparecchio
si riporterd la sensibilitd della pellicola stessa sull'aposito indicadore
(12. (Eccetto Dignette F)
View original page 10Page 11 · Read text
SETTING THE CAMERA
First, the exposure time must be determined. Average values can befound in anv exposure table, although  it is better practice to rely on
an exposure' meter. select the exposure time _by rotating. the. exposure        ring, until the exposure vblue is. in alignment with th.e doublemark."ettin$- ThJ'same applieb to the  f ixed stop number on the stop
sefter (5).
FOCUSTNG                                                 the t                                                        until                                               ring,                    pictures,                              the focusing                           turn         aicuratefo   tJt6                                                          13^ feet,ed                                                       approx.                                       up to                                     Distanies                               index.            alignm6nt                     with thevalue      is in
should be measured or paced, if possible.
BEGLAGE SUR LA SENSIBILITE DU FILM
Pour dviter toute erreur de diaphragme ou de temps-de pose, i.l faut
16oler I'appareil sur la sensibilt6 du film. Ceci s'effectue au disque
ma-'rqueur'du film (12). (Sauf Dignette F)
COMPTEUR D'IMAGES
En ouvrant le couvercle (lors du chargement du film) le disque compteurd'images (14) retourne' automatiquehent a zero (indicatif "A"). Le
compt-eur vbu's indique le nombre des photos d61A prises'
TRANSPORT DU FILM ET BLOCAGE D'EXPOSITION DOUBLE
                                             deux                                                 effectue                              rapide                                                                (1 l) on   I'aide              levier d'armement       duA                                                        photos."prisesEnd                                             prendre des                          commencer                                                          ir                 on peutvide".          la troisidme,    A
actionnant le levier (1 1) raiidement jusqu'd la but6e, le film est trans-
portd d'une image  ir ia fois. La Dignette p.ossdde egalement un dispositif
                                                 deux                                                                     tois' ou                                     pellicule                    que                                             soit exposeq           qui emp€che   blocage                             lade         -traniporte'plus                                                                   de                                                            erreur                                                  Toute                                    pellicule                                      nonexpos6e'que      I'on                              la                          loin
votre part est ainsi 6vit6e.
REGLAGE DE L'APPAREIL
ll s'agit de trouver d'abord le temps de pose exact. Un tableau succint
vous tonne des indications g6nerales, valables dans un cas-type. Un
posomdtre 6lectrique est 6videmment plus pr6cis. Le temps de pose est
16916 d I'anneau tournant (4) au repdre double; en mQme temps on re-pohe I'ouvorture du diaphragme n6cessaire d l'6chelle des diaphrag-
mes (5).
View original page 11Page 13 · Read text
AUFNAHME      -bl;h";                                                                      zur                                                     dienten                                       Kamera                                  der                            Handgriffe                                 mit             durchgefUhrtenAil;'                                                                   Hiinden                                   man                                                 mit beiden                                                      ftihrt                           NunVorU"i"itung             d;i nrin-uhr"nOie liamera" fest voi dJ" Arg""JtU"i.und visiert den Aufnahmegegenstandim Sucirer (,17) an, bis das Motiv die gewtinschte Abgrenzung hat. Dertrette t-euctitrdfrmeniucfrer- (t) mit der eingespiegelten Bildfeldbegren-zunq crleichtert die bildrichtige Wahl dei Aufnahme. Das eingespie-                                                   Nahaufnahmen                                         d. Motiven. F0r                                      u.                      i'ii,ft                 U"i;;l;L(r;;                    Sporturfn"ahmen-iu;                                                                                  rich-                                                       der                                          Parallaxen-Ausgl.eichs,                           des                     Zweck              ;;J";t,;;     ls;                                                                          rechts                                                 und                                                          links                                    ein-gespiegelten.Stape.tiS.h"-,lJausschnitt                ut                       di"-FUrlweiirn' Sucher nach unten.     die Aufiahhe-selbst drUckt man den Aus-
fosei (Zy iuf,ig-durch. Nach jeder Aufnahme wird der Schnellschalthebel
fJi-zu'm'festdn Anschlag ddrchgezogen, damit wird 1. der Film weiter-
i.Jn"Jottiett, 2. die fra"nsports[errd in Kraft gesetzt und 3. das Ziihl-
werk' um eine Nummer weitergeschaltet.
Tutte le ope razioni finora eseguite sull'apparecchio  fotografico servivanoquale prefarazione  alla fotogr;fia.stessa.'A  ques.to punto si porti I'appa-
r'ecchi6 all'altezza dell'occh'io e lo si punti sull'oggetto da fotografare
servendose del mirino (17). A tal fine liisognerd fare in modo che I'og-
getto sia ben _delimitato.  it mirino ad inquadra.tura luminosa con delimi-iazione dei margini della fotog'rafia agevola tale operazione. La crocetta
ui                            cos-tituisce un ausilio nel caso che si vogliano
fotograriare""niro,dell'in[uadraturamanifestazioni sportive o motivi simili. Nel caso che vogliate
esejuire una fotografia a breve distanza (fino a m 1.5),' la delimitazione
delli fotografia, in- quanto essa si sposta verso sotto fino alle due linee
srppleme'itari ihe si'vedono nel mirino. Per I'esecuzione materiale della
foiografia si abbassa completamente fino in fondo lo scatto (2).Dop6 I'esecuzione di ciascuna fotografia bisodnerd agire fino allo
scatto sulla leva d'avanzamento, rapido. Con tale operrazione Si otten-
gono i seguenti risultati:diascuna f-otografia bisogner2r agire lfino allo scatto sulla leva d'avanza-
                                                                                                                                                                                                                                                                                                  :mento, rapido. con tale-operazione si ottengono  i seguenti risultati1. la pellicola viene trasportata in avanti ,2.  il sistema di bloccaggiotrasporto in avanti viene posto in azione e 3. I'in'dicatore fotogrammi
scatta di un ulteriore numero.
HOW TO TAKE PICTURES
After having prepare,C the camera in the manner described abovc, the
first picture can now be taken. For this purpose, take the camerawith both your hands, hold it firmly before your eyes, and aim the
object by- lboking through the viewfinder (17), until the desired picture area    is  clearly- visible within the frame. The large-image view-     -  11) fwith its mi,rrored frames helps you- compose quickly andfinz-cor3 ,y. ffre mirrored cross in the center of the frame helps .youtakingj 3ports s,hots, etc. The frame moves as you focus to show
the exact picture area, and the parallax-compensating viewfindergives two separate   f iel,ds of view. Thus, for close-up shots theexact picture area is shown within the frame, the upper edge of
which is defined by the two shorter bars.
To take a picture, depress the srhutter release (2) smoothly. Aftercvery exposure, the rapid film wind lever is operated, thereby
advancing the  fi lm, counting the exposures, and engaging the film-
transport locking mechanism.
View original page 13Page 14 · Read text
COViMENT PHOTOGRAPHIER ?           www.butkus.us
I o.ltes les manoeuvres accornpircs lusqu lcl lle servent qu a prcparer la
prise de la photo proprement dite. On prendalors i'appareil a deux mains
eL le porte a la hauteur des yeux (pour plus,de stabilite, appuyez
i'ap;:areil contre le front). Visez l'objet a photographier d travers I'ocu-
laire, juso'a ce que I'image soit bien encadree. Le viseur d cadre
lumineux   ('l ) vous facilitera ce travail, etant donne que les cadres quiy apparaissent vous donnent les limites de champ exactes. La croix
marquee est surtout utilisee pour une visee rapide (phctos de sport)
Pour des prises il moins de'l ,5 m, reportez-vous aux reperes d droite et
a gauche apparaissant dans le vlseur, vous compenserez atnst la paral-
laxe. Pour declencher, appuyez sans nervosite le bouton du d6clic (2).
Apr   chaque photo, actionnez d fond le  levier d'armement (11)
voL    .:rez ainsi (a) transporte d'Lrne imaqe la pellicule (b) arme le
drspos:tif de blocage, (c) avance d'un chiffre le compteur d'image.
I]EALIZACION DE LA FOTO
ToCas la operaciones ejecutadas hasta el momento han sido meros pre-
ltarativos. Ahora no queda mds que lievarse la camara al ojo y centrarcl motivo de la fotografia en el visor, mirando por el ocular (17). El
nnarco luminoso que se ve en el visor (1) sirvc de limitador,de los con-
tornos del motivo. La crucecita central es de gran ayuada para fotos
deportivas y demds por el estilo Para tfotos por debajo de 1.5 m se

                 rxm                           'tl.ffi
View original page 14Page 15 · Read text
cncuadrare el motivo dentro de los trazos a derecha e izquierda del
visor, esto es, algo mes abajo que lo normal. Para hacer la fotografia se
pulsa por completo el disparador (2). Tras la realizaci6n de toda
fotografia, se vuelve a armar la c6mera con la palanca (11), quedano,
pues, 10 corrida la pelicula, 20 bloqueda la pelicula y 30 pasado el
contgdor en un n0mero.
                                                 '22


Auf dem VerschiuR ist eine Schiirfentiefenskala angebracht, auf der
links und rechts der Entfernungseinstellmarke  gleiche Blendenwerte
spiegelglelch angeordnet sind. Man kann die Schiirfentiefe ablesen,
indem man den Blendenwert links und rechts der Schiirfentiefenskala
auf die Entfernungsskala iibertragt. Das Beispiel zeigt eine Entferqungs-
einstellung von ca.3,2 m. Die Schtirfentiefe bei Blende 11 re  \von2,2mbis7m.                                                                                       /
BLITZEN
Alle Dignette-Modelle haben einen synchronisierten Blitzkontakt,  be-
sitzen X-Synchronisation und gestatten bei Verwendung eines Elek-
tronenblitzgcrates alle Verschlufizeiten, bei Blitzlampen die Venryen-
dung von r/ro sec. (Eingebautes Blitzgerat bei dignette F)
AUFSTECKSCHUH
Zur Befestigung von Zusatzgereten, wie Blitzgerate, Entfernungsmesser
usw. ist der Aufsteckschuh (13) vorgesehen. (Nicht bei dignette F)
F0r Blitzaufnahmen fragen Sie lhren Fotohandler nach Citus-Blitz-
gertiten.        __ _'SEIBT'TAI.'SLOSER
Der kleine rote Hebel (3) am VerschluB wlrd vor der Aufnahme ge-
soannt. Nach dem Auslosen liiuft das Vorlaufwerk ca. 7 sec. ab, bis
der VerschluR schaltet.
Sull'otturatore e riportata una scala della profonditd focale, sulla quale,
a destra de a sinlstra des segno per la distanza, sono dispostl armonica-
mente gli stessi valori per  ll diaframma. La profonditA focale si pud dedurre
riportando sulla scala delle distance i valori del diaframma regigtrati a
sinistra ed a destra della scala della profonditd focale. L'esempio moetra
una regolazione di distanza di metri 3.2. La profonditA focale con dia-
framma 11 comprende gli oggetti situati entro 2.2 e 7 metrl.
View original page 15Page 16 · Read text
Sull'otturatore 6 riportata una scala della profonditdwww.butkus.usfocale, sulla quale,
a destra de a sinistra des segno per la distanza, sono disposti armonica-
mente gli stessi valori per  il diaframma. La profonditd focale si puo dedurre
riportando sulla scala delle distance ivalori del diaframma registrati a
sinistra ed a destra della scala della profonditd focale. L'esempio mostra
una regolazione di distanza di metri 3.2. La profonditA focale con dia-framma 11 comprende gli oggetti situati entro 2.2 e 7 metri.   -\
IMPIEGO DEL LAMPEGGIATORE
Tutti i modelli Dignette sono muniti di un contatto sincronizzato per
lampeggiatore, hanno una sincronizzazione ad X e, impiegando un lam-
peggiatore elettronico, permettono qualsiasi tempo di esposizione. lm-
piegando, invece, lampadine al magnesio,  it tempo di esposizione dovra
esere di l/so di secondo. (La Dignette F ha incorporato un dispositivo per
il  lampo)
SUPPORTO PER LAMPEGGIATORE
Per fissare sull'apparecchio  strumenti sussidiari, come ad esempio lam-
peggiatori , telemetri, ecc.6 previsto I'apposito supporto (13) Eccetto
Dignette  F.
Se volete eseguire fotografie col lampeggiatore chiedete al Vostro
rivenditore di far Vi mostrare apparecchi Citus.
SCATTO AUTOMATTCO (AUTOSCATTO)
Prima di eseguire la fotografia mettete nella posizione prevista la pic-
cola levetta rossa (3) situata sull'otturatore. Dopo avere abbassato  il
pulsante di scatto, il sistema a tempo gira per circaT secondi, dopo di
che scatta I'otturatore.
The shutter has a depth-of-field scale. At the right and left sides of
the scale index stop numbers are provided, the numbers on the left
side being indentical to those on the right side. To flnd the depth of
field, appiy the respective stop number indicated on the right and
left sides of the depth-of-field scale to the focusing scale. In the
example, the focusing ring is set to approx. 3.2 m. Hence,  if the stop
number 1l is employed, the field of depth will be 2.2 to 7 m.
FLASH SHOTS
All Dignette models a(e synchronized for  f lash and have X flashcontacts. For electronic strobe flashes, all shutter speeds can be
used, while flash bulbs require r/ro sec. (Dignette F bailt-inflash)
ACCESSORY SHOE
For accessories as flash gun, rangefinder, etc. the accessory sl'^r (13)
is provided. (Except Dignette F)
For flash shots, contact your photo dealer for Citus flash units.
SELF.TIMER
The self-timer (3) on the shutter is cocked before the exposure. Upon,
depression, the timer runs for approx. 7 seconds before the shutter
is released.
View original page 16
Page 17 · Read text
L'obturateur. porte. une 6chelle de profondeur de champ. Les rep€res
sont indiqu6€ ir droite et d. gauche du trait central. Eir reportarit les
 indications des reperes sur I'dnneau des distances, on obtieirt, pour un
diaphragme donn6 la profondeur de champ. L'exemple ci-contre'montre
que .t appareil est mis au point sur une distance de 3,2 m environ. pour
 un diaphragme de 11, la profondeur de champ va de 2,2 m lusqu'd 7m.
COMMENT PHOTOGRAPHIER AU FLASH?
Tou    r moddles.Dignette ont un contact synchronis6 pour le flash etpn..    , une synchronisation X. En utilisant un flash dlectronique, tous
 les.temps de prises peuvent 6tre utilis6es. En utilisant des ampoules.
 169lez I'appareil sur l/roe de seconde. (Dignette F avec flash incorpor6)
COULISSE PORTE.FLASH
Pour monter sur I'appareil es divers accessoires, p, ex. le flash, le
telemetre, etc., une coulisse (,|3) a 6t6 prevue. (Sauf Dignette F)
Lorsque vous voudrez achetdr un flasli, demandez ir iotre mdrchandqu'il vous montre des flashs CITUS.
DECLENCHEUR AUTOMATIQUE
    petit          levier              rouge (3)                               I'bbturateur.est                                                       pr6alable.                  d                                   arm6 au                                                 D6s que    pousseton.-Le                      mouvement             le declic,                  un                                      d'horlogerie                                         se                                             met en marche                                                                             et
d6clenche l'obrurateur aprds 7 secondes.
      obturador                                        profundidad                             paraEn el              hay                  una escala                                      la                                                 campo,                                                 del                                                en la        izquierdague,            y derecha                                      para                            marca    g                    de la                                             el ajuste                                         de                                                              la 'distancia,nay-    dispuestos                 torma            en                        exacta                                                                   La                                       valores para el diafragma.                                  iguales-ieerprofundi.dad                       puede             campo         de                  se                                     aproximativamente                                           en li  escala
de las distancias, pasando el valor del diafragma de izquierda y derecha
de la .escala de profundidad del campo a la-escala dd la disiancia. El
ejemplo muestra.un ajuste de distancia de unos 3,2 m. La profundidad
de campo para el diafragma 1l va de 2,2 m a7 m.
FLASH
Todos los modelos Dignette llevan un punto de contacto sincronizado
para el flash, tienen sincronizaci6n X i  permiten, al utilizar un flashelectr6nico, todos los tiempos del obtirridor, con bombillitas de luzr,el6mpago,            empleo de 1/o seg. (La Dignette F esta provista de un               -eldispositivo              flash)
SUJETADOR
Par.a afianzar aparatos adicionales, tales como aparatos flash, tel6-metros, etc., se han previsto unas guias de suji:ci6n (13). ExceptoDignette F.
Para fotografias con flash pregunte a su suministrador de material foto-
erdtiez Dor los aparatos CITUS de luz reldmpago.
View original page 17Page 18 · Read text
9rdtr,-.)or  tos aparalos uil u5 de luz relampago.
DIS, ADOR AUTOMATICO              www.butkus.us
 La palanquita roja (3) del obturador se armar6 antes de realizar la foto-
 grafia. Una vez se ha- disparado, el mecanismo marcha unos 3 seg. hasta que tiene lugar funcionamiento del obturador.
 Entladen der Kamera
sind samtliche 20 bzw. 36 Aufnahmen belichtet, mulS der Film in die
 Patrone,:lurUckg^espult  werden. Zu diesem Zwdck wird der Entsperr-
knopf (16) am. Boden der DACORA-Dignette eingednickt, bis er ein- rastet,      dann           die Kurbel                                                                     gedreht.                                                    Pfeilrichiung                              und in Ein. gut        wahrnehmbares                       ^herumgeklappf(aubreiRen                         Geriius6h                                   des                                                                        Arf-                                               Films vo,i <i'ei-wickelspule)             zeigt                      an,.
               ijen                      Rilukiu;i.ui9".0 9"1. tierFilm_endgriltigDrg,iJii= urrirb,r.                                                           .zuri.ickgespu.ltule r\uroet.ist. wtroNun ", -i   i..;, i  ,;,;;ibis zum Anlchlag herausgezogen und die Filmpatrone der Kameraentnommen. Die dignette F hat statt der Rrickspulkurbel einen Rrick-spul knopf.
Scaricamento  del I'apparecchio
Dopo che tutte le 2O o 36. pose.(a seconda della pellicola) sono state
scattate,.bisogner6  riawolgere la pellicola nel contenitord. A tal fineorsognera_premere  sul pulsante di sbloccaggio (16), situato sul fondodella      DACORA-Dignette,                         fino                                    scatto,-iopo'                             allo                                                          si                                                         iiiona  la                                              'rumore.ii aema.novella           (J5) in direzione                                      freccia.                            della                                                                percepibile                                Un                                           ben
indica- ch^e. l-a pellicola d stata completamente riawolta  (il' rum5re d         Jalcaus              fatto che                        la pellicola                                        si libera                                              dalla bobina                                                                 di ar)volgimento).-p"oiteiioreSo.ltt                 puntd      a questo                         potrd essere                                     aperto                                                                     it coperctiioderra -,uignette. La manovella viene tirata verso fuori fino ailo scattoed il contenitore della pellicola impressionata pud essere tolta dall'ap-parecchio.
Removal of Exposed Film
H.aving taken the 20 or.36 pictures your film holds please wind thefilm    back           into              the                     cartridge.                     To do this,                                           delcress *re reiels6-bution                                                                                    liojarranged          at                lower           the                        side.of_.your                              DACORA-Dignette                                                             until it engages.
Thereafter, throw the crank (15) over and turn-in arrow directilnl Awell audible noise produced by the clearing away of the film from
View original page 18Page 19 · Read text
the winding-youspool indicates that the film has been fully rewound. Thereafter,      will be safe in opening the back of youi Dignette.
 Pull the crank up fully and take the film cartridge out.
 Pour sortir le film
 Lorsque toutes les 20 ou 36 poses sont prises, le film doit d'abord 6tre
 enroul6 sur la cartouche. Pour ce faire, appuyer sur le boalelr de deblocage (16) situe dans le bas de la DACORA-Dignette  jrf    \ ce qu'il s'enclenche, puis inverser la manivelle (15) et li  tourn-er\..,rs  le
 sens de la fldche. Un bruit bien perceptible (le film se d6tache de la
 bobine d'enroulement) indique que le film est d6finitivement enroul6 en
 sens inverse. Ce n'est qu'd ce moment que I'on pourra ouvrir le
 boitier de la Dignette. Retirer la manivelle jusqu'd but6e, puis extraire
 la cartouche.
 Extracci6n de la pelicula
Una vez expuestas las 20 6 36 fotografias, se enroller6 el film en el
 ca-rrete del chasis, para lo cual se presionar6 el bot6n (16) de la parte
 inferior de la DACORA-Dignette hasta que quede encldvddo. A ionti-nuaci6n se levantar6 la manivela y se ir6 girando en le sentido de la
 flecha. Un ruido bien perceptible, producio-por el desprendimiento  del
film de la ranura sujetadora, pone de manifiesto que'la pelicula estd
completamente enrollada. Luego, ya se podria abrir la tapa exterior de
 la cdmara. De la manivela se tirard hacia afuera hasta el m6ximo, de
forma que el chasis pueda sacarse del interior del aparato fotogr6fico.


DACORA-dignette  F
Die dignette F besitzt ein eingebautes  Blitzgerdt, geeignet frjr AG  1und AG 1 B Blitzbirnen. Zum Blitzen wird der Rellect-or aufgeklappt
und die Blitzbirne in die Fassung eingesetzt.
Mit Hilfe des auf der Reflektorrtickseite angebrachten  Rechenringes
["ln man die  - entsprechende Blende ablesen-. Sollte nach liingefomGebrauch ein Auswechseln der Batterie notwendig sein, so hebi man
den Kunststoffdeckel  (Pfeil) ab und wechselt die Batterie aus (polung
beachten).
                      iiiii'*                                     rt'*de    /-,
View original page 19Page 20 · Read text
DACORA-dignette  F                     www.butkus.us
 Die dignette F besitzt ein eingebautes  Blitzgerdt, geeignet fUr AG  1
 und AG 1B  Blitzbirnen. Zum Blitzen wird der Reilector aufgeklappt
 und die Blitzbirne in die Fassunq einoesetzt.
 Mit Hilfe des auf der Ref lektor-rticks'eite angebrachten Rechenringes
 (uln man die _ entsprechende Blende ablesen-. Sollte nach liingeiem
 Gebrauch cin Auswechseln der Batterie notwendig sein, so heb[ man
 den Kunststoffd'eckel (Pfeit) ab und wechselt die Batterie aus (polung
 beachten).


The "digne_tte F" incoroporates a flashlight attachment for which AG'land AG 1 B flash bulbs can be used. To-take flashlight pictures, swing
 reflector open- and insert bulb into socket. The calcul-atini ring providel
on the rear of the reflector permits to read the correct sioo. lf  it beco-mes necessalv after prolonged use to replace the battery, lift plastic
cover (arrow) and exchange battery (pay attention to coriect poiarity).
 -La, dignette F.p^ossede_ un flash incorpor6, indiqu6 pour les lampes-
flash AG 1 et AG 1 B. Pour I'utilisation du flash,'rel6ver le reflecieur
et,introduire la.lampe-flash. Au moyen de I'anneau gradu6 se trouvant
a Iarriere du reilecteur,. on peut lire le diaphragme correspondant.-bdtterie,    si,aprds un certain temps,  il 6taii n6cessaire de'rech-anger  la           levei le   .couvercle   - en plastique   (f leche) et changer la batterie (faire attentiond la polarit6)."
,,La d.igne.tte F es!5 provista 9!e un dispositivo flash acoplado, indicadopara bombillas AG 1 y AG 1B. Para ld utilizaci6n del flish,.se levanta
el. reflector.y se. intioduce la bombilla. Mediante et anitio-graoriJo
situado detrds del reflector, se puede leer el diafragma corresp6ndiente.si despues de un cierto tiempo fuera necesarid cambiar ia baterialevantar.l.a..tapa             de pl6stico (fldcha), y sustituir ta uaieiia lobservar la                  "polarida,d).
La dignette F ha incorporato un- dispositivo per il lampo,            0"r,l_amoale .al magnesio AG 1 e AG 1 B. per fotbgrafarJ l6n'iilhpo-"i"eapre il ritlettore e si introduce la lampada al- magnesio nell'aposito
portala.m.pada. Con I'ausilio dell'anello di calcolazioie che si trova sulretro del riflettore si pud leggere la relativa apertura di diairamma. se
dopo.qualc.he. tempo dovesse- essere necessaiio cambiare la batteria,sr sollevera  il coper.chio in plastica (freccia) e si sostituird la batteria(osservare la polaritd).
View original page 20
From the M. Butkus archive. Original publisher and archive notices are retained.
Check the model and edition against your equipment.
PDF verified 2026-10-10.