Lenses & filters
DeJUR Twin Lens Reflex User manual
User manual for DeJUR Twin Lens Reflex. 37 pages. Read the original PDF, download or print a copy without registration.
37 pagesOriginal document2.8 MB PDF
Loading your manual…Open PDF directly
Document details
- Brand
- Dejur
- Model / document
- DeJUR Twin Lens Reflex
- Document type
- User manual
- Language
- Check the original document
- Pages
- 37
- File size
- 2.8 MB
- Category
- Lenses & filters
- Document date
- Not specified in catalog
Search available document text
Find a term, then jump to its page in the original PDF. Image-only pages may not be searchable; check the PDF for exact wording and diagrams.
Page 2 · Read text
www.orphancameras.com

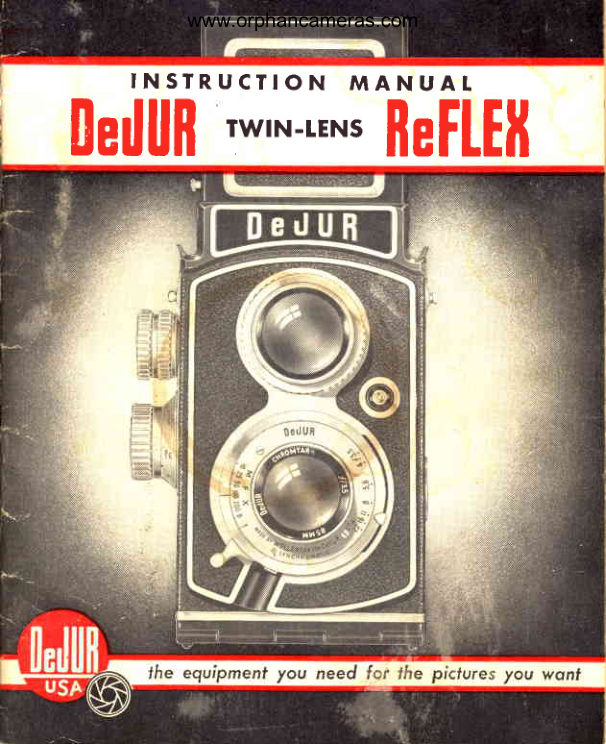
    INSTRUCTION  MANUAT
     TwrN-LENsllerfl|fl       [eF[Ell
View original page 2Page 3 · Read text
www.orphancameras.com


         Copyrighi 1953
   DeJUR-Amsco Corporation
    Long lsland City, N. Y.                   '
View original page 3Page 4 · Read text
www.orphancameras.com


          MANUAL OF
   INSTRUCTION

                  +or the
    rw,N-rENslledI|fl     tetLEll

             Models
            DR-IO
            DR.2O
            DR.4O


                        by
         CHARLESH. COLES,A.P.S.A.
                 TechnicalDirector
     DeJUR-AmscoCorporation,L. l. City, N. Y.
View original page 4Page 5 · Read text
www.orphancameras.com


                          Fie. I
       You see your picturewhileyou shootil.
View original page 5Page 8 · Read text
www.orphancameras.com
     DeJURReFLEXMANUAL

    The DeJUR  Reflex  is a modern  twin.lens  reflex  taking  12
 pictures  2Yq x  2r/a                    _inehes  in  size.    It  is  precision  engineE"ed
 by  expert  camera designers and manufactrired   in an uf,-to.date
 camera factory.   rts smooth and accurate operation  is  tlie  result
 of  care  in  manufacturing   each  part,  rigid   inspection  during
 fabrication,  and  precise  testing  afte.  osiembly.'
     viewing  Lens  is a coated and corrected anastigmat designed
 to produce  a sharpo brilliant  and  easily focused"image.    It  is
matched  to  the photographic  lens  to  insure  u"ror-frZ"  focus.
      Tl"   Photographic   Lens   is  a  fuily   color-eorrected,   anti-   ^
reflection  coated anastigmat.  Embodying  the  hith;;    correc.
tions           op$c-al precision, the lens wilr"produ""-"u"at"..hu"p     -and
negatives and  brilliant   color  transparencies.
    The  shutter   is,_precision   built   for  highest  accuracy  and
Iong   life.     It   is  fullv  svnchronized   for                 ;;ili;"     typesof  flash         _lamps, making   indoor   flash  "rr"ih"pi.t"ilr-;;d"        anddependable.

    Ground,-Glass F'ocusing Screen  is a  fine-grain,  hish  trans.
missio_'_glass made  to  give  the  bright".t    irri"g".'   A'iru.rr"I.
type  field-Iens under  the- ground  glasi  bright""r-iir"    1-oirr"r.  of
the image  for ease in  vieiing.       ri   ttr"  center, the ground  glass
is  pattern-free  to make  pr""Ir"   focus  quick        f3J*proof.
                                                       ""a
    Sports Finder   is                    _designed accurately  to frame  rapidly  mov.
ing  subjects.    rt  is arso u"sefur                 di-   ligui-.iditiorr.
y*:jl"    ground.glassimage-"y""Ju"r" too"e.y rui"itfi;ffi;propervrewrng.

^  -    F-ocusing Knob   is- Iarge and easy to  operate.  A  depth.of.
field  indicaror  shows the ringe  of .hu"p  fo#;i;;;uu-"-yti.r"rr""
setting.
View original page 8Page 10 · Read text
www.orphancameras.com

     Winding   lcnob   which  advances  the   fiIm   for   the  nexr_
 exposure  has  Farge and  comfortable   milled   edges.  When
 camera  is  clesed,  thi+ knob  locks  into  film  spool.     It  cannot
 be  accidentally  disengaged.
     Film  Ind.icator  in center  of winding  knob may be turned  to
 show what. type  of  film  has been loaded  in  the           Turn
 slrruil  projection   until     it  is  located  opposite  the"u*"ru.proper   film
 description.   Here   is  a  constant   ."ttrittder   to   tell  y-oo
 months   later  that  you  have,  say, color   film   in  yoo"  cu-""r."ro"t
    _Reflex  Mirror    is  fronr-surfaced  and  floating   in  a  special
 cradle  to make   it shock proof.     It  is precisely  adjustable  in  all
 directions   to  assure  absolute  uccuiacy   in  alignment    after
assembly.
     Film  Frame  against  which  the  pressure  plate  presses the
 fiIm   for  exposure   is  also  completely   adjusiable  and   is  set
 perfectly  square  with  the  optical  axis  of  ihe  lens.  The  lens
stage  itself   is  die.cast  to  assure  positive  and  life.long   lens
alignment.
      All  these  refinements  assure the  o\Mner of  the DeJUR
Reflex  of crystal-clear photographs  without   distortion  or optical
errors.

                    TUIODET DR-IO
    The  shutter  on  this model  is a DeJUR  self.cocking,  single.                         'Tocontrol  mechanism.        set the  speed,  turn  outer  rirrg   uitil
the  line  is opposite the desired speed.  For  l/100  secoid,  set
ring   to 100 (the  fraction  hne  has been  omitted   for  the  sake
of  clarity).
    To_ take  the_ photograph,   press  shutter  lever  slowly  and
smoothly   until  shutter  op_erateJ.  Try  to  do  this  so smoothly
that  camera  is  not  jarred.     slight  camera movement   durini
€xpo,sure  will  blur  the  picture,  so jarring  should  be avoidedl
A cable release screwed into  the socket u.td""  the release lever
and  used  to   trip   the  shutter   will   aid   in  achieving  srnooth
operation.

                                                                                              .,"
View original page 10Page 11 · Read text
www.orphancameras.com


4 - - T h e m a l c h e d     l e n s e s a n d    l e n s s t a g e o f    t h e
     D e J U R R e F L E X M o d e l D R - l 0
View original page 11Page 12 · Read text
www.orphancameras.com
    As  the  shutter  lever  or  cable  release  is pressed  slowly,  a
 faint  click  is heard, but the shuner has not operated  yet.  Con.
       pressure beyond  this  faint  click  until  the shuttei  operates. 9t_"-ug
 (rf   fi'ger   pressure  is relaxed  after  the  faint  click  but  before
 shutter  operates,  picture   will  be  spoiled.)
     For, moving  subjects,  set shutter  speed to  200.  This   will
 stop only moderate  action, so try  to caich  action  at peak when
movement  comes momentarily   to  rest.
     For   light   conditions   that  require  a  l.to-S-second time
exposure,  set shurter  to  line B  (Bulb).    At  this  setting, shutter
opens when  lever   is  depressed and  closes when  revlr   is  re.
leased.  camera  must  be  on  tripod   or  table  to  avoid  the
slightest  movement   during  period   shutter   is  open.
    To  make  longer   tirne  exposures,  set  shutter   line   to  T
(Time).   When  operating   levir    is  depressed and  released,
shutter  ppens and  stays open  until   levei   is  p""rr"J   u secorrd
time and released.  cameri  must remain imm6vable  during  the
exposure period.
               FTASH  PI{OTOGRAPHY
    The  DeJUR   shutter   is  internally   synchronized   for  flash.
rhe  colors  of  the, shutter speeds  i.tai"ulr   p";d"    ;"rrings   for
the various  flash bulbs.   (see page 23  for'-oi."     altuilrr.
     M-type- bulbs  are  filled  with  wire.   They  will  synchronize
properly when shutter is set to red numbers:'i.             T, B.
                                                ";10,210
    F type bulbs  are clear  with  two  electrodes  inside and  will
synchronize  properly  when  shutter   is  set  to  green numbers:
i.  e., 50, 100 (also at  l0 and 25).
    Strobe  typ-e repeating   flash  bulbs  synchronize   properly  _
when  shutter  is  set ar 200  or  any  othei  speed.
                        i,IODEL  DR.2O
    The  shutter  on  this  model   is a R5pax  set.and-release type
shutter  of  high  precision.   To  set the speedo turn  outer  ring
until  index  line  is opposite  desired speed.  For  l/100  second.
set ring  to 100 (the fraction  Iine  is omitted  for sake of  clarity).
View original page 12Page 14 · Read text
www.orphancameras.com
 To  set  to  400  requires  a  little   extra  pressur€r- to  overcome
 booster spring  tension.
     To take photograph,   firsr move  left-hand  leverall   the way
 np  to cock  shutter.  To  release, press right-hand  lever  slowly
 without   jarring   camera.  A  cable  release may  be  used  to
 produce  a smoothero jar-free  exposure.
     For  light  conditions  that require  short time  exposuresl set
 shutter  to B                 (Bulb).    At  this  serting, cock  shutrer  with   left-            'When
 hand  lever.          release is pressed, shutter  will  open.  Upon
rreleasing  lever,  shutter  will  close.
    To make  longer  time  exposures,  set shutter  to T  (Timei-
 Cock  shutter and press and release to open.  To  close shutter,
 press release leveiagain.
    WARNING:    Do  nor  turn  shutrer  serting  ring  uhile   lens
 is open  for  Time  exposure.    It may damage mechanism.
FTASH  PHOTOGRAPHY
    See Model DR-f0 and use same instructions.   (200 and 400
may be used for  strobe lights.)
                     ,VTODEL DR.4O
     Operation  is same as for DR-20.
FLASH  PHOTOGRAPHY
     This Rapax  shutter  is  fully  synchronized  for  all bulbs  at
all  speeds.  Before cocking  shutter, set synchronizer according
to  flash  bulb  being  used  with   small  knob  opposite  flash
connector.
  Eulb                Speed Selting    Set Synchronirerto
                    400, 200, t00
  Wire  filled flash           ( b l a c k )            B l a c kM
  b u l b s ( M   r y p e )     50, 25, t0, s, 2,  I
                B a n d T  ( R e d )        Red M
  Sfrobe lights          All speeds            B l a c k X
 C l e a r b u l b s w i t h
  two elecirodos     50, 25, t0, 5, 2,  I      Red F    ( F   i y p e )         B a n d T  ( R e d j
Keep synchronizer ai OFF  excepl  for  {lash piciures.
                                                                                                                                    l t
View original page 14Page 15 · Read text
www.orphancameras.com


Fig" 6-slipping  film into spool cage


 7-Threading
View original page 15
Page 16 · Read text
www.orphancameras.com
 HOW TO OPERATEDeJURReFLEX

    To open hood,  pull  out latch  at back  of camera near top.
Hood snaps open revealing ground  glass.
    To  close hood, press top  of hood down and toward  rear.
Hood   will  fold  down  and  snap  into  closed  position.   (Both
magnifier and sports finder must be in their out'of-use position.)
    To  raise magnifier, open hood, then push button  on  right
side  of  front  panel.   Magnifier   will  spring  into  position  for
use.  The eye must be brought  close to the lens for best view.
To  return  magnifier  to closed position,  press down on magni'
fier panel until   it catches.
    To  open  sports  findero raise hoodo raise  magnifierr- and
press in  center panel of hoocl front  until   it catches. Hold  eye
close to square hole  in back  of hood and looh through  square
aperture  in  front.   Everything  seen in  this  square  will  appear
in the picture except when very close to subject.  For closeups,
always use gtound  glass. To close sports finder,  pull  back on
left  corner  of hood.  Hood  panel  will  snap up and close.

                    tOAD|r{G
          Use No. 120 (2Ya x 3L/a) roll  film  only

    To open back for loading, set camera berck up on a smooth'
clean surface in a shady spot.  With  finger,  pull down on upper
button  and swing back  open.  Take   roll   of  film  out  of  its
carton and remove  all wrapping.  Swing  out lower  roll  holder
and insert  roll end with round hole to right.  Press holder with
 roll back  into camera.
    Empty take-up spool should be engaged ,tith  *iiding   knob.
To  insert spool, pull winding  knob  out, and let spool drop into
 position.  End  of  spool  with  slotted  hole  should be toward
winding  knob.   Flat end of winding  knob  spindle should enter
 slot.
                                                                      I3
View original page 16Page 17 · Read text
www.orphancameras.com


F i g . 8 - C o r r e c l  w a y   t o  u s e m d g n i f i e r
View original page 17
Page 18 · Read text
www.orphancameras.com
     Cut  seal on  film  and draw  off enough  paper-end to pass'fiI-   over
 both  rollers  and up  to take-up  spool.   Iise"t         of         itrto
 longer  of  the two  slots  in  take-up  spool and  turn  knob   until
 paper  is caught  securely.   close  camera back and  with  thumb
 press the back near  catch  until    it  snaps closed.
     To open  film  number  window,  step into  a shady spot and
 with  finger  slide  lower  button  up.   (Open  window   in  shade
 only.)  Now  turn   film  winding  knob  unril  number    I  appears
 in  window.  Now  close window.
    NOTE:   Never  permit  sunlight  to  fall  on window  when   it
 is open or  film  will  be fogged.
     Turn  film  indicator  on outside of winding  knob  to remind
 you what  kind  of  fiIm  is  in  camera.
     To unload  camera after  all  pictures  have been made, keep
 turning  knob   until   all  film   is on upper  spool.  Open camera
 back.  Seal film  with gummed paper  at  its end.   pull  out wind.
 ing knob  to remove  film.
Foatsing
    The viewing  lens and photographic  Iens move together on
 the same panel.   These  lenses have been  closely matched  so
 when  the image on the ground-glass  is sharp, the image on the
 film  is also in sharp focus.
     For  distant scenery and  objects more  than 50 feet away,
 it  is  not  necessary  to  focus  carefully.   The  focusing  knob   is
 turned  back  as  far  as possible  so the  indicator   is  at  infinity
 ( o ) .

     For  closer  subjects,  the  focusing  knob   is  turned   slowly
 until  the image  of the  principal   subject  in  the viewing  screen
becomes sharp.  By  rnoving  the  focusing knob  so the image
                                             r5
View original page 18Page 19 · Read text
www.orphancameras.com


        Fie. 9
   Shutler on                                                                                                           II
   Model DR-10
                                                                                  i


passes through   its  clearest appearance and then  turning    it  the
other  way,  the  point   of  sharpest  focus  is  quickly  found.

F ocu.sing with  Magnifier                                                                                                                                                                                                     I
    Only   the  sharpest  focus  makes    it  possible   to  achieve
negatives that  will  stand considerable enlargement.  To  attain
the be-"t focus, the magnifier  nust  be used to watch the image
on the ground  glass to pin.point  the sharpest focus.  Place the
eye close to the magnifier.

 Setting the Shutter
    Before  the picture  is taken, the shutter speed must be set.
First,   it  is necessary to decide what  shutter speed is required.
For most  subjects without  movement,  l/l00th   of a second is
the preferred  speed when the camera is held  in the hand.

l6
View original page 19Page 20 · Read text
www.orphancameras.com
   Move  the  shutter speed indicator  to 100 (which   is easier
to read than  l/100,  so the  fraction  line  has been  omitted).
    To  take  the photograph,   trip  the  shutter  with  the  shutter
release lever  or  with  a cable release screwed  into  the  shutter
socket.  The  cable  release  is  to  be  preferred   for  sharpest
pictures because operating   it  does not  jar  the camera.
    For  moving  subjects, the  shutter  speed  is usually  set fast
enough  to  stop the  action.

Setting  the Diaphragm    (f /rutntber)
    Exposure  is a combination   of how  fast the shutter  operates
and how much  light  the lens admits.  The amount  of  light  is
adjusted by the  iris diaphragm, whieh  controls the size of the
aperture   through  which   the   light   passes.  The   larger   the
aperture  (the more  light  admitted)o  the lower  the f/number.
Thus  f/B  admits more  light  than  f/11.


    +/3.5              +/8            +122
                Fis. l0-Aperiure   af three setiings


                                                       t7
View original page 20Page 21 · Read text
www.orphancameras.com
     DAYLIGHTEXPOSURECHART

   K"y                       K"y                 Subiect                        Lieht Number                 Number
                   I n s h a d e o r
         I    Indoors                                      I   D a r k d a y
         near window                Heavy clouds
        Dark subiects
          Street scenes                    Briqhi overcast
    2   People 5 fo  l0 feet      2   No sharp shadows
             d isfant
       Open landscapes with
        no important shadows          -{azy sun
    3    People l5 or more feef    3    iharp bul dim shadow
              distant

           Dista nt  La ndsca oes
    4    Beach     Snow          4    Clear Sun
          Vater    Mounfains

     Find  appropriate   descriptions   of SUBJECT  and  LIGHT.
Multiply  corresponding  numbers  together.   Product  (answer  to
this multiplication)   is correct  setting for  aperture  (f/number).
Set shutter  to  l/100  second.  ,
    The  table  above  is  for  use  at  l/100  second with  the
following  films:
          Verichrome           Plus X
          Plenachrome        Supreme
     IJse same f/number   as found  from  table  but  set shutter  to
l/200   for  the  following   films:
          Super XX           Superpan  Press

IB
View original page 21Page 22 · Read text
www.orphancameras.com
Example:
          Subject:  Open  landscape   :   No. 3
           Light:     Hazy Sun               :   No. 3
      M u l t i p l y i n g 3 x 3 : 9
          Set to f/number  nearest 9, which  is 8.
          Set  shutter  to  f/f00   second  (camera  loaded  with
         Verichrome    -      if  camera were  loaded  with  Super
         XX,  f/stop   is kept  at B but  shutter  is set for  200).
          Note:     If  the product  of the two numbers multiplied
          together  equals 4 or lower,  the  picture   will  probably
         be acceptable  if f/number   is set to  f./3.5 and shutter
          set to  l/25.
         Other  Shutter  Speeds:
                 If  you  wish  to use a  shutter  speed  other  than  that
         suggested, change  the  f/number   according  to  the
          table below:
              Shutter                Change  tf rutmber  to
              7/10                    three numbers  higher
                l/25                   two  numbers  higher
                l/50                     next number  higher
                f/f00                 no change
               l/200                   next number  lower
Example:
          Subject:  Beach  scene  :   No. 4
           Light:     Hazy sun         :   No. 3
      M u l t i p l y i n g 4 x 3 :      1 2
         Nearest f/number   on  lens  f/ll
          This  is  for  l/100  second shutter speed
        Suppose we wish  to use l/200  second to stop action.
         Table  above shows  that  you  must  use next number
          lower.  11 to B is one number  lower.  Set lens to  B.
                                                19
View original page 22Page 23 · Read text
www.orphancameras.com


Fig.  I l-Depth   of Field
Scale and Film Reminder


Depth ol Field
    The diaphragm  apert[re   (f/number)   not  only  controls  the
amount  of  light            the  lens, but  also the extent  of sharp
                        "trt"ritrgf ocus.
     This means, therefore,  the  smaller  the aperture  (higher  the
f/number)o  the  greater  is  the  range  of  sharp  focus.
Depth'     of  Fielil  Ind.icator
    Above  the  focusing  knob   is the  depth-of'field  scale which
makes   it easy to  determine  the  extent  of sharp focus  at every
lens setting.
     In  the  illustration  above, the  lens has been focused  for
B feet.  The B on the knob  is under  the center line.  On  either
side  of  this  line  are two  lines  indicated   at  their  top  as 3.5.
These  lines  indicate  the  range  of  sharp  focus when  the  dia'
phragm aperture  is set f.or f./3.5.  As you can see, this range of
sharp focus extends from  73/q to almost 9 feet from  the camera.
See Fig. 12 antl 13 on opposite page.
    The  next two  lines  outside  the  3.5 lines  indicate  the range
of  sharp  focus  for  f/4  which   is from  712 f.eet to  9  feet.   At
f./I6,  the range shown  is from  612  feet  to  12 feet.
20
View original page 23Page 24 · Read text
www.orphancameras.com
Selecting  the  proper  shatter-speed
and diaphragm-aperture   combination
       If  the  subject  of  your  picture  taking   is  going  to be  a
moving   subject,  select  the  shutter  speed  that   will   stop  the
action.  The  exposure guide  in  the  center  of  this book  will
give the diaphragm aperture (f/number)   to use with the shutter
speed you selected.
       If  the  subject  of  your  picture  requires  a wide  range  of
distances to be  in  sharp focus, select a small  aperture  (high
f/_number) and then set the shutter according  to the exposure
table.

                     Suggested  Settings
Action  S-ubjects -   Fasr shurter  (l/100,  l/200  or  l/400  sec.)
Indoor  Subjects  -   High  f/number    (t/t6   or  f./22.)
    Always  consult  the exposure  guide  or  an exposure  meter -
for  the  correct  combination  of  shutter and diaphragm.

                                                    Feef
                                         9


                                     sharp focus
     FiS.  f Z-Camera  focused af  8  feef.  Aperture  al  l/3.5

                                              Feef
                                               9


                                         sharp focus
      Fig.  f 3-Camera  focused al g feei.  Aperfure a+ l/16
                                                             2 l
View original page 24From the M. Butkus archive. Original publisher and archive notices are retained.
Check the model and edition against your equipment.
PDF verified 2026-10-10.