Film cameras
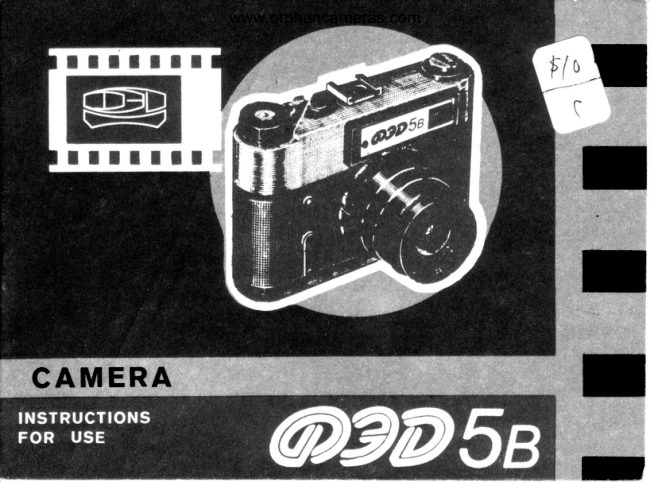
FED 5 User manual
User manual for FED 5. 19 pages in English. Read the original PDF, download or print a copy without registration.
19 pagesEnglish1.0 MB PDF

Loading your manual…Open PDF directly
Document details
- Brand
- FED
- Model / document
- FED 5
- Document type
- User manual
- Language
- English
- Pages
- 19
- File size
- 1.0 MB
- Category
- Film cameras
- Document date
- Not specified in catalog
Search available document text
Find a term, then jump to its page in the original PDF. Image-only pages may not be searchable; check the PDF for exact wording and diagrams.
Page 3 · Read text
IMPORTANT:
      Set the shutter speeds only when the shutter has been cocked.
     Do not turn the erposure head in the interval between "30" and
      n1".           Failure  to comply with  these requirements  results  in
      breaking  of the camera.

      Slnce efforts are continually  made to improve the reliability
     and performance  of the product,  minor  changes nay  be
      introduced  wlthout  special notice.


@ VneshtorgSzdat,L992


                  www.orphancameras.com
View original page 3Page 5 · Read text
1..GENERAL DIRECTIONS
Camera FtrD 58  is intended  for amateur and professional  shooting on
standard black-and-white  and colour perforated film 35 mm wide.
The camera is simple in handling. Fulfilment  of the rules set forth  in the
present manual ensures its reliable operation for many years.
While  handling the carnerq do not exert excessive efforts, protect  it from
dust, avoid to touch its optics.
The design of the carnera is protected by the USSR inventors' certificates
Nos 773562,313194.


                 www.orphancameras.com
View original page 5Page 9 · Read text
Fig.2z
8 -  dloptrlc correctlon rlng; 9 -  fllm sensltlvltyIndlcator llmb; /0  -  rewlndlng
knob; /i   - exposure head;12  -  exposure scalei 13 -  dlsconnector sleeve;14 -
                    shutter cocldng lever; J5 - camera cover


               www.orphancameras.com
View original page 9Page 10 · Read text
5. PR.EPARATION FOR OPERATION
 Preqaration   of  the camera  for  shooting
 consists in  its loading by the magazine witF
 a filrn-
 fn;,lq{inS       ls carried  out under  ordinary
 soft lighting  conditions.
 Undo the screuy fi*ing  the carnera in the case.
 Remove the camera fiom  the case.
 Raise the lock shackles of camera cover 15
 (fig.2)  and turn them half-way  round as far
       go accordlng t_oFig. 3. then  pressing                         Fig.3
with"..1,h.-ythe thumbs on the coyer, shiftlt  tn thI
 direction  of an alrow,  as.showir in Flg. 4, and
take offthe  crmera.
Put the magazine with a film  into the ctmem
recess. Insert the end ofthe  film  lnto the slot
in the take-up reel as shown in Fig.5.
Ttrrning  the shutter cocking lever I 4 (Fig. 2)
pull  the fllm  so that  its perforationsin6uta
get onto the teeth of both rims of the feeding
drum.
Close the camera by the cover and push  its
edge under the shield. Turn the lock J,hackles
half-way  round  and lower them  into  the
recesses.
                                                              Fig.4
View original page 10Page 11 · Read text
diglt "1" and wlll show the flrst frame
                                            prcpared for shooting.
                                           For convenienccin use the shutter cocking
                                              lever has two positions: operating and
                                                 transport In the operating position the end
                                                      of the lever protrudes beyond the crmera
                                      shield.                                                     tS
                                       ShowninFtg.&'-rl7@
                                                       film sensitivity indicator llmbs.


                   Fig.5


To feed the unexposed  fllm  to the picture
aperture, cock the shutter twice, pressing on
release button 4 (Fig.l)   after each cocking.
The shutter cocklng  lever'should  be turned
each time as far  as  it  goes, othenrise  the
button  will  be interlocked  and the shu{ter
will  not operate upon presslng on the button.             -                                                                 Fig.6:
After  the  second-third  cocking  picture           ,16-  Dlcture counter Index; 1 7 -  plclure counler
counter limb 17 (Fig. 6) wtll set opposite                        " - " ' @

E
                         www.orphancameras.com
View original page 11Page 12 · Read text
film  type indicator  limb  is arranged
       icture  counter.  The convent     al
                of the film  types
            as follows:


                                         artificial  lighg
                                                                  Ftg.7:
                                                             19 -  fllm sensltldty Indlcator Index


Having loaded the camerq#rt


T h e n    t u r n     l i m b  9 u n t i l    t h e n u m b e r
corresponding  to the sen3itivity  of the film
loaded into the camera coincides with  index
19.
The  indicator  limbr  will  help you  to
remember bywhat  type of the film the carnera
has been loaded when  you want  to take
pictures  after a long interval.
View original page 12Page 14 · Read text
shooting a series of subjects located at
different  distances from  the camera,
determine  the value  of the necessary
diaphragm with the aid of the depth-of-field
scale and diaphragrn  the lens by  setting
diaphragm scale 2l  in the required position
relative to the index.
Depth-of-field  scale 22 consists of two rows
of numbers corresponding  to the lens
diaphragm scale and disposed symmetrically
relative to distance scale index 24.                               Fig.10:
When the lens is being focused, the depth-of-           21 -  dfaphragm scale; 22 -  depth-of-fleld  scale;
                                                       23 -  dlstance scalez24 -  dlstance scale Indexfield  scale shows on the distance scale the
shortest and longest distances from  the
carnera within  which  the image sharpness
will be satisfactory  for each diaphragmvalue
chosen in shooting.
For example,ln Fig. 10 you san seethatwhen
                                                   from?.2  to 5 m from the carnera are sharplythe lens is focused at a distance of 3 m, the
                                             photographed on the picture and so on.diaphragm being 5.6, all the subjects located
                                              Determine  the shutter speed required  forat a distance of 2.5 to 4 m from the camera                                                   shooting. You can easily do it with the aid of
will  be sharply photographed. When  the      a pocket exposure meter  or €xposure
diaphragm  is equal to 8 the subjects located       metering  tables.

                                                                         L 1
View original page 14Page 15 · Read text
the chosen value on exposurescale J2 and
                                                           lorverit, in this cascthe head should be flxed
                                                         in the set position
                                                     In Fig. 11 the head is set at the exposure
                                                 (shutter speed)of 1/30 s.


                                         Thc exposure can be set only with tlu shatter
                                          cocked.Do not turn thc eryosure head in the
                                                 intewal between "30" and " 1".


                  Fig.11                     Dtgits on scrle 12 correspond to shutter
                                     speedsol  l,  Ll2,  ll4,  LlE, Llli,  1130,
                                             Ll60,ll1'25,ll2SO  and 1/500 s.
                                                                   n1"    n4n                                      The dot between digits    and    on the
                                           exposure limb corresponds to the shutter
To protect  the lens ftom  the overhead-and-       speed of Ll2  s. Letter 'Bn determines the
sid|   liglt    it  is good practice   to put  a                                                  position of the exposunehead intended forsunshade on the lens in.shooting.                                                                                        'by                                                obtaintng the prolonged exlxlsures  handn
                                                                    - when the release button has beenHaving determined  the value of the required
exposure, raise  slightly  exposure head  lJ       depressed"the shutter remains open until the
 (Fig. 11), turn  it  till the index registers with        instant of rcleasing the button

T 2
                         www.orphancameras.com
View original page 15Page 16 · Read text
'2u,  '4',  '8uOn exposure scale divisions  " 1",
and  " 15" tlu exposure hcad is set somewhat
higher than on tlu othcr divisions; do not try
to lower thc luad down by pressing on  it.

Now aim  the camera  at an obJect to be
photographcd, check its posltlon  in the field
of vision  of the view  finder  and, upon
choosing  the necessary Instant  smoothly
press on the shutter release button
                                                                     Fig.   l 2In  taking  pictures  with  the automatlc
releaser, cock the automatlc  releaser  after
setting the diaphragm and the shutter speed:
For  this  purpose  turn  automatic  releaser
cockinglever    I counter-cloclnvise,  as shown
                                      When photographing  with a flash lamp, thein Ftg. I2rto  the upper position  Secure the                                                     shutter should be set to the speed of 1/30  s
eamera on the dpod  and set the camera to the       and the diaphragm  value ls to be.selected in
required  position  with  the aid  of the view       accordance  with  the  film  sensitivity,  the
finder.  Press on the automatic  releaser        d_istqce to the obJect to be photographed and
                                                     the lamp power.button  2 and occupy  the  spot chosen  for
yourselfbeforehand-                           The cannera has clip 6 (Fig. 1) wtth cableless
                                                    connection.The shutter witl be released at least in 9 s.
It  is possible  to cock the  shutter  with  the        Prior to connectinq remove clip stonner 5 and
automatic releaser either released or cocked.        insert the flash tamp in the clip aiihown   in

                                                                 13
View original page 16Page 18 · Read text
rarinding                 knob                              l0  (rig.                                          ls)                                                      "A:T,.gFryrotEte  lt in the                 dlrection  of                             the arroi.
While  rewinding   the film  back  the lens
should be covered with a cap.
The end of ravlnding   is determlned by the
change of an effort  required  for pullins-        the
 film end out of the takc-up  reel.
To protect   the film  from  accidental                       Fig.14
exposure,  do  not  reload  the camera  at
excessively  bright   lighting   (e. S.,under
conditions  of direct  solar  radidtioi).
Open  the cemera, es  lt has been describcd
above, andtake  out the film magazine. In this
case the picture  counter  timb-will  be auto-
rnatically  set to the lnitial  position
Cock the shuttcr  for connecting  the shutter
mechanism- Closc the crmera  bi a cover and
lock  lts locks  Put the ctmera  into  the cese
rnd  fix itwith    I scnslv.
VYhen closing the case do not forget to shift
the cockitrg lever to the transport position To
do this, tighten the lever end to tlie shield. In
this position the lever will  not hinder to close
the case.
                                                               Fig.15
View original page 18Page 19 · Read text
APPENDTX
                         Rules of Loading the Magazine with a Film
Th_ecamera is compl_etednith  the magazine type 135M  intended for repeated application.
Take the reel out of the magazine and insert the film end lnto the reel sldt as shoivi  tn Fig. 1. Fold
 the free end of the film  twice according  to fig. Z and, pressing  it by the thumb  of the left hand,
 pull the fllm  out of the reel with  your  right  hand. In this case the folded end of the film  should
pass into the reel slot
 Pull the film so long as it will be fixed (Fig. 3).
Load the reel with  the wound  film  into the magazine. In this case the film end should enter the
 slot of the magazine housing (fig.  a).
  ffffiffiffiReload the magazine in the ncyerse order.
To avoid the film  fault  it ls necessarlr to clean the packing piecebf the magazine removing the dust
and emulsion remains from the fiLn-


                                                                            Bneurroprnr4ar.  HrA. Ns 1365Y/92.
                                                                           Anra. rr. K-Sp. 3an 2-1094.

                         www.orphancameras.com
View original page 19Related documents and language editions
From the M. Butkus archive. Original publisher and archive notices are retained.
Check the model and edition against your equipment.
PDF verified 2026-10-10.