Film cameras
DOUBLE PAGE Ensign Carbine No. 7 User manual
User manual for DOUBLE PAGE Ensign Carbine No. 7. 16 pages in English. Read the original PDF, download or print a copy without registration.
16 pagesEnglish4.3 MB PDF
Loading your manual…Open PDF directly
Document details
- Brand
- Ensign
- Model / document
- DOUBLE PAGE Ensign Carbine No. 7
- Document type
- User manual
- Language
- English
- Pages
- 16
- File size
- 4.3 MB
- Category
- Film cameras
- Document date
- Not specified in catalog
Search available document text
Find a term, then jump to its page in the original PDF. Image-only pages may not be searchable; check the PDF for exact wording and diagrams.
Page 1 · Read text
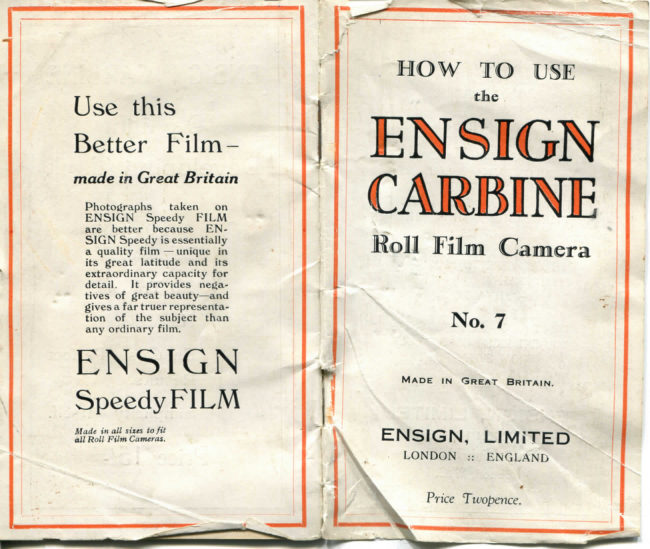
HOW TO USE
Use this                                                tibe
Better Film-        ENSIGNmade in Great Britain
  Photoijraphs   taken   on
 ENSIGN  Speedy  FILM
  are  better  because  EN-
  SIGN Speedy is essentially                                   ira'  HH   irp'-ii          ,/~~i
  a quality film — unique  in                         Molí film Camera   its great  latitude and  its
  extraordinary capacity  for
  detail.     It  provides  neija-
  tives of great beauty—and
  gives a far truer representa-
  tion        of  the                 subject  than                   No. 7  any ordinary                   film.
ENSIGN                      MADE  IN GREAT  BRITAIN.
Speedy FILM

Made  in all sizes  tofit
all Roll Film Cameras.                 ENSIGN, LIMITED
                                      LONDON   :: ENGLAND


                                                                                                      0
                                                                Price  Twojpence.
View original page 1Page 4 · Read text
The film register píate (Patent No. 280352) may              m the empty spool in the wmder chamber.  (Ihis
be seen when  the back  is  fully open (Fig. 2).                             slot is cut wider on one side than the other to
Its purpose  is  to  flatten  the  film  against  the                       take the paper ;  see that you  start the paper in
focal plañe of the camera, thereby removing the                        the wider side).
                             irregulanties   which                 Now give the winder one or two turns to make
                                 spoil  the   definition                        sure that the paper is centred nicely between the
                           obtainable with good                        flanges  of the  spool, and    if   it  is beanng  hard
                            quality  lenses,  and                        against  either  side,  press  it gently sideways  to
                           thus  to  make   film                          correct.
                        photography equal to                        Cióse the back and be sure that the catch is
                             píate photography in                       properly secured.  At this point open  the  front
                                this  respect.                                        of the camera and drop the baseboard.
                        The  register  píate                      Turn  the  co-ver  of  the  ruby w i n d o w  to
                                      is  operated  by  the                 "WIND," this  will  reléase the  film register píate
                          cover  píate  of  the                        (Patent No. 280352).  Give the winder about ten
             Fie. 2            ruby window.  The                        turns until a    ' hand   sign appears  in the ruby
                         two positions  of this                    window.  This  is a warning of the approach of
píate  for " winding" and for "exposing" are                     No.  1, which will appear after a few more turns.
indicated by red arrows (Fig. 3).                             Do not turn quickly or the number will pass the
  The arrangements for loading the camera are                   window  unnoticed, and once past, there  is no
very simple and convenient. In the upper chambei                       bringing it back.    If  the camera  is not  required
is  the  wmder  with                                                            for use at once  it  is advisable to leave the film at
one  fixed  spool-pm                                                            safety, that  is to say, with the hand showing at
opposite to it, and an                                                     the window, then should the shutter be inadver-
empty spool-core will                                                         tently released  no harm  will  result.  Always
be  found   in   this                                        turn the film befare  closing the camera,
chamber.  The lower                                     and  with  the  ruby window  cover  at
spool  chamber  will                          " WIND."    After  winding turn the ruby
be found to have one                                     window cover to "EXPOSE."
fixed and one hinged
spool-pm (Patent No.
281802), which makes                                                Fis. 3                       The Camera in useloading very easy.
  Take a spool of "Ensign Speedy" film, size2JB,                   Open the camera by pressing  the concealed
break the  seal and remove  all the  label,  insert                       catch  under  the  winding key, take  hold  of
the spool in the lower spool chamber on the studs,                       the  base-board and  press   it down   until  the
with the end  of the paper leading towards the                         side struts clip into position.  Be careful  to see
upper  chamber.  Keep  the  spool-pm  bracket                          that  this  is accomplished  satisfactorily.  Take
pressed into the camera by grasping the body                       hold  of the  finger  grips on  the  carriage  and
at that point, lead the free end of the paper across                   draw out. One grip  will move inwards releas-
both guide rollers and thread  it through the slot                mg  the  catch which  holds  back  the  carriage.
View original page 4Page 6 · Read text
Vieu)  Finders.
                                                                             fortable  viewing  of  the  subject  through  both
 Two types of view-fmder are fitted ; the optical                     openings,  which  should correspond with each
reílecting pattern cióse to the lens, which shows                      other.  The view which  is included in the  fronta reduced-scale image of what the lens wíll take,                                                                  frame  will agree with what the camera  will take,and is provided with a mask indicating the limits                                                                                   at  all  positions  of  the  focussing  lever, as theof view which must be used when taking an up-                                                                   frame moves with the  lens.right picture or a horizontal picture in the following
manner :—
                                                      THE  SHUTTER
                                                                 This is the " exposer," or method by whicn an
                                                                  cxposure is made.   It carnes the lens and is fitted
                                                                                  to the front of the camera.


    Horizontal              Fifí. 9

  After  reversing  the  optical  view-finder   t'or  a
horizontal  picture, always be  sure  to  return   it                         T.D.l.Typc                       3-speed Type
to the normal position,  or  it  will be damaged
when you attempt to cióse the camera.                                     Time,  Bulh,  Instantaneous.—A  rehable  shutter
                              The   direct                      giving a speed of about 1 30 on instantaneous.
                                     visión  v i e w-                         3-Speed  Typc.—An    all  metal  shutter  giving
                                                                 f ind  e r  is a                    instantaneous speeds  of  1.25,  1 50 and    1 100
                                   wire    f r a m e                            sec., also Time and Bulb.
                                 hinged at one                    Mulchro.—A very  efficient  mechanical  shutter,
                                      side of the lens                        British made, giving an accurately timed range of
                                        front (Fig. 10)                    speeds  1/100,  1/50,   I  25,  1  10, 1,5, 1 2,  1 sec.,
                                  used  in  con-                       also Time and Bulb.
                                   junction  with                   Compur.—A  mechamcally   operated   shutter
                                  a sliding back                      giving a range of speeds  1/250,  i  100, 1/50,  1/25,
                                      s i g h t    i n  a                        1/10,  1/5,  1/2,  1  sec., also Time and  Bulb.   In
                                  sheath on the                         this shutter the instantaneous speeds have to be
                  Fig, 10              camera back ;                         set by means of a lever at the top of the  shutter.
                                                            t o u s e   i t ,                   This  sets the  train of gears and  the  shutter  is
swing the frame outwards and slide out the back                    then operated by the Trigger or Cable Reléase.
 sight, hoíd the camera at eye level with the back                   This shutter can also be supplied with a Delayed
sight as cióse to one eye as will allow the com-                     Action fitted, for use with all instantaneous speeds
                                                                   except  1/250.  To  opérate  the  setting  lever  is
View original page 6Page 7 · Read text
moved in the usual way until  it stops.  Then the                 and near views ; /I I, for average views ; /16, for
 small  nickel knob  at  the  top  of the  shutter  is                                                                         áistant views ; ¡22 and/32, sea and cloud pictures
 pressed back and the settmg lever moved on once                and interiors where long exposures can be given.
                                                                                                             It must always be remembered that each smaller
                                                                     stop doubles the exposure.  For instance, if taking
                                                                                at /I I, a view requires an exposure of l/50th sec.,
                                                                        the  same  view  at  /16
                                                           would require 1 25th.
                                                                      The Ensign Cable Reléase
                                                                                            is supphed with all these
                                                                 cameras.     It should be
                                                               used  for time and bulb
                                                                exposures w h e n  the
                                                            camera  is  resting on  a
                                                                        table  or  stand,  and   it             Fig. 11
       Mulchro                    Compur                      can  be  used  for  any
                                                                    exposure.  When  not  in  use, keep  it folded in
again. On pressing the trigger reléase there will                                                                          the position shown on Fig. 11.be  a  delay  of  12 seconds  before  the  shutter
works.                                                          Making  an  Exposure.
  Snapshots holding camera in the hand :                        The camera being loaded and No. 1 in position,
  1 25th sec. Slow snapshots  ; fair light.                          examine  the  subiect  carefully and decide what
 1 53th    ,,  Médium fast snapshots  ; good  light.                  exposure to give. Then decide what stop to use
  I  lOOth  ,,   Fast snapshots in brilliant light.                     and  adjust  the diaphragm.  Next estímate the
           Beach pictures.  Clouds.                                 distance and move the focussing lever until the
 1 250th  ,,  Sports pictures.                                            pointer  registers the  distance  required on  the
                                                                      focussing  scale.
    Exposures where the camera should be                    Then having assured yourself that all you wish
               used on a stand :                                        to include  is shown  in the  finder, look  at youi
 1, 2    sec.  Portraits and  cióse up  in  dull light                     subject and press the reléase with a steady pres-
                (winter).                                                  sure. Do not jerk or the picture will be blurred.
 1  5th      ,,   Portraits and  cióse up  in  duíl  light                 The  exposure  being  made,  immediately   aliña
                (winter).                                               another  film   into  posilion   befare   closing   the
1/IOth  „  Cióse ups in modérate light (winter).                   camera ; make a habit of doing this immediately
B.  -        Short time exposures.                                          after exposure.    It  is very annoying to fmd two
             Portraits in open in dull light.                             pictures have been made on one film.
T.  -       •  Long time exposures.  .  Interiors.
                                                                To  Cióse the Camera.
  The  Iris Diaphragm  is used to control the  light                                                                                     First make sure that the view-finder is in its nor-forvarious subjects, and the following should serve                                                           mal (vertical) position  : that the wire finder frameas a guide :—/4.5 and anything larger, for portraits                                                                                               is folded over the lens front  ; that the focussing
                 donated to www.butkus.us
View original page 7Page 8 · Read text
P]ate¡«back Model lever is right home and snapped on to its retaining
 stud, also that the rising and cross motions are              Ensign Carbine No. 7
 returned to their normal positions, and the Flex-
 ible reléase folded away as in Fig. 11, ¡f it has been                The focussing arrangements for the " Plate-
 used.  Then grip the two carriage knobs, releas-                 Back " model are  slightly  difieren! : when used
mg the carriage from the locking pin by so doing,
 and run the carriage  right home into the body ;
 hold the camera as shown in Fig. 12, both thumbs
 pressing on the side struts together, reléase them
 and  cióse  up  the
 baseboard.
  The foldmg ieg will
 be found useful when
 g i v i n g  Time   ex-
 posures  indoors  or
where a table or other
 level support is avail-                                                                                 Fig. 13
 able.
                                                                                    for films there is no difference in the method of
 To UnloaJ the Spool.                                                   using, but  it will be seen (Fig. 13) that there are
   After exposing No.                                                íwo pointers, and the forward one, marked " P "
8 on a film, continué                                                    in red, is for plates only and  is not to be used for
 to wmd while looking                                                       films.
 through  the window                                                  When the  camera  is  to be  used  for  plates, until the  tail end  of                                                                     before  extending  the  bellows  to  the  infinity the paperpasses, then                                                                       position as usual, pulí out the pin which will be
 it  is safe to open the                  Fifí. 12                           íound between the pulí grips, and which extendsback;  complete  the                                                               a small lever marked " Plates " in red : then onwinding of the  film, pulí out the winder and the                                                            pulhng out the front, this lever will make contact
film  will  rise out of the chamber ; be careful not                   with an extra infinity pin on the right of the travel-
to allow it to slacken or edge-fog will be the result.                                                                            ling base,  set in the  correct  position  for plates,Seal  the  roll with the gummed  label marked                                                           and  will retain the lens in  this position on the
" Exposed " which will be found on the empty                     travelling base while the focussing lever is used
spool in the lower chamber, then transfer this spool                       for  nearer  distances,  reading  with the  pointer
to the winding chamber and you are  ready  to                                                          marked " P."reload with a fresh film as before.
                                                         The  back  of  the  camera has a rectangular
NO TE.—Do not load or unload in full sunlight  ij  i/ou                 opening cut in  it (Fig. 14), with a leather-covered
          can  avoid   it.  A  film  may  be fogged   in                  panel  filling  it when  the camera  is used with
         l/1000th  second,   therefore   gel  indoors    ij                       films, and a focussing screen with hood or single
         you can, or at leasi in íhe shadow.

                          10
View original page 8Page 9 · Read text
metal píate Holders, can be inserted in the runners
when  this  solid  panel and  the  register  píate              Useful Hínts ©e Picture
                                                                         ,                              behind                                                                    it,                                                are
                             removed                                                              f                                                                r o                             m                  Making
                                   the back.  The
                               back   sight  for
                                   the direct-vision
                              view - finder   is             STREET PHOTOGRAPHY.
                                   also  of  a   dif-
                                                                                     ' ícrent   pattern,                                It  is essential that the camera shouM alvvays
                               although    it   is                   be  held  level.   If  it  is  tilted upward, buildings
                                     u sed  in exactly                        will appear to be leaning backward and inward.
                                  the  same  way                                                                                                                          If  it is tilted downward, the buildings will appear                                  as  that on  the                                                                          to be leaning forward and outward.                                                    f i l m m o d e l
                               camera.
                             Thefocussmg              CH1LD  PICTURES.
                                  s c r e e n  a n d
                               plate-ho Ider s                When  taking  pictures  of  children,  always
                         suppeupplied   aa rr ee                     follow  their  movements.  Be  careful,  however,
 suitably  fmished  to match  the  camera,  blackblack                      in  your  efforts  to  obtain  good  pictures,  thatenamelled for the standard model, and Florentine                                                           you  hold  the camera  steadily,  as  this  is mostBronzed  for  the  Tropical  model.   The  píate
holders will take any 3i by 2i English píate, or                      essential.
the Continental standard  size 6^ by 9 c m, and
by means of the  special sheaths supplied, may
also be used for cut films.                             LANDSCAPE PICTURES.
  The  plate-back  user  has  a  wider choicc of                  Be very careful to select the right stand-point,
emulsions at his disposal than the film only can                  and  endeavour   to   find   the  most   artistic
give, and  it has also the advantage of bemg able                                                                   composition.to develop a single exposure immediately, without
waiting or waste.
  Any standard film pack,  size 3J by 2\ can be              SEA AND BEACH  SCENES.
used on  this camera  in an  Ensign  Film Pack
Adapter if desired, the advantage of 12 exposures                  Be careful to use the correct stop, and to have
combined with hght weight and  the facilityility  of                     the sun  either  to the  right, or  to  the  left.   If
developing a  single exposure  if required, beiing                 you have  it in  front, you  will  get a  silhouette
very useful on occasions,                                                                                       effect, if you have it behind, the result will appear
                                                                                                fíat and uninteresting.

                             12     donated to www.butkus.us
View original page 9Page 11 · Read text
The   general    fault   r                          Developíog amd Práetimg
with  No.    I   is  that
                                                       By far the most fascinatmg part of the hobby
too   much     fore-
                                                                                      of photography  is  to  be  found  in  the actual
ground    is    given,
                                                                  production  of  the  picture,  after  exposure  has
making  objects  un-
                                                              been made.  The  little time and trouble required
necessarily   fíat  and                                                                                             is amply repaid by the pleasure and amusement
indistinct.   In No. 2                                                                        to be had.
the background and
distance  can   very                                                                                It shouid not be thought that the developing
often  be  improved                                                        of one's own filns, and the subsequent printing
by  a   slight  altera-                                                        of the  negatives,  necessitates a large and com-
tion  in  the  position                                              prehensiva installation—nothing could be further
oí  the camera.   As regards lighting eítect  this                    from the truth.
is most important and has a great effect on the
                                                                  Developing  and  printing  is  reduced  nowa-
photograph.  Heavy shadows should be avoided
                                  A      days   to  an   almost   automatic
as far as possible.
                                       ^^•^L     process,  unless   it  is  deliberately
                                                                                       desired   to  go  further   into  the
                                                                               chemical  and   scientific   side  of
   Portraíts  and  Groups.—As  everyone  knows                                   the  hobby.  You do  not  require
 snapshot   portraits  are  nearly  always  more                                  a  specially  fitted  up  dark  room.
 pleasing and  truer to  life than  the studio  type,                            •    ñor is it even necessary to take a
and much can be done by the enterprismg amateur                     yf    room and make  it dark, by hang-
                                                                                 ing  up  temporary  curtains,  etc..in  obtaining  stnking  hkenesses.  Any  attempt
                                                                                    before the work of developing can
at posing  is  to be avoided;  a  little  patience,
                                                                       commence.
discrimination as regards the best moment, and
 study  of the  lighting conditions  prevailing,  will                                          All  you  require   is  a  suitable
 generally repay the photographer with the admira-              >^H ^K    tank, such as the " Ensign Carbine."
                                                                                procurable from any photographiction the resulting portrait receives.
                 donated to www.butkus.us
View original page 11Page 12 · Read text
dealer's shop,  and  a  few  packets  of  already                   structions as to how to put the film in are issued
made up  chemicals, which only  require  to be                  with the " Ensign Carbine " tank).
dissolved  in  a  given quantity of  water.  Any
bath-room,  therefore,  is an  admirable place  in                 The  process  of developmg  occupies  about
which to carry out the process.                                  twenty  minutes. When this  is  completed  the
                                                                  developing  solution is poured  out  of the  tank,
  Developing, Fixing and                     through a  special tap, and what  is known  as                                                                            fixing  solution  is  poured  in—this  consists  oí     Washing the Film                                                                 Fixing  Salt  (obtained   in  convenient  packets
Materials Required.                                             from  any photographic  dealer),  dissolved m a
                                                                        certain quantity of water.
    1.  " Ensign Carbine " Tank. the right size for
     your spools.                                                  Fixing  will occupy about  ten  minutes,  after
                                                           which  the  tank  can  be  opened,  the  film  ex-  2.  Developmg Powders.
                                                                           tracted,  and  washed  ¡n any  basin,  dish,  or
   3.  Fixing Salt.                                                                    other  convenient  receptacle.  The  film  should
   4. A small thermometer  is useful  for gauging                be washed  in running water for about  half  an
      the  temperature.                                           hour.
   5.  Such other accessories as you rnay think                                                      Be careful  to see that the temperature of the
      desirable,  such  as  dishes,  etc., though                                                                       Solutions does not rise too much.      these are not essential.
                                                          The  tank   is  then  thoroughly  washed.     If  Assummg that you have procured the neces-
sary materials, all you have to do is to dissolve               two or three films have to be developed  at the
the powder  in  the  required amount  of water,               same time, the developing and  fixing  Solutions
as indicated on the packet, and pour  it into the                can  be  kept  and  used  again,  but  the  tan!;
tank.                                                               should  be  thoroughly  washsd  between  each
  You then take your exposed  spool, and  load                      film.
it  into the  tank,  in very much  the same way                                                                            After washing the  film  should be pmned upas you put  it into the camera, that  is, you do
                                                                          to dry, in some  suitable place,  preferably  in athe whole thmg in complete daylight (exact  in-
View original page 12Page 13 · Read text
draught but away from dust or where  it might             When  your  negative  is dry,  it  will be m  a
get damaged.                                                            straight   strip,  showing eight  negative pictures.
                                                 T hat  is to say, what was white in your subject    It  will  be  seen  that  íhe  whole  process   is
simplicity  itself.  You do  not  even  require  to                     will appear black. and vice versa
be  present  while  the  film  is  developing,  but
can  leave   it dunng  tlie  twenty  minutes, and
proceed  to do  anything  else you  like  in  the
meantime.

   Printing the Negative

Materials Required.
                                                        The  easiest  printing médium  is by  what   is
    1.  Printing Frame of suitable size.                      known  as " Gaslight  Paper," the reason  beine;
   2.  Packet of Gaslight Paper.                                      that the process can be carried out in gaslight.
                                                                                                   It is preferable not to opérate in subdued day-
                                                                                 light,  or  if  electric  light  is  used   it  should  be
                                                              subdued.

                                                       The  negative   is  put m  the  printing trame
                                                                with  a  piece  of  gaslight  . printing paper,  and
                                                           exposed  at a given distance  from a  light.  The
                                                                 period of time depends on the type of negative,
   3.  Bottle  of  suitable  Developer  (obtainable               and on the volume of light.   Full mstructions in
      from any photographic dealer).                                   this  respect  are  issued  with  each  packet  of
  4.  Some Fixing Salt as used for the film.                       papei.
   5.  You  will also require one  or two  dishes.                                                        The  paper, havmg  been  exposed,   it  is  de-     Those prepared  specially for the purpose
                                                              veloped m  the  dish, the  picture appears  in a       of porcelam, or xylonite are undoubtedly
      to be recommended.                                        very  short  time,  and  the  paper  is  removed
                donated to www.butkus.us
View original page 13Page 14 · Read text
from  the developer, and  plunged              up to five or six times its original size, and becomes
                into  the  íixing bath, which you              a real picture.
            have  already  prepared  in  the
              second  dish.

             The  print  should  be  washed
                 for   fifteen   to  twenty  minutes,
             and then  laid out to dry in some
 suitable  place  free  from  dust;  alternatively  it
can be blotted.
           Finishing                              Apparatus  is available which produces  such
                                                                   pictures  with  a  minimum  of  expense,  and
  When  the  prints  have  been  finished  and                                                               a  minimum  of  trouble.  Ensign  Dayhght  En-
dried,  they can  either be mounted  in albums,                                                                      largers make big  prints without any  difficulty.
or on mounts to  suit individual taste. A large                                          A more ambitious type of Enlarger  is the Auto-
 variety  of Ensign Albums is  available  for  this                                                                        print.
p-urpose.

  Always  store  your  negatives  in  an  Ensign
Film Storage Álbum.                          The Dark Moom

         Enlarging                        When  you  have  become   sufficiently  en-
                                                                     thusiastic to  set aside a room for photographic  When  proficiency  in the  production of good
                                                            purposes  only,  the  fitting  up becomes  a  joy,negatives  and  prints  has  been  attained,  the
                                                         and  the  selection  of  the  various  accessonesappetite  will have been  sufficiently " whetted "
                                                                                    is a matler of great importance.  By that time,for the enthusiast to proceed to other branches
                                                          however, you  will be  well acquainted with  allof photographic activity.
                                                                the   best   apparatus.   Ensign   photography
  The  most fascmatmg  of  all  is, perhaps, that            means best results all the time, therefore always
of  enlarging,  where  the  tiny  print  is brought               ask for ENSIGN.
View original page 14Page 15 · Read text
Ensign    STORAGEFILM ÁLBUM
                      ENSIGN  CARBINE
                               Daylight
                                                       *    Developing Tank                                \Vith imerchange-
                              able   transparent
                              loóse   envelopes
                            on  binder  posts.
                                                     All  Operations in
     Always  store  your  negativos  carefully—
     you never know when you will w;mt them.                                                Daylight.
     Price : For negatives 2| x 3i  2/6
                                  No Trouble.
                                   No Mess.
Ensign Carrying Cases                 Ensures   Perfect
         You must keep your camera well                          Results.
                      ; protected — put   it  in  a  case.
      Canvas, with strong leather sewn                            Simplicity    Itself.
      corners. with sling strap

      Leather,  with  long  sling  strap.
      Black or Brown                                      Price  15/-
      Litnp Leather.  Black only    ...     ••• ó/6

               donated to www.butkus.us
View original page 15Related documents and language editions
From the M. Butkus archive. Original publisher and archive notices are retained.
Check the model and edition against your equipment.
PDF verified 2026-10-10.