Film cameras
Dover 620 User manual
User manual for Dover 620. 21 pages in English. Read the original PDF, download or print a copy without registration.
21 pagesEnglish2.7 MB PDF
Loading your manual…Open PDF directly
Document details
- Brand
- Dover
- Model / document
- Dover 620
- Document type
- User manual
- Language
- English
- Pages
- 21
- File size
- 2.7 MB
- Category
- Film cameras
- Document date
- Not specified in catalog
Search available document text
Find a term, then jump to its page in the original PDF. Image-only pages may not be searchable; check the PDF for exact wording and diagrams.
Page 3 · Read text
www.butkus.us


A -_ SHUTTER RELEASE
B _*. DIAPHRAGM CONTROL
C.- COATED LENS
D _- PORTRAIT LENS
E -- FILTER (YELLOW)
F -- WIND KNOB
C ._ SPOOL RELEASE PINS
H_ VIEW FINDER
I   EXPOSURE NUMBER WINDOW  -J ,._    LOCKING CATCH
K._- FLASH UNIT
L _ EXPOSURE CHART


           www.butks.us
View original page 3Page 5 · Read text
OPERATION OI
       DOVER
          62(J^ CAMERA
(Refer to descriptive photographs of front and leal
of Camera for working parts and their use  )


               Mike Butkus    Digitally                                                                                                               DN:ou=butkus.org,Date:cn=Mike2021.12.08signedButkus,email=mike@butkus.org,by16:06:20Mikeo=ButkusButkus-05'00'camera manuals,c=US


A-- -Sl-lU-l-TER P.ELEASE-         for easy right-hand                      -placed
    operation. The shutter is a spring and  f ly- leaf
    type which gives a 1/50 of a second exposure
   when realeased. lt is also self-cocking and its sim-
     plicity obviates mistakes c:used by forgetfulness.
View original page 5Page 6 · Read text
www.butkus.us
B DIAPHRAGM CONTROL and Lens opening num-
   ber-Five pre-determined lens openings lock into
    place and a visible number scale informs the pho-
    tographer of the stop in use. This scale is meant
    to be used in conjunction with the chart (L) on
    the rear of the camera.
C-COATED LENS-The normal lens of your camera
    has been coated on both sides to allow more light
    to pass through at each selected aperture, thus
    giving a sharper picture and better exposure under
    adverse conditions.
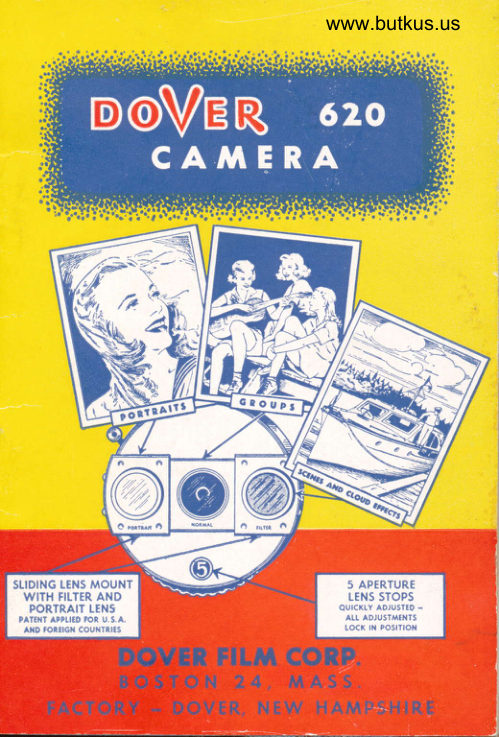
D-PORTRAIT LENS-Always on the camera, always
    handy. Simply slide it into position over normal
     lens. Close-ups from 2th feet to 6 feet when using
    the portrait lens can be taken. Slide it to one side
   and sharp pictures may be taken from 6 feet to
     infinity.
E-YELLOW SKY FILTER-Like the porrrait iens, it
     is always 'eady to be slid into place when required.
  When using Panchromatic film, slide this filter
   over the normal lens and correct for the usual
   over-exoosure of the blue sky. Beautiful cloud
    pictures may be taken this way. At the beach or at
     t'righ altitudes this  f ilter corrects for the excess
    scattered actinic light, criving a true rendition of
    :olors in the scale of black and white tones on
   Panchromatic film. This fittei shoutd not be used
   with color film.
View original page 6Page 7 · Read text
F-WINDING KNOB-An extra large winding knob,
    for easier transportation of film through your
   camera, is made available.
                                                   hasG-SPOOL RELEASE PINS-The Dover 620
    spring loaded spool pins which makes it easy to
    load and telease the film.
H-EYE LEVEL VIEW FINDER APERTURE.
l-EXPOSURE NUMBER WINDOw-Sixteen  ex-
   posures are made on each roll of 620 film, large
   enough for contact prints  ( 1 s/exLr/c) and they
   may be enlarged to jumbo size prints,3t/ax4t/a.
J-LOCKING CATCH-This simple but safe lock
    facilitates opening the camera for rapid changing
   of the film.
K-FLASH UNIT-This built-in flash will sive svn-
    chronous flash exposures with many of the small
    flash bulbs with bullet type base. The detachable
     reflector is easily slipped into place when indoor
    or outdoor  f lash pictures are desired.
L-EXPOSURE CHART-Attached  to the rear of the
   camera is listed a handy chart for use with the
    various types of films used under all light condi-
    tions. ln addition, the calculated exposures for
    use with filters and with flash bulbs is given. The
   data pertaining to use of portrait lens is also
    contained in this chart.
View original page 7Page 8 · Read text
www.butkus.us
  Your DOVER 620 Snap-shot camera has been
designed to give you simplicity of operation plus de-
pendability. Wh:n used under normal conditions with_
out your flash attachment, it will take brilliant piclures
so economically that you will want it with you wherever
you 90 for pleasure. Using the popular #620 size film,
you can take not 8, not 12, but l6 pictures per,roll.
By following a few simple instructions you will be able
to get pictures which would be impossible without un_
necessary fumbling with filters or portrait attachments
when using a more expensive type of a camera.
  When the lig'rt quality is poor or the light quantity
is insufficient, make use of the built_in flash attach_
ment on your Dover 620 camera. With the insertion
of a midget, inexpensive #5  flash bulb, your cam_
era is equipped to take pictures at night either insjde
or outdoors. With the flash attachment, the bulb is
flashed only when the lens is opened, guarding againsr
unintentional discharge of bulb.


                      6
View original page 8Page 9 · Read text
INSTRUCTIONS FOR USE
       DOVE R
      620 CAMERA


|           your Camera with fihn
 -Loading
  Holding the camera with the back towards you,
release roller catch (J) which hooks over the plastic
body of the camera and swing the back open. Place
an empty 620 spool aga inst the upper pin at right
hand side of camera and press upward and into cam-
era at the same time. This will allow bottom end of
spool to pass over wirrding l<eV and drop into place.
View original page 9Page 10 · Read text
www.butkus.us
Turn winding knob (F) until key drops into slot in
spool. Continue turning until long slot in the spool
 is uppermost. (See photo below)


  Now place new roll of tilm in left spool-well in the
same manner, making certain that paper unrolls
from the top of the spool. There being no key at
this end of camera, the spool will drop into place
at once. Thread tapered wedge of paper into empty
spool and wind two or three turns to make sure that
paper is winding correctly and that it does not slip
out of the spool. Close rear of camera and snap the
catch into place. Wind Knob (F) in the only direction
View original page 10
Page 11 · Read text
it will turn, to the right, until number I appears in
ruby window showing exposures. You are now ready
to expose your first picture. We will assume that this
shot will be taken outdoors without the use of flash.
 (For flash photography with your DOVER 620 camera,
see text under "Flash Photography.")

f-!ape5ulg
  Consider the type of film with which you have
loaded your camera. Consult the chart on the rear of
the camera for the exposure or diaphragm number
necessary. Set revolving diaphragm (B) until the cor-
rect number aDn-rars in the circular opening. The stop
will drop 1n16 nlac€, automatically centered. Compose
your subject in the eye-level view finder (H) and
squeeze the shutter release (A) until shutter clicks.
There is no necessity for focusing when the subiect
being photographed is 6 or more feet from your
camera.

J-pe717si1s
  Should you desire to take a close-up of flowers,
oeople, animals, etc., slide portrait lens (D)':' in
place over the normal lens (C). Exposures may now
be made from 2t/z feet to 6 feet in sharp focus, how-
ever it  is not recommended that the photographer
stand closer than 3 feet for portraits of people as the
distortion of proportion is uncomplimentary to their
 features. For flowers or pets this is not a serious fault.
View original page 11
Page 12 · Read text
www.butkus.us

4-Filtels
   In using the DOVER 2x filter* the type of film must
be again taken into consideration. Best results will
be obtained while using a panchromatic film. The rea-
son for this will become apparent when the theory of
 light filters is deliberated. Orthochromatic film  rs
sensitive only to blue light and green light. Therefore,
as a yellow filter will allow no blue light to pass, there
 is only the reflected green light which will affect the
emulsion. The film will have an apparent lower speed
with the filter because only half of the light to which
 it is sensitive can reach it. Panchromatic film is sensi-
t.ve to blue, green and red light. When blue is fil-
tered out by the 2x filter, the red and green still
affect it, allowing a smaller opening to be used than
with Orthochromatic film.
  Not only must the type of film be taken into con-
sideration, but the quality of light, also. Early morn-
ing and late afternoon pictures made out-doors are
receiving a light short on blue and rich in red. This
applies to tungsten light as well. Allowance should
be made for this fact by increasing the aperture
number to allow more light to reach the film. The fil-
ter factors on the chart (L) on the rear cover of the
            the                                   portrait                     filter                   and the                                     attachment                                                           be                                      may"+tot"-gothremoved                            purposes                 for                    cleaning                                                               pulling                               by                                                   lifting and        '   outward at top of the sliding carrier.
                         l0
View original page 12Page 13 · Read text
camera are for panchromatic film. Red and olange
         filters should neyer be used with Orthochromatic  film.
       For using the green, yellow and blue filters with ortho-
       cirromatic   fi lm, the next larger diaphragm opening
      must be used than is indicated on the chart. lf  this
        calls for a number larger than 5, naturally that par-
       ticular picture is out of the range of the camera and
      should be taken without a filter or not at all.
     5-Flash Photography With Your Dovet 620 Camera.
         Flash unit and reflector (K) in the illustrated pic-
       tures # I and 2 are designed for economical use where
      the light is insufficient to give proper exposure even at
     the largest aperture opening number. Let us first
       consider the construction of your Flash Unit. Built into
      the shutter are a set of contact points which give an
        infallible synchronized flash whenever the shutter  isT      tripped and a bulb has been placed in the bavonet
I      receptacle.
       The flash is set off by the current from the two
      Pen-Light batteries, obtainable in any electrical shop
      or department store. When no bulb is placed in the
       receptacle, no current is used, making the life of the
       cells about 200 actual flashes.
View original page 13Page 14 · Read text
www.butkus.us
  Th" #S and other midget type flash bulbs offer
further saving, being inexpensive bulbs. The aper-
ture numbers found in the table are relative values
to be used only as a guide. lt is suggested that several
pictures be taken with the flash and developed to de-
termine the effect of light and dark backgrounds as
well as variations in the camera-to-subject distance.
The table figures were calculated on the basis of light
walls as background and a camera distance from sub-
ject of  f rom 1 to l0  feet. Naturally the exposure
aperture should be based upon prevailing conditions
as this chart could not cover every condition. When
making close-ups of persons or animals, it is suggested
that a single layer of handkerchief be held over
the reflector. This seryes two purposes. First, should
the bulb break and shatter, the danger from the glass
particles is obviated. Secondly, the light is reduced and
dif  f used to give softer and more correctly exposed
pictures at a distance of seven feet or less. When
flash pictures are not desired, the reflector may be
removed by simply loosening the thumb screw (M),
withdrawing the ref lector and then tightening the
thumb screw (M) so that it will not fall out and be
lost. A handy lined pouch is provided with the camera
which will keep the  ref lector  f ree  f rom scratches
when not in use.
                        l2
View original page 14Page 15 · Read text
www.butkus.us


$-lns1lu6tions  for installing cells in battery case;i.
  On the left hand side of the camera is the battery
case (K) and  f lash unit. To install cells, open the
cover of the battery case by lifting out on the catch
of the rear edge of the cover. lt is r-rot important which
cell is up and which is down, but they must be placed
into the case in opposite ways to each other. Press
cells into pcsition and snap cover shut. Bulb is in-
stalled by pressing down on bulb and turning counter
clockwise a ouarter-turn.


                            r3
View original page 15Page 18 · Read text
www.butkus.us


7-To Remove film from Camera.
  Make certain that film is completely wound on the
take-up spool. Open rear of camera by releasing two
 rollers of catch from camera body, swinging them
outward and back. Swing open the back, hook upper
flange of spool with right thumb nail. This forces
spring pin (G) upward and frees spool from winding
key, allowing  it to swing outward at bottom. Control its
swing with left thumb and pinch roll between thumb
and forefinger of right hand. Remove from the camera
arrd tape it shut to prevent  it from unrolling. Move
                         l6
View original page 18Page 19 · Read text
empty core to winding side, or nght side as seen from
       open back, pressing spool upward and in. Turn winding
      knob (F) until key engages itself in the spool. Insert
        fresh roll of film in left receptac'e in the same man-
       ner, it being unnecessary to do more than engage
       spool on pin at each end. Pull paper, printed side up,
        across to take-up spool on pirr at caclr end. Pull paper,
       printed side up, across to take-up spool and thread
       tapered end of paper into wider slot cf spool. Turn
      two or three turns to make certain paper is correctly
       started. Close camera and wind to number  I  ex-
       posure. Remember the Dover 620 camera gives you
                f 6 pictures 71/a" x 21/4" on one roll of 620 film.
      8-Color Film.
       When using color film give more care in selection
      of aperture. Remer.,ber color   f ilm has less latitude
       than black and white film. lf first roll is not perfect,
I+    do not blame vour camera, correct your mistakes in
       exposure ir, tire next roll. lt is wise to note aperture
     and light conditions for each exposure on your first
*:T-       rolls of color film. With tfese facts to go by you can
      modify your exposure on the next roll and you will
      know the limits of your camera. Never expect perfect
        results when liglrting conditions or motion is beyond
       the limit of the camcra. Your flash attachment will be
       useful in supplementing and extending natural light-
       ing where e.perture called for would be greater than
      #5.  tt is also useful to bring detail into the shadows
      when shooting towaro the light.
                                  l7
View original page 19From the M. Butkus archive. Original publisher and archive notices are retained.
Check the model and edition against your equipment.
PDF verified 2026-10-10.