Sewing machines
Durkopp "New Family" Transverse Shuttle — User manual
User manual for Durkopp "New Family" Transverse Shuttle. 22 pages in English. Read the original PDF, download or print a copy without registration.
22 pagesEnglish3.2 MB PDF
Loading your manual…Open PDF directly
Document details
- Brand
- Durkopp
- Model / document
- Durkopp "New Family" Transverse Shuttle
- Document type
- User manual
- Language
- English
- Pages
- 22
- File size
- 3.2 MB
- Category
- Sewing machines
- Document date
- Not specified in catalog
Search available document text
Find a term, then jump to its page in the original PDF. Image-only pages may not be searchable; check the PDF for exact wording and diagrams.
Page 1 · Read text
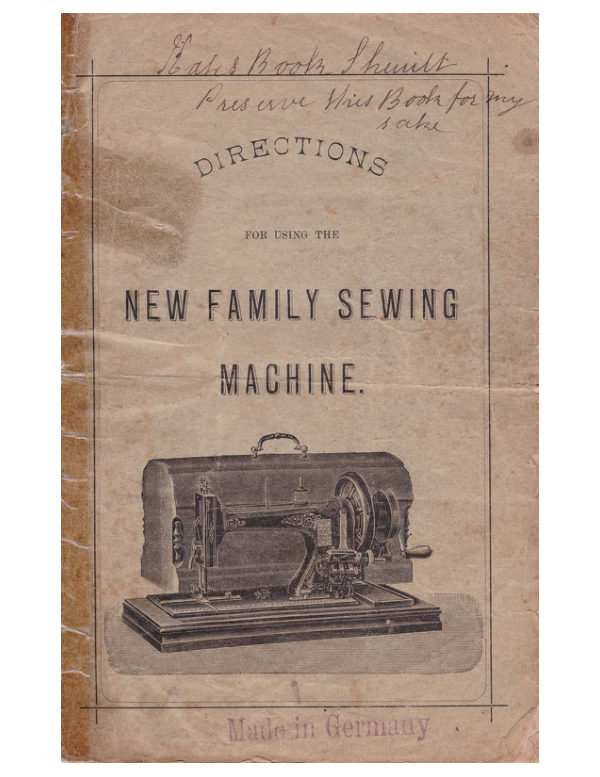
baks Book Shuilt
     Preserve His Book for
                s ahe
   DIRECTIONS


                FOR USING THE


NEW FAMILY SEWING

     MACHINE.


      Made in Germany
View original page 1Page 4 · Read text
The hints given on this page
Are introductory to those that follow and should be
             carefully read by the beginner
     before commencing to operate the machine.


      If sent by rail,the machine and stand will be found
packed in a case or a frame.
       In removing the machine from the case, unpack it care-
fully. The various pieces used in packing can readily be removed
 without injuring the machine or the packing case. All machines
 are sent with sample of work, and it is well not to remove such
 sampleuntil themachine is fixed upon the stand, for reasons
 afterwards mentioned.
      If thestandfor the machine issentunmounted, let the
 operator put it together in the following manner.
     Hold the two sides of the stand upright.one in each hand,
 placing to the right the one having a hole for the axle or the
 drivingwheel, and with the projections at top pointing inwards;
 then put the treadle plate in its place, placing in front the arm
which connects the pitman with the wheel. Insert the two ends
of the stay rod into the treadle plate andsides,and screw on
 the nuts turning them only two or three times round; put the
cross-brace uponthe stay rod,insert the two bolts through the
 supports and the top extremities of the cross-brace; put on the
 nuts, tightening them and those of the treadle-bar firmly. Insert
 the bearing stud for drivingwheel, andscrew it firmly in its
 place, (which will be found near the centre of right-hand side of
stand,) by means of the hexagon nut; thenput on the driving
wheel and connect it bymeans of the woodpitman with the
treadle. Now screw the table on the upright support; place the
machine on the table, and fix it thereto by means of the hinges
 with the screws provided for that purpose; and having placed
View original page 4Page 5 · Read text
4

the leather driving-band over the pulley on the balance wheel of
machine, through the holes in top of stand and round the driving
wheel below, the machine is then ready of use.
    NOTE.— In fixing the driving-band, the two ends of it should
be hooked together before it is slipped round the driving wheel.
    Havingset up the machine as instructed, before removing
the sample of work, or commencing to operate, let the beginner
give particular attention to the way in which the machine is
threaded up; indeed, it is best at this stage to become thoroughly
acquainted with the method    properly preparing the machine
for sewing by carefully studying andfollowing the directions
given in paragraph marked.  "To thread the needle" (page 8).
     The sample of work ought to be taken out of machine, the
 shuttle taken out of its place and the thread taken out of the
needle, before the learner begins to work the treadle.
View original page 5Page 6 · Read text
Fig. 1.


          33


                                Fig. 2.


              The treadle motion.

     Place the feet lightly upon the treadle, keeping the hollow
of the feet over the bar upon which the treadle swings, then
View original page 6Page 7 · Read text
6

with the hand turn towards the operator the wheel (36) on right
of the machine, allowing the feet to move freely with the motion
thus given, and continue this motion with the heel and toe alter-
nately until a regular movement is acquired. It is of great value
to spend a little time at this, frequently stopping, andstarting
the machine again, so as to thoroughly accustom the feet instintively
to control the movement of the machine, which is very soon
acquired. An easy regular motionof the machine is a great
desideratum, and the operator will best acquire this by being
 seated at a comfortable distance from the machine, keeping the
bodyrather erect and quite steady and effectingthe treadle
 motion by the limbs only.


              To wind the bobbin.


       Before starting to wind, pull down the lever on the back
 of the flywheel, in doing so the machine is set out of motion.
 This manipulation is not absolutely necessary, as the bobbins can
View original page 7Page 8 · Read text
be wound at the same time the stitching is done, but in most
cases the former mode is used for winding. To wind the cotton
on to the bobbin, place the two points of bobbin between the
piston m. on the left, and the cupin. on the right above the
plate i. The little brass plate on the bobbin with a hole in it
to the right so that the little pin will go in, and by this means
carry the bobbin round.  Place the reel of cotton on the pin 21
nearest the flywheel, draw the cotton from back to front through
the slot on the top of guide g.  Then through the tension plates
d. back again through the second slot b. and down at the back
of guide g. on to the bobbin. Now pull the bobbin a little to-
wards the left, and clamp the end of the cotton between the little
brass plate and cup on the right.
      This done, press the winding apparatus against the flywheel
by which action the plate i. will press against the bobbin. Set the
wheel in motion and the bobbin will begin to wind. Care is
to be taken that in starting to wind, the cotton is drawn tight at
the reel.
    As soon as the bobbin is filled the apparatus is thrown out
of motion automatically. Then press the plate i down and take
the bobbin out.
View original page 8Page 9 · Read text
Fig. 5.


             To thread the shuttle.


      Having removed the bobbin from the winder take it between
the thumb and finger of the right hand, being careful that the
thread comes over the upper side of the bobbin towards the hand.
At the same time take the shutttle in the fingers of the left hand
with the point towards the hand, place the end of bobbin in the
spring centre in the end of shuttle next to the point, andgently
press it down into its place. Pass the threadout at the long
slot "a" nearest to the bottom of shuttle, in at the other, and from
thence carry it over to the thension holes b., passing it through
one nearest the blunt end first, then through as many holes as
may be necessary to obtoin the tension required, always finishing;
however,by passing it through the hole nearest the point, either
from the inside outward, or from the outside inward (in the latter case

pass it out through the slot c.,) and finally in every case under
 the spring d.


   Instructions for threading the automatic
                    shuttle.


     To put the bobbin into the shuttle, place the point in the
 centre of the spring piston and press the other point slowly down
 the groove at the other end of the shuttle until it fits into the hole.
     The bobbin must be put in so that the cotton draws from
 underneath on the side where the bar "a" is in the shuttle.
                             "a" right across the shuttle, Bring the cotton round the bar
View original page 9Page 10 · Read text
thenPressdownwithslotthe "b',thumbin springof leftinsidehandshuttleon theandcotton,pull downwards.and bring it
                                  Now drawto the back part of shuttle under the end of spring.
 the cotton towards the point of shuttle so that it comes out at
the hole „C"in the middle of spring.
     With the aid of the small screwdriver you can regulate the
tension by turning the screw "e" to the right to make it tighter
and to the left to make it looser.
          To thread the needle.
      Pass the thread from the reel through the eye at the side
 of the face plate, downwards under and between the tension dises
        (23), upwards through the eye of the check-lever (24), then through
 the hole in the needle-clamp (18), and through the eye of the
 needle.

               To oil the machine.

       If the machine is onlyused occasionally, it requires but
  little oil, and in the following places: the sides of the needle-
 bar (7), in the four holes on the top of the arm, the two holes
 on the side of the arm, the shuttle carrier slide, both ends of
  the pitman (F, E) and feed-lever, the feed-raising cam (B, C),
  the centre joint of the feed-lever (D), and the feed-bar by drawing
 out the slide.Occasionally oil the places indicated in the follow-
 ing Note.  After oiling, put the machine in rapid motion for a
     minutes thenwipeoff the superfluous oil from the lower
  end of the needle bar, the presser-bar, and from the shuttle-race,
  and shuttle.
                        - It the machine is in constant use, it requires to be well      NOTE.  oiledtwice a day in all the places enumerated above, and also on the
  tollowing places: each side of the treadle where it rests upon the cones
                    both ends of the wooden pitman,the axle of the
  balance - wheel, the hinge of the check-lever (9), the points of the bobbin
   the face of the shuttle, the stitch regulator-slide, the winder-spindle (31),
  and the top of the lifter (20).
            It the machine works hard while in constant use, it is certain that
  some place requiring oil has beenoverlooked: it it works hard after
  navingbeen out of use for some time, or after using inferior oil use a
    little paraftin oil, then oil with the best machine oil.

             To commence sewing.
      Open the shuttle-race cover, place the shuttle in its carrier,
  leaving out about two inches of thread, and close the cover within
View original page 10Page 11 · Read text
10

an eighth of an inch; draw about two inches of thread downwards
from the check-lever and through the eye of the needle, holding
the end with the left hand, allowing it to be slack from the hand to the
needle, while, the wheel (36) is turned towards the operator, until
the needle moves down and up againto itshighest point;
pull the needle threadgently, and theshuttle-thread  will appear
                      Leave the threads to the left anderwith it, then close the cover.
the presser-foot, place the fabric under the needle,lower the
lifter, and commence sewing.  Having made a few stitches, stop


                                 Fig.


                  Fig. 7.                            Fig. 8.


and examime them.   Should there be loops projecting or a straight thread
upon the lower surface (like fig. 8), turn the tension seeew (30) on the top
 of the machine to the right, so as to tighten the tension on the needle
 thread.  If the thread lies straight upon the upper surface (like fig. 7), turn
 the tension-screw to the left to loosen the tension of the needle thread.
The secret of perfect sewing lies in the adjustment of the tension
of the needle thread, so that it will be equal to that of the
 shuttle (like fig. 7), and the adjustment of either may be regu-
lated as before described.


              To adjust the needle.


       Allow the needle-bar (7) to rest at its highest point, and
 loosen the needle clamp nut (17). Take the needle between the
 thumb and fore-finger ot the left hand, having its long groove
towards the operator; put the point down through the hole in
 the needle-plate; turn the wheel gently while the needle is guided
 under the needle clamp (18) on end of needle-bar, until the gauge
 mark (a line graven in the needle-bar, near the top) rests even
or full above the top of the arm; then adjust the needle eye
level with the needle-plate, and tighten screw.  Observe that the
 needle passes through the hole in the needle-plate without touching either side.
 If it touches, take hold of it near its point and press it gently
 in the opposite direction.
View original page 11Page 12 · Read text
11 -

          To regulate the tensions.

      Test the tension of the shuttle-thread by drawing it towards
the round endof the shuttle; ifit drawsas tightly as it
 will bear witbout breaking, it is right for fabries of firm texture;
 thin, soft fabrics require less tension.  To obtain more or less
 tension, pass the thread through more or fewer holes. (See p. 7.,
"To thread the Shuttle".)
    The tension of the needle-thread is regulated by turning the
 tension screw (30).  To test the tension draw the thread down-
 wards from the check-lever (24), turning to the right the tension
screw (30), until the thread draws as tightly as it will bear
without breaking, except for thin, soft fabrics, when the same
 rules applies to the needle thread as to that of the shuttle.

        To alter the length of stitch.
     The stitch regulator screw (28) is adjustable in a slot.
To lengthen the stitch, loosen the serew, and move it to the
 right; to shorten the stitch, move it to the left. After adjusting
the length of stitch, tighten the screw.
               - When the screw is at the end of the slot, and the
stitch not so short as desired, change the serew into the hole at the end
of the stitch regulator, then move it still further to the left.

           To remove the work.

     Allow the needle-bar (7) to rest at its highest point, raise
the lifter (20), and draw the fabrie from the left side of the
presserfoot (38) upwards about three inches; then eut the threads,
leaving the ends long enough to recommencesewing.  Seams
requiring to be extra strong at the endsshould be secured by
takinga fewstitches in the opposite direction before removing
the work, the same as in handsewing.


      The preceding Instructions are full and complete for the perfect
use of the machine.

      A few special notes are added below in explanation of every

adjustment that may be necessary during the long-continuaed use of the
machine.
View original page 12Page 13 · Read text
— 12 -

    THE SLACK-THREAD-PIN (29) presses down the check-
lever (24).  It isadjusted properly for all classes of general
sewing, and should never bealtered unless thethread
breaks in sewing very thick eloth; then loosen the screw (29)
and adjust the slack-thread-pin a very little lower.  Should it
become displaced, re-adjust it according to the following rule:
 It should begin to press down the check-lever when the needle-
gauge-mark is fully one-eighth of an inch above the top of
the arm.

    THE CHECK-SPRING (9) draws up the check-lever (24).
 Should it break or wear out, insert another as follows: let the
 needle-bar (7) rest when the gauge-mark is level with the top
of the arm, take out the screw that holds the spring, draw the
 check-lever out half its lenght, holding it while you put in the
 spring with its hook end downward, then move the check-lever
back into its place. Replace the screw, turning it a few times
 only, press down the end of the spring into the first hole (or
 into the second if using coarse thread), and tighten the serew.

      THE FOOT-BAR SCREW (33) regulates the pressure upon
 the fabric: turn it to the right to increase the pressure, and to
 the left to decrease it.  Fabries of thick or firm texture require
 more pressure than thin and soft fabries.

    THE LEATHER BAND must be tight enough to work the
 machine without slipping.  If it is too loose, eut about half an
 inch from one end and refasten it as before

      IF THE NEEDLE-THREAD BREAKS when the needle is,
 adjusted properly, it is caused by the tension being too small,
 the slack -thread -pin becomingdisplaced see Noteabove), a
 roughness on the shuttle or its carrier,or sometimes, when using
 coarse silk, by the point of the needle being bent.

       IF THE SHUTTLE-THREAD BREAKS, loosen the tension
 by passingthe thread through fewer holes.  (Seepage 7, "To
 thread the shuttle".) Or by loosening the serew in the self
  threading shuttle.
      IF THERE ARE MISSED STITCHES,theyare caused
 by the needle being adjusted too high or too low, by its being
  bent away from the shuttle, being too small for the thread, or
 by the point of the shuttle having become blunted.
View original page 13Page 14 · Read text
- 13 -

      IF THE NEEDLE-THREAD FORMS SMALL LOOPS on
the top of the fabric it is caused by the check-spring (9) having
become broken (see Note above "The Check-Spring"), and some-
times, when sewing with coarse silk or linen thread, by the
needle being too fine or its point being bent.

      IF THE STITCHES VARY IN LENGTH while hemming
or sewing very thick and soft fabrics, loosen the feed-raising
cam (C) and move it a little to the right to raise the feed
points, then thighten it firmly; do not raise the feed-points too
 high: when they drop down in working they should be a little
 below the surface of the needle-plate.

    SEAMS IN HARD COTTON FABRICS should be passed
 over slowly, and, if extra thick, rub a little white soap on them,
 which will facilitate the passage of the needle.

    THE EXTRA NEEDLE-PLATE, which has a large hole,
 is only required when using a No. 4 or 5 needle with 30 to 60
 linen thread: never use it for any other numbers.


           Accessories supplied with the
                    machines.

                                 11)  1 Braider   1) 12 Needles
  2)  6 Shuttle Bobbins        12  1 Oiler
                        13  1 Book of Instructions  3)  1 Screwdriver
  4)  1 Extra Check-spring        14) - 1 Ruftler
  5)  1 Extra Needle plate     15  1 Trimmer
  6)  1 Straight Guide           16) 1 Cord fastener
                                 17)  1 Adjustable Binder  7)  1 Hemmer
  8)  1 Adjustable Hemmer       18) 1 Quilter
  9)  1 Feller                  19) 1 Corder
 10) 1 Ordinary foot

        (These Accessories are given complete with the Family-Machine
  only. The Nos. 9, 11, 14, 16 and 19 are not given to Medium-, Titania-
  and Cylinder-Machines.)


          The following pages explain the use of the Accessories.
View original page 14Page 15 · Read text
1+

                               Fig. 9.


            Hemmer.

           TO MAKE A NARROW HEM.

      Adjust the hemmer to the presser bar.  Commence the hem
by folding it at the end, then pass a thread through by means
of a needle, drawing the thread and the fabric into the hemmer
 (or pass the edge of the fabrie into the hemmer without a thread,
lower the lifter, and commence sewing, guiding the edge of the
fabric with theright hand.  If theedge unfolds out of the
hemmer, move the fabric to the right, if it folds too much
into the hemmer, move it to the left.
                 Feller.
            TO MAKE A FELL SEAM.

     Join the two edges of the fabrie by a seamabout three
eighths of an inch from the edge, then open out the seam, trim
one edge, and pass the other one into the feller to turn the fell
in the following manner.  Pass the edge of the fabric into the
feller, lower the lifter, andcommence sewing, guiding the edge
of the fabric with theright hand, when the feller will neatly
turnand stitch downthe raw edge and form a second line of
stitching regular and at an equal distance from the other.
View original page 15Page 16 · Read text
15 -

                              Fig 10.


             TO MAKE A WIDE HEM.

     Use the Feller (see above), turn one fold only of the fabric
being hemmed the width required, adding about one-eighth of an
inch.  Proceed as with ihe narrow hem, and fix the fabrie with
the straight guide as usual.
                              Fig. 11.
View original page 16Page 17 · Read text
-- 16 -


              Adjustable hemmer.

  (FOR HEMMING TOWELS, NAPKINS, TABLE--CLOTHS,
           AND OTHER COARSE FABRICS.)

     Adjust the hemmer (fig. 11) to fold to desired width of
hem, fix it firmly to the machine with the thumbscrew, then turn
down the edge of the fabric one fold only, and pass it into the
hemmer with a double fold to complete the hem. If the sewing
is not on the edge of the hem, loosen, the screw, and move the
hemmer a little to the right or left, until it is in the right
position.
                                 Fig. 12.


                Braider.


      Adjust the braider to the presser-bar, pass the"ends through
 the eye at the top of the arm, then take a short piece of thread
 and pass the ends through the slot in the braider,forming a loop;
 place the endof the braid into the loop and drawing the thread
 through the slot, the braid will pass through with it.Or pass
 the braid through by pushing the end with the point ef a needle.]
 Stamp or trace the design on the fabric, and guide it as re-
 quired.
View original page 17Page 18 · Read text
- 17 -

                                  Fig. 13.


               Quilter.


      Adjust the guide on the presser-bar by passing the horse-
shoe shapedclamp over the presser-bar from behind, bringing
the holes in it in line with that in the presser-bar immediately
above the presser-foot: through these holes pass the rod of the
quilting guide from either side, and when the guide is at double
distance from the pattern required, tighten the quilter in its po-
sition by means of the thumb-screw inserted in the hole in the
bend of the clampabove mentioned. Make two straight lines
upon it; then adjust the gauge-arm the required distance for the
next line of stitching, andguide the fabric with the line already
sewn directly under the gauge-arm on either side of the needle.

               Adjustable binder.

     Adjust the binder [fig. 14] to the desired width of binding,
tix it firmly to the machine with the thumb-screw; place the end
of the binding over the feed-points and its edges under tha clips;
theplace the fabrie between the clips, and guide it against the
binder.  If thesewing is not on the edge of the binding,loosen
the screw and move the binder a little to the right or left until
it is in the right position;theunder clip may be adjusted to
fold the binding wider on the under than on the upper side of
the fabric.
View original page 18Page 19 · Read text
— 18 —

                                   Fig. 14.


                                   Fig. 15.


               Corder.

     Adjust the corder-foot to thepresser-bar, pass the cord
into the eye of the guide which is held in the left hand between
View original page 19Page 20 · Read text
19

the folds of the fabric, with its end opposite the first groove in
the foot; in placingeach succeding cord, guide the fabric with
the last cord sewed in the second groove of the foot. In Cor-
ding asquare corner always allow the needle to remain in
the fabric.

             Trimmer.

     Adjust the trimmer to the presser-bar; place the braid,
velvet or ribbon in the slot and under the needle; then guide
the fabrie and the trimming to stitch on the desired line or
pattern.


        Fig. 16.              Straight guide.


                        When you wish to sew parallel to an
               edgefasten this apparatus byits screw.
                 According to the desired distance of the
                width from the edge, the guide is to be
               moved more ur less.


                              Fig. 17.


           Cord-Fastener.
View original page 20Page 21 · Read text
20 -           -


                                    Fig. 18.


                 Ruffler.


 (The under side of the fabric is shewn in the place of the upperfside.)

      Assisted by thisapparatusyou may fold andgather the
lower one of two fabries whilethe upperone remainssmooth.
The aparatus is fastened to the machine by the gauge screw 33.
Place the fabric, that is wanted to be gathered, below the ga-
therer, and the other one upon it, and then lower the presser
to fix the upper fabric; only the lower one will be pushed by the
feeder and gathered. The longer the stitches the wider will be
the folds.
View original page 21From the ISMACS International. Original publisher and archive notices are retained.
Check the model and edition against your equipment.
PDF verified 2026-10-11.