Film cameras
Ensign All-Distance Twenty User manual
User manual for Ensign All-Distance Twenty. 29 pages in English. Read the original PDF, download or print a copy without registration.
29 pagesEnglish3.6 MB PDF
Loading your manual…Open PDF directly
Document details
- Brand
- Ensign
- Model / document
- Ensign All-Distance Twenty
- Document type
- User manual
- Language
- English
- Pages
- 29
- File size
- 3.6 MB
- Category
- Film cameras
- Document date
- Not specified in catalog
Search available document text
Find a term, then jump to its page in the original PDF. Image-only pages may not be searchable; check the PDF for exact wording and diagrams.
Page 1 · Read text
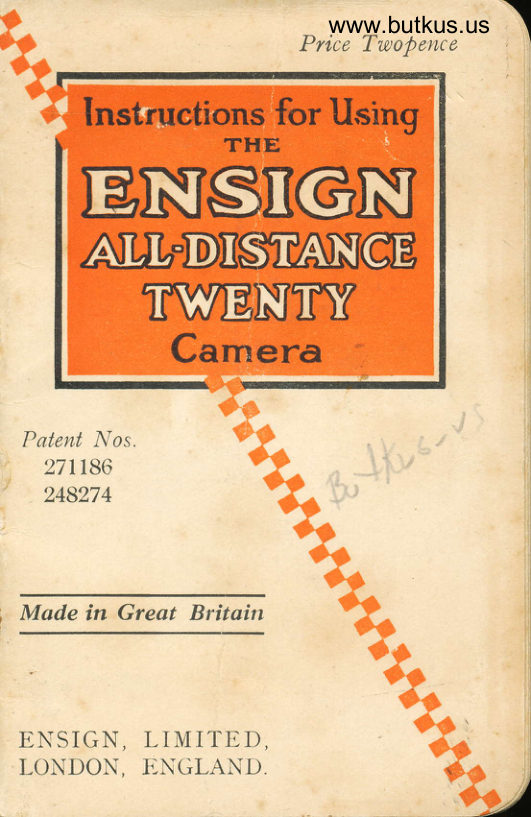
www.butkus.us
                           Price Twopence


  Patent Nos.
    271186
    248274


', Made in Great Britain


 ENSIGN, LIMITED,
 LONDON. ENGLAND.
View original page 1Page 5 · Read text
7

         tNSIRUCilONS.
     BEFORE LOADING,
       Read these brief directions carefully
        wit

     THE ENSIGN "ALL DISTANCE      T\UIENTY " which is a very compact
       all-metal camera measuring only 4t" x
         41" x3", takes the standard eight-exposure
        3t" x)1" daylight loading film E.zo Ensign        (o1 any other make of this size.).


                                                 Digitally signed by mike butkus
                                       cn=mike butkus, mike               DN:o=orphancameras,                                                       ou=29,
                                        email=mike@butkus.org, c=US
                                           Date: 2019.06.20 18:27:24 -04'00' butkus


                             Fig. r.
      The illustration  (Fig. r) shows the
       camera front and its " control " side with

                                                  1
View original page 5Page 6 · Read text
www.butkus.us
 the various parts lettered to assist identi-
 fication.
 A-The " All Distance " lens and tele-
     scopic mounting (Patents z7rt86 and
      248274).
 E-Vpp.r view finder, for vertical pictures. C-Side view finder, for horizontal (or
     oblong) pictures.
 D-Front frame of the " Direct-vision"
    view finder, for both Vertical and
     Horizontal pictures, drawn out ready
     for use.
E-Back sight used in coniunction with D. F-Film winder, non-reversible.
G-One of the two side catches for opening
    camera for loadine.
H-The  shutter lev'Er, for making all
     exposures.
 I         for changing exposures from                                           tt                           Time.', -Lever"Instantaneous " to
J     Stop " lever for controlling the lens  -" aperture, according to the light.
K-Leather carrying handle.
  T.y the actions of the shutter botht'T"    and "I" and observe the difference
by looking through the camera with the
back rem_oved, alio move the stop lever
from "Ordinary" to "Bright"  light
positions and note the effect.
  The lens mount (A, Fig. r) has twopositions : IN, for all subjects ro feet or
more away from the camera up to the
most distant subjects, OUT for all sub-
iects under ro feet awayTi6fr the camera,
View original page 6Page 7 · Read text
7

                                            head        dqwnr to 3; feet. At 3 feet, a large       and shoulders portrait may be taken with
        pleasing dffinition without any magnifier
          or portrait attachment.
       Now examine the inner arrangements
        for receiving the full and empty spools
         for loading and winding the film: to do
           this, grasp the winder (F, Fig. r) and draw
            it outwards as far as it will comer then
         ,depress the outer end of the catch (G'
        FiE' r) and move it to the opposite side
         of locking bridge: do the same with the
        corresponding catch on the other side of
         camera, thenldraw the back body straight
            off, revealing the cone as shown in Fig. z.


                  , :                  Fig. z.
                  '        The empty spool is mounted between
        the upper: ends: of two springs, one: of
View original page 7Page 8 · Read text
www.butkus.us
 which has an opening large enough for
 the camera winder to pass through (when
 the camera is closed) and engage-with the
 winder slot in the spool, the other spring
 has a plain bearing stud on which the
 spool turns.
            spool of film goes between the - The full lower ends of these springs, both of which                    -fhere have a bearing stdd.                          are also
 pressure springs at each side to keep the
 film from slackening while loading and
 winding, and at ttie open end oT the
 99ne are polished rollers to guide the film round the corner without frfction.


                      B


                    Fic.g.
  The spool (Fig. 3) has at one end a
plain hole. as shown at A, and at the other
a slot or keyway, shown at B to take the
winder key. The end with a plain hole A
mustrrrLrDL beuc placedptaucu onon fllethe bearjneoeanng stuctstud rnin
the upper end spring, while tfie slottedend B must be placedolacEd behindbehind thethe holehnlc
in the spring as sebn in Fig. z to allow the
winder key to engage in it.
  Inside the back portion of Camera, Fig.
4., there is a pair of liglt springs for keepirig
the film in contact, also the iuby windo#
through which the film numbers are seen.
View original page 8Page 9 · Read text
r


                              Fie. q.
     LOADING THE CAMERA.
         Ifhen the action of the various parts is        thoroughly understood, proc-eed to load
        the caireia, but remember that   " 4^y-          lieht loading " film is only protected^  from                                                                  if                                   backing, -and          tlie light by-unroll,its paper         allowe-d to       or even to become
                                            any          slack, it will be fogged instaltly by
         form- of white light' either before or after
        the film has received its exposures in the
       A6;dvantage of what shadow You. can
                                                  a        find whilst inserting the film:  if in
       room keep away from the brilliant light
        of a window, or turn Your back to it,
         keeping the camera and film in the shadow
         of your body.
        To load the film correctly into the cone,

\
View original page 9Page 10 · Read text
www.butkus.us
study the following diagrams with
relative description'-
STAGES OF LOADING.
    _..-J <)              Stage (a) Place               !                           full spool be-      3-=      B:i          tween bottom             l>-                    ends of loading                           a  n      N:E                                     break        Rrst                        | 0ll  springs,                                seal, and see that
                        o          paper leads out
       M  as shown by    :{1                arrow.
              /              Stage (b).
                 Draw  out
                          enough paper
                        to go round
                    both  pol-
                        ished rollers
                 and about
          !..6b>            two inches                              past the emp-
                           ty spool; re-                     o,;9i::R'38             N          move this                    spool from
                     the  springs,
                   and keeping
                     the keyway
                       towards the
open spring, thread the pointed end of the
paper through the saw-cut in the centre
of the spool, one side of which is cut wider
than the other to receive the paper. Give
View original page 10Page 11 · Read text
r

           the spool two or three turns in the direction
        shown by the arrow, BE SURE THAT
      THE PAPER MEETS THE FLANGES
      EQUALLY EACH SIDE, and that the
         paper is tightly gripped, then
                                       Stage (c). Re-
                                  place the spool,
            e   T   locatingway centralthe key-in         !                               hole in loading
                                                o                                         sprrng.                ill         o                   Now replace                H:;N!                             the back body,
                           lock   both
                                       catches, and en-       f.<            gage the winder
                       by pressing it
          inwards, at the same time turning it in
       the direction indicated by the arrow
        marked around it.
         As soon as it slips in, wind steadily on,
         looking into the red window at back,
        and watch for the warning sign: in some
          films this is a row of dots or arrows, in
          others a hand pointing, or the figure o,
           but, as soon as this appears, wind carefully
           until the figure r shows in the window.
         This is the same in all films and indicates
           that it is ready for ttre first exposure.
           After taking the first picture, wind
         'immediately to 2, and so on; make a
          practice of doing this always, for by
           this means you will save the blanks and
        double exposures that may otherwise
           occur.
l-
View original page 11Page 12 · Read text
\                      www.butkus.us
 MAKING AN EXPOSURE.
    ITith No. r film in position, decide
 whether your subject is nealrer than rJiil;
  if it-is, pull out the lensf,ITt is ro feet or
  turther, prrsh the le^ns right in. If you are glvrng a "Snapsloa,' o-r (,.fnstantaneous")
 exposure, see that the shutter controi lever (I, Fig. r) is set facing (6I,' o;- the plft-er and while you are -viewing the
 subject in the view-finder, press tt e iEutte.
 Iever (H, Fig. r) gently hb*r, ,, f"i
 will go, making ttre exposure; the lever"r-ii
 returns automatically in readiness for the next exposure.
   Aroid shaking the camera or you will get a  ,_,
 blurred picture Iooking as if it is out of foius.
    . Th. upright view ls most suitable foi etther one or two standing figures or one         sitjing, fSu.re              .under ro T".t" away: rhe horizontal or " oblong', finder witt be
 found most suitab_le foi 3 or more fig".;; rn a group, and for most view or land-
 scape pictures, but the user's own judg_
ment will somerimes decide to varv thls
arrangement, with advantage t0  the"composition" of the picture.-
  The Direct Vision View Finder con_
sists of a frame and a back sight ; tt.Vboth drawn out from ttre "siA6     th;"..
camera as shown in the illustration, "f"Fig. 5,
and. the object to be taken is sighted irrroiig-ti-;ig,T;      frames,     smaller j,  backPoltt        .rheberng placed close to the eye, and then lhe
yiew or subject which .an be seen in the
tront trame will be that taken on the fi.Im.
View original page 12Page 13 · Read text
r


                                 Fis. 5.
             Ttre chief value of this view-finder is that
           pictures are taken from the eye level, instead
          of waist level as with the ordinary finder,
            also that one is lookingtowards theobiectand
               is more readily able to secure the most fav-
          ourable moment for making the exposure if
         there is a possibility of movement occurr-
           ing, as in child portraiture or groups.
         The lens-stop lever (J' Fig. r) should be
           facing the words " Ordinary light " unless
         the light is very bright or when photo-
        graphing seascapes and beach scenes
           iottetr the levef should be moved to
          " Bright light."             '$71ien the conditions are too dull for
         snapshots at all, or the position of the
          subJect is shaded either by trees or build-
          ings, a " Time " exposure will be neces-
           saiy : the camera must then be supported
        on a table or tripod, or any fixed support;
             if outdoors a gate, fence, window-sill or        even holding it (firmly) against a tree or
View original page 13Page 14 · Read text
www.butkus.us
         post will.do, provided it will remain quite                                                                                 '         firm while the shutter lever is used.
        Then the control lever (I, Fig. r) is                                              t,,        placed to the position  '. T                                 tLe stop
         lever to " ordinary light " and ihe shutter
         lever p-ressed down and let up; you will
       remember that this differs from-tie snap-
        shot or instantaneous exposure because^it
        remains open until you let the lever up,
        so that the time of the exposure is under
 {      the control of tlr-e user entirely.-for Usually         " down and up " is sufficient      out-of-
  I     doors " Time "  exposures in shady or                                               -is        dull situations, bur if the subiect     a
        dark one, or it is late in the afternoon, the
        shutter lever may be held down for-one
        or two seconds before letting it up. For        indoor " Time " exposures, ihe coiditions
       vary so gr-eatly that only a quite rough
       guide can be given, but over-bxposure-is
         easier to deal with than under-exposure,
       so when in doubt give longer exposures.
         Always avoid the light shining towards            -        the camera whether outdoors oiindoors   :           it should be behind the camera although
          !t may be to the right or left, but nit        faggng directly into the lens or the picture
         will be very dull or " flat."
        In the case of Portraits outdoors,-littlethe       choice of background is worth a
       study: a brick wall is about the worst,
      one covered with creeper or ivy is ratherl.      better, but the glossy leaves hive a ten-
      dency to reflect light and come out like
       white patches in the print. If you can ger
]                                                         II
h                                                      ,-/
View original page 14Page 15 · Read text
7-
n        the bitter a fair distance away from the
        background (several - feet). !h.   slight           diffufion of focus will be a distinct advan-
                                           and          tage : for instance, sitter at 3+ feet         ba-ckground at ro+ or-- r-r f.eet with the               -pulled           lens                    forward will be iust sufficient
        to p"t the background slight-ly  . out 9{
         focus and soften any details which would
          clash with the sitter
                                           been       Vhen atl eieht Pictures have         exposed, continie to wind until the end
           of^ the paper passes the window, tlen                        ^catclies,       undo thi          pull out the winder,
        draw off the back, removed the exposed
          film from the upper side of che loading         sDrinss and, w6iie holding it  carefully          t6 prEvent  ii slackening, stick it with the                                          found          " Elxposed " label which will be         near the end, and put it away out of the
           light until it can be develoPed.
           For the sake of those who have had no
          pt
          necessary to repeat this warning:-Do
                                                       pictrrre-s."        ffi'see                   the        There is nothing to be seen until after
                                                       a         development, which must be done in
           orooet^ dark-room, with ruby light, or in
                i tifrt-tight tank. Any white light.which
          reaJhes the film witl spoil all the pictures
          in a fraction of a second.
          Remove the now emPty sPool from the
         bottom loading springs to the top, being
           careful to see ttrat the slotted end of the
          soool eoes behind the hole for winder, and
             tire .alnera is then ready for reloading.
                                       l2
View original page 15Page 16 · Read text
I                          www.butkus.us
         PICTURE MAKING HINTS.
t
     STREET PHOTOGRAPHY.
             It is essential that the camera should
        always be held level. If it is tilted upward,
        buildings will appear to be leaning back-
I      ward and inward. It it is tilted downward,
       the buildings will appear to be leaning
       forward and outward.
     CHILD PICTURES.I         $7hen taking pictures of children, always

                                         good I     followhowever,theirin yourmovements.efforts to obtainBe careful,
         pictures, that you hold the camera steadily'
       as this is most essential.
     LANDSCAPE PICTURES.
         Be very careful to select the right stand-
        point, and endeavour to find the most
          artistic composition.
fi     SEA AND BEACH SCENES.
       Be careful to use the correct stop, and
        to have the sun either to the right, or to'l        the left. If you have it in front, you will
                          you have itl      get a silhouette effect, if
       behind, the result will appear flat and
         uninteresting.
                                    r3
n'raq                                               )
View original page 16Page 17 · Read text
r
      COMPOSING THE PICTURE.


                               common     A NYBODY with ordinarY     A  sense can take a photograph, but it     a rnot evervone who without a thoughtis
        can " make a picture." We have only to       look at pictures produced by serious
                                                          a        workers to know that photography as
       means of producing pictures is anyth-ing
        but automatic and mechanical. \Jfe often
         hear our friends, the budding and would-be
           artists, denouncing with all the vigour of


\
View original page 17Page 18 · Read text
't                     www.butkus.us
                       their ignorance
                       the lack of real
                      art in  photo-
                        graphy, and.that
                a camera ls a
                       thing without a
                      soul. So is the
                    palette  and
                       brush before the
                           soul gets behind
                                 it. It is the same
                      with a camera;
                                  it gets its soul
                      from the photo-
                       grapher. As we
 I             !                     I see the painter's
masterpiece and the wooden, stiff photo-
graph, so also do we see the beautiful
photograph and the wooden soulless
painting. In other words, the brush or the
camera is only the outlet for the artist's
inspiration, be he painter or humble
photographer. The composition of a
picture requires more care than anything
else. The photograph is either made or
marred by composition, and a little extra
patience and thought beforehand will often
turn a dull subject into a pictorial success.
  The particular points to be studied in
landscapes are :-
             r.  Foreground.
         2. Background.
         3.  Lighting.
         4.  Position of objects.                            photographer.         5. Position of
                           r5
View original page 18Page 20 · Read text
\                     www.butkus.us
DEVELOPING AND PRINTING.
  By far the most fascinating part of the
hobby of photographv  is to be found in the
actual production of the picture, after
exposure has been made. The little time
and trouble required is amply repaid by
the pleasure and amusement to be had.
   It  should not be thought that the
developing of one's own films, and the
subsequent printing of the negatives,
necessitates a large and comprehensive
installation-nothing could be further
          from the truth.
            Developing and printing  is
          reduced nowadays to an almost
          automatic process, unless it  is
            deliberately desired to go fur-
         ther into the chemical and
            scientific side of the hobby.
        You do not require a specially
            fitted up dark room, nor is it
          even necessary to take a room
         and make it dark, by hanging
       up temporary curtains, etc.,
          before the work of developing
        can commence.
             All you require is a suitable
         tank, such as the "Ensign
          Carbiner" procurable from any
                          r7
View original page 20Page 21 · Read text
rt7
       photographic dealer's $op, and a few
                                          chemicals,       packets of already made up
                                                     a      which only require to be dissolved in
        given quantity of water. Any bath-room,
         therefore, is an admirable place in which
        to carry out the process.
      DEVELOPING, FIXING AND
      WASHING THE FILM.
       Materials Required.
            r.  Ensign Carbine Tank, the right size
              for your sPools.
         2. DeveloPing Powders.
         3. Fixing Salt.                                      +/
         4. A small thermometer is useful for
              gauging the temPerature.
         5. Such other accessories as you may
                                                 dishes,            think desirable, such as
                  etc., though these are not essential'
         Assuming that you have procured the
         necessary materials, all you have to do is
                                          required       to dissolve the powder in the
                                                 the       amount of waterr as indicated on
         packet, and pour it into the tank.
        You then take your exposed spool, and
        load it into the tank, in very much the
       same way as you put it into the camera,
          that is, you do the whole thing in complete
                                        r8
\
View original page 21Page 22 · Read text
www.butkus.us
daylight (exact instructions as to how to
               are issued with the "Ensignprr, il.  film in
Carbine" tank).
 The process of developing occupies                                com-about ten minutes' Vhen this is
pleted the developing solution is poured
 or.rt of the tank, through a special tap' and
what is known as fixing solution is poured
 in-this consists of Fixing Salt (obtained
 in convenient packets from any photo-
 graphic dealer), dissolved in                       ^  certain
 quantity of water.
   Fixing will occupy about ten minutes'
 after which the tank can be opened' the                           in any basin' film extracted, and washed
 dish, or other convenient receptacle' The
                       in running water film should be washed
 for about half an hour'
   Be careful to see that the temperature
 of the solutions does not rise too much'
                                                  If   The tank is then thoroughly washed'
 two or three films have to be developed at
  the same time, the developing and fixing
  solutions can be kept and used again' but
  the tank should be thoroughly washed
  between each film'
                            r9
View original page 22Page 23 · Read text
/

             After washing the film should be pinned
       up to dry, in some suitable place, prefer-
         ably in a draught but away from dust or
         where it might get damaged.
               It rvill be seen that the whole process is
           simplicity itself. You do not even require
          to be present while the film is developing,
         but can leave it during the twenty minutes,
        and proceed to do anything else you like
          in the meantime.

       PRINTING THE NEGATIVE.
           l\{aterials Required.
              r. Printing Frame of suitable size.
            z. Packet of Gaslight Paper.


                 3. Bottle of suitable Developer (obtain-
              able from any photographic dealer).
                4. Some Fixing Salt as used for the film.
                                     20
\
View original page 23Page 24 · Read text
www.butkus.us
  5. You will also require one or two
     dishes. 'fhose prepared specially
     for the purpose of porcelain, bakelite
    or xylonite are undoubtedly to be
    recommended.
  $7hen your negative is dry, it will be in
a straight strip showing eight negative
pictures. That is to say, what was white
in your subject will appear black, and
vice versa.


  The easiest printing medium is by what
is known as " Gaslight Paperr" the reason
being that the process can be carried out
in gaslight. It is preferable not to operate
in subdued daylight, or if electric light is
used it should be subdued.
 The negative is put in the printing
frame, with a piece of gaslight printing
paper, and exposed at a given distance
from a light. The period of time depends
on the type of negative, and on the volume
                            zl
                                                -/
View original page 24From the M. Butkus archive. Original publisher and archive notices are retained.
Check the model and edition against your equipment.
PDF verified 2026-10-10.