Film cameras
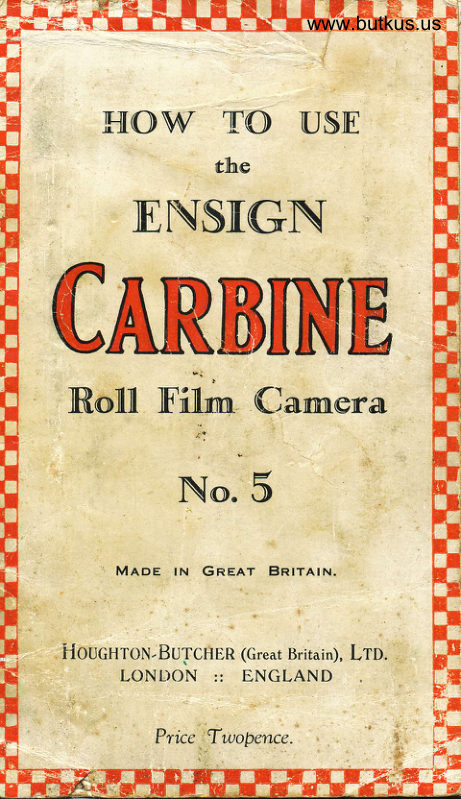
Ensign Carbine No. 5 User manual
User manual for Ensign Carbine No. 5. 29 pages in English. Read the original PDF, download or print a copy without registration.
29 pagesEnglish2.9 MB PDF
Loading your manual…Open PDF directly
Document details
- Brand
- Ensign
- Model / document
- Ensign Carbine No. 5
- Document type
- User manual
- Language
- English
- Pages
- 29
- File size
- 2.9 MB
- Category
- Film cameras
- Document date
- Not specified in catalog
Search available document text
Find a term, then jump to its page in the original PDF. Image-only pages may not be searchable; check the PDF for exact wording and diagrams.
Page 1 · Read text
www.butkus.us

  FilOW TO IJSE
               6he
   ENSNGN
CTnEIHH
 ffiOIn]TD. rtrl  lErt*tr\jt ilXm. L,fl]ffi€tr0
                            -:
      No. 5

          ] MADE IN GREAT BRITAIN.


 i{OUcHTon.BUTCHER (Great Britain), LTD.
     LO}IDON :: ENGLAND
      r;

            Price Twobence.
                                                                             '
View original page 1Page 2 · Read text
ALL ENSIGN CAMERAS              {1 ARE GUARANTEED TO GIVE
       GOOD RESULTS.
                                                 -1ri
  IF FOR ANY REASON YOUR
 CAMERA IS NOT DOING AS
 WELL AS YOU THINK IT
 SHOULD, ASK ABOUT IT- EITHER OF THE DEALER      j FROM WHOM YOU BOUGHT
 THE CAMERA OR DIREC'I'
          OF US.

 WE ARE HERE TO MAKE YOUR
 PHOTOGRAPHY A  PLEASURE
         A WORRY.      -NOT                                                                                                                          l
  DOI.i.T BE SATISFIED TILL
 YOU GET SIX GOOD RLSULTS                                          I
     FROM EVERY FILM.


H oughton- Butcher  (uc,iA1il, Ltd.,
        ENSIGN HOUSE,


                                                                                                                                                                           1     88/89, High Holborn,
             London, W.C.  I
View original page 2Page 5 · Read text
,..f                                          V{
                                                                                                                               I


 can subsequently be turned into the most pleasing
 results by means of a simple enlarger. The Ensign
 Carbine is complete in every detail, unrivalled in
 design, worl<manship and finish, and will commend
 itself to that large section of the public to whom picture
 making is their pleasure.

    The Camnena Descni,hedl
                       The camera con-
                                     sists of a metal body
                            rounded at the ends.
                          This body contains
                          two chambers for the
                                 film, and a winding
                       key is fitted at one         .l
                          end which engages in
                           the film spool. The
                              bellows of the camera
                            connecting the lens                                                                                   II                             plate and body are
                         made of leather. The              Fig. t
                                  front of the camera is                        I
                                                                                                                                                                           I
board which, when open, is r"ij',TX"|;Ii"jrln';    J
struts. When closed, the baseboard i, ,.",rr"d by a
catch. Two runners are fitted to the baseboard on                            I
*lri"lt the U shaped front travels. The lens plate,
which carries the lens and shutter,  is part of thelront.
This plate carries the reflex          view finder,                              "ollapsibl.also the wire frame of the direct                                 vision finder. The
cariage is fitted with two finger erips.
View original page 5Page 6 · Read text
,{    \;,               www.butkus.us


       [-,oadlimg t]he Camena

                                                    Digitally signed by Mike Butkus           Before loading,

                                          manuals,                                                    ou=butkus.org,
                                          email=mike@butkus.org,                                                        c=US         read these direct- Mike Butkus DN: cn=Mike Butkus, o=Butkus camera
                                             Date: 2021.05.08 16:59:07 -04'00'         ions carefully, ex-
                                 amining everypart
                                   thoroughly to un-
                                  ,      derstand whyit is
                                  \      there (fig. l). Re-
                      7)  member that once
                            "    the film is in posi-
                                    tion it cannot be
                            removed without
                                      spoiling, even in
                             the"dark"room.
 Test the shutter, and make sure you understand the
 various movements.


     iLoading.-Re-
move the back of
the camera, hold-
ing it in the left
hand and pressing
the two catches on
the sides of the
body with the right hand. Tal<e care not to press
the sides of the back together-only the roughened
part of the catches need be held, and the back eased
off with the tips of the fingers (tig. 2). Two film
chambers are revealed, the upper chamber having
two centre bearing studs upon which the film turns,
View original page 6Page 7 · Read text
mounted on hinged brackets of novel design (Prov.
      Patent 23500/1926), the lower chamber having only
     one -stud, the opposite side being occupied by the      winder, the key of which enters the side of the loose
      spool through the chamber, but can be withdrawn
     by pulling the winding handle outwards.

      Each chamber is
     also provided  \4iith
   a guide roller over
     which the film runs,
     and a tension spring,
      while an empty spool
     bobbin should be in
     the lower or windine
      chamber.
                                                Fig. 4
        . Take_a spool of _" Ensign Speedy " film, size 2!8,     break the seal and remove all the label, insert the
      spo-ol in the upper spool chamber on the studs,
      with the end of the paper leadin3 towards the lower
     chamber ({igs. 3 and 4). Keep the spool-pin brackets
     pressed into the camera by grasping the Lody at that
      point, lead the free end of the paper across both
                                   guide rollers and
                                     thread it through
                                 the slot in  the
                                    empty spool inthe
                               winder chamber
                                                 (fig. 5). This slot
                                          is  cut  wider
                             on one side than
                                     the other to take
                                 the paper;  see
                                     that you   start
                                 the paper in the
                                    wider side.


                             4

                                                                                                                                                                           i_                                  ----.&-
View original page 7Page 8 · Read text
,{-
                        www.butkus.us


  Give the winder two or
three turns, and replace the
back. This should be done
by putting it on winder end
first, then press until the
catches indicate that it  is         )    F==-6i.
securely fastened (fig. 6).
At this point pull up the              Fie.7
little catch (which also forms a foot) and open the
baseboard (fig. l0). Turn the cover of the ruby
window to " WIND " (fig. 7), this will release the
spring pressure plate (Patent 280352). Give the
winder about ten turns until a " hand " sign appears
in the ruby window. This is a warning of the
approach of No. l, which will appear after a few
more tums. Do not turn quickly or the number will
pass the window unnoticed, and once past, there
is no bringing  it back.  If the camera is not required
for use at once it is advisable to leave the film at sa[eti'.
                                          thatisto say,with
                                       .   the hand show-
                               ing at the win-
                                  dow.thenshould
                                       the shutterbe in-
                                 advertently re-
                                  leased no harm
                                          will result. AI-
                             u)aus.-i--    turn the
                                  film before clos-
               i@
                                and uith the rubg
                         uindou coler
                Fig. 6              fr
View original page 8Page 10 · Read text
www.butkus.us


                         moved forward. This
                            is accomplished by
                               depressing the whole
                                   plate on whichfigures
                                  are marked. The front
                               should then be moved


           .      Fig  10.

into position so that
the number of feet        Gishown on the scale
coriesponds with the
distance of the object
away.

  Viea Finders.-Two
are fitted (a) fig. ll.
The standard type of
brilliant finder is re-
                                        Fie. 1r

                          versible for horizontal
                               pictures; (6) fig. 12. Direct
                       vision with sight.ng
                         plate. When using, the
                       camera should be held
                           at eve level close to the
                                 f.... th" subject being
                      observed through the
                             sight hole, the sides of
                         which should correspond
                           with the wire finder.             Fie. L2
View original page 10Page 11 · Read text
The Shutter.-This is the " exposer," o, method
       by which an exposure is made. It carries the lens and
          is fitted to the front of the camera.


              T.B.I Type.                   3-spe.ed 'Iype.
         Time Bulb.-lnstantaneous.  A reliable shutter
        giving a speed of about l/30th on instantaneous.


               6-speed Type.
            Snapshots holding camera in the hand  :
          l/25th sec. Slow snapshots ;  fair light,
         l/50th ,,  Medium fast snapshots  ; good lieht.
          l/l00th ,,  Fast snapshots in brilliant light.-
                   Beachpictures. Clouds.
          l/250th ,,  Sports pictures.
          Exposures where the camera should be used on
     a stand:
       l/2  sec. P_ortraits and close up. In dull light
                    (Winter).
       l/5th   ,, Portraits and close up.  In' moderate
                       light (Winter).
       l/l0th  ,, Close ups. In moderate light (Winter).        B.    Short Time Exposures.
                     Portraits in open in dull light.
        T.   Long Time Exposures. Interiors.

 :':
U
View original page 11Page 12 · Read text
\          jlf
                              www.butkus.us

         . The lris Diaphragm is used to control the light         for various subjects, and the following should s.rv" .t
        a guide :-f63, f7 .7 orl8, for portraits and near obiects;
          /f l, for average views ;  Jl6, for distant views  ;
     f22 and 132, sea and cloud pictures and interiors
      where long exposures can be given.
           It rnust always be remembered that each smaller
       stop doubles the exposure. For instance, a vierv
        at/l I requires an exposure of l/50th sec. The same
       view atl16 would require l/25th.
      The Ensign Release is supplied with all these
        cameras.
         Nfiaking a]n JExposrure
       The camera being loaded and No. I in position,
t      examine the subject carefully, and having referred to
       the exposure table (see last page), decide what expos-
       ure and stop to use ; having done this, judge, or in
        close pictures actually pace out, the distance of your
        subject from the camera, and set the front accordingly.
                              Then havrng as-
                                  sured yourself that
                                              all you wish to in-
                                  clude is shown in
                                 the {inder, look at
                           your subject and
                               press the  release
                                    with a steady pres-
                                         sure. Do n:-t jerk or
                                   the picture will be
                                  blurred. The €x-
                                    posure being made,
                               immediatelg  uind                               l'rg'Fig. i3i3            another  f ilm  into
        positidn: make a habit of doing this immediately
        after exposure.  It is very annoying to find that twl
       pictures have been made on one film.
View original page 12Page 13 · Read text
First attempts should be made in the open aic
in a good light, with the shutter set at l/25, and tne
diaphragm scale at the largest aperture. Make two
exposures under these conditions, then close the dia-
phraem to /l I and make two more. Again close
it to/16 and expose the last two sections of the spool.
The development  of this film will serve as an example
of the difference made by using different sizes of the
diaphragm.
    Horizontal Prctures (fig. l4).-Hold the camera
on its side, turn over the finder and operate in the
usual manner. If a time or bulb .*porrr." is being
made, rest the camera on some suitable support and
turn the leg completely round until it forms a support
for the front of the camera (fig. l4).
   To close the Camera.-Take hold of the finger
grips, depress the focussing scale and push the front


                                Fi r. 14
along the runners into the body of the camera, close
up the foot, place both thumbs on the side struts near
the body, the fingers behind the body, and press down
the struts (fig. l3). The baseboard may then be folded
up and finally closed.
    To unload Spoo/.-The sixth film having been
exposed, tum the winder about a dozen timls and
remove the back. Pull the winder outwards and
remove spool holder. Transfer empty spool from
the other holder and replace in winder Lnd. Re-
load as described in " Loading."

                            t0
View original page 13Page 14 · Read text
v                       www.butkus.us

        lPicc'rme Composition
                                      Anybody
                                   with ordinary
                                common sense
                             can take  a
                                  photograph,
                                  but  it  is not
                                    everyone who
                                  without    a
                                 thought can
                                               " make a pic-
                                        ture."   We
                              have only to
   look at pictures produced by serious workers to know
   that photography u"   -u.rr" of producing pictures is  anything but automatic"  and mechanical. We often
  hear our friends, the budding and would-be  artists,
  denouncing with all the vigour of their ignorance
  the lack of r.al art in phlotography,      that a  camera is a thing without a soul. So is".rJthe palette
  and brush before the soul gets behind it.  It is the
  same with a camera;  it gets its soul from the photo-
  grapher. As we see the painter's masterpiece and the
  wooden, stiff photograph, so also do we see the beauti-
   ful photograph anJth. wooden soulless painting. In
  other words.
  the brush or
  the camera is
  only the outlet
   for the artist's
   inspiration, be
  he painter or
  humblephoto-
  grapher. The
  composition of
 a picture re-
  qurres more
  care than any,
View original page 14Page 15 · Read text
thing else. The photo-
 graph is either made or
 marred by composition,
 and a little extra patience
 and thought beforehand
 will often turn a dull sub-
 ject into a pictorial success
  The particular points to
 be studied in landscapes
are :.-1.  Foreground
      2.  Bactr<ground.
      3.  Lighting.
      4.  Position of
            objects.
      5.  Position of
           photographer.
T'he.general fault with No. I is that too much foreground
is. given, paking^objects unnecessarily frat Jra ;"-distinct. In No. 2 the background      J;rrance canvery often be improved bv   slight".1       in theposition of the camera. Ar r"g.rJr"     tighu"g"lLoti"n
is  most important              and has                                      .ff;"t;;                       a s!e"1                                               ,l*"ii"J;r"lri;                                                          ;i;i;:grap.b..       Heavy shadows                            ,h"""ld                                      .rroid"d                            b.                                                  ;;-f.;;.possible.
     Portroits and GrouDs.-As everyone knows snapshot
                                  portraits are nearly always
                                rrore pleasine a.rd truer to
                                    Iife than the studio type,
                         and much can be donl by
                           the _enterprising amateur
                             in obtaining striking like-
                        nesses. A.,y attempt at
                          posing is to be avoiled:
                       a . Iittle. patience, _ dis-
                              crrmination as regards the
                          b9r! moment,     study
                              of the lighting "ndconditions
                              prevailing,  will generally
                               rep-ay _the photographer                        with the admiration the
                                resulting portrait receives.
View original page 15Page 16 · Read text
v                             www.butkus.us
    N                  N
      DEVELOPING
        a"??4PRINTING

t,*      NI                                                   NNI
                lReq'cliremenfs
      I-IRST of all you must arrange a room.that can be          f{   made ouite dark. It does not in tholeast matter         r     what room  it is. but absolute darkness is essential.
          Naturally a Bath Room is convenient because there is a
         water supply, and also a little splashing on the floor will
         not do any damage. Still, if this is not convenient you
        may quite easily use a Sitting Room in the evening, taking
          the natural precaution to spread two or three newspapers
       on the table.  I suggest this is natural because I hope
        you realise that any success withPhotographymust  start
         with cleanliness and end with cleanliness. and cleanli-
        ness must environ you all through. There is another
         important factor to be observed in all your operations
      -do not hurry.           The next requisite  is a Ruby Lamp; you can buy
        one from 2/- upwards. You must, however, be rather
          careful, as all Ruby Lamps are not what they seem.
       The best plan is to pay a fair price to begin with and
         obtain a good one-it is cheaper in the long run. It is
         important that it is light-tight, or rather " white " light-
           tight ; you will easily see the first time you try it if any
         white light leaks out, and if so, you must stop the Ieaks
          or discard the lamp. The remaining requirements are
        two or three developing dishes, a glass measure and a
        washing tank. The size of the dishes should conform
         to the size of the plates in use, those intended for the
        developer are preferably of xylonite, but a large one
        of porcelain is the most convenient for the Fixing
        Solution.  If you are using small plates this dish may
         very well be large enough to take four of them.


                                               13
View original page 16Page 17 · Read text
ffis1l'*'/\I  EFI   /                                                                                                                                  L.F,FI    j
                                                                                          i E,l                                             \t F'/                        1
                                   <)^{Fl}{P
                                              -.'g

                                 dishes                                 one porcelain                                                          dish.                             and   l.-Procne              tuo xglonite                                                                                      II                                                 shade.                choose                                           ailjustable                  a lamp                               uith an  2.-Aluass
   3.-Ensisn " Euerseett " measures are oisible in the dimmest light.'   ,+I
   A Thermometer will be found of great service to
test the temperature of the solution.
   A Dish Cover of some kind should also be provided
This may consist of the lid of a card-board box, a little
 larger than the Developing Dish. It is really important
 to have a Dish Cover so as to prevent the plate being
exposed to the full rays of the Ruby Lamp all the time
the development  is taking place.

           Develotpers
    There is a bewildering variety of developers. The
action of all is similar and the results pretty much the
same. The most popular are Pyro Soda (P.S.), Metol
Quinol (M.Q.) and Azol.  It is best to commence with
Pyro Soda and later on you may try the others. These
developers may all be purchased ready mixed, requir-
ing only the addition of water. The " Primus " Pyro
Soda is supplied in two bottles, and full directions for
the mixing is printed on them. Metol Quinol is sup-
plied in the same form, whereas Azol is in a single
                                                                                                                                                                                    l1solution, and all will keep almost indefinitely.
   The two fgrmer developers are also supplied in      I,,
powder form in packets, but beginners are advised to
commence with the liquids-they are very economical
and save a lot of trouble.
View original page 17Page 18 · Read text
www.butkus.us
         .-Ns      ryvs
              4.-Aluaus hanille plates, uel or ihs, bu the eilees.
                S.-Alu'a,r  poui' on the deteloper uith one sueep.
            Fixing Sonucion
          Is made with Hypo and water. Thqe are two
          varieties of Hypo, Oiditt.ty Hypo and Acid Hvpo-the
           Iatter is th. besi for all purposes (except for Self-toning
        papers). The Solution  is made by -mixing 4.ozs. of Acid
       Hypo *ith 20 ozs. water. It dissolves readily in warm
        *"ier b"t the solution must not be used warm. You
        must allow  it to cool down. In very cold weather  it may
       be slightly warmed above the tap-water temperature
        but do ,rot ,r". it above 60' or 70" Fahr.   .
               Frocedurre
         You will already know that the side of the plate that
          the picture will be on is the one with the creamy film on
              it *ii"h  is called the " Emulsion " side.
        The plate must be placed in the dish with this side
        uppermost.
            First of all prepare the developer and have it ready
          in the measutl. Mi" up sufficient, don't be mean with
             it, about lL or 2 ott. ure necessary for a I plate.
        Then pour the Fixing Solution into the china dish
       and have it ready at the side.
          Place the exposed plate in the- develoPing dish,
         taking care all the time io keep  it as far  f rom theJight asI      you p"ossibly can, only iust near enough to enable you
          to see what you are doing.


                                                r5
View original page 18Page 19 · Read text
Q.-Pqur on det;eloper anil cooer uF, lhen uait the estimated time,
  7.-The result aill be a sparllling negatioe, correctlg  ileoelopeil.

  Then pour the developer on carefully but quickly,
and be sure that  it covers the whole surface of the plate
at once, or irregular marl<ings may result.
  Place the cover over the dish and rock  it gently
underneath.  Ii the cover is Iarge enough you will find
this quite easy-don't rock violently or you will upset
the developer, just gently so as to keep the liquid in
motion. After about one minute look at it and see if
there is any sign oi darkening. The image soon
appears, and if you are satisfied that something really
is coming on, replace the dish cover and continue the
gentle rocking.
 The time occupied to develop a negative greatly
vades.  It depends on-
    l.  The speed of the plates (rapid plates take longer
       than slow ones).
  2. The temperature o{ the solution.  In warm
        weather  it acts more rapidly than in cold.
 '3.  There is also a variation in the time occur:ied
       by different developers.
  On again examining the plate, watch carefully to see
if the image is coming out fairly clear and then turn the    J
plate so that you can look at the back, and when the
image shows clearlg through, take the plate out and put
it in the Fixing Solution.
View original page 19Page 20 · Read text
www.butkus.us


            8.-F x uour plates in a l:ad-lined tank lor prelerence.
            9.-Wasi under the tab until all traces ol hspo d.isapqear.

                  Densi'cy
        One of the little difficulties that beginners experience
           is to judge when a negative is sufficiently dense. The
         different makes of plates vary very much in respect to
        showing the image through the emulsion, and the only
         sure guide is " Experience." After you have develcped
        a few plates you will soon see how long you shoulcl give
       them, and do not be mislead if you see the whole
         surface covered. In most subjects it should be covered
          all over.  Incline to rather over than under develop.
      Most beginners are in too much hurry and thinl< the
         density is sufficient before it really is so, and then rvhen
        they take it out of the fixing are horribly disappointed
         to find their negative very thin and miserable.
                 Fixing
       When the developcd plate is placed in the fixing
         solution any remains of the creamy film will rapidly
       disappear.  It is dissolved out. But again. do not be in
      a hurry-let the plate remain in the solution not less
       than 15 minutes to mal<e quite sure-longer  will not
         matter, and may be an advantage particularly  in cold
        weather, because although you may not be able to see
       any of the unexposed emulsion, a little will still bel      there.  If you remcve the plate too quickly you will be
          sorry afterwards, so again err on the sideof caution and
rl       l:ave the plate in {or at least l5 minutes or more.
View original page 20Page 21 · Read text
10, ll,  l?.-Klinax Plate DetseloFing Tanh.
           Washingl
  The negative must be carefully washed either in
several changes of water or in one of the " Useful "
washers. About half an hour will suffice in summer
but in cold weather efficient washing will take longer.
The object is to remove all traces of the Hypo, and this
is less soluble in cold water.
          Dnyimg
  The negative must then be carefully driedaou can
accelerate this by wiping the glass side quite dry and
standing  it upon edge on a piece of blotting paper and
then place  it in a rack in a current of air. Do not try
and dry it in front of the fire or you will melt the
emulsion.
       Develloping Films
  Undoubtedly the easiest way is with the Carbine                    1
Davlight Developing Tank, the simplest, cleanest and
best tank on the market to-day. All operations are
carried out in daylight from beginning to end. If youhave not procured such a tank procedure  is as follows  :    l
 The method of dealing with films varies slightly
                                          the                                         whole      plates,                          same,                theory                             is the                               but as            thefrom                                                         ,l                              obvious                                             ordinary                               an          be dealt                    with     has tostrip                                     it is
dish is not suitable. Recourse must therefore be made
to a special appliance, such as a Trident Weight. This
consists of a rather heavy tridenl made of china, which                 I
View original page 21Page 22 · Read text
www.butkus.us


   ;  re\le lM       rT,                   .l        m,
                   13, 14, 15.-The Catbine FiIm Deoeloping Tanli.

  I      must be placed in the dgveloping- dish before the
         developer-is poured in. The iilms should have a clip?         fixed on e."h ettd to make it easier to hold and should
     be introduced into the developer underneath the
        centre prons of the trident. It can then be drawn back
        ..rd foi*"rl through its whole length until develop'
       ment is complete. You must remember that as only
        part of the film is in the developer it will take much
        iong". than a plate, as you will be developing- say-six
       exDosures at once, ..td .o you must allow for this.
        In^dealing with films, the side with-the emulsion on
       mn"t b" pi.""d downwards, so.that-there  is no chance
       of rbr.iing it by contact with the surface of the
        trident weight.
       The fixing is conducted in the same manner as
         plates, .*""ft that you-require either a larger dish or
       vou rrnrst c,tt the negatives off at their margins with a
         puir of scissors.
          Films are dried by pinning them along the edge of
       a shelf with glass push Pins.
I     Frf,ncing \Mf,ah Senfa'conimg lPapen
        'A printing frame is required, an! if you are using          t;t-.'li-t"""I have a piece of glass in it to.suqPort the                                                 that is, theimaget       i;i*- Sat-t"rrirrg p.p.-r " prints out,"
            U".i"".lv            It must be printed rather dee-per
                                           as it will lose consider-         i["""""  v"" rrig"ht "J*.'think necessary'         .ftv i" thelixing. In all printing operations gieat
View original page 22Page 23 · Read text
\V16     tu" %      M,l
           16.-Separute lilm lrom the paper baching.
           17.-Deoelop roll lilms in the length bs using a Triilent ueight.
          18.-Or a Carbine Film Dish.

        cleanliness is again a  desid.eratum. dirty  or greasy
         fingers will mark the prints and ruin the results. The
        prints should be washed in a few charrges of water
      and then transferred to a Hypo bath, which should
       always be quite fresh. Make up a new dose of solution
         for each batch of prints. For Self-toning paper do not
       use Acid Hypo. The bath should be composed of  :
                 Hypo ordinary, 4 ozs.
                        Plain water,  20 ozs.
        About 15 minutes will suffice for fixing, but do not
       allow the prints to stick together. Keep them moving
      and wash well in a few changes of water.  It is even
      more necessary to well wash the prints than the nega-
         tives, as if any traces of Hypo is left in them they will
      soon fade. At least a half-dozen changes of water
        are necessary and the time consumed should be about
         half an hour. They may be dried on special blotting
       paper which is sold for the purpose, or they may be
       squeeged down on to a Primus Glazer or Ferrotype
        plate, and left  till they are bone dry, when they will
        easily come off.
            Gasnigh'a lPrinrting
       The next important process is called Gaslight, and
            it is one of the most satisfactory as the prints can be
        rapidly made and, more important, the work can be
      done in the evening, as the exposures are made by


                                          2Q
    't            -                   , ,;,.,,,,*.,                                   "   .       .n,.           .     ,.,-,.         ..i
View original page 23From the M. Butkus archive. Original publisher and archive notices are retained.
Check the model and edition against your equipment.
PDF verified 2026-10-10.