Film cameras
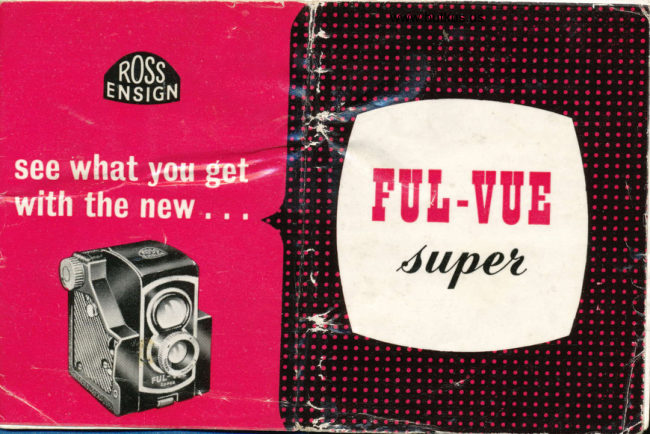
Ensign Ful-Vue Super User manual
User manual for Ensign Ful-Vue Super. 19 pages in English. Read the original PDF, download or print a copy without registration.
19 pagesEnglish8.8 MB PDF
Loading your manual…Open PDF directly
Document details
- Brand
- Ensign
- Model / document
- Ensign Ful-Vue Super
- Document type
- User manual
- Language
- English
- Pages
- 19
- File size
- 8.8 MB
- Category
- Film cameras
- Document date
- Not specified in catalog
Search available document text
Find a term, then jump to its page in the original PDF. Image-only pages may not be searchable; check the PDF for exact wording and diagrams.
Page 2 · Read text
THE CAMERA WITH A PEDIGREE

   The first model of the Ful-Vue camera     mount, so that close-ups and portraits could
appeared .on the market in 1939. It looked     be taken as well as distant views. In this
like almost any other inexpensive camera of     second model, also, the familiar box whichits duy, except that it was fitted with an     formed the body of the camera was stream-
unusually large reflex viewfinder, which made       lined, while the compact viewfinder improved
a pleasant change for anyone who had tried     the appearance of tire camera and reduced its
using other box cameras with viewfinders only      weight.-Thehalf the size of a postage stamp.                            introduction of midget-Hastr-bulbc-al
                     Although this first   a reasonable price led to the addition of a               model had no  other       built-in synchroflash socket on the third model                      special features, its suc-    of the Ful-Vue and the streamlining of the
                     cess was immediate for                      body was taken a stage
               the  large viewfinder                                further.
                     solved one of the diffi-                         Ever since the first                    culties met by  every                          Ful-Vue camera appeared,
               amateur photographer.                      however, its  designers                         It enabled a picture to                    were making notes of
               be accurately composed                          improvements and modi-
                    in the viewfinder before                               fications which could be
    FUL-vuE 1939  it was taken.                                introduced when the   The enthusiastic reception of the first                       time came to re-designFul-Vue led to the introduction of an improved                     the camera completely,
model fitted with a better lens in a focussing         FUL-VUE 1946   and in  the Ful-Vue

a
View original page 2Page 4 · Read text
Venmo @mike-butkus-camera  Ph. 2083
PayPal Name  Lynn@butkus.org      www.PayPal.me/lynnbutkus
View original page 4
Page 6 · Read text
www.butkus.us
 of precision. It will last a life time.      It is often imagined that a box camera  is
 capable of little more than Sunday s"atsh.i;
 or. back-yard portraits in the ,urrrhin". ^While thls ls true of certain other inexpensivecameras on the market, it will be fouid thattF" Ful-Vue Super can be useO ]oi- nastr,+oT, close-ups. and distant views, night
 photography and ev-en action pictures.- ThEre
are ln ract many ad.vanfa:ges in using a simplecamera        without          a lot                    of complica6dmerlts, for                it allows                         to -concentrateadjdst_on                 you-oftaking pictures instead   on solving technicalproblems.
    SoT"           typical               Ful-Vue                                       which                                                     These                          Super-phoiographerpictures                                                                             t_ypical                                                                       holiday snapslrcts                                                                                    were takenwere     taken                 amateur                                               are                                                          Ful-Vue,Super                                                            tvith the                                                                          at Canteiburv.r.eproduced                    guidance             your              b-Vroran                                            these                       and
rllustrations show what can be done with this
remarkable camera after some experience liisbeen gained in using it.
 FUI-VUE SUPER EVER-READY CASE
   A. beautifully made ever-ready case isspecnlly_ macle to protect the fine finish of
youl Ful-Vye Super-and the cameru       o"iy
be removed from the case in order "e"Oto load inew film. From the carrying position you can
be ready for action wiln -tn'e camlra in a
View original page 6Page 10 · Read text
www.butkus.us
     DETAII,S OF
   CONSTRUCTION
     The body ol  theI'    Ful-Vue Super con-
      sists ol two pressure
      die - cast aluminiumt     sections into which
    the various compon-
     ents arc fitted on the
    unit principle. For
    exarnple, the lenses
      (l) and (3), the view-
    finder (17) and the
    Ioading cradle (13)
    may all be renewed ll
    ever necessary: a sef-t
     vice whlch lew other
    photographic manu-i
     lacturers can provide.
   The two castinps are
    joined by tie rods and
    sealed at the front.
View original page 10Page 11 · Read text
HOW TO USE THE FUL-VUE SUPER


                                                      Fis. 2. Removing the                                            camera back.                                                 ^


i,i
  Fig. 1. Releasing the camera back'
     Hold the camera as shown in F!g' l, press                                                     an-d the back catch down with one finger.  i"-"i!-ln" i"mera back as shown in Fig' 2'                                         readv^ in  il';;oi;   620 spool will be found  inl iiii!-ip-"ttamber when the camera is first                         necessary to see that  i"."i".J        ii *itt be             "'na-
  10
View original page 11Page 12 · Read text
www.butkus.us
                                                underneath the sealing label on the new film
                                                   taces towards the top of the camera when
                                                 the loading cradle is open, so that the black
                                                    inside_surface of the paper leader will face
                                                   towards the lens when tho paper is drawn over

                                                                      Fig.4.  LoadinB a
                                                                  flm into the cradle.


   Fie. 3. Opening the fiImJoading cradle.
     - The film is held in the loadins cradle bv-;'sspring tensioned clips at either en"d and  it
only necessary to press one end of the spool?galnst one of the outer clips of the cridle.
Ior.the other side of the spool to drop intoposition. (Fig. 4.)
  .   It is particularly important to see that thetnangular shaped end of the paper leader
View original page 12Page 14 · Read text
www.butkus.us

                                                underneath the sealing label on- the new film                                                            f-aceq towards the to[ of the        when                                                                  the. loading cradle is bpen, so ttraf-tfri""-"r"  bdal                                                     inside surface of the pap6r leadei *itt  ia"e
                                                    towards the lens when the paper is drawn over

                                                                                  Fig. 4.  Loadinp a
                                                                               film into the cra1le.


    Fig. 3. Opening the filmJoading cradle.
     . The film is held in the loading cradle by
spTing tensioned clips at eitfrei-en? and it isonly necessarv to piess one end of th; s;;i|Bainst one of the outer ctipJ of the cradle,                                     -dr.til;for.the other side of  it   ,-i'.6t?position. (Fig. 4.)      "
 _ It -is particularly important to-;&,see that thetriangular- shaped i,nA 'ot tt;          leadcr
View original page 14Page 15 · Read text
unwind more of the paper leader than neces-
                                            sary. (Fig. 6.)
                                             Thread the triangular end of the paper leader
                                                         irl;-th" wide slot-in the take-up spbol and then
                                        6;  th; flm winding knob on the -side of the                                                                                                   inches                                               i"t**-i"--der   to iind three or four
                                                        -op"r"tioolJ the empty spool. The object                                                  "i--i"o"i-"ni[-it            is t6 make sure that the
                                            "?o"oiilt  ilinaittg freely and squarely from the                                                           '""'"-soool io the- othei and that the end of the
                                                 papei is securely attached for winding purposes'
                                                         Fig. 6. Threading up the take-up spool.
     FiS. 5. Closing the loading cradle.
                                       spool.                           take-up                      the                   to           aperturethe"^- picture                                      properly                  new                              film is-                   the                init   "M;k; *'."
seated in the cradle and then press on the                                                      5,^.in      of the spool^    as shown in Fig.;;a;"etttreto return  the cradle carrying the film
into the camera bodY.
    Next remove the paper seal from the centre
of th!-OjO Rtm and bv gentlv turning.th" fil3n
ip*t  in the loading chahber, unwind jqst 9"q-
 clent of the paper Eader to pass across the back
of the cameia- and into the wide slot of theempty spool in the take-up chamber. Do not
 l2
View original page 15Page 18 · Read text
www.butkus.us
                                            For making time exposures, the use of a
                                                       flexible cable release (which screws into the
                                                     socket just below the shutter release lever and
                                                           is obtainable as an accessory for the Ful-Vue
                                                Super) may be helpful as ii is essential that
                                                    the camera should remain perfectly still during
                                   a time exposure. When set at B, the shutter
                                                      release must be held down for the required-close                                      number of seconds ; the shutter will
                                                     automatically as soon as pressure is released.
                                                    Fig. 12. For time exposures support the
                                            camera a.r illustrated or use a tripod.


                                                                                :ii:iij:;ir:it::ii
Fig. ll.  How to hold the camera lor snapshots.
mount as shown in Fig. l0; infinity for whicha symbol @ is used, 4 yards aid Z yards.
The lens should be set at the infinity position
for landscapes and all types of distini views,at 4_ yards for small groups of people and
similar subjects at about this distanbe flom thecamera and at 2 yards for close-ups andportraits. It is not advisable to come closer
to the subiect than 2 yards.
View original page 18From the M. Butkus archive. Original publisher and archive notices are retained.
Check the model and edition against your equipment.
PDF verified 2026-10-10.