Film cameras
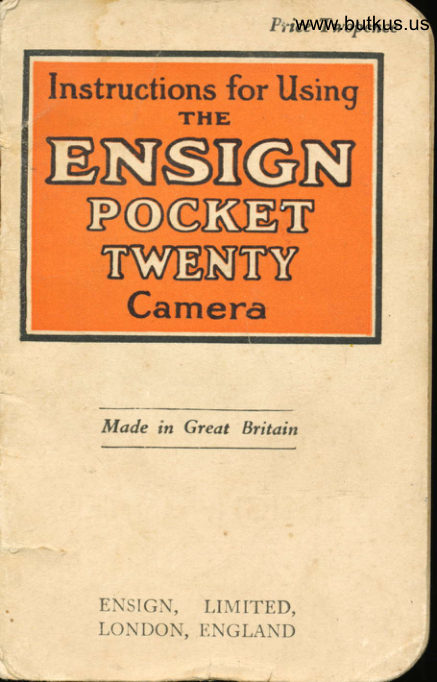
Ensign Pocket Twenty User manual
User manual for Ensign Pocket Twenty. 29 pages in English. Read the original PDF, download or print a copy without registration.
29 pagesEnglish1.9 MB PDF
Loading your manual…Open PDF directly
Document details
- Brand
- Ensign
- Model / document
- Ensign Pocket Twenty
- Document type
- User manual
- Language
- English
- Pages
- 29
- File size
- 1.9 MB
- Category
- Film cameras
- Document date
- Not specified in catalog
Search available document text
Find a term, then jump to its page in the original PDF. Image-only pages may not be searchable; check the PDF for exact wording and diagrams.
Page 1 · Read text
www.butkus.us

Instructions for Using
        THE
trNSIIGN
 P@CKtrT

    Camera


       tYIod" r,, f;r"o, tlr;ro;,,
View original page 1Page 5 · Read text
r
         INSTRUCTIONS
     BEFORE LOADING.
       Read these brief^.*,**. directionsffi€E-v^  carefullv
       with the camera in front of you so thar you
     *
        hesitation in actual use.
                               the word "Ensig'"
        facing y9u, raise the nickel piece, releasing
      the catch, pull outwards and lower the
      baseboard (trie. r) ro its fullest extenr)       pressing it when near the bottom-. until a
       sharp click is heard when it is secuielv held
      by the side srrurs


                    www.butkus.us
                              Fie.  /
       The nickel piece which forms the catch
       also acts as a foot if you wish to stand the
      camera level, in a vertical position.
         Inside the body, you witt observe the
       shutter and finder attached to rhe front of
       the camera. S7ith the forefinger and thumb,
       grip the lower black portion of the front and

                                         2
View original page 5Page 6 · Read text
qi\                      www.butkus.us
  slide forward (Fig. z). Continue this move-
 ment until the red mark at the side of the
 front is opposite the word " View " on the
 nickel indicator plate arrached to the right
 side of the baseboard (as the camera faces
 y-ou): Sfhen this operation is carried our,
 the front will be loiked at the position foi
 taking such subjects as lanclscap€s, sea
 picturesr, churches, houses, or groups, not
 nearer than about nine or ten feet-away.


                                       signed                                         by                                            mike

                               cn=mike                                              butkus, mike                                              ou=29,


                                     2019.12.01                                                  17:52:39 butkus                                      DigitallybutkusDN:o=orphancameras,email=mike@butkus.org,c=USDate:-05'00'


                 Fi  . 2
  The front of the indicator is milled.
Press downwards to release the front, pull
the front forward until the red marR is
gpposite the words " Close Ups." The
front will again be locked ana at thisposition it is possible to take portraits or
any other subject nearer than nine feet, and
other distances to 3$ feet from the camera.
      THE SHUTTER
(Fig. 3) bears ar rhe bottorn a small indica-
tor disc with a pointer at one side and a
small knob at the other side ; surroundingthis are the letrers T, B and I.  \7hen thE
disc is turned so that the pointer is opposite
View original page 6Page 7 · Read text
r
            '( T ') a Time exposure will be given on
       pressing the exposing lever A (Fig. :).


                                                                  (-\      a\
                                 Fis..1
      TIME,-This means that the shutter
      opens on the first pressure of the exposing
       lever and remains open until the lever is
       pressed a second time, when it closes. (Do
       not move the indicator dial while the shut-
       ter is open.)
      BULB.-Now move the pointer to B and
      operate the lever and you will see that a
      time exposure of slightly different kind is
      the result ; the shutter opens on the first
       pressure and will remain open only as long
      as you keep the lever down, but closes as
      soon as you allo"l' the lever to rise. This is
       generally known as a " Bulb " exposure.
      INSTANTANEOUS.-Now move the
       pointer to I and the exposure is the ordin-
     ary " snapshot "  or instantaneous one'
      opening and closing again with one pres-
      sure only. The speed is approximately
             r /3oth second which is found to be the
    m -'st generally useful for a wide variety of
       subjects
View original page 7Page 8 · Read text
\                      www.butkus.us
  LENS APERTURE.-AI the top of the
 shutter, there is a small nickel knob which
 controls the aperture plate. There are twc
 apertures, " Ordinary Light " and " Bril-
 liant Light." To chatrger push the knob to
the arrow above the engraved words
 " Brilliant Light " or vice versa. The
 " Ordinary Light "  aperture should be
used for all ordinary snapshots. The
 " Brilliant Light "  aperture should only
be used for very bright subjects such as
 seascapes, sky scenes, etc., also for time and
 bulb exposures when a tripod or some firm
base is used with the camera. A  little
 experience will show which aperture is
 best to use.
         VIE$T FINDER.
  Above the shutter is the View Finder, in
which a small lens reflects on a mirror a
reduced scale picture of the scene in front
 of the camera.
  \7hen the carnera is used for upright
pictures the amount of view includecl will


                                    www.butkus.us
      A          FiS.4          B
   Uhr'igltt Viere,              Horizoittal,  I/ieu:
be as shown by the dotted lines in Fig. 4
(A) ; when taking horizontal pictures the
{amera should be held side-wavs and the
View original page 8Page 9 · Read text
view finder swung round on its pivot, then
the view included will be as shown in Fig. 4
 (B).(                               __1ht_yt.y                                                -folrtfinder turned on its side or it will        tfre
side of the camera.)
 - To close tfre Camera, first disengage the
fro[t  fffi              indicator plate by
pressing the milled end of the plate and
sliding the front towards the back. With
the thumb and forefinger grip the lower
part of the front and push gently until it
is right inside the body.
  Do not push on the shutter itself or it
Tay be put out of alsnrnent:
  $fhen the front is right home, press with
both thumbs on the upper edges of the side
struts close to the body (FiS. 5) and lift up


                          Itig.5
the baseboard until the catch engages ;  ifthe leg has been used it should be replaced
in line with the base.


                                                                  ^
View original page 9Page 10 · Read text
www.butkus.us
  NOTE.-If any resistance is felt do not
force but open baseboard again and see
that the front is pushed back as far as
possible.-  The action of the various parts beingnow
understood we may now proceed to load
the camera.
    LOADING THE CAMERA.
  Slide the catch at the top of the back
to the right and lift off the back (Fig. 6)  ;
at the winder end it is only engaged by
grooves which interlock each other and
therefore it comes away freely.


                                      I;i g. 6
 Two film chambers are revealed, the
lower chamber having the winder on the
left side. An empty spool bobbin will
be found in one of the chambers (usually
in the lower). The empty bobbin has
at one end a plain hole and at the other
a slot or keyway to take the winding key.
If not already in the lower chamber insert
           A
View original page 10Page 11 · Read text
7
      the empty bobbin with the slot towards
     the winder. Pull the winder handle
      outwards, press bobbin into the chamber
     and then push back the winder handle
     with a turning movement until the key
      engages in thC slot of the bobbin.
        Tile  a spool of  " Ensign "   film,
     size 21$R (E.zo), break the seal and
     remove all the label, insert the spool in
      the upper spool-    chamber with the end of     the fiper  leading towards the lower     chambei. Keep the thumb of the left
     hand on the full spool of film to prevent
         it from becoming loose and fogging the
     edge of the film. Then lead the free
     end of the paper across the back of the


                       www.butkus.us

                                      I;ig. 7
     camera and thread it through the slot in
     the empty spool in the winder chamber
       (Fig. D.  (This slot is cut wider on one
View original page 11Page 12 · Read text
www.butkus.us
 side than the other to take the paper   ;
 see that you start the paper in the wider
 side.)
  Now give the winder one or two turns to
 make sure that the paper is centred nicely
 between the flanges of the spool, and if
 it is bearing hard against either side, press
 it gently sideways to correct.
  Replace the back, winder end firsr,
then close the top end and slide the
 catch.
    It  will be noticed that the back is
constructed to fit securely at the bottom
and the body is flanged ar the sides to
take the back.
  Note.-lt  is advisable to hold the
 full spool of film until the back has been
fitted in the botrom end and then closed
as far as possible
  The winding of the film may now be
continued, but it is better not to do this
with the front of the camera closed, as
the last folds of the bellows somerimes
project a little and cause faint scratches
on the sensitive surface of the film  ;
after about ro or T2 turns, observing the
moving band through the  little  red
window, a warning mark, somelimes a
"hand"  sometimes "0"    will  appear,
and if the camera is nor going to be used
at once) this is a good position in which
to leave it, as the shutter may be tried
without fear of making an exposure.
   If you propose to make an exposure
at once, continue to wind slowly, until
View original page 12Page 13 · Read text
the figure r appears in the red window,
and the camera is ready ;  after exposingon section r, wind immediately to No. 2'
and so orl: always remembering to wind
slowly, as if the number over-runs the
window, it cannot be wound back. It  is
best to make a practice of winding on the
new film immediately after an exposure,
as if forgotten, two exposures will be made
on one section, spoiling both.
  After completing No. 8, continue to
wind until the end of the paper passes
the window, when the back may be re-
moved. Place the thumb of the  left
hand on the exposed spool of film, gently
pull out the handle of the winder and the
exposed spool of film can then be removed.
Care must be taken not to allow it  to
unroll or light will penetrate and spoil
the film. A gummed label will be found
(usually on the now empty bobbin) which
can be used to seal the exposed film.
Transfer the empty spool bobbin to the
winder spool chamber (slotted end towards
winder) and the camera is ready for re-
loading.
  NOTE.-Do not load or unload in full
suntighi-if you can avoid-it. A frtm may
be foggea-inJ   , roootfi secondr- therefore
ge-t indoors- if vou cahir   at leiit  in tfre
$e4s_*.
   MAKING AN EXPOSURE.
  S7ith No. r Film in position and theCamera opened, the choice of " Views "

                              10
View original page 13Page 14 · Read text
www.butkus.us
 or (c Close Ups " position on the Indicator
 plate should not be difficult to decide.  If your subject is not further away than
 ro feet use " Close ffps "  position :   if it is further away, use 'z Views."
   See -your picture in the view finder, remember whether you are using th6
 camera upright or horizonral (Fig. +) and
 as soon as you have the scene or portrait
 4ge-lV framed in the limits of the- finder,hold the camera perfectly steady and
 press lhe release lever down until youhear the click. Do not jerk it or ihe
picture will certainly be blurred.
  Remember that Time or Bulb exposures                                            -iscannot be made while the camera    held
in the hand :  it must be supported, either
on a tripod or other firm support ;  out-doors, a wall, fenbe, gate or tree may be
used to hold the camera against ;  indoors,a table, window-sill or chairback willserve if a tripod is not available.
  Avoid taking pictures " against the
tigttt " which means with the sunlight or
all   the light             available                               rhe                                camera                         falling- oninstead             the subject.                                     pictures       of on                       Such
if taken under circumstances which are
unavgjd_able, are usually " flat " and lackingin relief.
  The choice of background is worth a
little study, in the case of portraits es-
pecially ; a brick wall is aboul rhe worsr,
one covered with ivy or creeper very little
better, because of the tendency of certain
leaves to reflect the light and become white
patches in the print.
                              I1
View original page 14Page 15 · Read text
7

          Pictorial composition is too large a sub-
       ject to enter into here, but the essential
        facts to bear in mind are fairly simple and
        will enable anyone to take pleasing pictures
      with the Ensign Pocket " Twenty "  in
       half-an-hour.
          (t) The light should fall on the subject          and away from the camera) prefer-     I
            ably from one side to get the most
            pleasing lighting and enable the
           shadows to give relief. This applies                                                 I          more particularly to buildings and
            only slightly to landscapes.
          (z) View the subject in the view finder
           both ways before taking it-upright
                 o.r horizontal-of course, this would
            not apply to a group of six or eight
           people, you would naturally take
        them better with the horizontal
             view.
      G) EgIb" s.akg ,!!1os9 who hry9_ @d
                                                                                                                           t o -                                                      e d g e _9 I_I_!9            ng_prgylqg q _$ owl
           Bfnhv, it is ngeeggart to iepegt ttiis
         I4qigg:-Do  not unroll the spool           to " see the pictures." There is
          nothing to be seen until  after            development, which must be done in     I
            a propel dark-1oom, with Tby light,           or in a light-tight tank. Any white            light which reaches the film will      I              spoil all the pictures in a fraction of a
             second.
View original page 15Page 16 · Read text
\                            www.butkus.us
          PICTURE MAKING HINTS.

      STREET PHOTOGRAPHY.
                It is essential that the camera should
          buildings will appear to be leaning back-I        always be held level. If it is tilted upward,         ward and inward. If it is tilted downward,
I       wardthe buildingsand outwardwill appear to be leaning for-
      CHILD PICTURES.
            \fhen taking pictures of childrer: always
          follow their movements. Be careful, how-
         ever, in your efforts to obtain good
           pictures, that you hold the camera steadily,
        as this is most essential.    www.butkus.us
      LANDSCAPE PICTURES.
          Be very careful to select the right stand-
          point, and endeavour to find the most
           artistic composition.
      SEA AND BEACH SCENES.I
          B -' careful to use the correct stop, and
         to have the sun either to the right, or to!        the left.  If you have it in front, you will
        get a silhouette effect, if you have it
         behind, the result will appear flat and
           uninteresting.

                                                 t3
View original page 16Page 17 · Read text
r
   COMPOSING THE PICTURE.


                             '^--\G.--  -t0* S-,^'\-Jn-
    A NYBODY with ordinary common
          sense               can take                     a photograph,                                   but                                                              it is        t'A             everyone                                       thought                who                           without a       ^notc6     can  make a picture." We have only to
    look at pictures produced by  serious
     workers to know that photography as a
    means of producing pictures is anything
     but automatic and mechanical. $7e often
     hear our friends, the buddine and would-be
      artists, denouncing with all the vigour of
View original page 17Page 18 · Read text
www.butkus.us
                        their ignorance
                       the lack of real
                        art  in  photo-
                          graphy, and that
                 a camera is a
                        thing without a
                      soul. So is the
                     palerte  and
                        brush before the
                          soul gets behind
                                    it. It is the same
                      with a camera ;
                                 ''c  .  t        it gets its soul  /4-*-l'*v'o*a                     from the photo-
  'uU.\,/4-\-5---       ts  _-    \     grapher. As we
                          see the painter's
mast€rpiece and ttre wooden, sdf photo-
graph, so also do we see the bebutiful
photograph and the wooden soulless
painting. In other words, the brush or the
camera is only the outlet for the artist's
inspiration, be he painter or humble
photographer. The composition of  a
picture   . requires more care than anything
else. The photograph is either made or
marred by comnosition, and a little extra
patience and thought beforehand will often
turn a dull subject into a pictorial success.
  The particular points to be studied inlandscapes are '-
      r.  Foreground.
    z. Background.
    3.  Lighting.
    4.  Position of objects.
    5.  Position of photographer.
                               r5
View original page 18Page 19 · Read text
r
      The general
        fault with No. r
         is that too much
     foreground    i s
     given, making
       objects unneces-
      sarily flat and
      indistinct.  I n
      No. z the back-
    ground   and
     distance  can
     very often be
     improved by a
      slight alteration
       in the position of the camera. As regards
       lighting effect, this is mosr important and
     has a great effect on the photograph.
     Heavy shadows should be avoided as far
      as possible.
        Portraits and Groups.-As everyone
     knows snapshot portraits are nearly always
     more pleasing and truer to life than the
       studio type, and much can be done by the
       enterprising amateur in obtaining striking
      likenesses. Any attempt at posing is ro
     be avoided ; a little patience, discrimina-
     tion as regards the best moment, and
      study of the lighting conditions prevailing,
      will  generally repay the photographer
     witb the admiration the resulting portrait
       receives.

                                       16
View original page 19Page 20 · Read text
www.butkus.us
DEVELOPING AND PRINTING.
  By far the most fascinating parr of the
hobby of photography is to be found in the
actual production of the picture, after
exposure has been made. The little time
and trouble required is arnply repaid by
the pleasure and amusement ro be had.
   It  should not be thought that the
developing of one's own films, and the
subsequent printing of the negatives,
necessitates a large and comprehensive
installation-nothing could be  further

            Developing and printing is
          reduced nowadays to an almost
          automatic process, unless it  is
           deliberately desired to go fur-
         ther into the chemical and
            scientific side of the hobby.
        You do not require a specially
            fitted up dark room, nor is it
         even necessary to take a room
        and make it dark, by hanging
       up temporary curtains,  etc.,
          before the work of developing
         can commence.
             All you require is a suitable
         tank, such as the " Ensign
          Carbiner" procurable from any

                              L7
View original page 20Page 21 · Read text
7
       photographic dealer's shop, and a few
       packets of already made up chemicals,
      which only require to be dissolved in a
       given quantity of water. Any bath-rooffir
        therefore, is an admirable place in which
       to carry out the process.
     DEVELOPING, FIXING AND
      WASHING THE FILM.
       Materiafs Required.
           r.  Ensign Carbine Tank, the right size
              for your spools.
         z.  Developing PowCers.
        3.  trixing Salt.
        4. A small thermometer is useful for
             gauging'the temperature.
        5. Such other accessories as you may
           think desirable, such as dishes,
                etc., though these are not essential.
        Assuming that you have procured the
       necessary materials, all you have to do is
      to dissolve the powder in the required
     amount of water,r as indicated on the
       packet, and pour it into the tank.
       You then take your exposed spool, and
      load it into the tank, in very much the
      same way as you put it into the camera,
       that is, you do the whole thing in complete

                                         18
View original page 21Page 22 · Read text
\
                      www.butkus.us
 daylight (exact rnstructrons as to how to
 put the film in are issued with the " Ensien
 Carbine " tank).
  The process of developing occupies
 about ten minures. When this is com-
 pleted the developing solution is poured
 out of the tank, through a special tap, and
 what is known as fixing solution is poured
 in-this consists of Fixing Salt (obtained
 in convenient packets from any photo-
 graphic dealer), dissolved in a cerrain
 quantity of water.
   F'ixing will occupy about ten minutes,
after which the tank can be opened, the
film extracted, and washed in any basin,
dish, or other convenient receptacle. The
film should be washed in running warer
for about half an hour.
  Be careful to see that the temperature
of the solutions does not rise too much.
  The tank is then thoroughly washed. If
two or three films have to be developed ar
the same time, the developing and fixing
solutions can be kept and used again, but
the tank should be thoroughly washed
between each film.

                              19
View original page 22Page 23 · Read text
r
         After washing the film should be pinned
     up to d.y, in some suitable place, prefer-
      ably in a draught but away from dust or
     where it might get damaged.
           It will be seen that the whole process is
       simplicity itself. You do nct even require
       to be present while the film is developing,
       but can leave it during the twenty minutes,
     and proceed to do anything else you like
      in the meantime.
    PRINTING THE NEGATIVE.
      Materials Required.
           r.  Printing Frame of suitable size.
        z.  Packet of Gaslight Paper.


             3.   Bottle of suitable I)eveloper (obtain-
             able from any photographic  dealer).
            4.  Some Fixing Salt as used for the film"
h-
View original page 23From the M. Butkus archive. Original publisher and archive notices are retained.
Check the model and edition against your equipment.
PDF verified 2026-10-10.