Film cameras
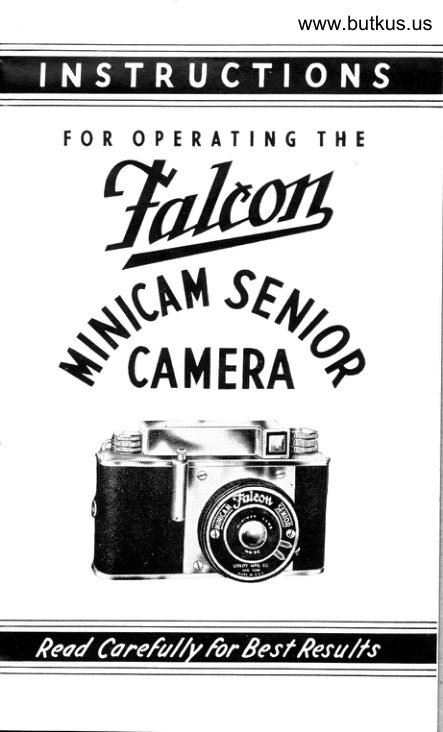
Falcon Minicam Senior User manual
User manual for Falcon Minicam Senior. 12 pages in English. Read the original PDF, download or print a copy without registration.
12 pagesEnglish1.5 MB PDF
Loading your manual…Open PDF directly
Document details
- Brand
- Falcon
- Model / document
- Falcon Minicam Senior
- Document type
- User manual
- Language
- English
- Pages
- 12
- File size
- 1.5 MB
- Category
- Film cameras
- Document date
- Not specified in catalog
Search available document text
Find a term, then jump to its page in the original PDF. Image-only pages may not be searchable; check the PDF for exact wording and diagrams.
Page 2 · Read text
(6uuruntru
 This Falcon Minicam Senior
 is unconditionally guaranteed against de-
 fective workmanship and material for a
 period of one year.
FOR SERVICE return camera to factory
with this guarantee attached and twenty-
 five cents in stamps to cover handling and
 postage.
                o
 We want you to get the fullest satisfac-
tion from your Falcon camera. you rvill if
you follow the simple instructions rvhich
are contained in this booklet. Please read
them thoroughly before commencing to use
the camera.

Clean Lens fmportant
   It is very important that you clean the.lense rvith a soft cloth or handkerchief,
before using camera, to insure securing
bright pictures.

 [frrury MaNupacruRrNc Co.
              Incorporated
 40 Wrsr 25rn Srnrnr, Nrw yonr. N. If.
View original page 2Page 4 · Read text
Venmo @mike-butkus-camera  Ph. 2083
PayPal Name  Lynn@butkus.org      www.PayPal.me/lynnbutkus
View original page 4
Page 5 · Read text
fnstructions for Picture Taking With
          the Falcon Minicam Senior
                 Film    .
     The Falcon Minicam Senior can be
   I     loaded with any standard roll film, either


     i    trASTMAN No. 127 or AGFA A-8. It
t    makes 16 exposures lrlxlfu  inches per
        roll.

      To Load and Unload Camera

       Always load and unload camera in sub-
     dued light; never in direct sunlight. Hold
     back of camera toward you, and push lock
      slide in direction of arrow. Remove back.
    Make sure that the empty spool is in the
I     top receptacle (alongside the winding key)
     with the notched end of spool engaged in
     the key.
       Pull out the film retaining knob and
     place the film under the spring in the
View original page 5Page 6 · Read text
www.butkus.us
lower receptacle. Allow the retaining
knob to spring back into place, making
sure that it engages the projecting end of
the spool. If the spool has been placed
properly, the protective paper will  feed
from the top of the spool, with its black
 side toward the lens.
  Now break the seal which holds the
 roll, and draw out enough of the protec-
tive paper to enable you to thread its end
into the broad side of the spool slit. Give
the winding key two or three turns (it
turns in only one direction) to make sure
the paper is firmly engaged, and replace
the back of the camera. To do this, place
                                                              llthe recess near the window "B" under the
spring catch on the camera body, and      t
press downward gently.
 The film is now properly placed and
the camera shut. Follow directions for
rvinding very carefully.
View original page 6Page 7 · Read text
To Wind Film
  Turn the winding key slowly rvhile
watching the lower red window "A" on
back of camera. When the figure "1"
appears in the center of the window
         t'A"marked     the camera is readv for
use. See illustration below.


                                                                      'l olr \\'inrlow_B                                     _


                             Lou'cr  \\-irrrlotr',\


 As soon as you have taken the first
picture be sure to wind number "1" from
"A" window to "B" window'. Yotr are
now ready to snap your second picttrre.
Repeat process after every picture. When
View original page 7Page 8 · Read text
www.butkus.us
the number 8 appears in the center of
"8" window you will be ready to take
the 16th (last) picture.
   Vflren you have taken all the pictures
keep turning the key until the complete
roll of film  ( including the paper which
protects it) is wound on the spool.
  Open the back of the camera and seal
the roll with the gummed label provided
by the film manufacturer. Now pull out
the winding key and remove the film.
Place the empty spool properly in the
winding receptacle, ready for the next
roll of film.

       Spare Spool Chamber
 A chamber for carrying an extra roll
of film is located at the top of the
camera to the right of the view finder.
It  is advisable to keep an extra roll of
film in the camera at all times so that
View original page 8Page 9 · Read text
you can take advantage of any picture
opportunities which may arise. Remove
the extra roll from its wrapping and place
it in the chamber, under the retaining
spring.

   '       To Take Pictures

  Hold the camera with the sight as close
to the eye as possible, bracing the camera
firmly against the face. Make sure the
object or subject you are taking is framed
within the finder. Then press the ex-
posure lever (tr) GENTLY. The ex-
posure is made on the downstroke of the
lever. Allow the lever to spring back
immediately after making the exposure.

 The camera MUST be held level.
Should the subject be below your normal
eye level, like a small animal, bring the
camera down level with the center of the
subiect.
View original page 9
Page 10 · Read text
www.butkus.us         Time Exposures
  To take time exposure pictures press
 lever (B) from "inst.,, to ,,time.,, This
 lever is on the right side of name plate                                                                      t rvhen the camera is facing you.
  When taking time exposures place the
 camera on a tripod or other firm support
 such as a table or chair. Never hold the
 camera in your hand.
   After sighting your object press shutter
 release, keeping your finger on it, counting
 the number of seconds of exposure desired.
When the required number of seconds has
elapsed-and not until then-remove your
finger from the shutter release. If  no
more time exposures are desired, adjust
for instantaneous pictures, by pushing
lever back to "inst."

      Suitable Light Conditions
  When taking instantaneous pictures, be
sure that the sun is behind your back.
If sun shines directly into the lens, pic-
tures will be fogged.
View original page 10Page 11 · Read text
..LARGER"             CONTACT
             PRINTS


   N{ost photo finishers throughout the
country are equipped with contact enlarge-
ment printers that produce approximately
3 x 4 prints from the negatives you get
rvith this Falcon Minicam Senior.

   Retail prices for these enlarged prints
vary in different sections of the United
States. However, in most cases they cost
only slightly more than ordinary qtrality
prints. See your dealer for further infor-
nration.


UTILITY  MAN TIFACTTIRIN(}  CO.
               INCORPORATED
40 \4/ns'r' 25rrr Slnnnr' .  New Yonx, N. Y.
View original page 11Page 12 · Read text
www.butkus.us
          (atn- fiot-CaMryinq-
           Falcon MINICAM Senior
                        The unique"Ever-
                             ready" feature ap-
                                plied to a carrying
                             case priced so low
                             that it should sell
                         to almost every-
                          one rvho buys this
                         camera. Made of
                           sturdy, simulated
                                 leather, this smart
                          case looks several
                       times its  price.
                       Just snap open                      the two buttons.
                          rvithout moving
                        strap from your
                         shoulder-and the
camera is read.v for action. To close, simply
 pull back the cover and press the fastener bui-
tons, and 1,ou again have the camera covered
and protected.
          Cornfletc with  leat her
        shoulder straf.
              $1oo         Retails at only

T-TILITY  MAN TIFACTURING  CO.
                 INCORPORATED.  Nnw Yonx. N. Y.40 Wrsr' 25rrr Slnrrr
                   Printed in U.S.A.
View original page 12From the M. Butkus archive. Original publisher and archive notices are retained.
Check the model and edition against your equipment.
PDF verified 2026-10-10.