Film cameras
FED 5C - translation User manual
User manual for FED 5C - translation. 14 pages in English. Read the original PDF, download or print a copy without registration.
14 pagesEnglish6.7 MB PDF
Loading your manual…Open PDF directly
Document details
- Brand
- FED
- Model / document
- FED 5C - translation
- Document type
- User manual
- Language
- English
- Pages
- 14
- File size
- 6.7 MB
- Category
- Film cameras
- Document date
- Not specified in catalog
Search available document text
Find a term, then jump to its page in the original PDF. Image-only pages may not be searchable; check the PDF for exact wording and diagrams.
Page 1 · Read text
www.butkus.us

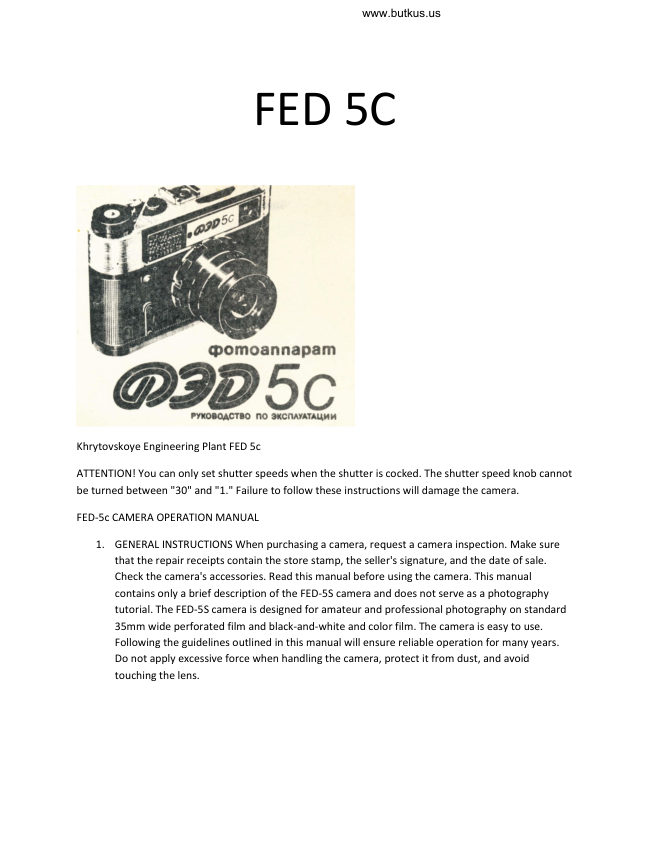
       FED 5C


Khrytovskoye Engineering Plant FED 5c

ATTENTION! You can only set shutter speeds when the shutter is cocked. The shutter speed knob cannot
be turned between "30" and "1." Failure to follow these instructions will damage the camera.

FED-5c CAMERA OPERATION MANUAL

    1.  GENERAL INSTRUCTIONS When purchasing a camera, request a camera inspection. Make sure
        that the repair receipts contain the store stamp, the seller's signature, and the date of sale.
       Check the camera's accessories. Read this manual before using the camera. This manual
        contains only a brief description of the FED-5S camera and does not serve as a photography
         tutorial. The FED-5S camera is designed for amateur and professional photography on standard
     35mm wide perforated film and black-and-white and color film. The camera is easy to use.
        Following the guidelines outlined in this manual will ensure reliable operation for many years.
      Do not apply excessive force when handling the camera, protect it from dust, and avoid
       touching the lens.
View original page 1Page 3 · Read text
www.butkus.us


4 - Shutter release button;
5 - Magazine cover;
6 - Magazine with synchronizer contact;
7 - Rangefinder window;
8 - Viewfinder window.


                                                     www.butkus.us


9 - viewfinder eyepiece; rangefinder;
10 - rewind knob;
11 - shutter speed knob;
12 - shutter speed scale;
13 - switch sleeve;
14 - shutter cocking lever;
15 - camera cover.
View original page 3Page 4 · Read text
5. PREPARING THE CAMERA FOR USE
Preparing the camera for shooting involves loading it with a film
cassette. Loading is done under normal, bright lighting. Rotate the case
knob to loosen the screw that holds the camera in the case. Remove
the camera from the case. Lift the camera cover latches 15 (Fig. 2) and
turn them one turn until they stop, as shown in Fig. 3. Then, pressing
with your thumbs on the cover, slide it in the direction of the arrow, as
shown in Fig. 4, and remove it from the camera.
Insert the cartridge into the camera's chamber. Insert the cartridge's
feed end into the slot in the feed slot, as shown in Fig. 5. Turning the
shutter cocking lever 14 (Fig. 2), pull the cartridge until its perforations
engage the teeth of both wheels of the transport drum.
View original page 4
Page 5 · Read text
Venmo @mike-butkus-camera  Ph. 2083
PayPal Name  Lynn@butkus.org      www.PayPal.me/lynnbutkus
View original page 5
Page 6 · Read text
www.butkus.us


Place the lid on the camera and slide its edge under the shield. Turn the shutter
release brackets half a turn and lower them into place. To feed unexposed film to
the frame window, cock the shutter twice, pressing shutter release button 4 (Fig.
1) after each cocking. The shutter release lever must be fully depressed each
time, otherwise the button will become locked, and the shutter will not fire when
pressed. After the second cocking, frame counter 17 (Fig. 6) will be set to 1 and
will display the first, final frame of the shooting day.


     www.butkus.us


16 - frame counter index;
17 - frame counter limb
View original page 6Page 7 · Read text
For ease of use, the shutter cocking lever has two positions: operating and
transport. In the operating position, the end of the lever faces the camera's back.
After loading the camera with film, turn the film sensitivity memory knob 26 until
the number corresponding to the sensitivity of the film loaded in the camera
aligns with index 24 (Fig. 9). The film reminder will help you remember which film
is loaded in the camera when you want to take pictures after a long break.


6. OPERATING PROCEDURE

So, your photo camera is loaded, you can start shooting. After choosing a shooting
location, open the camera case, remove the lens cap, and, looking through the
eyepiece of the viewfinder-rangemeter 9 (Fig. 2), check how the selected camera
fits within the viewfinder's illuminated frame, shadow. If the subject is closer than
three meters, compose the frame taking into account the parallax marks on the
frame.


Focus the lens. This is done by rotating the distance dial 20 (Fig. 8). Combine the
two images, visible in the viewfinder's eyepiece as shown in Fig. 7, in one.
When photographing distant objects, or if the distance to the object being
photographed is known, the lens focus can be adjusted using the distance scale.
When photographing an object with significant depth, or when photographing a
series of objects located at different distances from the camera, determine the
required aperture using the depth-of-field scale and frame the lens by setting the
View original page 7
Page 8 · Read text
www.butkus.us


aperture scale 18 to the desired position relative to the index. The depth-of-field
scale 19 consists of two rows of numbers corresponding to the lens aperture
scale, cylindrically positioned relative to the index of the distance scale 20 (Fig. 8).
When focusing the lens, the depth of field scale shows the largest and greatest
distance from the camera within which the image sharpness will be satisfactory:
the day of each selected when shooting, the sound of two fractions.


                        www.butkus.us


18 - aperture scale;

19 - depth-of-field scale;

20 - distance scale;

21 - distance scale index.
View original page 8Page 9 · Read text
22 - Channel index;

23 - Channel scale limb;

24 - Film sensitivity scale index;

25 - Bracket scale limb;

26 - Film sensitivity and aperture reminder limb;

27 - Exposure meter scale;

28 - Meter needle.
View original page 9
Page 10 · Read text
www.butkus.us


For example, in Fig. 8, you can see that when focusing the lens at a distance of 3
meters, with an aperture of 5.6, all objects within the aperture range of 2.5 to 4
meters will be sharply captured. With an aperture of 8, objects within the
aperture range of 2.2 to 5 meters will be sharply captured. The shutter speed is
determined by the required 10-day shooting time. To do this, point the camera at
the object being photographed and, according to the meter's arrow, point the
camera at the 28-meter mark. Then, turn the shutter speed dial to the 25-meter
mark until the channel is clear, just below the meter's arrow. The yellow numbers
on the 11-meter mark indicate additional seconds, and the edge numbers indicate
continuous seconds.

In this position, the calculator will display a series of shutter speed and aperture
combinations. Any of these combinations will yield the same exposure. Select the
desired value depending on specific shooting conditions or the previously set
aperture. Figure 9 shows the calculator with the following combinations: shutter
speed 1/125 sec - aperture 2.8; then, shutter speed 1/60 sec, and aperture 4;
shutter speed 1/30 sec corresponds to aperture 5.6, and so on. Remember that
the exposure meter measures the average brightness of the objects being
photographed. If the subject's important area is small, or differs significantly in
brightness, it is best to measure the brightness in close proximity to the subject
when determining the shutter speed.
View original page 10
Page 11 · Read text
This means measuring the brightness from a distance of 30-40 centimeters. Avoid
direct light from powerful light sources into the photocell window, as this can
cause exposure errors.

When shooting, we recommend using a lens hood to protect the lens or upper-
side light.

Having determined the desired shutter speed, attach shutter speed knob 11 and
turn it until the index aligns with the selected value on shutter speed dial 12 (Fig.
10). Lower it into place. In Fig. 10, the knob is set to a shutter speed of 1/30 sec.
Shutter speeds can only be set when the shutter is cocked. The knob cannot be
turned between 30 and 1. The shutter speed numbers indicate the shutter speeds
given by the shutter in fractions of a second (1, 1/2, 1/4, 1/8, 1/15, 1/30, 1/60,
1/125, 1/250, and 1/500). The dot between the numbers 1 and 4 indicates a
shutter speed of 1/2 sec. The letter "B" determines the position of the shutter
head 2 for obtaining shutter speeds. Fig. 11. "by hand" - when pressing the
shutter release button, the shutter remains closed until the button is released. At
shutter speed scale divisions 1, 2, 4, 8, and 15, the shutter speed knob is set
slightly higher than at other divisions; do not press the knob down. Now point the
camera at the subject, check its position in the viewfinder.


              www.butkus.us


At the same time, gently press the shutter-release button. When taking
photographs with the self-timer, after setting the aperture and shutter speed,
cock the self-timer by turning the self-timer cocking lever 1 counterclockwise, as
View original page 11Page 12 · Read text
www.butkus.us


shown in Fig. 11, to the upper position. Mount the camera on a tripod and use the
viewfinder to set the desired camera position. Press the self-timer button 2 (Fig.
11) and take your pre-selected position. The shutter will be released in no less
than 9 seconds. The shutter can be cocked either with the shutter release or with
the self-timer cocked. When photographing with an IR lamp, the shutter should
be set to 1/30 sec, and the aperture value is selected according to the light
sensitivity of the lens, the distance to the subject, and the power of the lamp.


The camera has a clip 6 (Fig. 1) with a cordless connection. Before connecting,
remove clip 5 and insert the flash tube into the clip, as shown in Fig. 12. This will
connect it to the synchronizer contact. Flash tubes can be attached and released
with the shutter cocked or released. For more information on shooting with flash
tubes, please refer to the manuals included with the flash tubes and photography
guides. Pressing the shutter release button simultaneously with the shutter
release activates the flash tube. Flash tubes can also be activated using the self-
View original page 12
Page 13 · Read text
timer. When photographing, the film is unloaded from the cassette and wound
onto the take-up sleeve. To reload the camera for subsequent shooting, the film
must be rewound back into the cassette. Once you have reached 36 exposures,
release the shutter mechanism. To do this, press the shutter release sleeve 13 all
the way down (Fig. 13), locking it in this position. While pressing sleeve 13, do not
release the cocking lever, as this prevents the sleeve from locking. Then, press the
rewind knob 10 (Fig. 2) with your finger and turn it counterclockwise. When you
release your finger, the head pops up. Rotating the head as shown in Fig. 14, rewind the
entire film into the cassette. When unwinding the film, the lens cap must be closed.
View original page 13
Page 14 · Read text
www.butkus.us


The rewind speed is determined by the change in force required to eject the film
from the feed tube. Open the camera as described previously and remove the
cassette. The frame counter dial will automatically return to its initial position. To
engage the shutter mechanism, cock the shutter. Close the camera with the lid
and lock it. Place the camera in the case and secure it with the POWER SCREW.
When closing the case, remember to move the cocking lever to the travel
position. To do this, press the end of the lever against the shield. In this position,
the lever will not interfere with the closing of the case.

RULES FOR LOADING FILM IN A CASSETTE The camera is designed for use with a
135M type single-use film cassette.


Remove the spool from the cassette and insert the end of the film into the groove
of the cartridge, as shown in Fig. 1. Press the free end of the film twice (see Fig. 2)
and, pressing it with the finger of your left hand, pull the film out of the spool
with your right hand. The end of the film should enter the groove of the cartridge.
Pull the film until it locks (see Fig. 3). Load the cartridge with the new film into the
cassette. The end of the film should enter the groove of the cassette body (see
Fig. 4). Unloading the cassette occurs in the reverse order. To avoid damage to
the spit, it is necessary to periodically clean the cassette seal, removing dust and
any remaining emulsion or spit.
View original page 14
From the M. Butkus archive. Original publisher and archive notices are retained.
Check the model and edition against your equipment.
PDF verified 2026-10-10.