Flashes & lighting
Flashmaster camera User manual
User manual for Flashmaster camera. 9 pages in English. Read the original PDF, download or print a copy without registration.
9 pagesEnglish1.2 MB PDF
Loading your manual…Open PDF directly
Document details
- Brand
- Flashmaster
- Model / document
- Flashmaster camera
- Document type
- User manual
- Language
- English
- Pages
- 9
- File size
- 1.2 MB
- Category
- Flashes & lighting
- Document date
- Not specified in catalog
Search available document text
Find a term, then jump to its page in the original PDF. Image-only pages may not be searchable; check the PDF for exact wording and diagrams.
Page 1 · Read text
\\_
                             www.butkus.us

 lllllltrltlrrtllralllltla

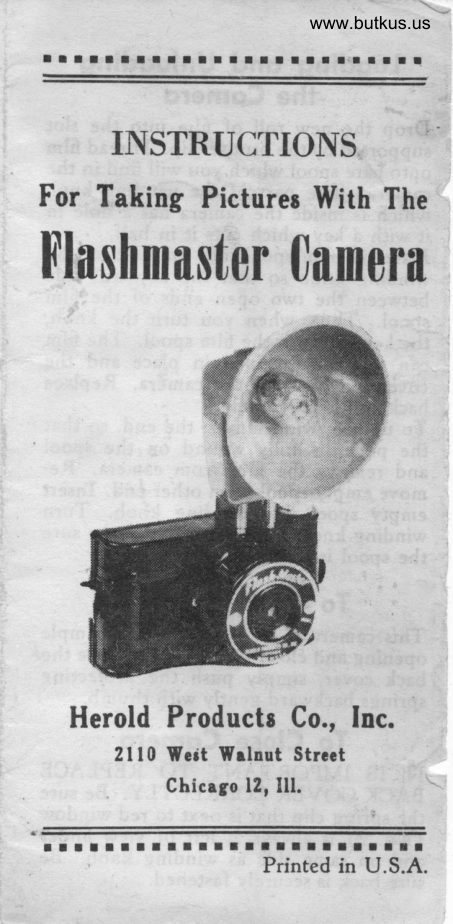
    INSTRUCTIONS
For Tahing Pictures With The
tlashmil$tor Camoril


  Herold Productr Co., Inc.
         2l l0 Vcdt Wrlnut Strcct
            Chicago 12, Ill.
                                                                                                                        ;

 tttlllttllllltllrllllrtrt
                        Printed in U.S.A.
View original page 1Page 2 · Read text
Looding ond Unlooding
         the Cqmerq
 Drop the new roll of film into the slot
 supported by the bronze clip. Thread film
 onto bare spool which you will find in the
 camera. The part of the winding knob
 which is inside the camera has a hole in
  it with a key which cuts it in half.
 Place the film spool into the hold of the
 winding knob so that the key will ride
 between the two open ends of the film
 spool. Thus, when you turn the knob,
 the key will turn the film spool. The flm
 can now be dropped in place and the
 cover put back on the camera. Replace
 back and lock securely.
 To unload, wind film to the end, so that
 the paper is fully wound on the spool
 and remove the film from camera. Re,
 move empty spool from other end. Insert
 empty spool into winding knob. Tttrn
 winding knob a few times and make sure
 the spool is engaged.
     To Open Comero
 This camera is made with a new simple
 opening and closing lock. To remove the
 back cover, simply push the projecting
 springs backward gently with thumb.
'     To Close Comero
 IT IS IMPORTANT TO REPLACE
 BACK COVER CORRECTLY. Be sure
 the spring clip that is next to red window
 (No. 2) is always at left of view finder
 and on same side as winding knob. Be
 sure back is securely fastened.
View original page 2Page 3 · Read text
www.butkus.us
    To Tqke Snopshots
                                      PlaceJust hold camera close to face.
view finder close to eye.
When you are sure the obiect to be
photographed is exactly in the center of
ihe view finder, hold camera perfectly
still, snap shutter lever and release
quickly. The area taken in the catnera
will be larger than that seen through the
view finder. Use the'view finder merely
to center the object.

      To Wind Film
When you are ready to wind film, turn
winding key slowly. When you see num'
ber "1" on back of film roll appear in
center of lower window marked ( 1) on
back of camera case, you can take your
first picture. After first picture is taken,
turn winding key and when the number
"1" comes into view in center of window
marked (2) on back of camera case, you
can then take your second picture. Re'
peat this same procedure with each num,
ber and be sure to remember that all the
numbers take TWO pictures each---one
when number appears in lower window
 ( 1) and a second picture when same
number appears in top window number
(2) . This gives you a total of 16 pictures
in black and white, or a total of LZ pic'
tures in Kodacolor. Before removing
film, be sure to wind until complete roll
of film is wound on the top roll. Open
back and remove roll of film.
                          ;lsd*.
View original page 3Page 4 · Read text
Venmo @mike-butkus-camera  Ph. 2083
PayPal Name  Lynn@butkus.org      www.PayPal.me/lynnbutkus
View original page 4
Page 5 · Read text
Time Exposures
Time exposures may be made during the
daylight hours only. PLACE EXPO'
SURE LEVER IN FLASH POSITION.
Do not use a flash bulb when making
time exposures. Place camera on table or
firm object--never hold in hand. Hold
shutter lever down arrd count number of
scconds time exposure requires, then re,
lease shutter. Be surc that exposure lever
is returned to INST. for regular snap,
shots.                                 www.butkus.us

   Toking Cofor Pictures
To take color pictures, use No. 127 Ko'
dacolor film. The strbject must be in
bright sunlight to take snapshots. The
best time of day is late morning or earlv
afternoon. At noon the light is too high
and tends to give people an unnatural ap,
pearance because their eyes are shadowed.
Do not attempt to take snapshots when
the subjects are in shadow or the light is
dull. Follow instructions given in the
instr.uction sheet that comes with the filnr.
               Mike Butkus     Digitally                                                                                                                     DN:ou=butkus.org,Date:cn=Mike2022.06.04signedButkus,email=mike@butkus.org,by11:04:22Mikeo=ButkusButkus-04'00'camera manuals,c=US
   To Toke Flosh Pictures
In order to take flash pictures, it is first
necessary to have the flash gun in operat,
irrg condition. This can be accomplished
in the following manner:
View original page 5Page 6 · Read text
www.butkus.us
Remove back cover from flash unit by
gently pulling back on finger tab located
at top.
Insert batteries, of type given below, in
holder in the direction as indicated on
inside-one tip up and one tip down.
Replace cover.
1. Type of bulb to be used and rltx'
   imum distance:
   Number M2--14  f eet Max.
   Numbers M5 et M2 5-25 feet Max.
   These can be procured at your local
   Photo supply store.
CAUTION: Do not use flash closer
than 5 feet without first diffusing light
in flash. This may be done by placing
a clean white handkerchief over flash gun
reflector.
2. Type of film to be used for FLASH
    pictures:
   For best results use Eastman's No:
   I27 Verichrome Pan or Ansco All
   Weather Pan.
3. Type of batteries to be used for flash
    pictures:
  The following penlight batteries for
   the flash.gun are obtainable from your
   photo supply dealer, hardware, drug,
   or department store:
   BRIGHT STAR No. 59
    BURGESS No. Z


                                                                                                                                                                                                                                        ;   EVEREADY No. 915
    RAY.O,VAC No. 7R
View original page 6Page 7 · Read text
To Take Flaeh Pictureg-cont'
 Only purchase batteries DATED IN
 AiitiNcn on THE DArE oF PUR'                                             six btrtnbn. They htu. a shelf life of
                            consumed ."t*t   .nd since the current
 t-;;h;fl"sh bulb is verv small, thqv should
 last for this period with normal use' It
               as to the condition of the ;;;t-i" do"bt                               new batteries, it is advisable to obrain
 ones. Their cost is very reasonable'
TO OPERAfE CAMERA WHEN
 TAKING FLASH BULB PICTURE.
                       FLASH MOVE LEVER ARM TO
                                    pressing POSITION. Take picture by
 shutter lever down all the way until stop
  is reached-(flash  will not operate-prop:
                                            until                               n-ot  erly, if shutter lever is                              .pressed                   Place flash bulb in re' stop is reached. )  fle.tot. It is not necessary to twist bulb,                                    bulb as it is self locking. To remove
  lift up top lever-.slightly and bulb will
 pop out.
  It is recommended that flash shots should
 not be made at a distance greater than
                             completing bulb specifications. After
 flash pictures be sure that  expqslr-e                                           -                        FOR LEVER is returned to IN ST.
 REGULAR snaPshots.
                                   and With a minimum amount of care
  caution you should get very fine results
                                    pleasure. and derive a good amount of with this equiPment.
   THINGS TO REMEMBER
 1. Before using alwaYs clean lens
                         remove    with soft dty cloth, to
     dust, finger Prints, dew, etc.
View original page 7Page 8 · Read text
E
                              www.butkus.us                                  Fl_2. Advance film after each expo.
    sure. Avoid spoiling good pic,
    tures by double exposure.
 tJ.  Be sure sun is behind your back
   when taking pictures.
1. When taking color pictures be
   sure that every part of the
    subject is evenly and brightly
                                                                                                                           gt,    illuminated.                                                                                     F"
 ). Use the viewfinder to center
   the subject. The camera takes
   more than you see through the
    viewfinder.

    SPECIAL FEATURES
 l. Takes brilliant full color and
    black and white photos.
2. The film track is scientifically
   curved in the camera to bring
    every part into sharp focus.
3. Takes 16 pictures for the price
    of 8 in black and white or color.
.4. [Jses No. 127 frlm for black and
   white   No. 127 Kodacolor for         -_
    color.
                                                                             It. Has a Genuine Graf lens.               *t
6. Has eye.Ievel centering view,       t
    finder.
7. Fully guaranteed.
View original page 8Page 9 · Read text
{F       3,'o #J

 tltlttlltttrrrltlllatlr                                                            ll

                                www.butkus.us

      GUARANTEE
  This camera is guaranteed against
all dcfective workmanship and ma,
terial for a period of 90 days. Guar,
  "e& does not apply where the
c?.Inci?. has been damaged or broken
through careless handling.

  For service, return camera to the
factory. Prepay all charges, and
send F1.00 to cover cost of postage
and handling.

   Failure to enclose $ 1.00 handling
charge will delay the repair and re,
turn of your camera.


 ltlrttlttttlttrlttlltllrt
View original page 9From the M. Butkus archive. Original publisher and archive notices are retained.
Check the model and edition against your equipment.
PDF verified 2026-10-10.