Film cameras
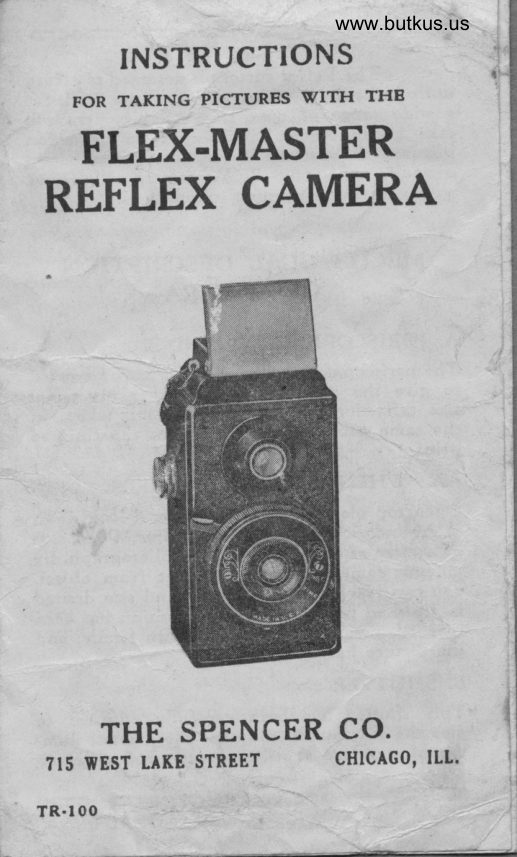
FLEX-MASTER Reflex User manual
User manual for FLEX-MASTER Reflex. 9 pages in English. Read the original PDF, download or print a copy without registration.
9 pagesEnglish1.4 MB PDF
Loading your manual…Open PDF directly
Document details
- Brand
- Flex-Master
- Model / document
- FLEX-MASTER Reflex
- Document type
- User manual
- Language
- English
- Pages
- 9
- File size
- 1.4 MB
- Category
- Film cameras
- Document date
- Not specified in catalog
Search available document text
Find a term, then jump to its page in the original PDF. Image-only pages may not be searchable; check the PDF for exact wording and diagrams.
Page 2 · Read text
€O€O€€O€O€O€O€

      The Reflex camera is designed to afford
 unlimited picture-raking opporrunities. Built for
a wide range of uses, this reflex camera wiil
take group scenes, time exposures or action
pictures. Follow the instructions given herein
carefully, and your Reflex camera will  rcpay
 you with prize-winning photographs.

  MECHANICAL DESCRIPTION
       OF CAMERA
A. PERISCOPIC VIEW FINDER
The periscopic view finder has been constructed
to give the amatetrr photographer an actual
 size reflection of the picture being taken, in
the same proportions and size as the finished
print.
AA. WHEN TAKING PICTURES.
Open top metal cover carefully and look d6wn
in ground glass enclosed under cover. Point lens
of camera at object you want to photograph. By.
moving camera closer or farther from object,
you can reach the proportions and size desired
in finished print. $7hen this position has been
reached, press shutter trigger down firmly, and
the picture has been taken.
B. SHUTTER
This shutter has becn carefully adjusted to
give the maximum utility for the greatesr num-
ber of rtandard shots, and will produce ercel-
3()G€()€()€O€()€(r-()
View original page 2Page 3 · Read text
www.butkus.us
-O€O€0€0€X)€o€()Glent results when taking landscapes, groups,
portraits, indoor bulb shots and regular action
shotr.


  Mike Butkus    Digitally                                                   DN:ou=butkus.org,Date:cn=Mike2021.12.01signedButkus,email=mike@butkus.org,by20:49:04Mikeo=ButkusButkus-05'00'camera manuals,c=US


c. sHLrrrER ADJUSTMENT
      The instant and time adjustments on tha
Reflex camera is made by moving the indicator
at thc right sidc of camera to cither INST or'
TIME.

=x@:€O€>'J-Xt-xr<
View original page 3Page 5 · Read text
DO€DO€()€O€OGO€O€
 FOR INSTANTANEOUS PICTURES
 Be sure that indicator is pointing ar INST.
 Hold camera firmly. Sight object in ground
 glass view finder.  Press shutter trigger down
 firmly, and the picture is taken. Failure to
 hold camera absolutely still while taking pic-
 tures may result in a blurred photograph.
 FOR TIME EXPOSURES
                                           place Move lever from INST. to TIME.
 camera on any stable support such as window
 sill or table so that camera will be absolutely
 motionless. Never hold camera in your hands
 for time shots. Sight object through ground
 glass view finder, press down shutter trigger and
 hold trigger down in this position until you havc
 counted the required number of seconds, ( I sec-
onds as a general rule, depending on amount of
light and type of film in use). Now release.
 If you wish to return to INST. daylight shoot.
ing, remember to push lever back from TIME
to INST.
D. LENS
The Reflex lens is a fixed focus super-speed
Graf lens. The only precaution necessary is to
keep the lenses clean. Be carful not to scratch
or break lens when handling camera.
>()€()€O€OGO,S0C:>oG!
View original page 5Page 6 · Read text
()€{)€()F.)-                 }€xt:(  www.butkus.usr:(    )€      F{                       =>(
TO OPEN AND ELOSB CAMERA                                                               f1
     On the back of the Reflex Camera is a
knob that unscrews by turning. (Jnscrew this      r1
knob as far as it can go. When this has been
                                 easily removed                may be         back               coverdone, the                                                                                                                                                                          lit.lI                                                  \il7hen           l,                             gr pressure.              excessive                      pulling       anywithout
 replacing back cover, see that ridged, slots at     r{
bottom of back cover are on both sides of pro'           l-li
 truding ridge in camera case. Push back cover
on case forward, and turn knob from left to                tllit
 right as far as it will go, without excessive twist'                      I
ing, and the Refl*  is ready  f or action.                                         I

TO LOAD AND UNLOAD CAMERA
Always load and unload camera in subducd     t
light, never in bright sunlight. Place empty             i ,l                                                                                                        l,lspool in receptacle containing winding key at
top of camera with slotted end in oontact with
winding key. Place film in receptacle at extremc
opposite end (under the film retainer spring)
at thc bottom of camcra.
Break seal and pull in the red paper toward
cmpty spool and thread through broadest side
of the spool. Turn winding key t'wo or throc                     iti                                                                                                                                  | ,,times undl paper r,rlls on cmpty spool. Rcplace
back on camcrl.
-ao->o€0€o-o€(r€oGD()€'.
View original page 6Page 7 · Read text
--o,--tO€(;       D( )€(   )€o€>(      )€
TO WIND FILM
Turn winding knob slowly, while watching lower
red window on back of camera. When thc
figure "1" appears in the center of the lower
red window marked "A", the camera is tea'dy
for the first picture. Now, wind knob forward
until figure "1" appears in red window marked
"B", then take second picture. In this manner'
two exposures are taken for each number ap'
pearing on the film  roll. One in "A"-one
    t'8".in                                                   '
                                                  rrB"When Number 8 appears in center of
window, you will have aken 16 pictures.

When you have aken all the pictures, keep
turning the knob in same direction'until the
complete roll of film (including the red paper
which protects it)  is ail wound on the top roll.
Open back of camera as when loading in sub.
dued light, remove roll of fi[m; now seal roll
with piece of gummed paper which you will
find on the end of the ro[[, so that it cannot
run looee
r€(     )€r/.)€(          }*(     )€(      )€'     l€()€
View original page 7Page 8 · Read text
www.butkus.us


                        a


        CAUTION
'     To obtain best results,
    subject  to be photo-
      graphed should be at least
     8 feet away from camera,
View original page 8From the M. Butkus archive. Original publisher and archive notices are retained.
Check the model and edition against your equipment.
PDF verified 2026-10-10.