Film cameras
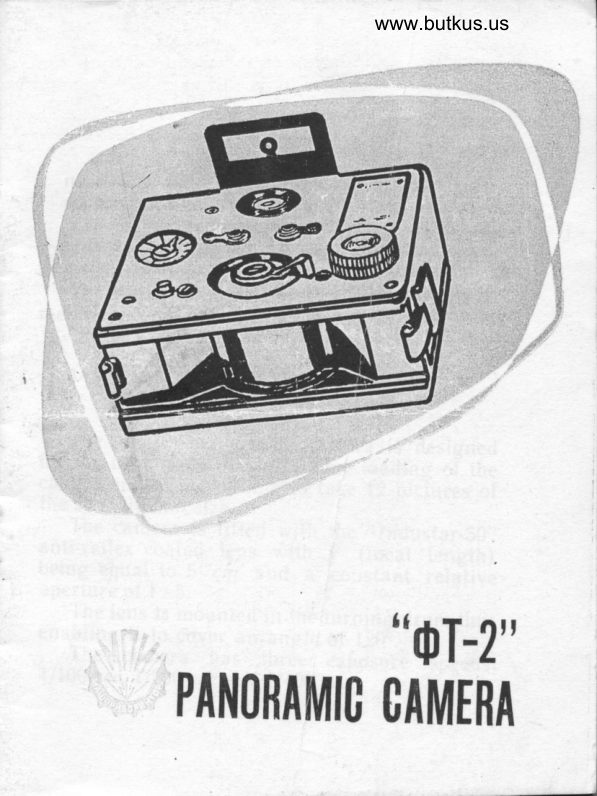
FT-2 Panoramic User manual
User manual for FT-2 Panoramic. 13 pages in Russian, English. Read the original PDF, download or print a copy without registration.
13 pagesRussian, English1.9 MB PDF
Loading your manual…Open PDF directly
Document details
- Brand
- Various brands
- Model / document
- FT-2 Panoramic
- Document type
- User manual
- Language
- Russian, English
- Pages
- 13
- File size
- 1.9 MB
- Category
- Film cameras
- Document date
- Not specified in catalog
Search available document text
Find a term, then jump to its page in the original PDF. Image-only pages may not be searchable; check the PDF for exact wording and diagrams.
Page 2 · Read text
Hrl


                                                                                                                                                                         i
                                                                                                                                     'll
   This booklet describes basic instructions on                                                   I
how to use the "QT-2" camera and cannot be
regarded as a photography rnanual.
   Eelore using the came ra, peruse the handling
and operating instructions in this description.
    Insignificant discrepancies between the des-
cription and your camera are possible due to  rl
further technical perfection of the camera design.
View original page 2Page 3 · Read text
www.butkus.us


                 PURPOSE
   The "OT-2" is a special panoramic  ca'mera
for iandsg.ape photogr-aphy wit,tr a large viewing                           -angle of the object.
   The camera is intended for amateur camera-
men, reporters and research workers.

   BASIC SPECIFICATIONS AND DESIGNATTON
       OF CAIVIERA'S COMPONENTS
  The "QT-2" panoramic camera is clesip_ned
for the normal 55 mrn fiim. Orre loacli"s'oi'tn.
camera malies it possibre to tarie 12 picTures o[the 24X ll0 m,n size.
   Trhe camera is fitted with the " lndustar-S0"
anti-reflex coatecl lens with F (focal length)being equal to 5 cm ancl a  cr-rnstant relativeapertureofl:5.
   The ier-rs is mounted in flre turning clrunr thus
enabling it to cot,er an ang!e o[ 12fi",
  The camera has thr.ee  expoiLrre speeds:
l/100 sec, 11200 sec and l/400 Se'd.
View original page 3Page 5 · Read text
{
  A special light-proof magazine rhousing the
film 1.65 m long is provided for the camera
loading.
   The camera is furnished with an ordinary
folding visor for viewing the area being photo-
graphed.
   The camera is designed for taking pictures
with the lens constantly set. In practi-ce it  is
possib_le to take sharp enough pictules of objects
placed from l0 m to infinitv.

Overall Dimensions. mm:
    Length                                t20                i
    width                                  85
    Height (minus view-finder)               48
Weight, kg                                0.730

CAMERA DESICN AND HANDLING INSTRUCTIONS                      {                                                                                                                         I
                                                                                                                                                     I.l
                     Camera
   The diagram of the "OT-2" camera is shown
        The camera comprises the following:il  lig. l."Industar-50" lens / mounted inside turning
drum 2, feed magazine 3, graduated exposure

2
View original page 5Page 7 · Read text
counter roller 4 and take-up spool 6. The diagram
         also shows film positior-r 5 in the camera'
          The following fixtures are mounted on upper
            lid 2 (Fig. 2): exposure counter 3 with needle 4'
         ball level 7, right-hand lever 8 and left'hand
         lever 5, Exposure speeds are set by turning the
       above levers to various positions indicated in
         table 9. Besides the exposure speeds shown in
        the table an exposure speecl equalling roughly
          l/60 sec can also be attained by settilglevere
       8 and 5 into position shown in Fig.-4-'lTo wind
                                                           direc-                                             the                                    10 in                              turn key              Uy oieli-cture,          [Tln-r)   (/.,                                                   needle                                 arrow                                                               till             sltown               by the engrarred         tion  flt'         4 makes three turns around the counter axle plus  I        one mark o! the exposure counter s-cqle-.
              ffiutter  is cocked bv turning crank 1I
                                               The        towards release button /  until latching-
         exposure speed setting is not coupled with the
         shutter cocl<ing and film winding.
            Frante 6 is a rriew-finder. Standard thread 2
                                                     / for lixing          lFig. 3) is provided on the lower lid
          th! carnera on a tripocl or in the case. Side walls
          oi ihe cletaclrable li'd / (Fig.4) have jacks 2 tor
          locliing the camera after its loading.

             4
View original page 7Page 9 · Read text
Magazine and lts Loading
         The magazine consists of four parts: cart-
         ridge, outer cramp, inner cramp and reel. To
       open the magazine, remove the outer and inner
       cramps from the cartridge and take out the reel.
       Magazine is loaded with a film in red light or in
        complete darkness depending on the film type.          I
           Fix the film end under the spring and start                                                                                                                                                                                                                                                                                                                                                                   It        winding the film over the reel. Trhe light-sensitive
        layer of the film should face inside towards
        the reel axle.         the reel and pulling the                      'Holding
        loose end of the film do not tighten t,he winding
        for the resultant friction between turns mav
       cause scratches on t,he light-sensitive layer.
       Do not touch the light-sensitive layer both
        during the magazine loading and while handling
        the film. T,he film can be held only by the per-
         forated edges. Insert the reel with film into the
         cartridge, leave the film end passed between the
        cartridge dies, slip on the outer and inner
         cramps.
           Subsequent operations with the ma gazine can
        proceed in light.

                           :l


i-
View original page 9Page 10 · Read text
www.butkus.us
                      Camera Loading

         Slip the take-up spool out of the camera. Pull
      the filrn end l2-13 cm long out of the ma gazine.
    li,   Take out the reel from the empty spool and fix I      the film end under the pressing spring, wind one
      I   \    turn and assemble the spool.
      When fixing the film end make sure that theI'    slot of the spool is in the upper position. Turn
      the open camera with its back to you. Set needle
I   4 (F\g. 2) of the exposure counter at mark "6",
      insert the nra gazine and take-up spool into the
     camera. Slip on the lid and latch locks 2 (Fig. a\.
      To advance the unexposed film to the film        r
     gate turn rvinding key 10 (Fig. 2) by 3.5 turns J +     of needle 4 and set the latter at the mark with      figure "I".                                6
                                 N0 ''  I               Photographing
       The "OT-2" camera makes it possible to take
 $   hand-held photos and to shoot with tripod with
     the slipped on case. Photographing can be ef-
 u   Iected without case from any horizontal plane.
       .  Prio'r to photographing:
       open the case and swing out the case cover;
             lift the rriew-finder:
View original page 10Page 11 · Read text
mount ttre camera on the tripod rvtren photo-
graphing with the latter.
   Then set the exposure speed b.v turning levers
8 and 5 into positions shown in table 9 (Fig.2)   .
   Cock the shutter by turning crarrk //  clocl<-
wise until it clicks.
   Focus the camera with the view-[inder, set
the bubble of the ball level into the central posi-
tion and release smoothlr,' button L See that
the bubble of the level is not displaced frorn the
level centre when photographing a 'horizontalplane. Hold the camera fast r,r'ith both lianils
when taking hand-held pictures.


                Camera Unloading

   To unloacl the canrera:
   open the camera, i.e. remove baclt detachable
lid / (Fig. a);
    slip out take-up spool 6 (Fig l) r,vith  f ilm by
Iifting crank 10 (Fig. 2) until stop. The canrera
is ready for reloading.                                                                                {f
                                                I        Maintenance and Care of the Camera
   Protect the camera from impacts, jerks, dr,rst,
dampness and sharp temperature changes.

8
View original page 11Page 12 · Read text
www.butkus.us
       Keep the camera with the released shutter iir
     case. Moisture unlavourably affects the mecha-
                                                      lenses'     nical parts and coated surfaces of the
    When in use, see that no rain or snow fall on the
       r'ar.nera. When changing from cold to warm' do
I'r'I     not opetr the case. Let the camera warm up in
      the buttoned case.

                          Cleaning the Lens
       The "lnclustar-50" lens is liouserl inside the
      carnera ancl thus prevented from getting dirt5''
      Nerrertheless it can gather some dust with time'
    To get access to the lens, cock the shutter and'
      lroliing tl-re lens drum with finger, press the
                                                        the      release button and s,hift the clrum slit to
        rniclclle of the camera' Dust and fogging traces
     can be remorrecl from the coated surface of the
        Ierrs by a solt brush or cotton-wool pad slightly
                                          perfume      soakecl in rectif ied alcohol, ether or
       uiithout pressing against the suriace cleaned'
          Et,eniicluetocareless'lrancllingofthecoaterl
      lens or some other reason the anti-flare coating
       oi outer suriaces is cJamaged, the lens will uever-
View original page 12Page 13 · Read text
theless transmit more light and will produce
pictures of higher contrast than an ordinary lens.
of t:he same type.


                  Camera set
  dT-2 camera with detachable back I pc
  Metal magazines          4 pcs
  Camera case                        I pc
  Camera's descrrption            I copy     1
View original page 13From the M. Butkus archive. Original publisher and archive notices are retained.
Check the model and edition against your equipment.
PDF verified 2026-10-10.