Film cameras
Fujica 35 FS User manual
User manual for Fujica 35 FS. 26 pages in English. Read the original PDF, download or print a copy without registration.
26 pagesEnglish6.0 MB PDF
Loading your manual…Open PDF directly
Document details
- Brand
- Fujica
- Model / document
- Fujica 35 FS
- Document type
- User manual
- Language
- English
- Pages
- 26
- File size
- 6.0 MB
- Category
- Film cameras
- Document date
- Not specified in catalog
Search available document text
Find a term, then jump to its page in the original PDF. Image-only pages may not be searchable; check the PDF for exact wording and diagrams.
Page 1 · Read text
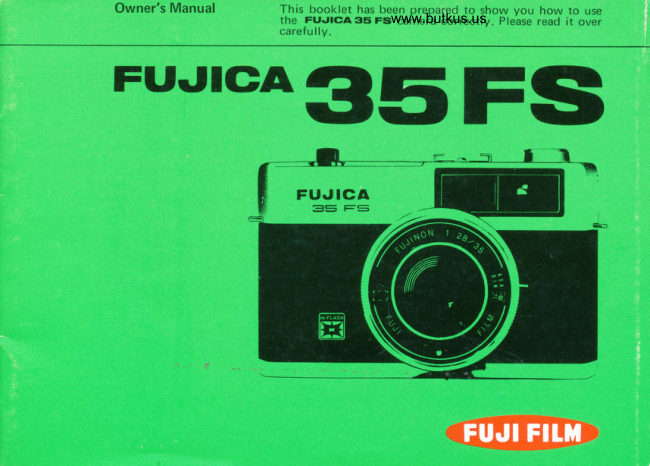
Owner's Manual          This booklet has been prepared to show you how to use
                         the FuJlCA35FSi www.butkus.uscamera correctlv. Please read it over
                                 carefullv.
FurrGASSFS
View original page 1Page 5 · Read text
HOW TO LOAD THE MERCURY BATTERY


1. 0pen the Mercury Bat-   2. Insert one mercury hat-  3. Be sure the battery   ls
   tery Chamber Cover.           tery (HS-D 1.3V).              inserted properly.
  \d(-,/
                       Ell        -Lf      w     C}-fr@G       o               a                       t1. Use a coin to open the cover.    2.  Examples:
                        MALLORY PX.13
                              EVEFIEDY EPX-'I3
                          The  battery  that  comes     Wipe the poles clean before
                              packed with  your camera      loading the battery.
                           may not last a full year since    The battery will  last for
                                                             it is only supplied as a spare     about one year.
                                         battery.
View original page 5Page 8 · Read text
www.butkus.us


              Viewfinder Eyepiece
               Film Rewind Crank Shaft
             Film Chamber
             Tripod Socket
              Film Advance Lever
            Mercury BatterY Chamber
             Holds one mercury bat-
            tery (HS-D 1.3V) for
             powering the camera ex-
             posure meter.
               Film Sprocket Wheel
              Film Rewind Button
              Film Take-up Spool
            Back Cover
              Pressure Plate
View original page 8Page 9 · Read text
EE EXPOSURE  (First, remove the lens cap)
$    r-o.u the Film   . Alwayssunlight.choose a shady place to load your film. Avoid loading in direct
1. 0pen the Camera Back.    2. Load the film cartridge.     3. Insert the film tip into
                                                      the slot.


1. Lift the Film Rewind Crank.   2. Hold the cartridge with the   3. Insert the trimmed end tip
                                spool head pointing to the      of the film deep into the slot
                               bottom of the camera and fit       of the Film Take-up Spool.
                                 the  F ilm  Rewind Crank
                                Shaft into the hole in the
                                opposite end of  the  car-
                                      tridge. The  cartridge will
                          now  fit snugly in the Film
                                   Chamber-
View original page 9Page 12 · Read text
EE EXPOSURE                                www.butkus.us
      t.. the shutter speed at -dS                                or 4r


                                         - 11250 sec., for shooting outdoors in bright sunlight.
                                         - 1/30 sec^, for shooting outdoors on a cloudy or rainy day, or
                                           indoors in a brightly lit room.
                  x6Ea!-<^                                                   ac                                dJ,   {.


To set the shutter, just turn the
ring and set the marks opposite
the Setting Mark.       ffi
View original page 12Page 13 · Read text
EE EXPOSUBE
 O   r-oot throush the Viewfinder
    1. What You Will See through the Viewfinder
                              o Zone focusing symbols and indicator bar./The bar
                                            shows you the correct focus.
                              o Underexposure warning mark.llf the indicator bar
                                            remains inside this mark when you press the Shutter
                                                Release Button half-way down, it means the light is too
                                         dim for correct exposure.
                                                   r  Parallax correction mark./lf your lens is focused for !,
                              be sure your picture is framed inside the parallax
                                                  correction mark.
                              o Aperture Scale and indicator bar./They show you the
                                                   aperture you are using to shoot your picture.
                              o Bright frame./Everything inside the frame will be
                                                  pictured on the  f ilm.
                              o Flash Mark./lt will start blinking as soon as the
                                 FUJICOLOR STROBO S is charged and ready for                                             -     shooting.
          o
   a  Parallax
     ln photography, parallax is the angular
     difJer of the obiect as seen through the
    viewfinder and as taken by the  lens
     resulting from the change of position
    from which it is viewed.


t0
View original page 13Page 14 · Read text
EE EXPOSURE                                www.butkus.us


2. Focus the Lens
 1. Focus with the zone focus-                               2. Focus with the distance
    ing symbols.                                                                    scale.
                                                               Eti == 5.5ft3ft (O.9ml(1.5m)forforclose-ups.half length
                                              oortraits.
                                                             frf = 11.5ft (3.5m) for  full
                                        length portraits, group pic-
                                         tures, and for quick snap-
                                           shots. (Snapshot mark)
                                     t^ =infinity 1 rc ) for shooting
                                      anything farther than 11.5
                                                    ft (3.5m).

       o               o
1. Look  through the  V iew-     You  will  see the  same   2. You can also focus the lens
   finder,  turn the  Focusing     symbols on the ring itself  .      with the distance scale en-
   Ring and set the bar to the     You can focus for the shot     graved on the side of the
   symbol you want. The ring is     you want by  setting the      Focusing Ring. The setting
   provided with click stops.         symbols on the ring opposite     mark is the white line on the
                                       the Setting Mark.                 camera body.


                                                                                                                                          1l
View original page 14Page 15 · Read text
EE EXPOSURE


3. Use the snapshot mark on a
    clear day outdoors.

        G


                  www.butkus.us
       o
3. For  shooting outdoors in
   bright sunlight, set the Jocus
   at  $i    . Practically any sub-
   ject will be in sharp focus
   with th is setting and it is also
   the best camera setting Jor
   shooting fast-moving sub-
         J ects.
View original page 15Page 16 · Read text
EE EXPOSURE                                  www.butkus.us


3. Check the Exposure Indicator Bar and Underexposure
   Warning Mark.
 'l  . Correct Exoosure            2. Under Exposure


       a              o
1. Press the Shutter Release     2.   lf the exposure indicator bar
   Button halfway down.  lf the      does not move out of the red
  exposure  indicator   bar      zone when the camera is set
  moves outside the underex-       at-,F. change the setting to
  posure warning mark (red       €r-  lf   it still remains in the
  zone on the upper right of      red zone, you will have to
   the viewfinder), you can go       shoot with flash,
  ahead and shoot your pic-
    tu re.
                                                                                                                           13
View original page 16Page 17 · Read text
EE EXPOSURE
         ot,"t You Are through Shooting  S
    1. End of the film.           2. Press the Film Rewind   3. Rewind the film.
                                     Button.
     {x                         ICil

                                        a      oo      When the Exposure Counter  2. Press the Film Rewind But-   3. Turn the Film Rewind Crank
      shows that  the  specified    ton  to  free the Sprocket       in the direction pointed by      number of frames has\mbeen     Wheel.                          the arrow. A sudden release
       exposed, stop strooting.                                             of tension will tell you that
                                                                   the film has been rewound
                                                                  back into the cartridge.                                                          -


14
View original page 17Page 18 · Read text
EE EXPOSURE                                www.butkus.us


4. Open the Camera Back   5. Send out your film for processing as soon as possible
  and unload the cartridge.
                                         {til'
                           J
                               ',-11|


     lf something goes wrong and          lf the Film Advance Lever
   the film cannot be rewouno        fails to return at the end of
   to the end, do not try  to      the roll, just press the Film
   force  it back with the Re-     Rewind Button, swing the
   wind Crank. The film might       lever fully out and let it snap
   break  if Vou do. Just take      back into position.
   your camera to your photo-      Atter unloading the film, be
   finisher without opening the     sure to  press the Shutter
   Back Cover and explain the      Release Button to free the
   situation to h im.                      spring.                                                                           l5
View original page 18Page 19 · Read text
TO SHOOT WITH FLASH
      How to use FUJICOLOR STROBO S.                 (lt will cause the flash mark in the Viewf inder to blink).    HOWs     l. Remove the hot shoe 2. Mount the STB0B0 S on   3. Set the guide number op-
    cover.                    the camera.                   posite the Setting Mark.
                 fl,


                                     .Tr,.^             Et                *   fX6{                         o
     1. FUJICOLOR STROBO S is a   2.  Insert the foot into the Hot   3" The shutter speed is set at
        cordless flash. All you do  is       Shoe.                                 'll3Osec., and the flash syn-
        insert the strobo foot  into                                          chronization contact is "X".
        the camera Hot Shoe.                                      The black guide numbers re-
                                                                              present meters and the green
                                                               guide  numbers  represent
                                                                                               feet.

l6
View original page 19Page 21 · Read text
HOW TO SHOOT WITH FLASH
               lt you are using other types of flash ..... @


                   66_€qS

         o
             '1        . Just set the                  camera to the           lf you are using a cord type
       specified guide number.  lf        flash. be sure to connect the
       the guide number is a figure     cord to the Sync Socket in
      anywhere between the num-      the upper left side of  the
        bers engraved on the camera,       camera.
       use a guide number that is    3. Remember, it  is only FUJI-
       smaller than the  specif ied     coLoR STRoBO S that witl
       number.                     cause the  flash mark  to
l8                                               blink.
View original page 21Page 22 · Read text
HINTS TO BETTER PICTURES                                               www.butkus.us
$         to Hold the Camera    "o*
                         To take good pictures, you must first of all, hold the camera steadv.
                                 This is especially important  if the shutter speed is set at €>  .


                       O               o
                                 Rest the elbows against the     Guard against placing your
                                         sides of your body. place the        fingers in front of the camera
                                camera against your face, re-        lens and the E E window.
                                   lax your shoulder muscles
                           and press the Shutter Re-
                                           lease Button gently down.


                                                                                                                                          l9
View original page 22Page 23 · Read text
HINTS TO BETTER PICTURES
    to* to Shoot Backlighted PortraitsO


                              (ASA) 100        (ASA) 50
     KT*KTO
1. Your portrait will normally  2. To make your picture turn
   turn out dark due to strong     out iust right, give your film
   back light.                        one-half the ASA speed rat-
                                         ing Printed on the box.
View original page 23Page 24 · Read text
HINTS TO BETTER PICTURES                 www.butkus.us

                   Stage Scenes0         to Shoot    "o*


                               (ASAI 100       (ASA) 200
      BT*                     o
1. Spot-lighted subjects such as   2. To make your picture turn   Note: After  shooting in  the
   stage scenes will  nOrmally      out lust right, give your film           situations described in 2
   turn out too light due to the      twice the ASA speed rating       and 3, be sure to  reset
   darkness of the background.       printed on the box.                   the film spsed s€lsctor to
                                                                                                              its original position,
View original page 24Page 25 · Read text
HINTS TO BETTER PICTURES
        T-ftll When to Use a Filter
    1.- Taken without  f ilter. 2. Taken with a yellow filter.
        (With black & white film)


                        www.butkus.us
         o               o     Be sure to  use 49mm6,      used for shooting with both      Light balancing filters will
     O.75mmP screw-in type fil-      color and black &  white     change the color tempera-
          ters.                                films. They also afford lens      ture of  light for improved
      Exposure compensation  is       protection.                      color rend ition with  color
        automatic since the  f ilter will  o  Yellow and orange  f ilters for              f ilms.
       cover both the Taking Lens      black and white landscape     ND  f ilters are used for shoot-
       and the EE Window.            photography will  enhance      ing with  both color and
       U ltraviolet   f ilters  f or absorb-      contrast and improve sky      black & white  f ilms for  re-
       ing u ltraviolet rays can be         to nes.                           ducing the quantity of light
22                                                                            that passes through the lens.
View original page 25From the M. Butkus archive. Original publisher and archive notices are retained.
Check the model and edition against your equipment.
PDF verified 2026-10-10.