Film cameras
Fujica Auto Strobo 200x User manual
User manual for Fujica Auto Strobo 200x. 38 pages in German, French, Spanish. Read the original PDF, download or print a copy without registration.
38 pagesGerman, French, Spanish2.0 MB PDF
Loading your manual…Open PDF directly
Document details
- Brand
- Fujica
- Model / document
- Fujica Auto Strobo 200x
- Document type
- User manual
- Language
- German, French, Spanish
- Pages
- 38
- File size
- 2.0 MB
- Category
- Film cameras
- Document date
- Not specified in catalog
Search available document text
Find a term, then jump to its page in the original PDF. Image-only pages may not be searchable; check the PDF for exact wording and diagrams.
Page 1 · Read text
www.butkus.us

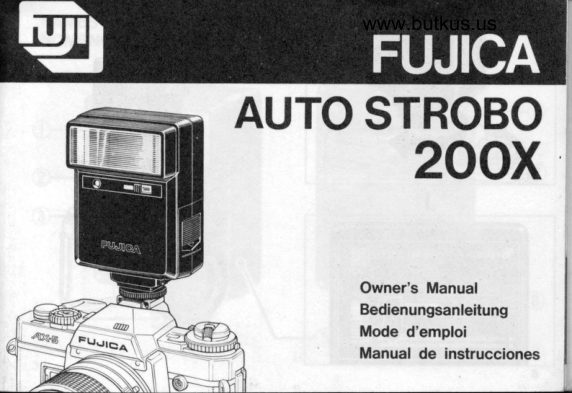
AUTO STROBO
      200x


               Owner's Manual
                 Bedienungsanleitung
             Mode d'emploi
              Manual de instrucciones
View original page 1Page 3 · Read text
www.butkus.us


Mike Butkus                              Digitally                                                                    DN:email=mike@butkus.org,Date:cn=Mike2023.04.29signedButkus,by16:35:38Mikeo=ButkusButkusc=US-04'00'camera manuals, ou=butkus.org,
View original page 3
Page 7 · Read text
INAMES OF PARTS

@ Flash Lamp-face
@ Sensor
@ film Speed Setector
@ Wheel Lock   gattery Compartment Cover        E@
@ Flash Ready Lamp                                                 .#
@ uain switch
@ Test Button
@ lot-shoe Contact
LOADING THE BATTERIES
I  Battery type
Use four penlight batteries (AA size). Alkaline-manganese  batteries
(LR6 type) are recommended because of their long service life.
o Recycle time will be longer in cold weather because low temper-
View original page 7
Page 8 · Read text
www.butkus.us     *
  atures will reduce battery efficiency. Try to keep the batteries
  warm in cold weather by carrying them in your coat pocket until
  they are needed.
o lf the flash is not to be used for a long intenral, retrove the batteries
  before putting it away because old batteries can develop leaks
  and damage  it.
I How to load the batteries
1. Open the Battery Compartment Cover by pulling it up in the
  direction of the arrow. (Fig. A)
2.Insert four batteries, plus (*) and minus (-) ends correctly as il-
  lustrated in the battery compartment, then close the cover by
  sliding it in until it locks. (Fig. B)
3. Turn on the Main Switch and make sure that the Flash Ready
  Lamp turns on in a few seconds. (Fig. C)
I  Baftery life
o lf the batteries are weak, it will take longer for the Flash Ready
View original page 8
Page 9 · Read text
r
  Lamp to turn on. lf the Flash Ready Lamp does not turn on after
  30 seconds, change the batteries.
 o Be sure to change the four batteries all at once and make sure
   all four are of the same brand and new.
 oAfter you are through taking pictures, always turn the Main switch
   off to save battery.
Note: Do not use rechargeable nickel-cadmium  batteries.
MOUNTING THE FLASH ON THE CAMERA
1. Turn off the Main Switch.
2. Loosen the Wheel Lock by turning it counterclockwise,  grip the
  bottom part of the flash and clip the strobe foot into the camera's
  accessory shoe. Make sure the foot goes all the way in because
  the flash might not function properly if it is only part of the way
   in, then turn the wheel Lock clockwise to lock the flash securely
  in place. (Fig. D)
3. To dismount the flash, loosen the Wheel Lock by turning  it
View original page 9
Page 10 · Read text
www.butkus.us
    counterclockwise then grip the bottom part of the flash and slide
    the strobe foot out. (Fig. E)
                                                                                                                                                          :
 TAKING FLASH PICTURES
  I  Setting the camera's shufter speed
  1. lf you are using the flash with a Fujica AX-series camera, the
   camera's shutter speed will automatically switch to 1/60 sec.
    (X-sync) as soon as it is fully charged, regardless of where the
    shutter speed dial has been set (except "8"  ).
  2.lf you are using the flash with a Fujica AZ-1, the camera's shutter
   speed will automatically switch to 1/60 sec. (X-sync), with the
    shutter speed dial set to "AE", as soon as it is fully charged.
  3.lf you are using it with other cameras, set the camera's shutter
   speed to 1/60 sec. (X-sync).
  I  Setting the film speed
  Set the Film Speed Selector in the front in accordance with the
10
View original page 10Page 11 · Read text
s'
speed of the film you are using.  (lf you are using an lso/ASA go
film, set it to "100".) (Fig. F)
 ISO/A$A   100 (80)    400

   DIN      21(2O)     27
I  Setting the aperture
Set the lens aperture to "4". (Set it to "4", whether you are using
an ISO/ASA 100 (80) or ISO/ASA 4O0 fitm.) (Fig. G)
View original page 11
Page 12 · Read text
:f
                               www.butkus.us
                                       than ISO/ASA 1OO (8O)               II  Aperture setting with film speeds other
  and 4OO
 Speed of Film Used    Aperture
 rso/AsA    DIN       Setting
   200      24                           5.6    160       23

    64         19          2.8

    25         15           1.6
t With the Film Speed Selector set to "100"
With film speeds other than ISO/ASA 100 (80) and 400, set the lens
aperture as shown in the above table to obtain correct exposure.


                                                                   1
View original page 12Page 13 · Read text
Testing           the                 flash f                                                                                                                             '                 'li- 1.  Turn      on the            Main                       Switch.
 2.lf the Flash Ready Lamp turns on, press  in the Test Button
  make sure that the flash fires. (Fig. H)                      "G
 I  Automatic flash range
The automatic flash range is 1-5m (3.3-16.s ft.) with an lso/ASA 1oo
film, and 2-10m (6.6-33ft.) with an lso/ASA 400 fitm. your ftash will
automatically deliver the exact amount of light needed for correct
exposure.  (Fig.l)
 o Turn off the Main switch after you are through taking pictures.
   (Fig. J)

SPECtFtCAnONS
Type-series-circuitry          computer flash.
Connection        Hotshoe and clip-on type with safety lock.
Guide Number-2O    (ISO/ASA 100. m)
View original page 13
Page 14 · Read text
www.butkus.usFlash Duration-1/'1500-1/30000 sec.                    sS
Angle of CoveragHovers  the view angle of a 35mm lens
                           (horizontal 60', vertical 45').
Recyc|eT|me-5sec.or|esswithnewa|ka|ine.manganese
                              batteries.
Light Quali            Daylight type.              H
Aperture Setting-F4    (ISO/ASA 100 and 400)
Automatic Flash Range-lSO/ASA 100 : 1-5m (3.3-16.5ft.)
                    ISO/ASA 400  : 2-10m (6.6-33ft.)
Battery Life-About        300-3000 flashes depending on the
                         shooting distance.
Power Source-Four      1.5-volt AA-size alkaline-manganese
                             batteries (LRO type).
Dlmensions-------102 (H) X 65 (W X 43 (D) mm
Weight---------------= 409 (without batteries)
:F Specifications are subject to change without notice.
View original page 14Page 15 · Read text
BEZEICHNUNG DER TETLE
e eliu
@ Sensor
@ Filmempfindlichkeitswdhter
@ RaOcnenverriegelung
@ Batteriefachdeckel
@ Alitzbereitschaftslampe
@ Hauptschalter@ Priifknopf                    :l
@ Mittenkontakt

EINSETZEN DER BATTERIEN
I  Batteriesorte
Vier Mignon-Batterien (Gr6Be AA) verwenden. wegen der langen
Lebensdauer werden Alkali-Mangan-Batterien (Typ LR6) zur Ver-
wendung empfohlen.
View original page 15
Page 16 · Read text
I                                   www.butkus.us
      o Die Blitzfolgezeit  ist bei kalter Witterung ldnger, da niedrige Tem-
        peraturen die Batherieleistung schwichen. Daher sollten Sie die
         Batterien bei kaltem Wetter in lhrer Manteltasche warmhalten bis
         sie gebraucht werden.
     .Wenn das Blitzgerdt uber einen lAngeren Zeitraum nicht benutzt
          wird, vor dem Weglegen die Batterien herausnehmen,da  alte BatterienLolct    anfangen konnen zu lecken und das GerAt dadurch beschddigtt wird.
      olol       f  Wie die Batterien elngesetzt werden: )      1. Batteriefachdeckel durch Schieben in Pfeilrichtung offnen.
          (Abb. A)
      2.Yier Batterien einsetzen, wobei darauf zu achten ist, daB die
        Plus- und Minus-Polaritiiten nicht vertauscht werden; siehe
        Markierungen im Batteriefach. Danach den Deckel wieder schlieBen,
       so daB er einrastet. (Abb. B)
        3. Hauptschalter einschalten und tiberprufen, ob die Blitzbereitschafts-
       lampe nach ein paar Sekunden aufleuchtet. (Abb. C)

       16
View original page 16Page 17 · Read text
TF
 I  Batterie-Lebensdauer
  o wenn die Batterien verbraucht sind, dauert es ldnger, bis die
   Blitzbereitschaftslampe aufleuchtet. Wenn sie nach 30 sekunden
   nicht aufleuchtet, mussen die Batterien ausgewechselt werden.
 o lmmer alle vier Batterien auf einmal austauschen und darauf
   achten, daB alle vier vom gleichen Typ, vom gleichen Hersteller
  und neu sind.
 o Nach der Aufnahme von Bildern immer den Hauptschalter  abschalten,
  um Batteriestrom zu sparen.
 Hinweis : Benutzen sie keine auf ladbaren Nickel-KadmiurirBatterien.
 AUFSETZEN DES BLITZGERATCS AUF DIE KAMERA
 1. Hauptschalter abschalten.
 2. Rddchenverriegelung durch Drehen im Gegenuhrzeigersinn l6sen,
   unteren Teil des Gerdtes fassen und den FuB in den Mittenkon-
   taktschuh der Kamera einschieben. Darauf achten, daB der FuB
   bis zum Anschlag eingeschoben wird, da das Blitzgerdt sonst
View original page 17
Page 18 · Read text
www.butkus.us
  mOglicherweise nicht richtig funktioniert. Danach die Rddchenver-
  riegelung im Uhrzeigersinn drehen, um das Blitzgerdt in Stellung
  fest zu sichern. (Abb. D)
3. Zum Abnehmen des Blitzger6tes die RAdchenverriegelung im
  Gegenuhrzeigersinn  drehen, um es zu l6sen, dann den unteren
  Teil des Gerdtes fassen und den FuB herausziehen. (Abb. E)

BLITZAUFNAHMEN
I  Einstellen der KameraverschluBzelt
1. Wenn Sie den Blitz zusammen mit einer Fujica-Kamera der AX-Serie
  benutzen, wird die VerschluBzeit automatisch auf 1/60 sec (X-Sync)
  eingestellt, sobald der Blitzkondensator voll aufgeladen  ist,
  unabhAngig davon wie die VerschluBzeiten-Wihlscheibe eingestellt
   ist (ausgenommen  "8").
2. Bei Verwendung mit der Fujica AZ-1 wird die KameraverschluB-
  zeit automatisch auf 1/60 sec eingestellt (X-Sync), wenn die
  VerschluBzeiten-WAhlscheide  auf "AE" steht und der Bli2kondensator
View original page 18
Page 19 · Read text
voll aufgeladen ist.                  ,in
 3. Bei Verwendung mit anderen Kameras die KameraverschluBzeit
   auf 1/60 sec (X-Sync) einstellen.
 I  Einstellen der Filmempfindtichkeit
 Filmempfindlichkeitswdhler an der Vorderseite entsprechend dem
 Empfindlichkeitswert des von lhnen verwendeten Films einstellen.
 (Bei verwendung eines lso/ASA go Films stellen sie ihn auf ,'100"
 ein.) (Abb. F)
 lso/AsA   100 (80)    400
   DIN      21(2O)     27
I  Elnstellen der Blende
objektiv-Blendenring  aul "4" einstellen. (Auf Blende 4 einstellen;
ungeachtet ob sie einen tso/ASA 100 (80) oder tso/ASA 400 Film
verwenden.) (Abb. G)
View original page 19
Page 21 · Read text
I  Blitz-Test
 1. Hauptschalter einschalten.
 2. wenn die Blitzbereitschaftslampe  aufleuchtet, den prr.rfknopf
   drticken, um zu sehen, daB der Blitz z0ndet. (Abb. H)
 I  Automatischer Blitzbereich
Der automatische Blitzbereich ist't-s m bei tso/AsA 100 und 2-10 m
bei lso/ASA 400. Das Blitzgerdt sorgt ftir eine automatische Lichtmen-                       tgen-Dosierung, um lhnen immer eine richtige Belichtung zu gewdhrleisten.  [,#
(Abb. D                      W
o Nach der Aufnahme schalten Sie den Blitzschalter ab. (Abb. J)

TECHNISCHE DATEN
Tyffiomputerblitzgerdt             mit Serienschaltung
AnschluB-Mittenkontaktschuhtyp  mit Sichertheits-
                           verriegelung
Leatzahl-2O          (ISO/ASA 100. m)
                                                                                                   2l
View original page 21Page 22 · Read text
www.butkus.us
Leuchtzeit-1/1500-1/30000 sec                      '#
B|itzwinke|-DecktdenBi|dwinke|von35mmobjektiven
                          (60" horizontal, 45" vertikal)
Blitzfolgezeit-S    sec oder weniger mit neuen Afkali-
                         Mangan-Batterien
                                                                                                                                                                       I ichtLichtqualitdt-Tages
Einsteflen der Blende-fl4 (ISO/ASA 100 und 400)
Automatischer Blitz--1-5 m bei ISO/ASA 100
bereich           2{0 m bei ISO/ASA 400
Batterie-Lebensdauer-Ungefdhr 300-3000  Bl itze entsprechend der
                             Auf nahmeentfernung
Stromque||e-Vier1,5VA|ka|i-Mangan.Batterien,Gr6Be
                AA (Typ LR6)
Abmessungen     102 (H) X 65 (B) X 43 (T) mm
Gewicht-140        g (ohne Batterien)
* Anderungen der technischen Daten sind ohne vorherige Ankundigung
  vorbehalten.
View original page 22Page 23 · Read text
NOMENCLATURE

@ Flash
@ Senseur
@ S6lecteur de sensibilit6
@ Molette de blocage
@ Couvercle du logement des piles
@ T6moin de charge du flash
@ Interrupteur principal
@ Bouton test
@ Contact sabot

CHARGEMENT DES PILES
I  Type de piles
Utiliser quatre piles miniature (taille AA). L'emploi des piles alcalino-
mangandse (type LR 6) est recommand6 en raison de leur dur6e de
service plus longue.
                                                                           23
View original page 23Page 24 · Read text
www.butkus.us
 o Le temps de recyclage est plus long par temps froid, car les
  basses temp6ratures r6duisent le rendement des piles. D6s lors,
  essayer de les maintenir au chaud par temps froid en les laissant
  en poche jusqu'au moment de s'en servir.
oSi le flash ne doit pas 6tre utilis6 pendant un certain temps, en
   retirer les piles avant de le ranger, car de vieilles piles risquent
  de fuir et d'endommager l'appareil.
I  Pour installer les piles
1. Ouvrir le couvercle du logement des piles en le tirant dans la
  direction de la fleche. (Fig. A)
2.Ins6rer quatre piles en respectant leurs polarit6s positives et
  n{Tatives comme indiqu6 dans le logement, puis refermer le couvercle
  en le glissant jusqu'A ce qu'il se verrouille. (Fig. B)
3.Allumer I'interrupteur principal et s'assurer que le t6moin de charge
  du flash s'allume au bout de quelques secondes. (Fig. C)
View original page 24Page 25 · Read text
I  Autonomie des piles
     oSi les piles sont faibles, le t6moin de charge ctu flash mettra plus
       de temps d s'allumer.  S'il ne s'allume qu'aprds plus de 30 secondes,
       remplacer les piles.
       r Remplacer en m6me temps les quatre piles et veiller que toutes
        soient neuves et de m6me marque.
     oPour 6conomiser les piles, couper I'intem.rpteur principal dds qu'on
      a termin6 la prise de vues.                                         i*
     Note: Ne jamais utiliser de piles rechargeables au nickel-cadmium.
    FIXATION DU FLASH SUR L'APPAREIL          G                                                        IE
       1. Couper l'interrupteur principal.        2. Desserrer la molette de blocage en la tournant a I'oppose du sens u
      des aiguilles, saisir la partie inf6rieure du flash et glisser son pied
'fl     dans la griffe porte-accessoires de I'appareil.S'assurer que le pied
       est pouss6 a fond, car le flash ne fonctionnera pas normalement
           s'il n'est ins6r6 qu'en partie; tourner alors la molette de blocage
View original page 25From the M. Butkus archive. Original publisher and archive notices are retained.
Check the model and edition against your equipment.
PDF verified 2026-10-10.