Camera accessories
Fujica Auto Winder X User manual
User manual for Fujica Auto Winder X. 12 pages in German. Read the original PDF, download or print a copy without registration.
12 pagesGerman1.1 MB PDF
Loading your manual…Open PDF directly
Document details
- Brand
- Fujica
- Model / document
- Fujica Auto Winder X
- Document type
- User manual
- Language
- German
- Pages
- 12
- File size
- 1.1 MB
- Category
- Camera accessories
- Document date
- Not specified in catalog
Search available document text
Find a term, then jump to its page in the original PDF. Image-only pages may not be searchable; check the PDF for exact wording and diagrams.
Page 2 · Read text
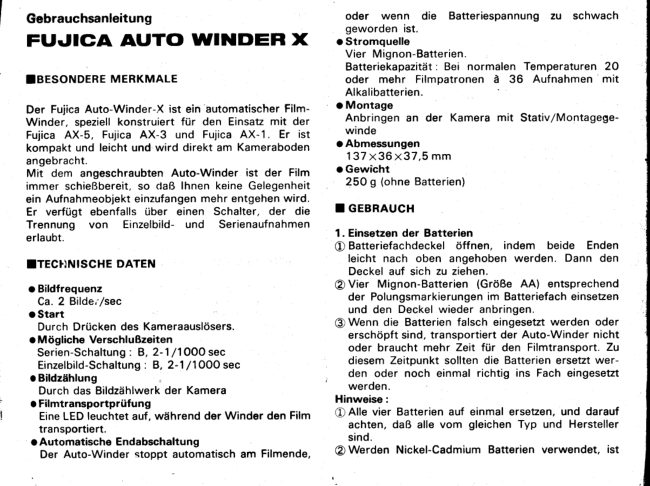
Gebrauchsanleitung                                 oder  wenn  die  Batteriespannung zu  schwach
                                                 geworden  ist.
FUJTCA AUTO WTNDERX        o Stromquelle
                                                          Vier Mignon-Batterien.
                                                               Batteriekapazitiit: Bei normalen Temperaturen 20
IBESONDERE MERKMALE                           oder mehr  Filmpatronen a 36  Aufnahmen mit
                                                            Alkalibatterien.
Der Fujica Auto-Winder-X ist ein'automatischer Film-    o Montage
Winder, speziell konstruiert fiir den Einsatz mit der     Anbringen an der Kamera mit Stativ/Montagege-
Fujica AX-5. Fujica AX-3 und Fujica AX-1.  Er  ist     winde
kompakt und leicht und wird direkt am Kameraboden    o Abmessungen' l                                                        3 7 x 3 6 x 3 7 . 5 m mangebracht.
Mit dem angeschraubten Auto-Winder  ist der Film    o Gewicht
immer schieBbereit,so rlaB lhnen keine Gelegenheit     250 g (ohne Batterien)
ein Aufnahmeobjekteinzufangenmehr entgehen wird.
Er  verfi.igt ebenfalls iiber  einen  Schalter, der  die    T GEBRAUCH
Trennung  von   Einzelbild- und  Serienaufnahmen
erlaubt.                                                        1. Einsetzen der Batterien
                                      O Batteriefachdeckel offnen,  indem  beide  Enden
                                                                 leicht nach oben angehoben werden. Dann denITEC}]NISCHE DATEN                                                    Deckel auf sich zu ziehen.
o Bildfrequenz                      @ Vier Mignon-Batterien (GrdBe AA) entsprechend
                                                        der Polungsmarkierungenim Batteriefacheinsetzen  Ca. 2 Bilde,'/sec
                                                 und den Deckel wieder anbringen. o Start
  Durch DrUcken des Kameraausliisers.        @ Wenn die Batterien falsch eingesetzt werden oder
 r M iigliche VerschluBzeiten                                erschcipftsind, transportiert der Auto-Winder nicht
  Serien-Schaltung: B, 2-1l10OO sec                     oder braucht mehr Zeit  ftr den Filmtransport. Zu
  Einzelbild-Schaltung: B, 2:U lOOO sec                 diesem Zeitpunkt sollten die Batterien ersetzt wer-
                                                 den oder noch einmal richtig ins Fach eingesetzt o BildziihlunS
  Durch das Bildzdhlwerkder Kamera                   werden.
                                                      Hinweise: r Filmtransportpraif ung
  Eine LED leuchtet auf, wdhrend der Winder den Film  @ Alle vier Batterien auf einmal ersetzen, und darauf
   transportiert.                                         achten, daB alle vom gleichen Typ und Hersteller
 o Automatische Endabschaltung                           sind.
  Der Auto-Winder stoppt automatisch am Filmende,  @ Werden Nickel-Cadmium Batterien verwendet,  ist
View original page 2Page 3 · Read text
der Filmtransport etwas schneller.                    Riickspulentriegelung der Kamera, und drehen Sie
 2. Anbringen des Auto-Winders an die Kamera         den Film mit der Ri.ickspulkurbelin die Filmpatrone
 MontagefUhrungsstift des Auto-Winders  in die Auf-    zur0ck.
nahmedffnung auf der linken Seite des Kamerabodens    6. Manueller Filmtrasport
einsetzen, die Fli.igelschraubedes Winders  in das   Wenn der Schalter abgeschaltet ist, kdnnen Sie den
Stativgewinde einfijhren und fest anziehen.            Film mit dem Transporthebel der Kamera transpor-
 3. Einstellen des Auto-Winder Schalters                   tieren.
Stellen Sie den Schalterentweder auf "SINGLE" oder     7. VorsichtsmaRnahmen
"CONT.", je nach gewijnschter Transportart.      @ Der Auto-Winder-X  arbeitet nicht, wenn die Bat-
Wiinschen Sie Einzelbildaufnahmen,stellen Sie ihn auf       terien in der Kamera erschcipft sind. Uberpriifen
"SINGLE"  Position. Der Auto-Winder transportiert      Sie daher zusammen mit den Winder-Batterien
den Film, jedesmal wenn der Kameraausldsergedri.ickt     auch immer die Kamera-Batterien.
wird, um ein Bild weiter. Wollen Sie aber Serienauf-  @ Bei Frostwetter verlangsamt sich u.U. der Film-
nahmen machen, stellenSie ihn auf "CONT." Position.      transport, weil geringe Temperaturen die Batterie-
 Das SchieBeneiner Serie und der Filmtransport wer-       leistungsfdhigkeitbeeintriichtigen. Halten Sie die
den solangefortgesetzt,wie der Auslciserbetetigt wird.       Batterien deshalb bei kaltem Wetter warm.
 4. Belichtung priifen und schieBen            @ Unbedingt den Schalter abschalten, bevor Sie den
Um eine Aufnahme zu machen, den Ausl6ser der      Auto-Winder an-  oder abbauen.
Kamera driicken. Wenn der Schalter auf "SINGLE"
gestellt  ist. k6nnen  Sie  nur  Einzelbildaufnahmen  TBEZEICHNUNG DER TEILE
machen, selbst wenn  Sie den Ausldser  gedri.ickt
halten. lst er aber auf "CONT."  gestellt, konnen Sie  @ Batteriefachdeckel
Serienaufnahmen machen, solange lhr  Finger den  @ Elektrischer Kontakt
Ausldser gedri.ickt helt. In beiden Fdllen transportiert  @ Befestigun gsschraube
der Auto-Winder den Film mit der hohen Geschwin-  @ Schalter
digkeit von 2 Bildern pro Sekunde.Wdhrend der Film  @ Filmtransportkupplung
von Auto-Winder  transportiert  wird,  leuchtet eine  @ M ontagefi.ihrungsstift
rote LED unter dem Schalter auf, um lhnen anzuzeigen,  @ Befestigungsschraube
daB der Film transportiert wird.             @ Stativgewinde
 5. Filmende und automatische Endabschaltung
 Sobald das Filmende erreicht  ist, stoppt der Auto-
 Winder automatisch. Wenn er stoppt, den Schalter
 ausschalten,um  die Batterien zu schonen, danach
 den Film zuriickspulen.Der Film kann bei montiertem
 Auto-Winder zuriickgespult werden. Driicken Sie die
                      www.orphancameras.com
                                                                            :?
View original page 3Page 4 · Read text
Mode d'emploi                        ,;',                      fisante.
AUTO-AI|TIEUR   FUr'TCAX       o AlimentationOuatre piles miniature.6lectrique
                                                 Autonomie : A temp6rature normale, au moins 2O
                                                      rouleaux de 36 images avec des piles alcalines.
ICARACTERISTIOUES SPECIALES                  o Montage sur l'appareil
                                                          Fixationsur le fond de I'appareilpar l'6crou de pied.
L'auto-armeur Fujica X est une bobineuse automatique    o Dimensions
sp6cialementcongue pour fonctionner avec les Fujica     1 3 7 x 3 6 x 3 7 , 5 m m
AX-s, FujicaAX-3 et Fujica AX-1. Compact et l6ger,    o Poids
 il s'adapte directement sur  le fond de  l'appareil.    25O g (sans les piles)
Ouand  il est install6, le film est toujours pr6t d 6tre
expos6 et, d6livr6 du souci de devoir r6armer, on   IINSTRUCTIONS
risque moins de perdre des occasions uniques. ll est
pr6vu pour la prise de vues image par image et en     1. Mise en place des piles
continu,mode que l'on choisit d l'aide de I'interrupteur  O Ouvrir  le couvercle du  logement des  piles en
principal.                                             soulevant l6gdrement ses deux extr6mit6s et en le
                                                                   tirant vers soi.
TFICHE TECHNIOUE DE L'AUTO-ARMEUR      @ lnstaller quatre piles miniature (taille AA) comme
  FUJICA X                                                      illustr6 d  I'int6rieur du logement et refermer le
                                                        couvercle.
 oVitesse d'armement                  @ Si les piles ne sont pas correctement dispos6es ou
  Environ 2 images par seconde.                                 si elles sont 6puisees,l'auto-armeurne fonctionnera
 o Mise en marche                                    pas ou I'avance du film prendra du temps. Dans
  Par pression sur le d6clencheurde l'appareil.           ces cas. replacer correctement les piles ou  les
 o Vitesses d'obturation  utilisables                       remplacer par des neuves.
  Prise de vues en continu : B, 2 d 1/1OOOsec.         Notes:
  lmage par image : B, 2 d 1/1OOOsec.        @ Remplacer les quatre piles en mOme temps et veiller
 oCompte d'images                                     d en choisir des neuves de m€me type et de m6me
  Par le compteur d'images de l'appareil.               marque.
 oV6rification de l'avance du film            @ L'armement du film sera l6gdrement plus rapide si
  Une diode LED s'allumependant l'armement du film.        l'on utilise des piles au nickel-cadmium.
 oArrtt  automatique                                          2. Fixation de l'auto-armeur sur l'appareil
  L'auto-armeurs'arr6tede lui-mdmequand tout le film    Placer le pion de positionnement de I'auto-armeur
  est expos6 ou quand la charge des piles est insuf-    dans I'orifice correspondant sur le c6t€ gauche du
View original page 4Page 5 · Read text
fond de l'appareil; placer la vis de I'auto-armeurdans     8. Armement manuel du film
l'6crou de pied de l'appareil et serrer la vis d fond.     Si l'interrupteur principal est coup6,  il est possible
3. Allumage de l'interrupteur de l'auto-armeur          de faire avancer le film d l'aide du levier d'armement
Placer l'interrupteursur "SINGLE" ou "CONT" en    de l'appareil.
fonction du type de prise de vue d6sir6.                  7. Pr6cautions
Le placer sur "SINGLE" si l'on veut prendreune image  @ L'auto-armeur Fujica X ne fonctionnera pas si les
d  la fois. L'auto-armeur fera avancer une image  i        piles de l'appareil sont us6es; veiller, dds lors, d
chaque pression sur le d6clencheur de l'obturateur.       v6rifier les piles de l'auto-armeur,mais aussi celles
Le placer sur "CONT."  pour  la prise de vues en      de l'appareil'proprement dit.
continu. Un cycle d'exposition et d'avancement du  @ Par temps froid,  il arrive que la vitesse de l'arme-film sera r6p6t6 sans interruption aussi longtemps     ment automatique soit plus lente par suite d'une    II
que le d6clencheur est maintenu enfonc6.                r6duction de l'efficacit6 des piles qu'il est consei116
4. V6rification de l'exposition et prise de vue             de maintenir au chaud d basse temp6rature.
Pour prendre la photo, appuyer sur le d6clencheurde  @ Veiller d couper l'interrupteur principal avant de
I'obturateur.                                                    fixer ou de d6tacher.l'auto-armeur.
Si l'interrupteur principal est plac6 sur "SlNGLE", on
ne pourra prendre qu'une seule photo, mOme si le   TNOMENCLATURE
d6clencheur est maintenu enfonc6. S'il est plac6 sur
"CONT.",  la prise de vues se fait en continu aussi  @ Couvercle du logement des piles
longtemps que  le  doigt  maintient le d6clencheur  @ Contact 6lectrique
enfonc6. Dans les deux cas, l'auto-armeur bobine le  @ Vis de fixation
film d la vitesse rapide de deux images d la seconde.  @ Interrupteur principal
Pendant que l'auto-armeur fait avancer le film, une  @ Couplage d'avancement du film
diode LED rouge, plac6e juste au-dessousde  l'inter-  @ Pion de positionnement                                             ':l
rupteur principal, s'allume pour rappeler que le film   Q Vis de fixation
est en train d'avancer.                 @ Ecrou de pied
5. Fin du film et arr€t aqtomatique
L'armement automatique du film s'arr€te dds que la
pelliculearrive d son ext16mit6. Dans ce cas, couper
l'interrupteur principal pour 6viter l'usure inutile despiles et rembobiner le film dans le chargeur.           N
 ll est possible de rembobiner le film en laissant enplace l'auto-armeur. Appuyer  sur  le  bouton  de           C
d6brayage et rembobiner le film dans son chargeur
d l'aide de la manivellede rembobinage.
                      www.orphancameras.com
View original page 5Page 6 · Read text
f nstrucciones                                       o Parada automitica
                                                       La bobinadora automdtica se para autom6ticamente
                                                     cuando se ha bobinado toda la peliculao cuando el   FUJICA  AUTO WTNDER X
                                                                      voltaje de las pilas es demasiado bajo.
                                                          o Alimentaci6n
    TCARACTERISTICAS ESPECIALES                   Cuatro pilas.
                                                      Capacidad de las pilas: En temperatura normal, 2O
     Esta es una bobinadora automdtica especialmente      o m5s carretes de  36  exposiciones con  pilas
     disefrada para usarla con las Fujica AX-S, Fujica AX-3       alcalinas.
      y  Fujica AX-1. Es compacta y  ligera y se monta    o MontajeIil directamentea la parte inferior de la cdmara. Cuando     Se une a la parte inferior de la c5mara mediante la
      la bobinadora automdtica est6 montada, la pelicula     rosca del tripode.
     estard siempre en  posici6n para ser expuesta de     o Dimensiones
    manera que usted no perderS ninguna oportunidad      1 3 7 x 3 6 x 3 7 , 5 m m                        'capturar'     de disparo para          su instantSnea.Tambi6n    o Peso
     estS provista para fotografiar imagen por imagen o      250 grs. sin pilas
     continuamente, funci6n que puede cambiarse por
    medio del interruptor principal.                     T PROCEDIMIENTODE MANEJO

    IESPECIFICACTONES                                     1. Carga de las pilas
                                @ Abra la tapa del compartimento de las pilas elevando
     oVelocidad de bobinado                                ligeramenteambos extremos y tirando de ella hacia
       Aprox. 2 im5genes por segundo                         usted.
     o Accionamiento                     @ Meta cuatro pilas (tamafroAA) tal como se muestra
      Apretando el bot6n disparador del obturador de la      dentro del compartimento, y vuelva a colocar la
      c5mara                                                 tapa.
      oVelocidades usables para el obturador         @ Si las pilas no estSn correctamente cargadas o
      Disparo continuo : B, 2 a 1/1000 seg.                 estSn gastadas,  la  bobinadora automStica no
      lmagenpor imagen : B, 2 a 1/1OOOseg.                funcionar6 o tardarA mds tiempo para avanzar la
      o Contador de exposiciones                                 pelicula. En tales casos, las  pilas deberlan deil       Por medio del contador de exposiciones de  la      recambiarse o volver a cargarse correctamente.
      cSmara.                                        Notas;0   r Comprobaci6n de avalrce de la pelicula           O Cambie las cuatro pilas al mismo tiempo y aseg0rese
      Se enciende un LED (diodo emisor de luz) mientras      de que todas las nuevasson del mismo tipo y marca.
         la bobinadora automdtica estS avanzando la pelicula.  @ Si se usan pilas de niquel-cadmio,el avance de la
View original page 6Page 7 · Read text
p
pellcula se realizard de forma un poco mds rdpida.  .    Tan pronto como se llega al final de la pelicula, la     $
2. Montaje de la bobinadora.autom6tica en la cdmara    bobinadora automStica se detiene autometicamente.       a*
Introduzca el  pasador de  posicionamiento de  la     Si se para, desconecte el interruptor principal para     {
                                                                          la descarga de las pilas, y despu6s rebobine la                                           situado                                 del                                           orificio                                                a     evitar                       dentro           automSticabobinadora                                                                                                                                                           iiE                                                          pelfcula.                                              ajuste                                 cdmara,                           de la                           inferior           de la partela izquierda                                                                                                                     J
firmemente el tornillo de mariposa de la bobinadora   La  pelicula puede rebobinarse con  la bobinadoraen la rosca del tripode de la c6mara y gire y apri6telo.    automStica montada. Apriete el bot6n de rebobinado    i
3. Conecte el interruptor de la bobinadora automdtica    de la cdmara y rebobine la pelicula en el cartucho      ,L
Coloque el  interruptor principal en "SINGLE"  o    con la manivela de rebobinado.                                                                                                               :L*i'Ft6.
                                                                                                                                                                                                                                                                                                                                                                                                                                                                                                                                                                                                                                                                                                                                                                                                                                                                                                                                                                                                                                                                                                                      '  I"CONT", dependiendo del tipo de disparo que usted     6. Avance manual de la pelicula
quiera.                                                     Si el interruptor principal estd desconectado, usted
Si usted quiere fotografiar una imagen cada vez que    puede avanzar la pelicula usando la palanca de avance
aprieta el disparador,ajostelo en posici6n "SlNGLE".    de la cSmara.
La bobinadora automdtica avanzard una imagen de     7. Precauciones
la pelicula cada vez que el disparador del obturador   O La bobinadora X automdtica no funcionard si las
sea apretado.   Si  usted  quiere tomar  fotografias       pilas de la cdmara est6n gastadas. Aseg0rese de
continuamente, aj0stelo en "CONT".  Se  repeti16     comprobar las pilas de la cdmara, adem6s de las
ininterrumpidamente un  ciclo de exposici6n y  de       pilas de la bobinadora.
avance de la pelicula en tanto usted siga apretando  @ En tiempo  frio,  el avance de  la  pelicula puede
 el disparador del obturador.                            hacerse m5s lento porque las bajas temperaturas
 4. Compruebe la exposici6n y dispare                    reducir5n  la  eficiencia de  las  pilas. Trate de
 Para disparar, apriete el disparador de la cSmara.       mantener las pilas a una temperatura adecuada
 Si el interruptor principal estS en posici6n "SlNGLE",      durante el tiempo frio.
 usted puede solo fotografiar una imagen a0n en el  @ Aseg0rese de desconectar el interruptor principal
 caso en que usted mantenga apretado el disparador.      antes de  montar  o  desmontar  la  bobinadora
 Si estd en "CONT", usted puede fotografiar imSgenes     automStica.
                                         su dedo                                apretado                    mantenga            en tanto consecutivas                                                                                                          *                                              la bobinadora                 En                   ambos casos. sobre el disparador.                                      TNOMENCLATURA
 autom5tica avanzarl la pelicula a una velocidad de
 2 imdgenes por segundo. Mientras la bobinadora  @ Tapa del compartimiento de las pilas
 autom6tica estS avanzando la pelicula, se encenderd  @ Contacto el6ctrico
 una luz roja LED que est6 situada justamente debaio  @ Tornillo de acoplamiento
 del  interruptor principal, para  recordarle que  la  @ Interruptor principal
 pellcula est5 avanzando.                 @ Acoplador del avance del film
 5. Fin de la pellcula y parada automdtica         @ Pasador de posicionamiento
                      www.orphancameras.com
View original page 7Page 9 · Read text
INSTRUCTIONS
FUrrlCA AUTO WINDER  X


 ISPECIAL FEATURES             ISPECIFICATIONS

Your Fujica Auto Winder X is an automatic film winder   Winding Speed    Approx. 2 frames per sec.
specially designed for use on the Fujica AX-5, Fulica  Starting          By depressingthe camera'sshutter
AX-3 and Fujica AX-1.  lt  is compact and light and                     releasebutton.
attaches directly to the camera bottom. With the Auto   Usable Shutter    Continuous shooting:  B,  2  to
Winder attached, the film  is always in position for   Speeds           1 /1 OOOsec.
exposure so that you wil! not lose any shooting op-                     Single-frame shooting: B, 2  to
portunities to capture your subject. lt is also provided                     1 /1 OOOsec.
for single f rame and continuous.shooting,and change-  ExposureCount-   By means of the camera's expo-
over of the operation mode is achieved by means of        i n g               sure counter.
the main switch.                                     Film Advance     An LED light turns on while the
                                             Check            Auto Winder is advancingthe film.
                                                  Automatic Stop    The Auto Winder stops automati-
                                                                                 cally when all of the film has been
                                                                       transported or the battery voltage
                                                                                               is too low.
                                              Power Source     Four penlight batteries.(AA size)
                                                                         Battery capacity : ln normal tem-
                                                                         perature. 20 or more 36-exposure
                                                                                       rolls with alkalinebatteries.
                                                Mounting         Attaches on the camera bottom
                                                                               via tripod socket.
                                               Dimensions       1 3 7 x 3 6 x 3 7 . 5 m m
                                                Weight          25O g (without batteries)
                      www.orphancameras.com
View original page 9Page 10 · Read text
IHOW TO USE

1. Load the batteries             Q) lf the batteries are not properly
                                   loaded or  are exhausted, the
                                  Auto Winder will not run, or will
                                      take longer time to advance the
                                              film. In such cases,the batteries
                                    should be replaced or reloaded
                                          correctly.
                                 Notes:
                   @ Change the four batteries all at
                                  once and make sure the four
                               new batteries you are using are
                                            of the same type and brand.      camera. fit the thumbscrew of the
                   @ lf nickel-cadmium batteries are    winder securely into the camera'se Open the Battery Compartment                                    used, the film advance will lbe     tripod socket and turn  it tightly.  Cover by  lifting both ends up                                      a little quicker.
   slightly and  pulling  it toward                                               3. Turn  on  the  auto  winder
  you.                                          2. Attach  the  auto winder  to        switch
                                       the camera                     Set the Main Switch to "SINGLE"
                                      Insert the positioningpin on the     or "CONT." dependingon the type
                                 Auto Winder into the positioning    of shooting you want.
                                    hole on the left side bottom of the        lf you want to shoot one frame at


                                                                                                                   t
                                                                                     l

aa Insert four  penlight batteries
  (AA size)as shown in the battery
  compartment and replace the
  cover.
View original page 10Page 11 · Read text
a time, set  it to "SINGLE". The     high speed of two frames a sec-     6. Manual film advance
Auto Winder will advancethe film,    ond. While the Auto Winder  is        lf the Main Switch is turned off,
one frame each time the camera's   advancingthe film, a red LED light    you can advancethe film using the
shutter releaseis depressed.lf you     locatedjustrbelowthe Main Switch    camera'sfilm advance lever.
want to take picturescontinuously,     will turn on to remind vou that the
set it to "coNT.". A cycleof expo-     film is advancing..
sure and film advance will be re-                                                7. Precautions
peated uninterruptedly as long as                      @ The Auto Winder will not ruh
you keep depressing the shutter                                                                               if the batteriesin the camera are
release.                                 5. End of the filrn and automat-        exhaused.Be sure to check the
                                                     ic stop                          camera batteries, in addition to
4. Check  the  exposure  and    As soon as the end of the film is       the winder batteries.
   shoot                           reached, the  Auto Winder  will     Q; ln freezing weather, the  film
To shoot, depress the camera's    automaticallystop. lf it stops, turn      advance may become slower
shutter release.                          off  the Main Switch to prevent      because low temperatures will
 lf the main switch is set to "SlN-     battery drain, then rewind the film.       reduce battery eff iciency. Try
GLE", you can shoot only one    The film can be rewound with the        to keep the batteries warm  in
frame even if you keep depressing    Auto Winder attached.Pressin the       cold weather.
the shutter release. lf  it is set to    camera's rewind button and  re-   @ Be sure to  turn  off the Main
"CONT.", you can shoot consecu-   wind the film back into the car-       Switch before attaching or de-
tive frames as long as your finger     tridge with the film rewind crank.       taching the Auto Winder.
is kept pressed on the shutter re-
lease. In  both cases, the Auto
Winder will advance the film at a


                      www.orphancameras.com
View original page 11From the M. Butkus archive. Original publisher and archive notices are retained.
Check the model and edition against your equipment.
PDF verified 2026-10-10.