Film cameras
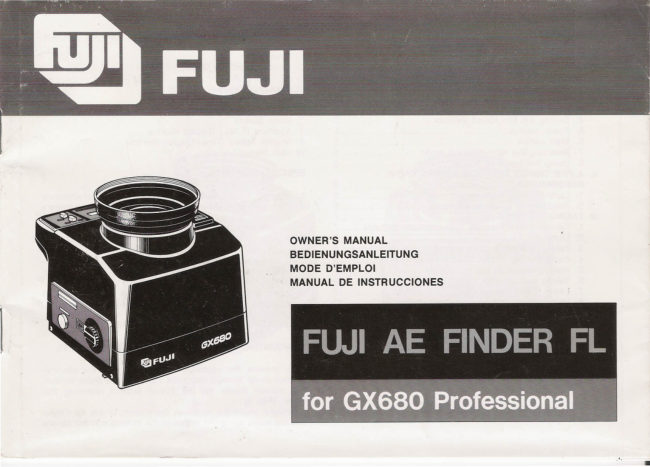
Fujica Fuji GX680 AE finder FL User manual
User manual for Fujica Fuji GX680 AE finder FL. 16 pages in German, French, Spanish, English. Read the original PDF, download or print a copy without registration.
16 pagesGerman, French, Spanish, English6.0 MB PDF
Loading your manual…Open PDF directly
Document details
- Brand
- Fujica
- Model / document
- Fujica Fuji GX680 AE finder FL
- Document type
- User manual
- Language
- German, French, Spanish, English
- Pages
- 16
- File size
- 6.0 MB
- Category
- Film cameras
- Document date
- Not specified in catalog
Search available document text
Find a term, then jump to its page in the original PDF. Image-only pages may not be searchable; check the PDF for exact wording and diagrams.
Page 2 · Read text
OWNER'S MANUAL                                                                   English (Page 4  - 12)
This manual will show you how to use your  Fuji AE Finder FL  correctly.         See illustrations while you read this
Please follow the instructions carefully.                                             manual.


Bedienungsanleitung                                                             Deutsch  (Sei te 13 - 22)
Diese Anleitung beschreibt die korrekte Handhabung Ihres Fuji Belichtungs-            Orientieren Sie sich beim Durchle-
automatiksuchers FL. Richten Sie sich bitte nach den hier gegebenen An-          sen dieser Anleitung  bitte an den
weisungen.                                                                         Abbildungen.


MODE D'EMPLOI
                                                                                       Français (Pages 23  - 31)Ce mode d'emploi contient les informations nécessaires pour vous permettre
d'utiliser correctement votre Viseur FL AE Fuji. Nous vous recommandons de         Se reporter aux illustrations en lisant
                                                                                                        le mode d'emploi.suivre attentivement les instructions.


MANUAL DE INSTRUCCIONES                                                             Espaiiol (Pagina 32 - 41)
Este manual le explica como manejar correctamente su Visor Fuji FL de           Consulte las ilustraciones mientras
Exposiciòn Automatica. Sirvase seguir atentamente las instrucciones.                    lee este manual.


                    donated to www.butkus.us
View original page 2Page 3 · Read text
NAMES OF PARTS/BEZEICHNUNG DER TEILEINOMENCLATURE/NOMENCLATURA


                                              8
View original page 3Page 6 · Read text
mzor     CONTENTS                                      NAMES OF PARTSi.ii    NAMES OF PARTS                                                           ......4      CD Eyecup
I      SPECIAL FEATURES.                 . .                                        ..4   @ Finder Magnifying Glass
              I.  GETIING READY TO TAKE PICTURES                     .4   ® AE Lock Button
            1. Mounting and dismounting the AE Finder FL..  ..    ..4   ® Fractional Exposure Control
                2.  Attaching and detaching the eyecup...                   .  5   ® Eyepiece-shutter Button
              3. Changing the AE finder's magnifying glass         5   ® AE Lock Memory Indicator
                4.  Setting the film speed selector                       5         (J) Mode Switch
               5. Power source       .                                            .5   ® Aperture (F No.) Display Window
               6.  Main switch..                                                           .   5   ® Shutter Speed (Time) Display Window
                7.  Selecting the light-metering mode.                     .     5   ® Main Switch
              8.  Using the eyepiece shutter.    .                     5
               Il. A FEW THINGS THAT YOU SHOULD KNOW               SPECIAL FEATURES
                BEFOREHAND........................                                      .  B
             1. Light-metering system and metering area          6       1. Your AE Finder FL is an aperture-priority auto-exposure
                2.  Reading the liquid-crystal display (LCD).       .       6           finder which measures the brightness  of the camera's
        111.TAKING PICTURES.                                                  .         .7          viewfinder screen with  its light sensor and computes the
             1. Taking aperture-priority auto-exposure pictures       ..7          correct shutter speed with  its built-in microprocessor.
              2. Using the AE lock...                                        .       7        2.   It also funclions  as a flash meter  for  controlling  flash
                3.  Taking aperture-priority manual exposure pictures   8         exposures.
               4.  Using the AE Finder FL as a flash meter           8         3. A unique, easy-to-use finder,  it shows the selected ap-
                5.  Making exposure compensations                       ..9          erture and computed  shutter speed on a large  liquid-
               6. Taking pictures with instant film..                  .      9           crystal display.
                7.  Using the SF190mm lens..          .                10        4.   It provides center-weighted SPD light metering and  is
                8.  Using camera movements  (tilts, swings, etc.) .    ..10        equipped with an AE lock.
       FINDER CARE.                                                                     .   10
       SPECIFICATIONS.                                                                   .  11           I.  GETIING  READY TO TAKE PICTURES

                                                                                                   1. MOUNTING ANO OISMOUNTING THE AE FINOER FL

                                                                                             First, remove the camera's finder hood and the  electric-
                                                                           contact cover located alongside the camera's finder screen.
                                                          You cannot  rnount. the AE Finder without  removing  this
                                                                            cover. (Fig.  1)
                                                           To mount, insert the hooks in the botto m of the AE Finder
 4                                                                                    into the holes along the edges of the carnera's finder screen
                          donated to www.butkus.us
View original page 6Page 7 · Read text
then slide the AE Finder toward the camera back.                    5. POWER SOURCE
To dismount, while pressing  in the camera's  finder  lock,                                                                                                                                                                                                                                                                                                                             mzorslide the AE Finder toward the camera front. (Fig. 2)           The AE  Finder FL uses the same power source as the                                                                                                                                                                                                                               1i5
   Mounting (Fig. 2-A)                                 GX680 Camera. Power  is  turned on  by  turning  on  the        I
   Dismounting (Fig. 2-B)                                    Camera's main switch.
                                                                        Note:
2. ATTACHING ANO DETACHING THE EYECUP               Power automatically switches  of! and the AE Finder won't
                                                                operate when the camera lens is dismounted or the mirror is
The Eyecup is the screw-in type. To attach, fit  it on and turn       up.
it to the right. To detach, turn  it to the left. (Fig. 3)
   Detaching (Fig. 3-A)                                                      6. MAIN SWITCH
Note:
When photographing the carnera's finder-screen image, be     To turn on the AE Finder's liquid-crystal display, first turn on
sure  to use the Eyecup to  cut  of! extraneous  light from       the Camera's main switch then turn on the AE Finder's Main
entering the eyepiece.                                            Switch. (Fig. 6)
                                                            Main Switch (Fig. 6-A)
3. CHANGING THE AE FINDER'S MAGNIFYING GLASS           Note:
                                                                                                               If you are not using the AE Finder, turn of! its Main Switch.
The AE Finder's Magnifying Glass has a bayonet screw and     Though  it has no power supply of its own, its internai elec-
is dismounted by turning  it to the left. (Fig. 4)                            tric  circuits  and  liquid-crystal  display  will consume  the
 •  The refractive power of the AE Finder's standard magni-      Camera's power  if the Main Switch is ono
    fying glass is -1 diopter. Magnifying glasses of -4 to +3
    diopters (the same as those used on the GX680's finder        7. SELECTING THE LlGHT-METERING MODE
   hood) are also available at an extra cost so be sure to
    obtain one that suits your vision.                        The AE Finder can be set to the FLASH, AE, and AEL (AE
   Dismounting (Fig. 4-A)                                       Lock) modes. (Figs. 7)
                                                    Mode Switch (Fig. 7-A)
4. SETTING THE FILM SPEED SELECTOR
                                                                                 8. USING THE EYEPIECE SHUTTER
Set  the  GX680's  film  speed  selector  (Iocated  on  the
camera's film holder) to the speed of the film loaded in the     The AE Finder is provided with an Eyepiece Shutter to pre-
camera. (Fig. 5)                                                  vent extraneous light from entering  it.
    Film Speed Selector (Fig. 5-A)                                            •    If you check the finder-screen  image through  the AE
    Film Speed Markings (Fig. 5-B)                           't     Finder then take your picture with your eye of! the Finder,
                                                                 extraneous light will enter  it and spoil your picture.
                                                                        Note:
                                                   Be sure to close the Eyepiece Shutter before taking pictures.      5
View original page 7Page 8 · Read text
mz          If you take pictures with the Eyepiece Shutter open, you     The disadvantage  is  that  since   it measures the  overall
Clr(jj     cannot get correct exposure.                                   minatingbrightnesslight01 theas wellsubject,as subjectinciudingrellectance,the intensityyou willof thealwaysillu-
I        (1)  Opening the Eyepiece Shutter                              get average light readings regardless of whether you meas-
      To  open,  piace  your  finger  on  the  near end  of  the                                                                     ure the clear (white) or the dark (black) area 01the subject.
        Eyepiece-shutter Button then slide the Button toward OPEN.                                                                                In short, the important point  is which part of the subject
      To close, just take your finger oft the Button. (Fig, 8)                                                                     (which is made up of ali sorts 01 reflection ratios and pre-
           •  With the Eyepiece Shutter closed, you'lI be able to see                                                                      sents  itsell under varied exposure conditions) should be
          through the Eyepiece the white spot  that marks the                                                                measured. But with a clear understanding of what  is  in-
           center of the Eyepiece Shutter Biade.                                                                          volved,  it  is possible to expose lor  specific parts 01 the
                                                                          subject or to depict subject detail regardless 01whether the          (2)  Holding the Eyepiece Shutter in "Open" Position
                                                                          subject is, as a whole, bright (white) or dark (black). That is      To open the Eyepiece Shutter and hold it in "Open" position,
                                                        why you should know exactly which part of the linder-screen         slide the Eyepiece-shutter Button toward you then press
                                                             image the AE Finder measures. Although the measuring      down the front end of the Button. (Fig. 9)
           Holding in "Open"  Position (Fig. 9-A)                       area difters somewhat depending on whether the AE Finder
                                                                                            is set to the AE or the Flash mode, just remember that  it
         (3)  Releasing the Eyepiece Shutter trom "Open"             measures the centrai area of the linder-screen image. (Figs.
            Position                                             11 & 12)
      To release the Eyepiece Shutter from "Open"  position and      Light-metering Area on the Finder Screen
        close  it, just press down the near end of the Eyepiece-      AE Mode (Fig. 11-A)
        shutter Button. (Fig. 10)                                          Flash Mode (Fig. 12-A)
          Close (Fig. 10-A)
                                                                                     2. REAOING THE LlQUIO-CRYSTAL OISPLAY (LCO)
              Il. A FEW THINGS THAT YOU SHOULD KNOW
        BEFOREHAND                                                 .                      (1)  Aperture Value Indications
                                                          The LCD displays the f-numbers numerically. If a short bar
         1. LlGHT-METERING SYSTEM ANO METERING AREA          appears to the right of the f-numb.èr,it means +1/3,  +1/2,
                                                                           or +2/3  stop has been added to the f-number. (Figs. 13 &
      The AE Finder FL's exposure meter is the TIL-reflected-         14)
        light-metering type.  It measures on the finder screen the
       amount of light which comes through the camera lens from          •  With the Finder Set to the AE Mode
        the scene being photographed.                           The aperture value that  will show in the LCD is the value
      The advantage of this system is its eftectiveness in meas-       that has been selected with the camera's aperture selector.
        uring the brightness of hard-to-approach subjects, closs-up     The aperture values in this case will be shown in 1/2-stop
        subjects that need calculation of exposure factors, trans-        units. The LCD will not show 1/3-stop values.
        illuminated subjects, and  light-emitting  subjects such as     To use an intermediate f-number,  you'lI have to  set the
 6     neon signs.                                                 camera's aperture selector between the numbers on the
                          donated to www.butkus.us   lens aperture scale.
View original page 8Page 9 · Read text
interchangeable lens or those of the Camera and AE Finder       mz •  With the Finder Set to the Flash Mode
The  correct  aperture  value  for  the  flash as measured     FL are not properly connected. In this case, clean the con-             G)r
through the lens will appear in the LCD in O, 1/3, 1/2, and      tacts then remount the lens or AE Finder.                                                Ci)
2/3 stop units.                                                                                                                                                    I
                                                          11I.TAKING PICTURES
(2)  Shutter Speed Indications
The LCD displays the shutter speeds numerically. Only the       1. TAKING APERTURE-PRIORITYAUTO-EXPOSURE
denominators of the fractions of a second 1/2 - 1/400 will       PICTURES
show in the LCD. The numbers 1 to 8 represent full seconds
and the letter "L"  next to these numbers stands for "long      CD Turn on the main switch of the GX680 Camera and that
exposure". (Fig. 15)                                                     of the AE Finder FL. (Fig. 16)
                              ® Set the GX680's shutter speed selector to AUTO. (Fig.
 •  With the Finder Set to the AE Mode                              17)
The LCD displays in 1/3-step units the correct shutter speed   ® Set the GX680's lens aperture to suit the subject you are
obtained through the regular aperture-priority TIL  light me-          taking.
tering method.                     o Frame your picture, focus the lens, then close the AE
 •  With the Finder Set to the Flash Mode                           Finder's Eyepiece Shutter. The AE Finder will automat-
The LCD displays the shutter speed that has been set with            ically compute the correct shutter speed for the bright-
the GX680's shutter speed selector.                            ness  of your  subject  to  let you take your  aperture-
                                                                      preferred AE picture.
 (3)  Beyond-the-Interlocking-Range Warnings                          •  The LCD will show you the selected aperture value and
 •  With the Finder Set to the AE Mode                        computed shutter speed.
 If the setting  is not within the Finder's interlocking range,
either the 1/400-sec. or 8-sec. indicator will turn on in the       2. USING THE AE LOCK
LCD and blink.
 •  With the Finder Set to the Flash Mode                                      If the area in the center of the AE Finder FL locks too bright
Either the maximum lens f-number or the F64 sign will turn       or too  dark when you frame the camera's finder-screen
on in the LCD and blink.                                     image, or  if the contrast is too harsh, use the AE Lock to
Note:                                                              set exposure.
 If the number in the LCD blinks, set the aperture within      CD The basic procedure  is the same as that  for  taking
interlocking range  if the Finder is in the AE Mode, and ad-          aperture-priority  auto-exposure  pictures  except  that
just the flash's light quantity to within interlocking range  if             you'll have to set the AE Finder's Mode Switch to AEL
the Finder is in the Flash Mode.                              (AE Lock).
                               ® With the light-sensing sector of the finder (the centrai
 (4) Trouble Warnings                                            area of the screen), frame the part of the subject that
 If the sign EEO,EE1, EE2, or EE4 turns on and blinks in the        has an average-density hue.
LCD, the electric contacts  of the GX680 Camera and  its                                                                   7
View original page 9Page 10 · Read text
® While holding the finder in that position, press in the AE         your subject to check the changes in the shutter-speed
          Lock memory Button located on the right hand side of         values in the LCD as you scan your subject.mzor           the AE Finder FL. (Fig. 18)                ® While scanning your subject, select the shutter speed
UiI        The AE Lock  is activated by pressing the button and          that appeals to you then set the Camera's shutter speed
           released by pressing  it again. (Fig.18-A)                           selector to that speed.
    ® As soon as you press in the AE Lock Button, a red LED         •  You can fine-tune each shutter-speed setting in 1/3, 1/2,
         (AE Lock Memory Indicator) just above the Mode Switch          or 2/3 stop increments or decrements with the Fractional
              will turn on to tell you that the exposure setting has been        Exposure  Control   if you  wish.  (See section  entitled
           locked (committed to memory). (Fig. 19)                       "Making exposure compensations).
         The red LED turns on when the exposure  setting  is      Note:
           locked. (Fig. 19-A)                                   The shutter speed value in the LCD will change as you scan
    ® Next, reframe the finder-screen image then press down      the light and dark areas of your subject with the Camera,
           the Camera's shutter release to take your auto-exposure      but when you press down the Camera's shutter release, the
            picture.                                                          shutter will operate at the speed that has been set with the
           •  After the shutter trips, the AE Lock Memory is automat-     Camera's shutter speed selector.
              ically canceled.                                                    In other words,  if the Camera's shutter speed selector has
                                                             been moved away from AUTO and set anywhere between 8
           •  Releasing the AE Lock (AE Memory)                     and 1/400, the shutter speed value in the LCD merely tells
         1. To release the AE Lock (AE Memory), press in the AE     you what the correct exposing speed is. Remember, it has
          Lock Button a second time. (At the same time, the ex-      nothing to do with the actual shutter speed that will be used
          posure value measured at this moment will be locked.)         to expose your picture.
         2. Pressing down the camera's shutter release will also re-
           lease the AE Lock.                                                4. USING THE AE FINDER FL AS A FLASH METER
         3.  It can also be released by turning olt the Main Switch or
          by changing the setting of the Mode Switch.              The AE Finder FL can be used as a TIL reflection type flash
                                                                  meter for measuring the  light 01 flash units that are com-
         3. TAKING APERTURE-PRIORITYMANUAL EXPOSURE        monly used in photo studioso
        PICTURES                                              eD Plug the sync cord into the Camera's sync socket and
                                                                               set the AE Finder's Mode Switch to FLASH.The LCD will
             If the contrast of your subject is too harsh or  if you want to        show a segmented line  (-  -  -) instead 01 an I-number.
        over- or underexpose  intentionally, use manual exposure          (Figs. 20 & 21)
         settings.                           ® Set the Camera's shutter speed selector for the subject
       eD Set the GX680's lens aperture to suit your subject.             you are taking (between 1/15 and 1/400 second) be-
    ® Set the AE Finder FL's Mode Switch to AE.                   cause the AE Finder FL will simultaneously measure the
    ® Move the GX680's shutter speed selector away from          flash-discharged light together with ali ambient lights.
       AUTO and set  it to any value between 8 and 1/400.     ® Aim the Camera at the part 01 the subject you want to
 8   ® Point the camera at the various light and dark areas of        measure then lire the flash by pressing in the Camera's
                          donated to www.butkus.us
View original page 10Page 11 · Read text
sync test button. (Fig. 22)                                                in the LCD will change. Set the lens aperture to the        mz
   Synchro Test Button (Fig. 22-A)                                f-number displayed in the LCD.                                                                G)r                                                                                        •                                                          Examples                                                                  01                                                                        Exposure   Sync        Cord (Fig.                     22-6)                                                                                Compensation                                                      UiI                                                              Exposing                                                                                              for                                                                                  the                                                                                               highlights   Simultaneously                    with                         the  firing  of  the  flash,  the AE       1.®
   Finder's LCD will show an f-number.                        As a rule,  if you want a white subject to turn out white,
® Turn the Camera's aperture selector and set  it to that          increase exposure by 2 stops (+ 2 stops).
   f-number.                                                           2. Exposing for the shadows
® Frame your subject  in the finder screen then take your        As a rule,  if you want a black subject to turn out black,
    picture by pressing down the Camera's shutter release.         reduce exposure by 2 stops (-2 stops).
                                                                         3.  If you are placing importance on the delineation of white
Note:                                                                  or black subjects and want to bring out the details, as a
When using the AE Finder as a flash meter, you'lI have to           rule you should increase or reduce exposure by 1 stop
set the Camera's shutter speed selector between 1/15 and          (±1  stop).
1/400 second, otherwise the f-number  in the AE Finder's         •  However, if your picture includes an ordinary subject or a
LCD will blink and the Finder won't function.                          subject having an average reflection index,  it is recom-
                                                          mended, to be on the safe side, that you do not make
5. MAKING EXPOSURE COMPENSATIONS                        exposure compensations.

The AE  Finder FL  is designed  for  TIL  center-weighted        6. TAKING PICTURES WITH INSTANT FILM
reflected-light metering, but  it  is possible to obtain with  it
average light readings similar to those made with an incident     The GX680's instant-film holder  is not provided with a film
light meter by taking readings of subject sectors having a      speed selector, but when  it is mounted on the Camera, the
reflection index of near 18% or by using a standard 18%    AE Finder FL will interlock with the Camera's ISO 100 film
reflector or the human skin (face or palm). And  if you have     speed setting. Therefore, if the speed of the instant film you
formed a good idea of the kind of picture you want, that  is,      are using is slower or faster than ISO 100,you'lI have to use
 if you know exactly how you want to reproduce each of the       the  Fractional Exposure Control  to make adjustments as
various  parts  of  your  subject,  then  you  can  use  the     shown below.
Fractional Exposure Control to expose your subject to suit
your own personal taste.                                                Instant Film ISO Speed         Fractional Exposure
eD The Fractional Exposure Control  (Iocated on the  right                                            Control Setting
   hand side of the AE Finder FL) will let you make expo-
   sure compensations up to plus or minus 2 1/2 stops.                 75                        +1/2
    (Fig. 23)                                                        80                        +1/3
® To  increase  exposure,  turn  the  Fractional Exposure                100                             O
    Control to the plus (+)  side, and to reduce exposure,                                                                  800                            -3
    turn  it to the minus (-) side.                                       3000                     *mark
 •  With the Finder set to the flash mode, only thr f-number                                                                         9
View original page 11Page 12 · Read text
"111.  3. Takinq aperture-prioritymz        7. USING THE SF190mm LENS                                procedure explained under
G)r                                                             manual exposure pictures", then use the camera movement
UiI      Sincemetering,the errorsAE Finderwill occurFL isil designedmetering toris donelull-aperturewith the lightap-     you•  WithwanttheandAEtakeFinderyourFLpicture.Set to the Flash Mode
         erture  stopped  down.  But  the recommendation  lor  the     Measure the light, make the exposure settings, then  tilt or
      SF190mm lens is that locusing  should be done with the      swing the lens and take your picture.
        aperture locked in stopped-down position  -  a condition in
       which the AE Finder cannot lunction.                        FINDER CARE
      When using the SF190mm lens, therelore, set the aperture
            lirst then release the aperture lock and take your picture         •  Wipe  olt  rain and water droplets thoroughly Irom the
        with the aperture wide open (F8).                                  Finder with a piece 01 clean, dry cloth then let  it dry.
         Note:                                                                      After using the Finder in salt-water atmosphere near the
               Il the AE Finder FL  is used with the aperture locked  in         ocean, wipe olt the exterior thoroughly with a clean piece
       stopped-down position:                                                      01 cloth.
       <D AE Mode                                                                      •  Avoid leaving or keeping the Finder where  it  is hot or
         The shutter speed value in the LCD will blink and the AE          moist. Be carelul because the interior 01 a car can build
           Finder won't lunction.                                     up heat. Also, do not keep the Finder in your wardrobe
           Cl) Flash Mode                                                 drawer because the gas emitted by mothballs and other
         The segmented line  (-  -  -) showing in the LCD belore          insect repellents can harm the Finder.
              light measurement will remain as  it is and you won't be         •  Do not use solvents, such as thinners and alcohols, to
           able to take a reading.                                         clean the Finder.
                                                                                                 •  Dust olt the lens and glass parts with a lens brush and
          8. USING CAMERA MOVEMENTS (TILTS, SWINGS, ETC.)         an air blower. Fingermarks are removed with a piece 01
                                                                          clean  cotton  cloth   (prelerably  washed  belorehand)
      Camera movements will prevent the AE Finder FL's  light         moistened with lens-cleaning Iluid (commercially available)
       sensor Irom measuring the brightness 01 the subject accu-        by wiping gently  in a spirai motion,  starting Irom the
         rately because the light that passes through the lens will be          center then moving out toward the edges.
        altected by the Fresnel rings 01 the linder screen. Do not         •  As a whole, the major cause 01 electric troubles is dust
       use the AE Finder FL with the camera lens already tilted or        and debris in the contact points. Just blow  it away with
      swung to one side.                                         an air blower.
               Il you are using camera movements, measure the brightness                  Il you detect any lault  that  points  to  electric  trouble,
          01 your subject lirst then  tilt or swing the camera lens.             check the various contact points lor hand grease, cor-
            •  With the AE Finder FL Set to the AE Mode                       rosion (Irom salts or certain gasses), and dust and de-
          First, measure the  light,  press  in the AE Lock  Button            bris.  Il the lault cannot be corrected by removing dust
       (Memory Lock), then  tilt or swing the lens and take your        and debris, take your Finder to your nearest service
         picture. (Tripping the shutter will release the AE Lock).                station.
lO           If you are taking several pictures in succession, follow the         •   It is usually impossible to repair a Finder that has been
                         donated to www.butkus.us
View original page 12Page 13 · Read text
immersed    in  waler.  Check   wilh  your  service   station   lo        SPD  cenler-weighled    sensing   (TIL  full-aperlure    Iype).
   see whal  can be done.                                                                    •  LCD  Display                                                                                                                                                                                                                                                                                                                     mZor•  To keep  your  Finder   in  top  shape   al   ali  limes,  have    il          Seven-segmenl    illuminaled   indicalors.
    inspecled   every  one  or Iwo  years.   If you  haven't used    il            •  LCD  Indications                                                                                                      U5I
    for  a  long  while,  or    if you  are  laking  some   importanl        AE Mode
    pìctures,  always  check  'and  lesi     il beforehand.              *  Selecled   lens f-numbers   (including   1/2-slop   fraclions).                                             * Compuled   shutter  speeds   (1/400   - 8-sec.   in  1/3-slep
SPECIFICATIONS                                  *  units).1/400-sec.   or  8-sec.   indicalor   blinks    if  setting   is  noi
 •  Magnifying   Glass                                                                    wilhin   inlerlocking   range.
    Inlerchangeable,    2.52X  magnificalion,    available   in 8  re-           Flash  Mode
    fraclive   powers   ranging   from  -4  lo  +3   dioplers    (Ihe            (Before  melering)
   same   magnifying   glasses   as  Ihose   designed    for   Ihe       *  Selecled   shutter  speeds   (1-slep   unils);  LeO  indicalor
   GX680  Camera's   collapsible   focusing   hood).                                  blinks    if setting   is noi  wilhin  1/400   - 1/15  sec.
•  Eyepiece   Shutter                               * Segmenled    line  (-  -  -)  indicator.
    Normally  closed:  can be opened  by  sliding  a button  and            (Af1er  melering)
    closed  by  releasing      il;  can  also  be  locked   in  "Open"       *  Fraclional  f-numbers    (O,  1/3,  1/2, and  2/3  stop).
    posilion.                                                                                       •  Camera-Finder    Interoperation
 •   Light  Meter                                        AE Mode    TIL   normal-lighl    melering,    aperture-priorily      autornatic       *  Automalic    Finder   operalion   by  setting   Ihe  GX680's
    shutter-speed     setting;  LCD  displays   selecled   aperlure                  shutter  speed  seleclor   lo AUTO.
    values  and compuled   shutter  speeds.                    * The  LCD  shows   Ihe   correct    shutter   speed     if  Ihe
    Also,  TIL  flash-Iighl   melering   with LCD displaying   correcl              GX680's  shutter  speed  seleclor    is  off AUTO.
    aperlure   value.                                                          Flash Mode
 •  Main  Switch                                    *  Lighl  measuremenl    in combinalion    wilh  Ihe  GX680's
    On/Off   loggle   switch.                                                    sync  lesi  button.
 •  Mode  Switch                                                                               •  Metering  Range
   Can be  sei  lo FLASH,  AE, and AEL  (AE  Lock).              AE Mode
 •   Film Speed  Selector                                                         (F4, ISO 100)    l.ocated   on  Ihe  GX680's  dedicaled    film  holder;  can  be       * EV 1 (8-sec.  F4)  lo EV 19.5  (1/400-sec.   F45).
    sei  from  ISO 25  lo  1600  in  1/3-slep   incremenls;    auto-            Flash  Mode
    malically   sets   lo  ISO  100  when   holder    is   off   (noi           (ISO  100)
    rnounted.)                                                         Max.  aperture    -  F64
 •   Fractional   Exposure   Control                                                   •  AE Control
    Dialing  Iype  wilh  16 settings  (up lo  ±21/2   stops and  (-5).           Microcompulerized     aperture-priorily    syslem.
 •   Light  Sensor                                                                               •  Power  Source
                                                         Same  power  source  as the  GX680's.                           11
View original page 13Page 14 · Read text
~      * Power is supplied by lurning on Ihe GX680's main
Cl6i      *  swilch.Power is cuI off when Ihe GX680's lens is dismounled
I             or mirror is up.
            •  AE Lock
         The AE Lock can be activated only when Ihe Mode
          Swilch is seI lo AEL.
           CD Merely setting Ihe Mode Swilch lo AEL has Ihe same
                effecl as setting  il lo AE.
     @ The AE Lock  Button (Memory Button)  musI be
             pressed down in order lo lock Ihe exposure meas-
             urement. Pressing down Ihe AE Lock Button will also
               lock Ihe LeD indicator. (The Mode Swilch musI be
              seI lo AEL).
     ® Pressing in Ihe AE Lock Button a second lime locks
                 in Ihe lighl measuremenl made Ihe ìnstant Ihe Button
           was depressed once again. (The previous reading is
               aulomalically discarded).
     @ Resetting Ihe Mode Swilch lo AE aulomalically re-
             leases Ihe AE Lock and relurns Ihe Finder lo Ihe
               condilion described in CD above.

        Notice:
        Specificalions are subjecl lo change wilhoul nolice.


12
                         donated to www.butkus.us
View original page 14Page 16 · Read text
TD.     ~~~.!";feb~2~!~;"~I~~LS6~~~"LIU,..< Fuji  Film Abroad >

In North  America      FUJI PHOTO  FILM  U.S.A.,  INC.
                       555  Taxter  Road.  Elrnsford,  N.Y. 10523.  U.sA
                   FWI PHOTO  FILM CANADA  INC.
                          5915. Ave .. Coopers.  Mississauga.   Ontario,  L4Z 2Y6, Canada
                      FUJI PHOTO  FILM HAWAII,  INC.
                       1650 Kalakaua  Avenue,  Honolulu,  Hawaii  96826
In Europe             FUJI PHOTO  FILM (EUROPE)  G.m.b.H.
                           Heesenstr.   31, 4000  Dusseldorf   11, Postfach  190321, West  Germany
                      FUJI PHOTO  FILM  (U.K.) LTO.
                                Fuji  Film House,  125 Finchley  Road, Swiss  Cotlage,  London NW3  6JH, England
In South  America      FUJI PHOTO  FILM DO BRASIL  LTOA.
                           Av. Ver. Jose  Diniz  3465, CEP 04603,  C.P. 9959,  S.Paulo,  Brazil
In Asia                FUJI PH010   FILM CO., LTO., HONG KONG OFFICE
                     RM. 2704,  Admiralty   Centre,  Tower  1, 18 Harcourt  Road, Hong Kong
                      FUJI PHÒTO  FILM (SINGAPORE)  PTE. LTD.
                       101 Thomson  Road,  32-00  Goldhill  Square,  Singapore  1130
                      FUJI PHOTO  FILM CO., LTO., BANGKOK  OFFICE
                            6th  Floor,  Inchcape  House,  2160 Ramkhamhaeng   Road, Hua Mark,  Bangkok  10240,  Thailand
                      FUJI PHOTO  FILM CO., LTD., TAIPEI OFFICE
                     Rm. 501 Hung Chong  Bldg.,  No. 20,  Chiling  Road,  Taipei  10424, Taiwan
                        F,UJI PHOTO  FILM CO., LTO., SEOUL OFFICE
                     Han Boo  Bldg.,  30-1, Mukjung-dong,    Churig-ku,   Seoul,  Korea
                      FUJI PHOTO  FILM CO., LTO., BEIJING  REPRESENTATIVE  OFFICE
                              Beijing  Hotel. Room  No. 6053,  Dong Chang An  Street,  Beijing,  China
In Oceania            FUJI PHOTO  FILM CO., LTO., SYONEY REPRESENTATIVE  OFFICE
                          c o Hanimex   Pty.  Limited,  Old  Pittwater  Road,  Brookvale,  N.SW.  2100, Australia
Printed  in Japan             donated to www.butkus.us                                      IT'-883610-MB·O.5-1@
View original page 16From the M. Butkus archive. Original publisher and archive notices are retained.
Check the model and edition against your equipment.
PDF verified 2026-10-10.