Film cameras
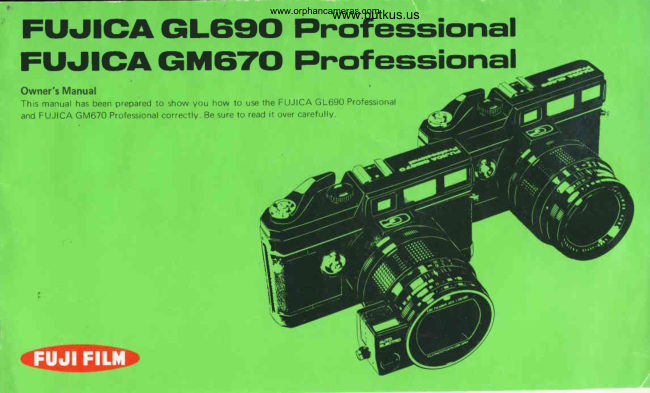
Fujica Fujifilm GL690 / GM670DF User manual
User manual for Fujica Fujifilm GL690 / GM670DF. 32 pages. Read the original PDF, download or print a copy without registration.
32 pagesOriginal document6.7 MB PDF
Loading your manual…Open PDF directly
Document details
- Brand
- Fujica
- Model / document
- Fujica Fujifilm GL690 / GM670DF
- Document type
- User manual
- Language
- Check the original document
- Pages
- 32
- File size
- 6.7 MB
- Category
- Film cameras
- Document date
- Not specified in catalog
Search available document text
Find a term, then jump to its page in the original PDF. Image-only pages may not be searchable; check the PDF for exact wording and diagrams.
Page 17 · Read text
O CAMERA OPERATION
(  Film Loading )
 1. Film Loading                              2. Film Start Positaoning Mark                3. 12O and 22O Roll Film


   Open the Camera Back @ by erecting        Pass the  f ilm paper leader over the  f ilm     When using 120 roll film, the Pressure
    the Camera Back Lock/Spool Loading        guide, insert the leading end into the take-       Plate @  is set so that the side marked
   Key @ and turning  it in the direction      up spool slot and wind the Film Advance       120 faces cut and the Film Selector @  is
   of the arrow. Next, pull the key out-        Lever O until the start mark (two-headed          set at 120.
   ward to retract the shaft and turn it to        arrow) on the paper leader is aligned with      When using 22O roll film, turn the Pressure
    the left to lock the shaft in that position.        the Film Start Positioning Mark @(red dot).        Pfate over so that the side marked 22O
   Now insert the take-up spool, turn the        Note:                                                faces out and set the Film Selector at22O.                                           o To prevent the paper leader from buck-    key to the right to release the shaf t.                                                         ling, press it down lightly with your   Load the  f ilm. Repeat the same proce-                                                     finger while winding  it on the take-up
    dure with the  f ilm Loading Key @.               spool.
                                           o Be sure to insert the tip of the paper
                                                   leader securely into the take-up spool
                                                            slot before winding.
16
View original page 17Page 19 · Read text
( Shooting )
1. Shutter Speed and Apertu re Setting              2. Focusing                                     3. Field of View


The shutter speed and aperture are set by       Look through theViewf inder Eyepiece @         The outer bright frame in the view-
turning the Shutter Speed Selector Ring         bring the subject's center of interest in the                          f inder is used for framing the picture
                                              center of the Viewfinder and turn the          with a 1OOmm normal lens on the@ and the Aperture Selector Ring @.                                                Focusing Ring @ until the double images           camera. The inner bright frame is used
                                                           in the bright sguare spot of the Viewf inder            for framing the picture with a 150mm
                                               converge into one. (All the interchangeable           telephoto lens on the camera. Parallax
                                                      lenses of the FUJICA GL690 and GM670              is automatically corrected as you turn
                                                      are focused in the same way.)                        the Focusing Ring.
                                             Note: To shoot infrared pictures, focus           2. A moving subject can be framed faster
                                                 the lens in the normal way then bring         by watching  it through the viewfinder
                                              the point of  correct focus on the          with the right eye and looking at  it
                                             Focusing R ing opposite the Inf rared            directly with the left eye The field of
                                         Mark (the short red line marked R and          view at short distance  is 95olo. and g2%o
                                                     located next to the Exposure Setting         when the camera is set at inf inity.
                                         Mark (long red line on the lens barrel           Special viewfinders are supplied with
                                           marked with a ball in the middle to          the  lenses other than the 1OOmm
1B                                         make the proper compensation.                  normal and 150mm teleohoto.
View original page 19Page 20 · Read text
www.butkus.us


4. Special Viewfinders

  8P
  The SOmm super wideangle, 65mm       2. Af ter changing the lens, the special       3. To correct for parallax, focus the lens
   wideangle and 18Omm telephoto lenses            viewf inder is mounted on the camera's         then set the distance scale on the
   are each supplied with an exclusive           Accessory Shoe @.                               special viewfinder eyepiece so that  it
   viewf inder. (The viewf inder   f or the                                                      agrees with the setting of the lens
  iOOmm normal and 150mm telephoto                                                               distance scale.
    lenses are built into the camera.)
View original page 20Page 21 · Read text
5. How to Avoid Camera Shake


       I                                 I
      I                                  I
       I                                  I


4. The subject is viewed through the        1. Hold the camera steady. The camera          camera lightly against the face, look
    special viewfinder. The outer frame  is             will shake if  it  is held improperly. This           through the viewf inder, focus the lens
   used for shooting with the GL69O (6 x                 is the way to hold it:                       and press the Shutter Release Button
  9cm format) and the inner frame            Press the left elbow against the side of            gently down.
   (marked with hyphenated  lines) is useo            the chest and hold the lens in the plam
   for shooting with the GM670 (6 x 7cm           of the left hand so that the  f ingers will
        f ormat ).                                be in a position to turn the Focusing
            Type        Magnif ication           Ring @.
          cou nter-Galelien                           Place the thumb of the right hand on 50mm                al bada                            0.39X               the Film Advance Lever O and the
          cou nter-G alel ien                                  foref inger on the Shutter Release But- 65mm                    0.39X          albada                                 ton @.
 lBOmm  albada               1.0x                Relax the shoulder muscles, press the
View original page 21Page 22 · Read text
www.butkus.us


                                               6. Film Advance                                                                                               7. F lash Photography

                           vA                                                                                                                       \            f-  \>
2. f he camera is mounted on a triood ano       Wind the Film Advance Lever O twice to         All  the  interchangeable lenses of  the
   the shutter is operated with a cable         advance the  f ilm and cock the shutter. The      GL690 and GM67O are provided with X
   release when shooting indoor and night        Film Advance Lever will remain locked      and M contacts (except EBC FUJINON
   pictures which require a shutter speed          until the shutter is released to Drevent     AE 3.5/100mm, which is provided for X
   of 1/3O sec. or longer.                        double exoosure.                                 contact onlV) and an inter-lens shutter for
Noter lf the Shutter Release Button  ts                                                        synchronization with  all shutter speeds.
   pressed far down but short of activat-                                              The Flash Selector Switch 6) is flipped to
   ing the shutter then released, it may                                     X when using electronic  f lash and M when
  become locked and fail to go down                                                       using M-class flash bulbs. To shoot, just   again when it  is depressed a second                                                                                              follow the directions packed with  the   time. To unlock it. reset the R S
  Button (9  at S, press down the                                                                                                                                         f lash   .                                                                                                                                                                                                                                                                          f lash photography, read rhe   Shutter Release Button and turn the                                                 For daylight
                                                                                                                                          F lash Photo-  R S Button back to R and resu me                                                    chapter entitled "Daylight
   shoo t  i nq.                                                                                         graphy "                                   21
View original page 22Page 23 · Read text
8. Multiple Expozure


                                                tqJ- 5.
 1. Exoose the film then close the shutter       2. Dismount the lens and cock the shutter        Note:
     curtain. The Shutter Release Button  is          by pushing the Shutter Setting Lever in       o The Shutter Release Button will not
   now locked and the Lens Safety Lock            the back end of the lens strongly with         operate unless the shutter curtain  is
  @  is released. (The above picture           the butt end of a pencil, then remount           open.
    shows the camera back ooened but in           the lens. Next, set the R-S Button at S,       o After making the multiple exposure, be
     this case it will be closed.)                 open the shutter curtain aim the          sure to reset the R-S Button at R.
                                               camera at your subject and press down
                                                         the Shutter Release Button. Repeat the
                                              same process to make triple and quad-
                                                           ruple exposures.


 22
View original page 23Page 24 · Read text
www.butkus.us
( Film Unloading )
 1. After Shooting


             G                                                             rl'7"'
After completing the number of exposures      The empty spool is transferred into the
the roll of film will allow, use the Film        Take-up Spool Chamber for taking up the
Advance Lever e  to wind the  f ilm onto        next roll of film.
the Take-up Spool @ . Keep winding
until a sudden release of tension is felt,
then give it about three extra strokes.
Next, open the camera back, unload the
f ilm and seal it securelv.
View original page 24Page 25 · Read text
O HOW TO USE THE EBC FUJ|i..,.iN    LINS                         ^E
1. Battery Loading                               2. Battery Check                               3. Automatic Exposure Setting


            l._
Open the Battery Chamber Cover @           Press the Battery Check Button @ to see       1. Turn the Film Speed Selector Ring
insert the battery (6V silver batter) correcr-            if the battery is working. lf the needle    @ and set it for the speed of the  f ilm
ly into the battery chamber and close the        swrngs beyond the green triangular mark,         you are ustng.
cover.                                       the battery is working properly.  lf nor,      2. Turn the Shutter Speed Selector Ring
                                               change the battery.                             and set it at A.
                                                                                                                  Selector Ring O                                        Note: lf the battery is not loading or if it      3. Turn the Aperture
                                                         is exhausted, the shutter will always         and set the aperture. The camera will                                                                                                 automatically set the correct shutter                                                  operate at 1/500 second whether the          speed for the aperture being used. All
                                           camera is set for automatic or manual         you need to do is aim the camera and
                                                          operation.                                       press down the Shutter Release But_
                                                                                                        ton. (The camera's automatic exposure
                                                                          system covers from EVO.6 lt/3.s
                                                                                           8-sec./ASAlOO) to EVl9 (,t/32 i/SOO-24                                                                                                      sec./ASAl OO).
View original page 25Page 26 · Read text
www.butkus.us


                                          mounted on a tripod to prevent camera        4. Manual Exposure Setting
                                                       shake.                                    Set the shutter speed (anywhere from B,
                                           o Over and underexposure can be cont-         B-sec. to 1/500 sec.) by turning the Shut-
                                                             rolled without changing the aperture. All         ter Speed Selector Ring @. (When tne
                                         you do is turn the ASA Speed Selector       camera is set manual, the Shutter Speed
                                         Ring @.                             Check Button may not shorv you the
                                                                                                       correct shutter speed.   )

                                                                                       5. Using the Camera in Place
                                                                                                         of an Exposure Meter
                                                                                Set the camera for automatic exoosure
                                                                                 and press down the Shutter Speed Check
Note:                                                                                         Button. You will now be able to read the
o To  f ind out the shutter speed set by the                                                        correct shutter speeds for the different
 camera's automatic exposure system,                                                               apertu res.
  just watch the Shutter Speed/Battery
 Check Window @ and press down the
  Shutter Speed Check Button @ . lt tne
  needle is in the reddish-orange zone,  it
 means overexposure and the aperture
 must be stopped down further.  lf the
  needle is in the yellowish-orange zone,
 the shutter speed is 1/3O-second or
  slower, in which case the aperture has to
 be opened up or the camera must be
View original page 26Page 27 · Read text
O DAYLIGHT FLASH PHOTOGRAPHY

   Manual Exposure Settings                  2. Daylight Flash Photography with EBC
     lf you are using an ASA 100  f ilm, use         FUJINON AE 3.5/1OOmm lens and an             1.   lf you are using an ASA 100 film, for
   an exposure meter to measure the light           automatic Professional strobe.                  example, the exposure setting is from
    in the brightest area of your subject. lf       Since the EBC FUJINON AE 3.5/1Oomm        EV13-16 (F/11 1160- 1/500-sec.) on
   the reading is EV14 (tlB 1/250-sec.),          lens is equipped with an aperture-preferred          a clear dav and  f rom EV10-13 (F/5.6
   and if a flash with a guide number of         fully automatic exposure type electronic           1l3O-1/25O-sec.) on a cloudy day. The
   32 (ASA 100, meters) covers a distance         shutter, combination with an automatic          aperture is therefore set at f/11 or
   of 3 meters (10 ft.), the aperture is set         professional strobe with a 2-way automatic             f/5.6, the shutter speed selector ring at
   at  f/1 1 and the shutter speed at          lisht control of  f /11 and f/5.6. (ASA100)      A  (automatic) and the ASA speed
    11125-sec.   f or shooting since guide         will greatly simplify daylight flash photo-            selector ring at 100. This will give you
   number = f-stop x meter (covering         graphy.                                      the correct exposure for the subject
    distance) and, therefore,                                                                you are shooting.
          ,r-_ G.No. __32:-      ._;   .,.I r'      m     3
  and since the exposure value in this
   case is EV14.
2. lf you are using a  f lash for supple-
   mentary lighting, use the same aperture
   and shutter soeed but move the  f lash a
    little farther away from the subject.
   The shadow areas will turn out clearlV
    lighted and look natural.


26
View original page 27Page 28 · Read text
www.butkus.us


I

          2.  Next, by turning the light switch on
        your professional strobe to suit the
         aperture ft/11 and f/5.61, the light
        from the flash will give you the cor-
            rect exDosure.
       The foregoing methods will let you
          take  f lash pictures in daylight without
        the necessity of figuring out camera
           settings and distances from the flash
          guide number.
              lf you are using flash for supple-
         mentary lighting, close down the aper-        o Taken without flash (f/8 1l25ol            o Flash used as supplementary lighting
           ture by % or 1 full stop (f/11 to I/11%,                                           (EBC FUJINON AE and an automatic
         f/5.6 to t15.6% or f 111 to  f /16 and                                                                 professional strobe. (lens setting:   t l1 1%,
          f/5.6 to f/8) to make the details stand                                                                                                                                               f lash setting'.  t /11],
         out more naturally.
        Use the ASA Speed Selector Ring for
                        f ractional exposure control.

                                                             + o Taken with EBC FUJINON AE
                                                                                       3.5/1OOmm and an automatic professio-
                                                                                    nal strobe. (lens setting: t111, flash
                                                                                                                          setting: t/11l'.
View original page 28Page 30 · Read text
www.butkus.us    O INTERCHANGEABLE LENSES & ACCESSORIES
      (  Interchangeable Lenses )                  (  Accessories )
                                               o Lens Hoods
    O FUJINON SWS       1:5.6 f=Somm           Useful for cutting out extraneous  light     @ Eyesight Adjustment Lens (the same
                            (new type)            from the lens. Yields clearer pictures and           attachment lens is used on the ST701
     OFUJINON SWS       1r5.6 f=65mm         recommended especially for  shooting          and ST8OI)
                            (new type)                against the light.                             This is attached to the viewfinder
                          @ Hood for 50 and 65mm wideangle lenses           eyepiece to let near- and far-sightedI    @ FUJINON S          1:3.5 f=1OOmm                           @ Hood for 100mm lens                          people to focus the lens more easily.                            {new type}                           @ Hood for EBC FUJINON AE l0Omm       +2 and +0.5 for the farsighted andI    @ EBC FUJINON AE   1:3.5 f=1Oomm                                                                         lens                                                and          f or the nearsiohted.                            (new type)                                                             -2.5    -4                           @ Hood for 150 and l8omm telephoto     @ Close-up Lens
     @ FUJINON TS        1:5.6 f=1Somm                lenses                                        This is attached in front of the taking
    @ FUJINON TS        1:5.6 f=18omm                                                                        lens for shooting extreme close-ups.
                                                  o Viewf inders                   @ Rightangle Finder (the same finder  is
                                           The viewfinder for the 100 and 15Omm        used on the FUJICA STTOI and
                                                      lenses is built into the camera. All the          sT801  )
                                                   other interchangeable  lenses are supplied              It allows you to shoot comf ortably
                                                       with special viewf inders.                     from low angles as well as with the
                            @ rinder for 50mm lens.                       camera mounted on a copying stand.
                            @ Finder for 65mm lens.                         Correction   f or eyesight is made by
                            @ Finder for 180mm lens.                           turning the eyepiece.
                                                           @ Sports Finder
                                                   o Other Accessories                                    Simplif ies  f raming of fast-moving sub-
                                @ Eyecup (the same eyecup is used on               jects.
                                                               the ST7O1 and ST801  )              @ Accessory Shoe
                                                                                   It gives you a clearer view through the          For mounting viewf inders, clip-on type
                                                                viewf inder.                                            flash and other accessories.
View original page 30Page 31 · Read text
O HOW TO CARE FOR              . CHECK THE CAMERA
                         THE CAMERA              BEFORE SHOOTING

@ o-Setter                                  o Be sure to set the R-S Button at S when     The FUJICA G L69O and GM67O are
   The O-setter adapter  is mounted on the           operating the unloaded camera.              designed  f or  prof essional use. Always
   camera's tripod socket plate and the        o Always load and unload  f ilm in subdued      check the camera before use to prevent
   O-setter itself is mounted on the               light.                                             costly mistakes.
  Tripod. This arrangement lets you         o When shooting for sustained periods in
  mount the camera on the triood and                                                                                             Advance Lever                                    -2O"C temperature or lower, ask for       1. Film
   dismount  it much faster.                                 anti-f reeze treatment. (Th is service is      Check the lever to make sure it is working
@ Neck Strap                                     rendered on request and cost basis).           smoothly. There is a limit to the mecha-
  For slinging the camera around the        o After unloading the exposed film,        nical durability of the  f ilm winding unit.
  shoulder when not in use and around           always depress the shutter release button      Always ask for an overhaul about once
  the neck when shooting to prevent            to make sure the shutter is released.            each year.
  camera shake.                            o Do not leave the camera in the car in the
@ Compartment Case                      summer time or in moist places for       2. Rangefinder
  For holding the camera, interchange-           prolonged periods.                      Look through the viewfinder and focus
  able lenses, accessories and extra rolls        o Alwavs clean the camera before and       the lens on infinity and on a close-range
  of  f ilm. Designed for shoulder carrying            after use. The insides should be dusted       subject with the double-image focusing
  with emphasis on manoeuverabil itv.           with an air brush and the outsides       spot and check the distance scale on the
                                                   should be wiped with silicon cloth.               lens barrel to make sure they agree. All the
                                           o Do not put  f inger marks on the lens and        better if you can open the camera back
                                                 viewfinder glass. In case you do, wipe      and check the focused image at the film
                                                           off with lens cleaning fluid.                     plane with a sheet of ground glass.
                                      o Keep the camera away from dust and
                                                 moisture and always put a cap on both
                                                 ends of the lens when not in use.
View original page 31Page 32 · Read text
''illip                                           www.butkus.us


  3. Shutter
  Set the R-S Button at S, open the camera
  back and check the different shutter
  soeeds with the shutter release button.
  The quantity of light reaching your eye
  and the sound of the shutter will give you
  a close indication of the shutter's condi-
  tion. There is also a limit to the mecha-
   nical durability the shutter. A mechanical
  shutter needs overhauling about once a
  year and an electronic shutter about once
  everv two years.
  4. Flash Synchronization
  Mount the flash, open the camera back,
  open the aperture fully. set the shutter
  speed  f or the  f lash you are using and
  release the shutter to make sure  it
  svnchronizes with the flash.
View original page 32
From the M. Butkus archive. Original publisher and archive notices are retained.
Check the model and edition against your equipment.
PDF verified 2026-10-10.