Film cameras
Fujica GE User manual
User manual for Fujica GE. 20 pages in English. Read the original PDF, download or print a copy without registration.
20 pagesEnglish3.9 MB PDF
Loading your manual…Open PDF directly
Document details
- Brand
- Fujica
- Model / document
- Fujica GE
- Document type
- User manual
- Language
- English
- Pages
- 20
- File size
- 3.9 MB
- Category
- Film cameras
- Document date
- Not specified in catalog
Search available document text
Find a term, then jump to its page in the original PDF. Image-only pages may not be searchable; check the PDF for exact wording and diagrams.
Page 1 · Read text
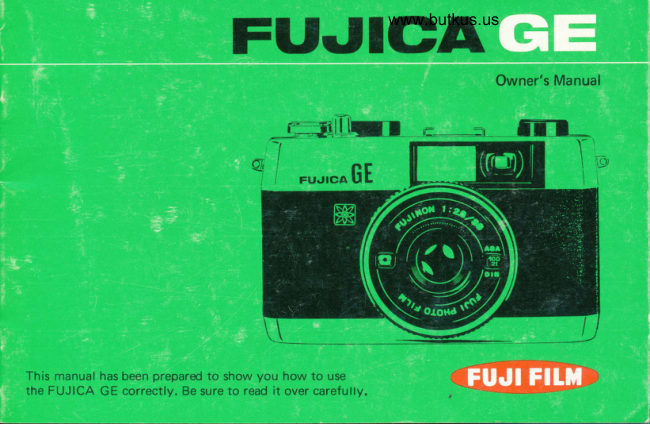
www.butkus.us     FUJIGA
                                                                 Owner's Manual


This manual has been prepared to show you how to use
the FUJICA GE correctly. Be sure to read it over carefulty,
View original page 1Page 2 · Read text
O CONTENTS               O SPECIAT FEATURES

  o  Special Features                         2     This extra-compect, lightweight full-size 35mm
  O How to Attach the Handstrap             3    camera offers you the follbwing advanced
  o  Names of Parts                        4      features:
       1. Load the Batteries                       6     l.Continuous  fully automatic exposure control
      2. Load the Film                               by electronic shutter.
                                                                                                                                                                                                                                                                                        i lt-in fool-proof safety features:     3.Set the Film Speed Selector                          6I     2.Bu
       4. Automatic EE Exposure                  10   O f ilm Confirmation Window
      5. Flash Photography .  .                     11      (D f itm Advance Conf irmation Window
-      6. Focusing                                              't2    @f itm Wind-up Signal
      7 .Frame Your Picture                    13     @Automatic Shuiter Release Lock tells you
     8.After Shooting                         14       when the batteries are exhausted.
    9.How to Shoot Back-lighted Portraits      15   @ Flash Ready Signal visible in the viewf inder
    10.Stage Photography .  .                 16        (provided you are using FUJICOLOR
      1 l.Shooting with a Filter                    17      STROBO S).
     12. Hold the Camera Steady                  1B
     13. How to Care for Your Camera            19
                                                     Be sure to remove the lens cap before
                                                              shooting.
View original page 2Page 5 · Read text
. NAMES OF PARTS

                                             O) Shutter Release Button
                       @ Exposure Counter Window (lt tells you how many pictures
                                                  have been taken and automatically resets at S (Start) when
                                                       the camera back cover is opened.)
                      @ fit-  Advance Lwer (Multiple or Single stroke film advance.
                                                Windinq latitude provided by lever tip.)
                      @ f itm Wind-up Signal (When it is red, the film has been wound
                                            up and the shutter is cocked. When  it shows green, the shutter
                                                     has been released but the film has not been advanced.)
                      @ Battery Checker/Camera Shake Warning Lamp
                       @ Flash Fteady Signal (lt tells you when the flash is ready for
                                                        firing-provided you are using FUJICOLOR STROEO S.)
                                          Hot Shoe (X-contact for cordless electronic  f lash.)
                                              Film Rewind Crank (The camera back cover is openecl by lift-
                                                             ing the crank up.)
                                              Aperture Selector R ing (Just set it at A {or automatic
                                                         exoosure.)
                    @ Rangefinder Window
                       @ Handstrap Eyelet
                       @ Distance/Aperture Setting Mark
                      @ Focusing Ring
                        @ Tat ing Lens (FUJINON 1:2.8 f=38mm. Filter: 46mm@,
                                            0.75mmP)
                      @ f itm Speed Indicator Window
                      @ f itm Speed Selector
                                        CdS Photo Cell
View original page 5Page 6 · Read text
www.butkus.us

                                  @ Film Cartridge Chamber
                                  @ Film Rewind Spindle
                                    @ Viewfinder Eyepiece
                                  @ ritm Advance confirmauon
                                  @ Sprocket Teeth
                                                                            Film Take-up Spool
                                  @ Back Cover
                                  @ Pressure Plate


Mike Butkus         Digitally                                                    DN:org,Date:cn=Mikeemail=mike@butkus.org,2023.04.29signedButkus,by17:11:23Mikeo=ButkusButkus-04'00'c=UScamera manuals, ou=butkus.

 @ Battery Chamber (Two 1.4V'
       mercury batteries. Mallory RM-
      640R or Eveready E-640N)
 @ ritm Rewind Button
 @ Tripod Socket
 @ ritm Confirmation Window
                   -
View original page 6Page 7 · Read text
I. LOAD THE BATTEBIES                             2. LOAD THE FILM
l.Open the Battery Chamber
 Cover by pushing it toward    2.Load the batteries correctly    l.Open the Back Cover by
 the arrow and lifting it up     as illustrated in the Battery       lifting  the Film Rewind
  with your fingernail.             Chamber.                       Crank up as far as it will go.


                           www.butkus.us

. Use two 1.4V mercury batteries, either Mallory RM-640R or    (Avoid direct sunlight during
  Evermdy E-640N. The batteries power the camera's EE system.     film loading and unloading)
. Wipe both ends of the batteries clean before loading.
. The batteries will last about 1 vear.
View original page 7Page 8 · Read text
www.butkus.us
 2.lnsert the film  (cartridge-
  packed 35mm roll film) in                          4.Wind the Film Advance
  the Film Cartridge Chamber     3.lnsert the film leading end      Lever to make sure the film
  and push the Film Rewind      deeply into the slot of the       is advancing properly. then
  Crank down.                     Film Take-up Spool.                close the Back Cover.


Lift the Film Rewind Crank                                 Make sure the  f  i lm perforations
up as far as it will go, hold it                               are caught in the sprocket
there, and insert the film into                                teeth and wind the  Film
the cartridge chamber.                                         Advance Lever to take up any
                                                                         slack in the film.
View original page 8Page 9 · Read text
s.Wind the film until the figure
  1 appears opposite the green
  line in the Exposure Counter                                6.Check the Film Wind-uo
  Window.                                                                    Signal


    r
                                            ;,"r,riiircr**lrkiffi iM.        -..  ,i                  :..-::1,,.:i;:,f ,']9{'i4$iw'
The film is advancing properly    The figure 1 is brought oppo-   When the Film Wind-up Signal
if the red stripes in the Film    site the green line in the   shows red, the film has been
Advance Conf irmation Wirdow    Exoosure Counter Window (tfp   wound and the  shutter  is
move to the right when the     starting position) by winding    cocked. When it shows green,
Film Advance Lever is wound.    the Film Advance Lever and    the shutter has been released,To advance the film, wind the                                                                                       beenFilm Advance Lever as far as    depressing the Shutter Release   but the film has not
 it will go.                        Button a few times.               advanced.
View original page 9Page 10 · Read text
www.butkus.us
                              3. SET THE FILM SPEED SELECTOR

                                     l.Set the film speed by turnirg
                           the Film Speed Selector
                            while watching the Film    2.The film speed is printed on
T.Check the Film                  Speed lndicator Window.          the film box.


The Film Confirmation Win-   No exposure compensation is   FUJICOLOR NlOO-ASAIOO
dow tells you whether the    necesrnry wen if you are using    FUJ ICH ROME F.I OO-ASA1 OO
camera is loaded or not. lf  it    a f ilter because  it will cover the   NEOPAN SS       ASAI0O
is loaded with FUJI FILM,  it   whole lens front including the   NEOPAN SSS      ASA200
will tell you the type of film   CdS Photocell.                         lf you are using an ASA ul0you are using.                                                                                                                       f ilm, set the-  Film Speed                                                                          -                                                                        Selector at ASA 32.
View original page 10Page 12 · Read text
www.butkus.us
                               5. FLASH PHOTOGRAPHY
 'l
I                                l.Mount the Flash on the Hot    2.Set the Aperture with the
                                        Shoe.                            Aperture Selector Ring.


   The Battery Checker/Camera   The Hot Shoe is designed   The correct aoerture is ob-
    Shake Warning Lamp is visible     for taking cordless  f lash.         tained by dividing the flash
    on the camera top side as well                                    guide number by the distance
I  as(rightthroughhand side).the lfVi€^the/finderlamp                                 from camera to subiect.
   does not turn on or  if the
[j   Shutterlocked. Releasethe batteriesButton remainsare ex-
     hausted and must be replaced.
View original page 12Page 13 · Read text
6. FOCUSING
                                                         l.Make a visual measurement
                                                                     of the distance from camera
                                                           to subject and set that dis-
                                                                       tance Setting lt/brk by turn-
                                                                                    ing the Focusing Ring.
  Example: The FUJICA COLOR
  STROBO S guide number
   is 16 for ASA 100 film.
     if  the shooting distance
   (camera to subject distance)
    is 2 meters (6.5ft), 16+ 2
  = 8. In other words, Fg is
    the correct aperture.
   lf the   f lash guide number
  yields an  intermediate  f-
  number, use the smaller f-
  number.                        With a FUJICOLOR STROBO    With the distance set at 10 ft.
  Example:  lf the flash guide   S mounted on the Hot Shoe,   (3m red number), practically
   numberdivided by the shoot-   you can shoot as soon as a      all outdoor snapshots will turn
   ing distance equals 7, set    green light starts blinking in    out sharply focused.
    the aperture at F5.6 (instead    the 'flash mark' visible in the
    of 8).                         upper, left-hard side as you
                                    look through the Viaryf inder.
T2
View original page 13Page 14 · Read text
2.Look through the View-    7. FRAME YOUB PICTUREwww.butkus.us
  finder and set the focusing
 bar opposite one of the
  focusing symbols in the Vievu      1.lf the subject is 5 ft. (1.5m1
  finder by turning the Focus-    or more away from the     2.lf the subject is 3 ft. (0.9m)
  ing Ring.                            camera..,                        from the camera or nearer...


   Zone fbcusing symbols

E-3.3ft.  (1m)               Frameyour picture inside the    Frameyour picture inside thell-Sft.   (1.5m)                   bright frame line.                   oarallax correction line.
ll-1ofr.  (3m)                                                   In taking portraits, bring the
A-@   (infinity)                                       camera up as close to the
                                                                         subject as it will permit.
View original page 14Page 15 · Read text
8. AFTER SHOOTING

  l.Press in the Film Rewind    2.Rewind the film with the    3.Open the Back Cover and
    Button                           Film Rewind Crank               unload the film cartridge


 www.butkus.us


 The end of the film is reached    The red stripes in the Film      lf the end of the film  is
 when the Exposure Counter     Advance Conf irmation Window    reached when the Film Ad-
 Window says you have com-     will move to the left to tell    vance Lever is wound only
  pleted the number of exposures    you the film is being rewound      half wav around, do not force
  printed on the film box.            properly. Stop winding as soon      it through, because the film
                                         as the red stripes stop moving.    might break if you do. Just
                                                       push it back to normal posi-
l4                                                                    tion and rewind the film into
                                                                         the cartridge.
View original page 15Page 16 · Read text
9. HOW TO SHOOT BACK.LIGHTED PORTRAITSwww.butkus.us
         '+ml


Bright light from the back will cause    To brighten  it up, set the  Film
your subject to turn out dark.             Speed Selector at one   half  the
                                          film speed rating printed on the film
                                           box.
View original page 16Page 17 · Read text
10. STAGE PHOTOGRAPHY
   H+H


  Spotlighted subjects will turn out light    To take good pictures, set the Film
  due to the surrounding darkness.            Speed Selector at twice the film speed
                                                   rating printed on the film box.


16
View original page 17Page 20 · Read text
www.butkus.us13. HOW TO CARE FOR YOUR CAMERA

                                              1.Dust off your camera periodically and wipe  it clean
                                           with a piece of cloth. The insides should be cleaned
                                           with particular care.
    ffit                                2.Do not put  f inger marks on the lens glass, viewf inder

                                 j.                                       window, eyepiece glass and CdS photocell. In case
   *$'t                                you do, wipe off with a soft, clean piece of cloth
                                             moistened in lens cleaning fluid.
                                                    3.lf you are not using the camera for any length of
                                              time, removb the batteries and keep the camera and
                                                  batteries separalely where it is dry, cool and free of
                                              dust. The best way is to store them away together
                                        with some desiccant in separate cans covered with
                                                                     lids.
                                     4.Do not leave your camera in the car during the hot
                                   summer months dr keep it where it  is damp for
                                           prolonged periods. This is a precision instrument.
                                     Be sure to protect it from the cold when you take it
                                                to a mountain or ski resort with you in winter.


                                                                                                           19
View original page 20From the M. Butkus archive. Original publisher and archive notices are retained.
Check the model and edition against your equipment.
PDF verified 2026-10-10.